

Before you begin
- Labs create a Google Cloud project and resources for a fixed time
- Labs have a time limit and no pause feature. If you end the lab, you'll have to restart from the beginning.
- On the top left of your screen, click Start lab to begin

Create a Kubernetes cluster
/ 20
Configure and Install Jenkins
/ 20
Create the production and canary deployments
/ 30
Build for the 'new-feature' branch
/ 10
Deploying a canary release
/ 10
Deploying to production
/ 10
Create a Kubernetes cluster
/ 20
Configure and Install Jenkins
/ 20
Create the production and canary deployments
/ 30
Build for the 'new-feature' branch
/ 10
Deploying a canary release
/ 10
Deploying to production
/ 10


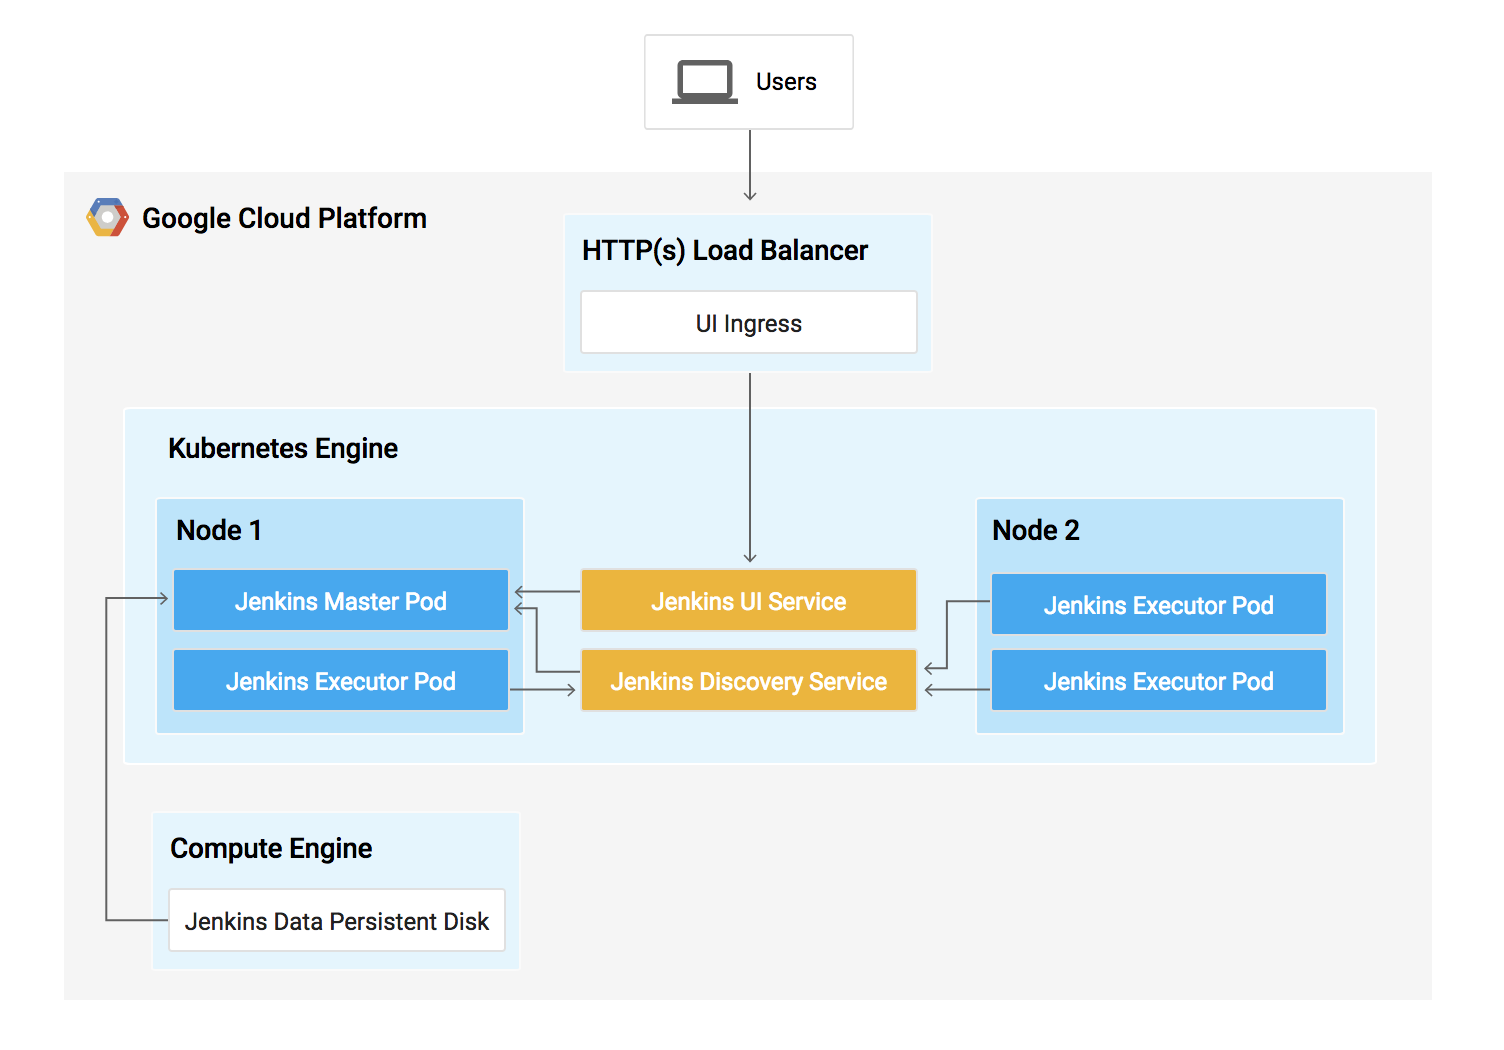
In this lab, you learn how to set up a continuous delivery pipeline with Jenkins on Kubernetes engine. Jenkins is the go-to automation server used by developers who frequently integrate their code in a shared repository. The solution you build in this lab is similar to the following diagram:
In the Cloud Architecture Center, see Jenkins on Kubernetes Engine to learn more about running Jenkins on Kubernetes.
In this lab, you complete the following tasks to learn about running Jenkins on Kubernetes:
This is an advanced level lab. Before taking it, you should be comfortable with at least the basics of shell programming, Kubernetes, and Jenkins. Here are some labs that can get you up to speed:
Once you are prepared, scroll down to learn more about Kubernetes, Jenkins, and Continuous Delivery.
Kubernetes Engine is Google Cloud's hosted version of Kubernetes - a powerful cluster manager and orchestration system for containers. Kubernetes is an open source project that can run on many different environments—from laptops to high-availability multi-node clusters; from virtual machines to bare metal. As mentioned before, Kubernetes apps are built on containers - these are lightweight applications bundled with all the necessary dependencies and libraries to run them. This underlying structure makes Kubernetes applications highly available, secure, and quick to deploy—an ideal framework for cloud developers.
Jenkins is an open-source automation server that lets you flexibly orchestrate your build, test, and deployment pipelines. Jenkins allows developers to iterate quickly on projects without worrying about overhead issues that can stem from continuous delivery.
When you need to set up a continuous delivery (CD) pipeline, deploying Jenkins on Kubernetes Engine provides important benefits over a standard VM-based deployment.
When your build process uses containers, one virtual host can run jobs on multiple operating systems. Kubernetes Engine provides ephemeral build executors—these are only utilized when builds are actively running, which leaves resources for other cluster tasks such as batch processing jobs. Another benefit of ephemeral build executors is speed—they launch in a matter of seconds.
Kubernetes Engine also comes pre-equipped with Google's global load balancer, which you can use to automate web traffic routing to your instance(s). The load balancer handles SSL termination and utilizes a global IP address that's configured with Google's backbone network—coupled with your web front, this load balancer always sets your users on the fastest possible path to an application instance.
Now that you've learned a little bit about Kubernetes, Jenkins, and how the two interact in a CD pipeline, it's time to go build one.
Read these instructions. Labs are timed and you cannot pause them. The timer, which starts when you click Start Lab, shows how long Google Cloud resources are made available to you.
This hands-on lab lets you do the lab activities in a real cloud environment, not in a simulation or demo environment. It does so by giving you new, temporary credentials you use to sign in and access Google Cloud for the duration of the lab.
To complete this lab, you need:
Click the Start Lab button. If you need to pay for the lab, a dialog opens for you to select your payment method. On the right is the Lab setup and access panel with the following:
Note that the lab timer is located near the top of the page, showing the remaining time.
Click Open Google Cloud console (or right-click and select Open Link in Incognito Window if you are running the Chrome browser).
The lab spins up resources, and then opens another tab that shows the Sign in page.
Tip: Arrange the tabs in separate windows, side-by-side.
If necessary, copy the Username below and paste it into the Sign in dialog.
You can also find the Username in the Lab setup and access panel.
Click Next.
Copy the Password below and paste it into the Welcome dialog.
You can also find the Password in the Lab setup and access panel.
Click Next.
Click through the subsequent pages:
After a few moments, the Google Cloud console opens in this tab.

Cloud Shell is a virtual machine that is loaded with development tools. It offers a persistent 5GB home directory and runs on the Google Cloud. Cloud Shell provides command-line access to your Google Cloud resources.
Click Activate Cloud Shell 
Click through the following windows:
When you are connected, you are already authenticated, and the project is set to your Project_ID,
gcloud is the command-line tool for Google Cloud. It comes pre-installed on Cloud Shell and supports tab-completion.
Output:
Output:
gcloud, in Google Cloud, refer to the gcloud CLI overview guide.
In this task, you download the source code for this lab.
Create a Kubernetes cluster and enable Jenkins to access Google Cloud services and Google Artifact Registry.
This step can take up to several minutes to complete. The extra scopes enable Jenkins to access Google Cloud services and Google Artifact Registry.
Click Check my progress to verify your performed task. If you have successfully created a Kubernetes cluster, you see an assessment score.
Helm is a package manager that makes it easy to configure and deploy Kubernetes applications. Once you install Jenkins, you can set up your CI/CD pipeline.
In this task, you use Helm to install Jenkins from the Charts repository.
When installing Jenkins, a values file can be used as a template to provide values that are necessary for setup.
You use a custom values file to automatically configure your Kubernetes Cloud and add the following necessary plugins:
This allows Jenkins to connect to your cluster and your Google Cloud project.
This command may take a couple minutes to complete.
Click Check my progress to verify your performed task. If you have successfully configured a Jenkins chart you see an assessment score.
Running state and the container is in the READY state:Example Output:
You should receive the following output:
Example Output:
You are using the Kubernetes Plugin so that the builder nodes are automatically launched as necessary when the Jenkins master requests them. Upon completion of their work, builder nodes automatically turn down and their resources are added back to the cluster's resource pool.
Notice that this service exposes ports 8080 and 50000 for any pods that match the selector. This exposes the Jenkins web UI and builder/agent registration ports within the Kubernetes cluster. Additionally, the jenkins-ui service is exposed using a ClusterIP so that it is not accessible from outside the cluster.
Retrieve the admin password and log into the Jenkins interface.
To get to the Jenkins user interface, in the Cloud Shell action bar, click Web Preview (
If asked, log in with username admin and your auto-generated password.
You now have Jenkins set up in your Kubernetes cluster! Jenkins drives your automated CI/CD pipelines in the next sections.
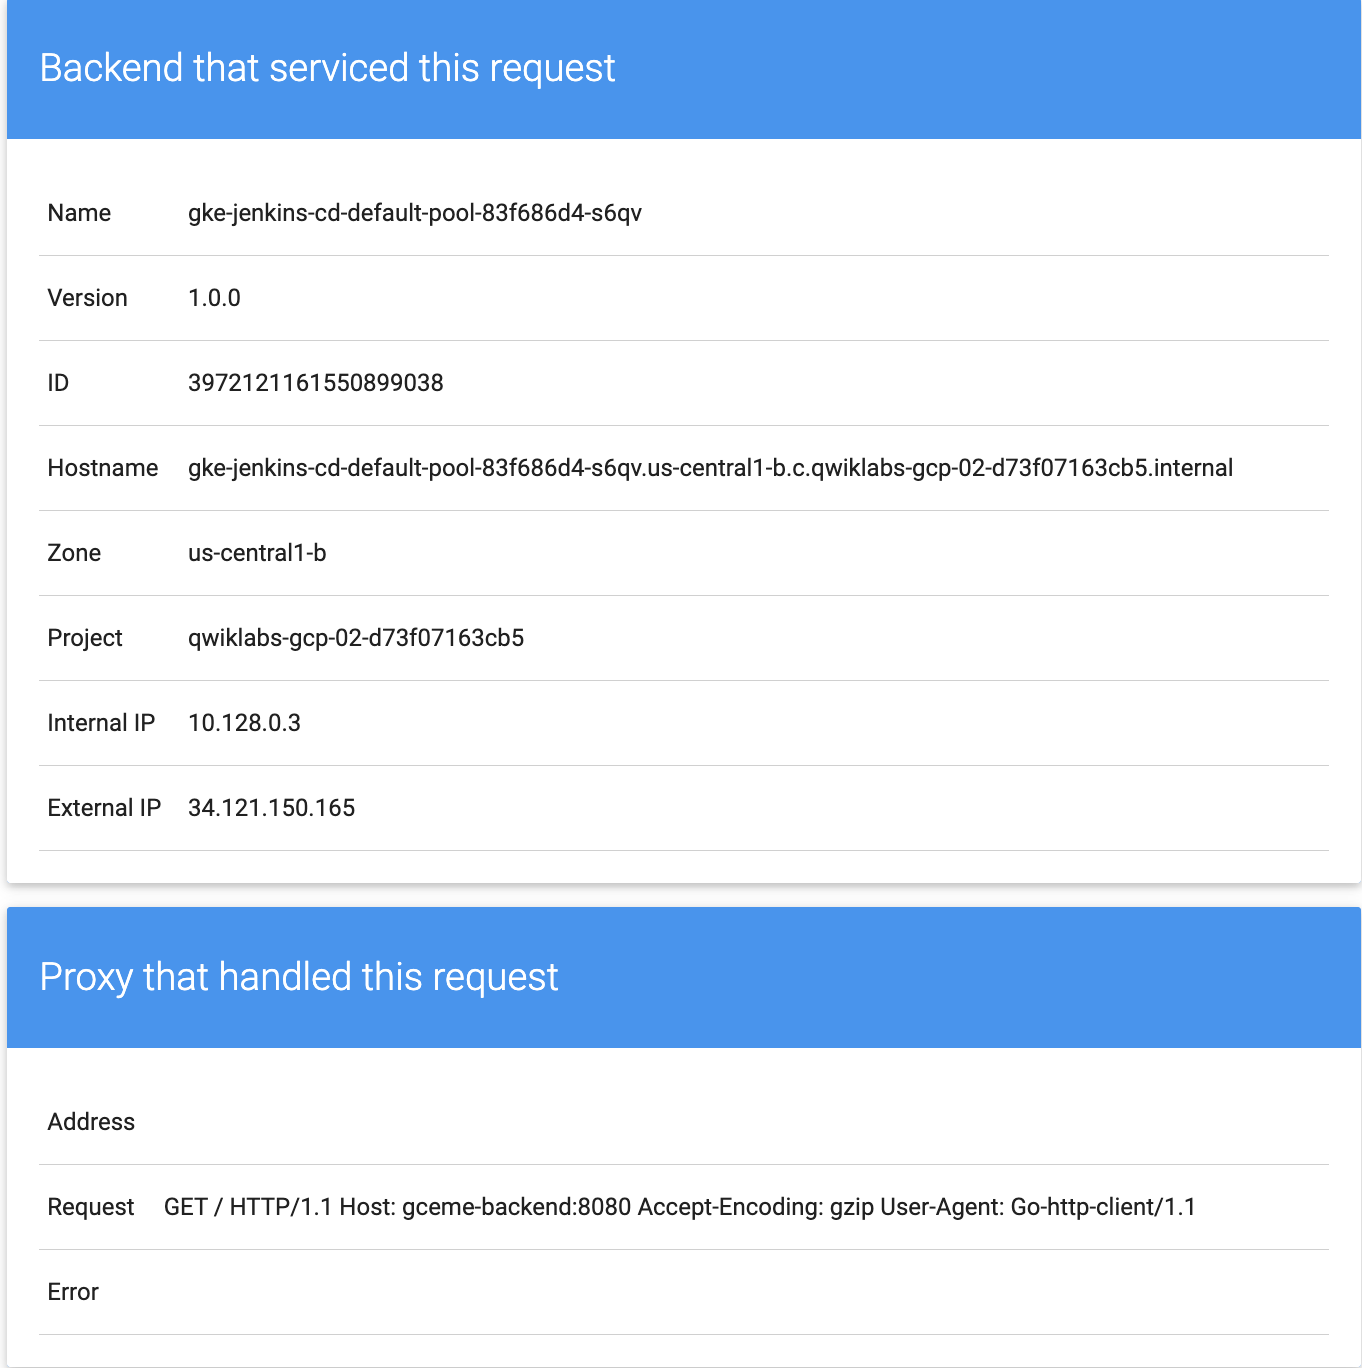
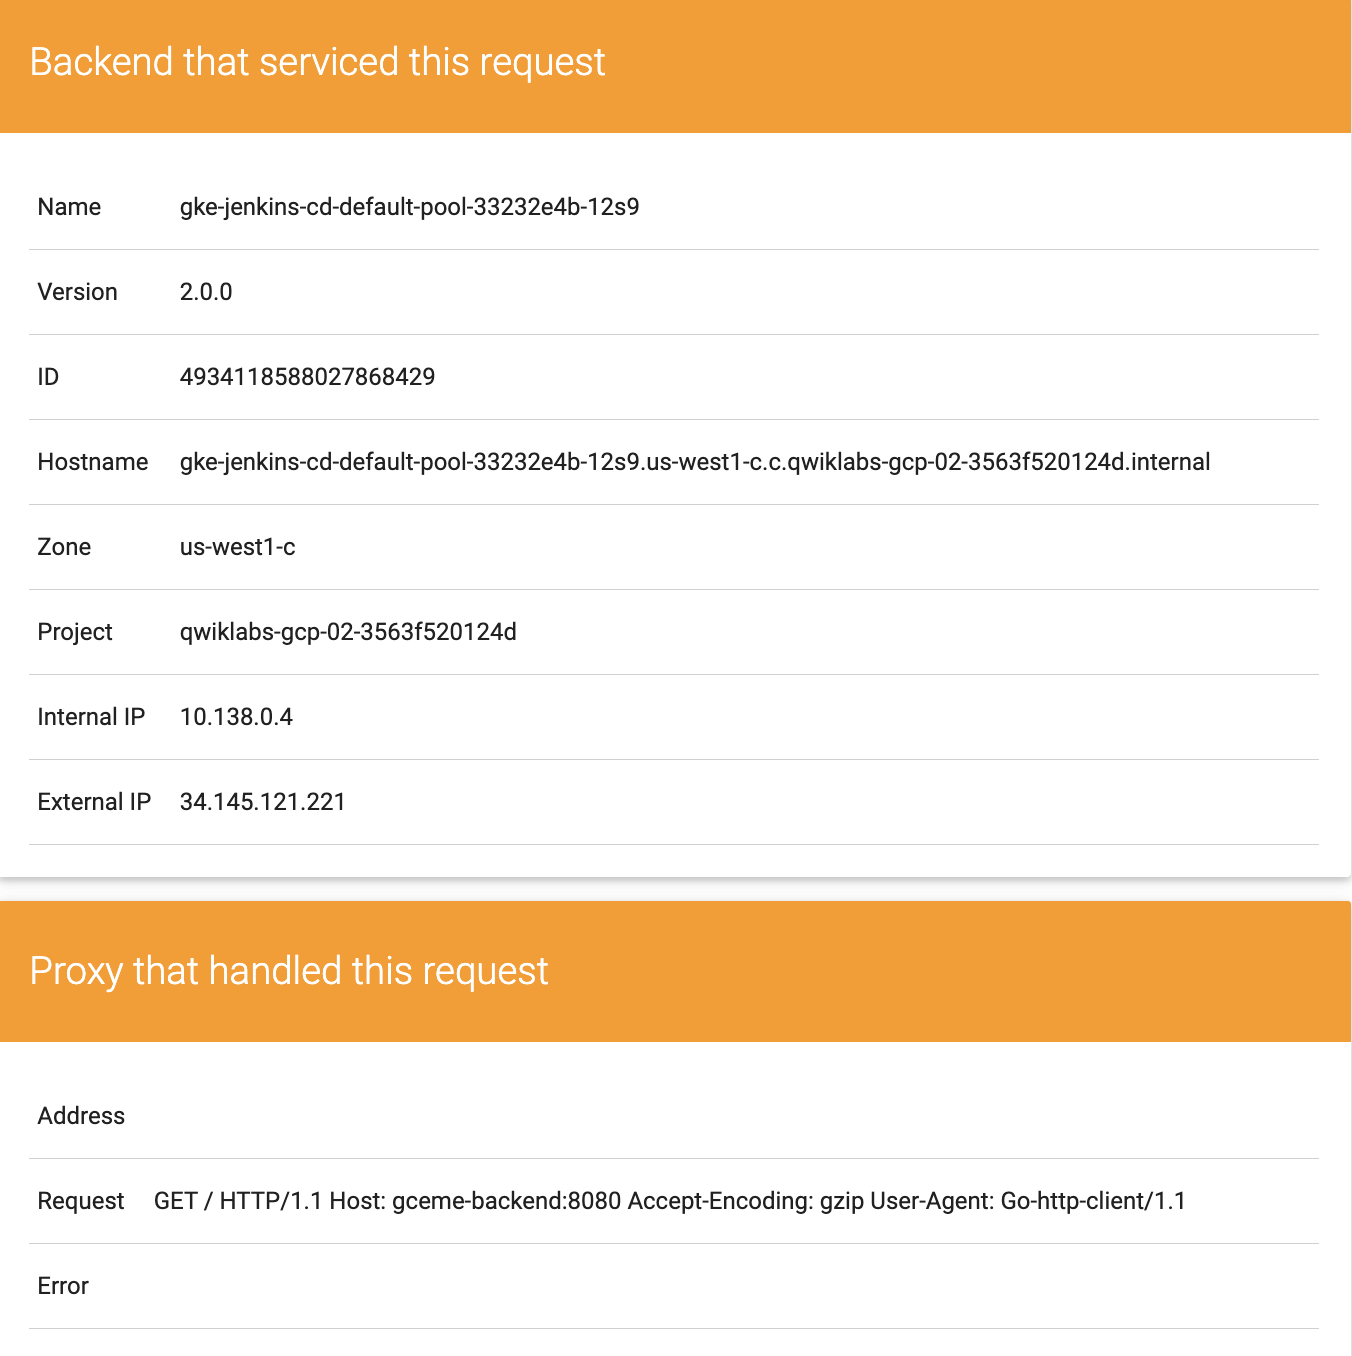
In this task, you deploy the sample application, gceme, in your continuous deployment pipeline. The application is written in the Go language and is located in the repo's sample-app directory. When you run the gceme binary on a Compute Engine instance, the app displays the instance's metadata in an info card.
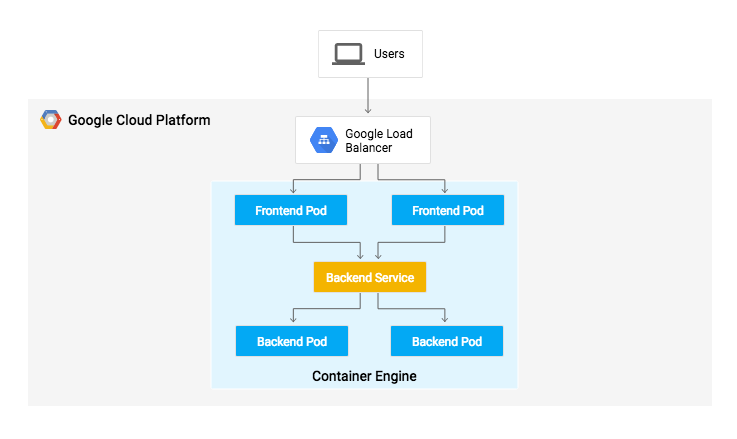
The application mimics a microservice by supporting two operation modes.
Deploy the application into two different environments:
kubectl apply commands:Click Check my progress to verify your performed task. If you have successfully created deployments you see an assessment score.
By default, only one replica of the frontend is deployed. Use the kubectl scale command to ensure that there are at least 4 replicas running at all times.
Example Output:
Paste External IP into a browser to see the info card displayed on a card—you should get a similar page:
Confirm that both services are working by opening the frontend external IP address in your browser.
Check the version output of the service by running the following command (it should read 1.0.0):
You have successfully deployed the sample application! Next, you set up a pipeline to deploy your changes continuously and reliably.
In this task, you set up a Git repository on your dedicated Git server and create the Jenkins pipeline:
sample-app directory as a Git repository:master branch:Configure your credentials to allow Jenkins to access the cluster and deploy resources.
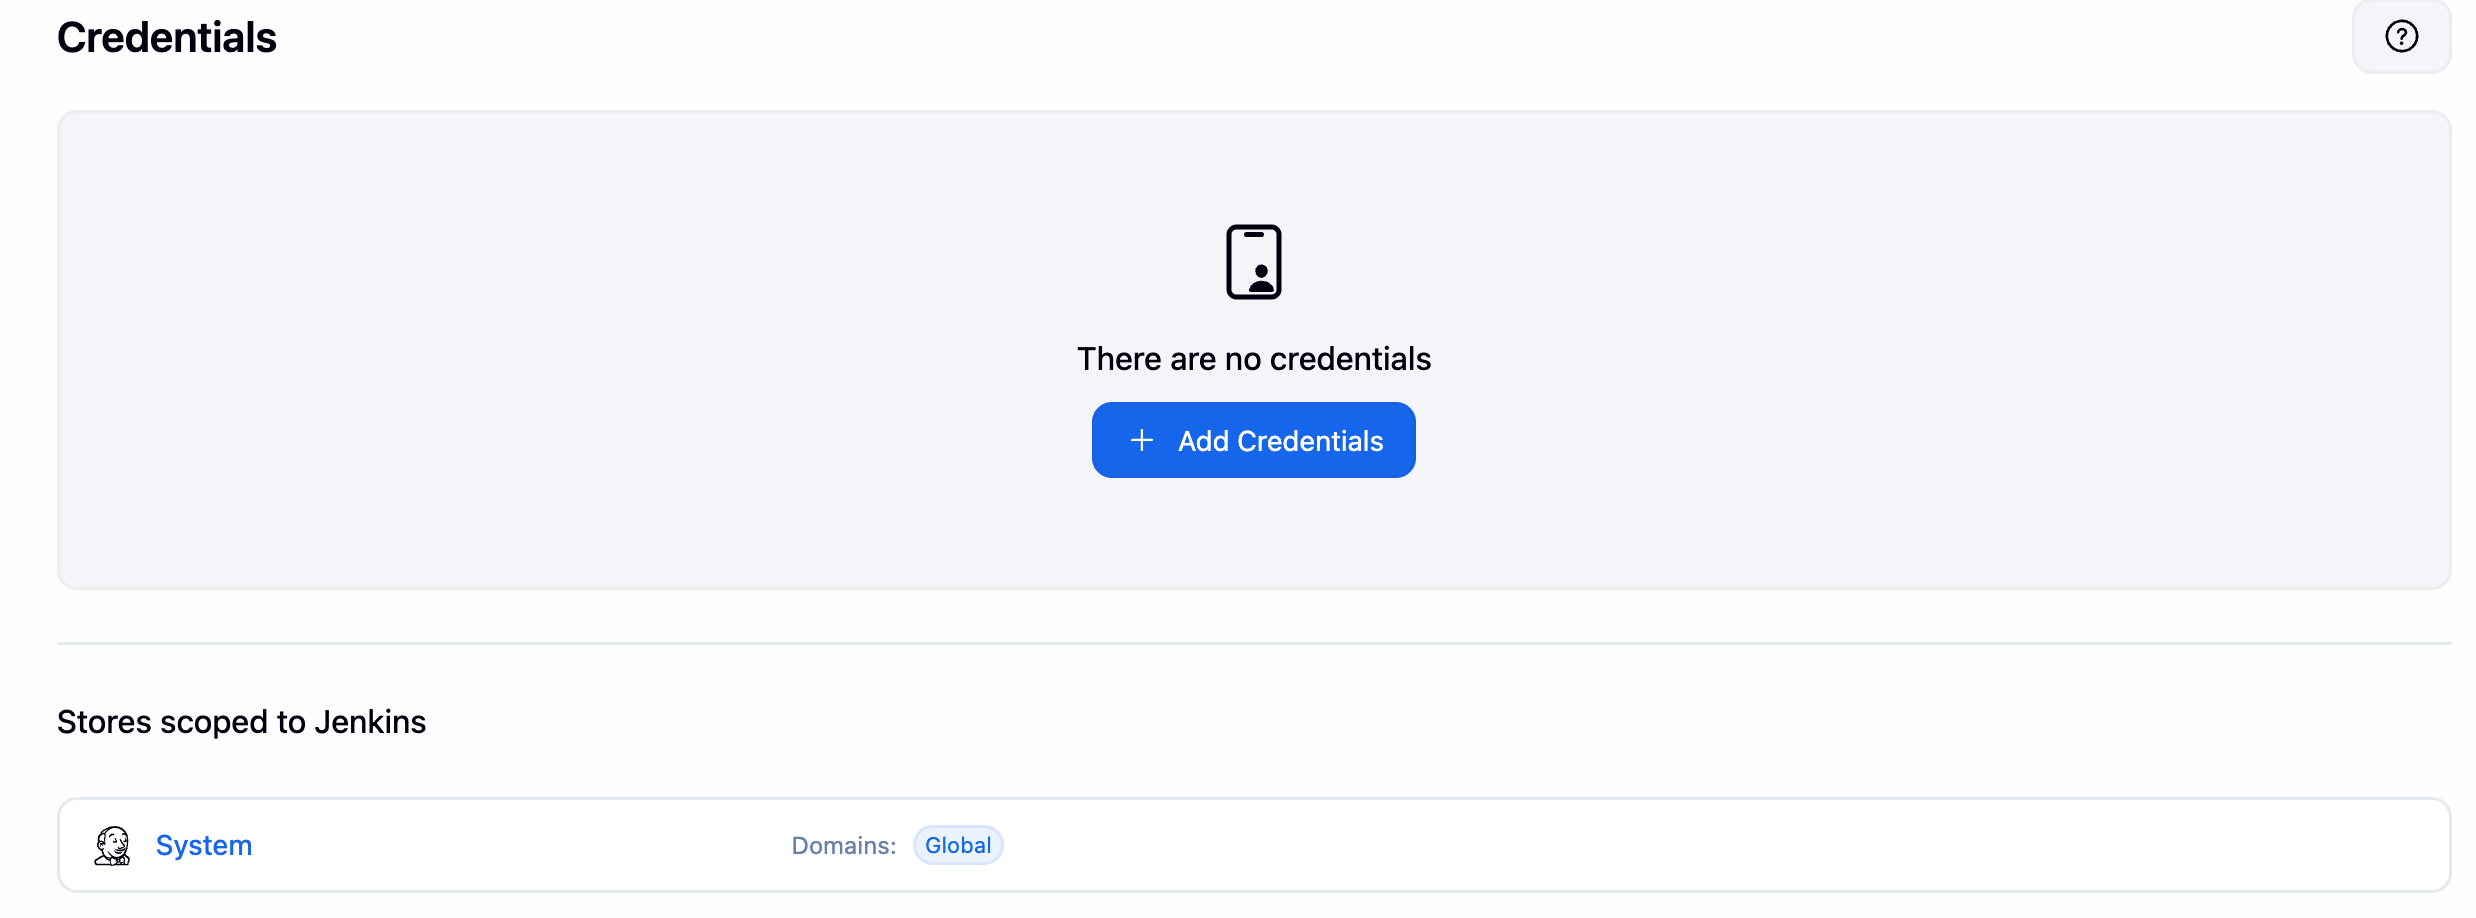
Scroll down to the Security section and click Credentials.
Under Stores scoped to Jenkins, click System.
Click Global credentials (unrestricted).
Click Add Credentials.
For Kind, select Google Service Account from metadata and click Next.
Under the ID field, enter your Project ID (
The global credentials have been added.
http://cd-jenkins:8080.cd-jenkins-agent:50000.Navigate to your Jenkins user interface and follow these steps to configure a Multibranch Pipeline job:
Click Jenkins > New Item in the left panel.
Enter the item name sample-app, choose the Multibranch Pipeline option, and click OK.
On the next page, in the Branch Sources section, select Git from the Add source dropdown.
In the Project Repository field, enter the clone URL of your repository:
Under Credentials, leave it set to - none -.
Under the Scan Multibranch Pipeline Triggers section, check the Periodically if not otherwise run box and set the Interval value to 1 minute.
Leave all other options at their defaults and click Save.
After you complete these steps, a job named Branch indexing runs. This meta-job identifies the branches in your repository and ensures changes haven't occurred in existing branches. If you click sample-app in the breadcrumb navigation, the master job should be seen.
You have successfully created a Jenkins pipeline! Next, you create the development environment for continuous integration.
Development branches are a set of environments your developers use to test their code changes before submitting them for integration into the live site. These environments are scaled-down versions of your application, but need to be deployed using the same mechanisms as the live environment.
To create a development environment from a feature branch, you can push the branch to the Git server and let Jenkins deploy your environment.
The Jenkinsfile that defines that pipeline is written using the Jenkins Pipeline Groovy syntax. Using a Jenkinsfile allows an entire build pipeline to be expressed in a single file that lives alongside your source code. Pipelines support powerful features like parallelization and require manual user approval.
For the pipeline to work as expected, you need to modify the Jenkinsfile to set your project ID.
vi:Add your PROJECT_ID to the REPLACE_WITH_YOUR_PROJECT_ID value. (Your PROJECT_ID is your Project ID found in the CONNECTION DETAILS section of the lab. You can also run gcloud config get-value project to find it.
Change the value of CLUSTER_ZONE to gcloud config get compute/zone.
Jenkinsfile file: press ESC then (for vi users):To demonstrate changing the application, you change the gceme cards from blue to orange.
html.go:
<div class="card blue"> with following:html.go file: press ESC then:main.go:
Update it to the following:
In this task you deploy your development environment.
This starts a build of your development environment.
In the Jenkins user interface, navigate to the sample-app job:
new-feature branch does not appear immediately under the Branches tab, click Scan Multibranch Pipeline Now in the left sidebar.Click the new-feature branch link.
In the Build History section on the left, click the build number (for example, #1), then click Console Output in the left sidebar to view the live build logs.
Track the output of the build and watch for the kubectl --namespace=new-feature apply... messages. Once completed, your new-feature branch is deployed to your cluster.
localhost and letting kubectl proxy forward it to your service:You should see it respond with 2.0.0, which is the version that is now running.
If you receive a similar error:
curl command again. Move on when you get the following output:You have set up the development environment! Next, build on what you learned in the previous module by deploying a canary release to test out a new feature.
Click Check my progress to verify your performed task. If you have successfully started the build for the new-feature branch, you see an assessment score.
new-feature branch
You have verified that your app is running the latest code in the development environment, so now deploy that code to the canary environment.
2.0.0:That's it! You have deployed a canary release. Next you deploy the new version to production.
Click Check my progress to verify your performed task. If you have successfully deployed the canary release, you see an assessment score.
Now that our canary release was successful and we haven't heard any customer complaints, deploy to the rest of your production fleet.
In Jenkins, you should see the master pipeline has kicked off.
Click Check my progress to verify your performed task. If you have successfully started the master pipeline, you see an assessment score.
1.0.0 try running the above commands again. To stop this command press CTRL+C.Example output:
You can also navigate to site on which the gceme application displays the info cards. The card color changed from blue to orange.
Example output:
Below are multiple-choice questions to reinforce your understanding of this lab's concepts. Answer them to the best of your abilities.
You're done!
Awesome job, you have successfully deployed your application to production!
This concludes this hands-on lab deploying and working with Jenkins in Kubernetes Engine to enable a Continuous Delivery / Continuous Deployment pipeline. You've had the opportunity to deploy a significant DevOps tool in Kubernetes Engine and configure it for production use. You've worked with the kubectl command-line tool and deployment configurations in YAML files, and have learned a bit about setting up Jenkins pipelines for a development / deployment process. With this practical hands-on experience you should feel comfortable applying these tools in your own DevOps shop.
...helps you make the most of Google Cloud technologies. Our classes include technical skills and best practices to help you get up to speed quickly and continue your learning journey. We offer fundamental to advanced level training, with on-demand, live, and virtual options to suit your busy schedule. Certifications help you validate and prove your skill and expertise in Google Cloud technologies.
Manual Last Updated August 27, 2026
Lab Last Tested August 27, 2026
Copyright 2026 Google LLC. All rights reserved. Google and the Google logo are trademarks of Google LLC. All other company and product names may be trademarks of the respective companies with which they are associated.



This content is not currently available
We can notify you via email when it becomes available

Great!
We can contact you via email if it becomes available


One lab at a time
Confirm to end all existing labs and start this one