

Before you begin
- Labs create a Google Cloud project and resources for a fixed time
- Labs have a time limit and no pause feature. If you end the lab, you'll have to restart from the beginning.
- On the top left of your screen, click Start lab to begin

Install the ADK and set up your environment
/ 50
Create the API key and deploy the ADK agent
/ 50
Install the ADK and set up your environment
/ 50
Create the API key and deploy the ADK agent
/ 50


In this lab, you explore Model Context Protocol (MCP), an open standard that enables seamless integration between external services, data sources, tools, and applications. You learn how to integrate MCP into your Agent Development Kit (ADK) agents, using tools provided by existing MCP servers to enhance your ADK workflows. Additionally, you discover how to expose ADK tools like load_web_page through a custom-built MCP server, enabling broader integration with MCP clients.
What is Model Context Protocol (MCP)?
Model Context Protocol (MCP) is an open standard designed to standardize how Large Language Models (LLMs) like Gemini and Claude communicate with external applications, data sources, and tools. Think of it as a universal connection mechanism that simplifies how LLMs obtain context, execute actions, and interact with various systems.
MCP follows a client-server architecture, defining how data (resources), interactive templates (prompts), and actionable functions (tools) are exposed by an MCP server and consumed by an MCP client (which could be an LLM host application or an AI agent).
This lab covers two primary integration patterns:
Explore other content in the Gemini Enterprise Agent Ready (GEAR) program.
In this lab, you learn how to perform the following tasks:
Read these instructions. Labs are timed and you cannot pause them. The timer, which starts when you click Start Lab, shows how long Google Cloud resources are made available to you.
This hands-on lab lets you do the lab activities in a real cloud environment, not in a simulation or demo environment. It does so by giving you new, temporary credentials you use to sign in and access Google Cloud for the duration of the lab.
To complete this lab, you need:
Click the Start Lab button. If you need to pay for the lab, a dialog opens for you to select your payment method. On the right is the Lab setup pane with the following:
In the Lab Setup section, right-click Open Google Cloud console and select Open link in new window (or alternatively right-click and select Open Link in Incognito Window if you are running the Chrome browser).
The lab spins up resources, and then opens another tab that shows the Sign in page.
Tip: Arrange the tabs in separate windows, side-by-side.
If necessary, copy the Username below and paste it into the Sign in dialog.
You can also find the Username in the Lab Setup pane.
Click Next.
Copy the Password below and paste it into the Welcome dialog.
You can also find the Password in the Lab Setup pane.
Click Next.
Click through the subsequent pages:
After a few moments, the Google Cloud console opens in this tab.

In this lab environment, the Agent Platform API, Routes API, and Directions API have been enabled for you.
 ) in the upper right of the Cloud console.
 ).
). ) at the top of the pane to view files.
 ) to open your file explorer.
In this section, you run the commands that follow in the Cloud Shell terminal.
Run the following command in the Cloud Shell terminal to copy the project directory from Cloud Storage:
Run the following commands to install the Agent Development Kit (ADK) and other dependencies required to run the sample applications:
Click Check my progress to verify the objective.
This section demonstrates how to integrate tools from an external Google Maps MCP server into your ADK agents. This is the most common integration pattern when your ADK agent needs to use capabilities provided by an existing service that exposes an MCP interface. You will see how the MCPToolset class can be directly added to your agent's tools list, enabling seamless connection to an MCP server, discovery of its tools, and making them available for your agent to use. These examples primarily focus on interactions within the adk web development environment.
The MCPToolset class is ADK's primary mechanism for integrating tools from an MCP server. When you include an MCPToolset instance in your agent's tools list, it automatically handles the interaction with the specified MCP server. Here's how it works:
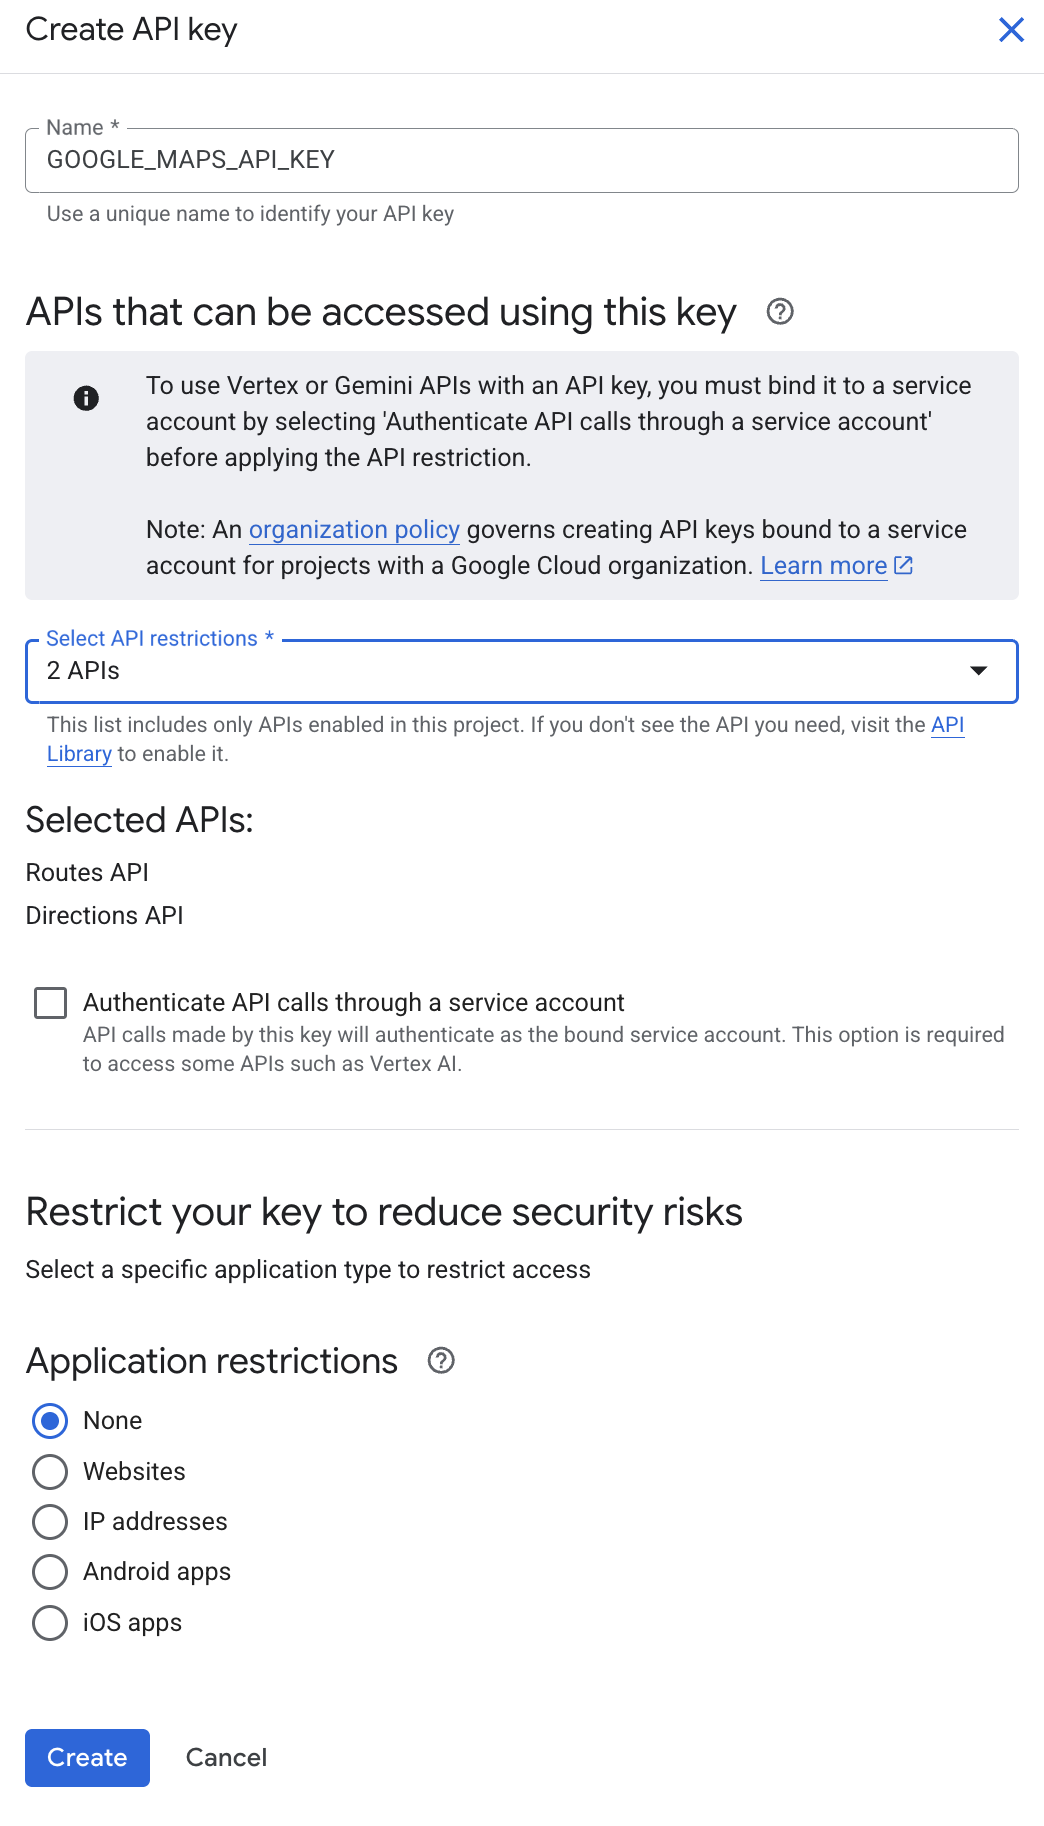
MCPToolset establishes and manages the connection to the MCP server. This can be a local server process (using StdioServerParameters for communication over standard input/output) or a remote server (using SseServerParams for Server-Sent Events). The toolset also handles the graceful shutdown of this connection when the agent or application terminates.MCPToolset queries the MCP server for its available tools (via the list_tools MCP method). It then converts the schemas of these discovered MCP tools into ADK-compatible BaseTool instances.LlmAgent as if they were native ADK tools.LlmAgent decides to use one of these tools, MCPToolset transparently proxies the call (using the call_tool MCP method) to the MCP server, sends the necessary arguments, and returns the server's response back to the agent.tool_filter parameter when creating an MCPToolset to select a specific subset of tools from the MCP server, rather than exposing all of them to your agent.The Google Maps MCP server requires an API key to communicate with Google Maps services. In this step, you generate a new API key named GOOGLE_MAPS_API_KEY and restrict it to the Directions and Routes APIs for security.
Go to the Google Cloud console browser tab (not your Cloud Shell Editor).
You can close the Cloud Shell terminal pane in this browser tab for more console area.
Search for Credentials in the search bar at the top of the page. Select it from the results.
On the Credentials page, click Create credentials at the top of the page, then select API key.
For Name, type GOOGLE_MAPS_API_KEY
For APIs that can be accessed using this key, select the following APIs:
Click Create.
The API key created dialog displays your newly created API key. Be sure to copy and save this key locally for use later in the lab.
Click Close on the dialog box.
Now you will configure your agent to use the Google Maps tools. By adding the MCPToolset, you enable the agent to dynamically discover and call the Maps APIs when needed.
Paste the following command into a plain text document on your computer, then update the YOUR_ACTUAL_API_KEY value with the Google Maps API key you generated and saved in a previous step:
Copy and paste the updated command into the Cloud Shell terminal and run it to write a .env file, which provides authentication details for this agent directory.
Copy the .env file to the other agent directory for later use in this lab by running the following command:
In the Cloud Shell Editor's file explorer pane, find the adk_mcp_tools folder. Click it to toggle it open.
Navigate to the directory adk_mcp_tools/google_maps_mcp_agent.
Open agent.py and add the following code after the comment ## Add the MCPToolset (on a new line after line 53) to configure the agent's connection to the Google Maps MCP server:
Save the file.
From the adk_mcp_tools project directory, launch the Agent Development Kit Dev UI with the following command:
Output:
To view the web interface in a new tab, click the http://127.0.0.1:8000 link in the terminal output.
A new browser tab opens with the ADK Dev UI. From the Select an agent drop-down on the left, select the google_maps_mcp_agent.
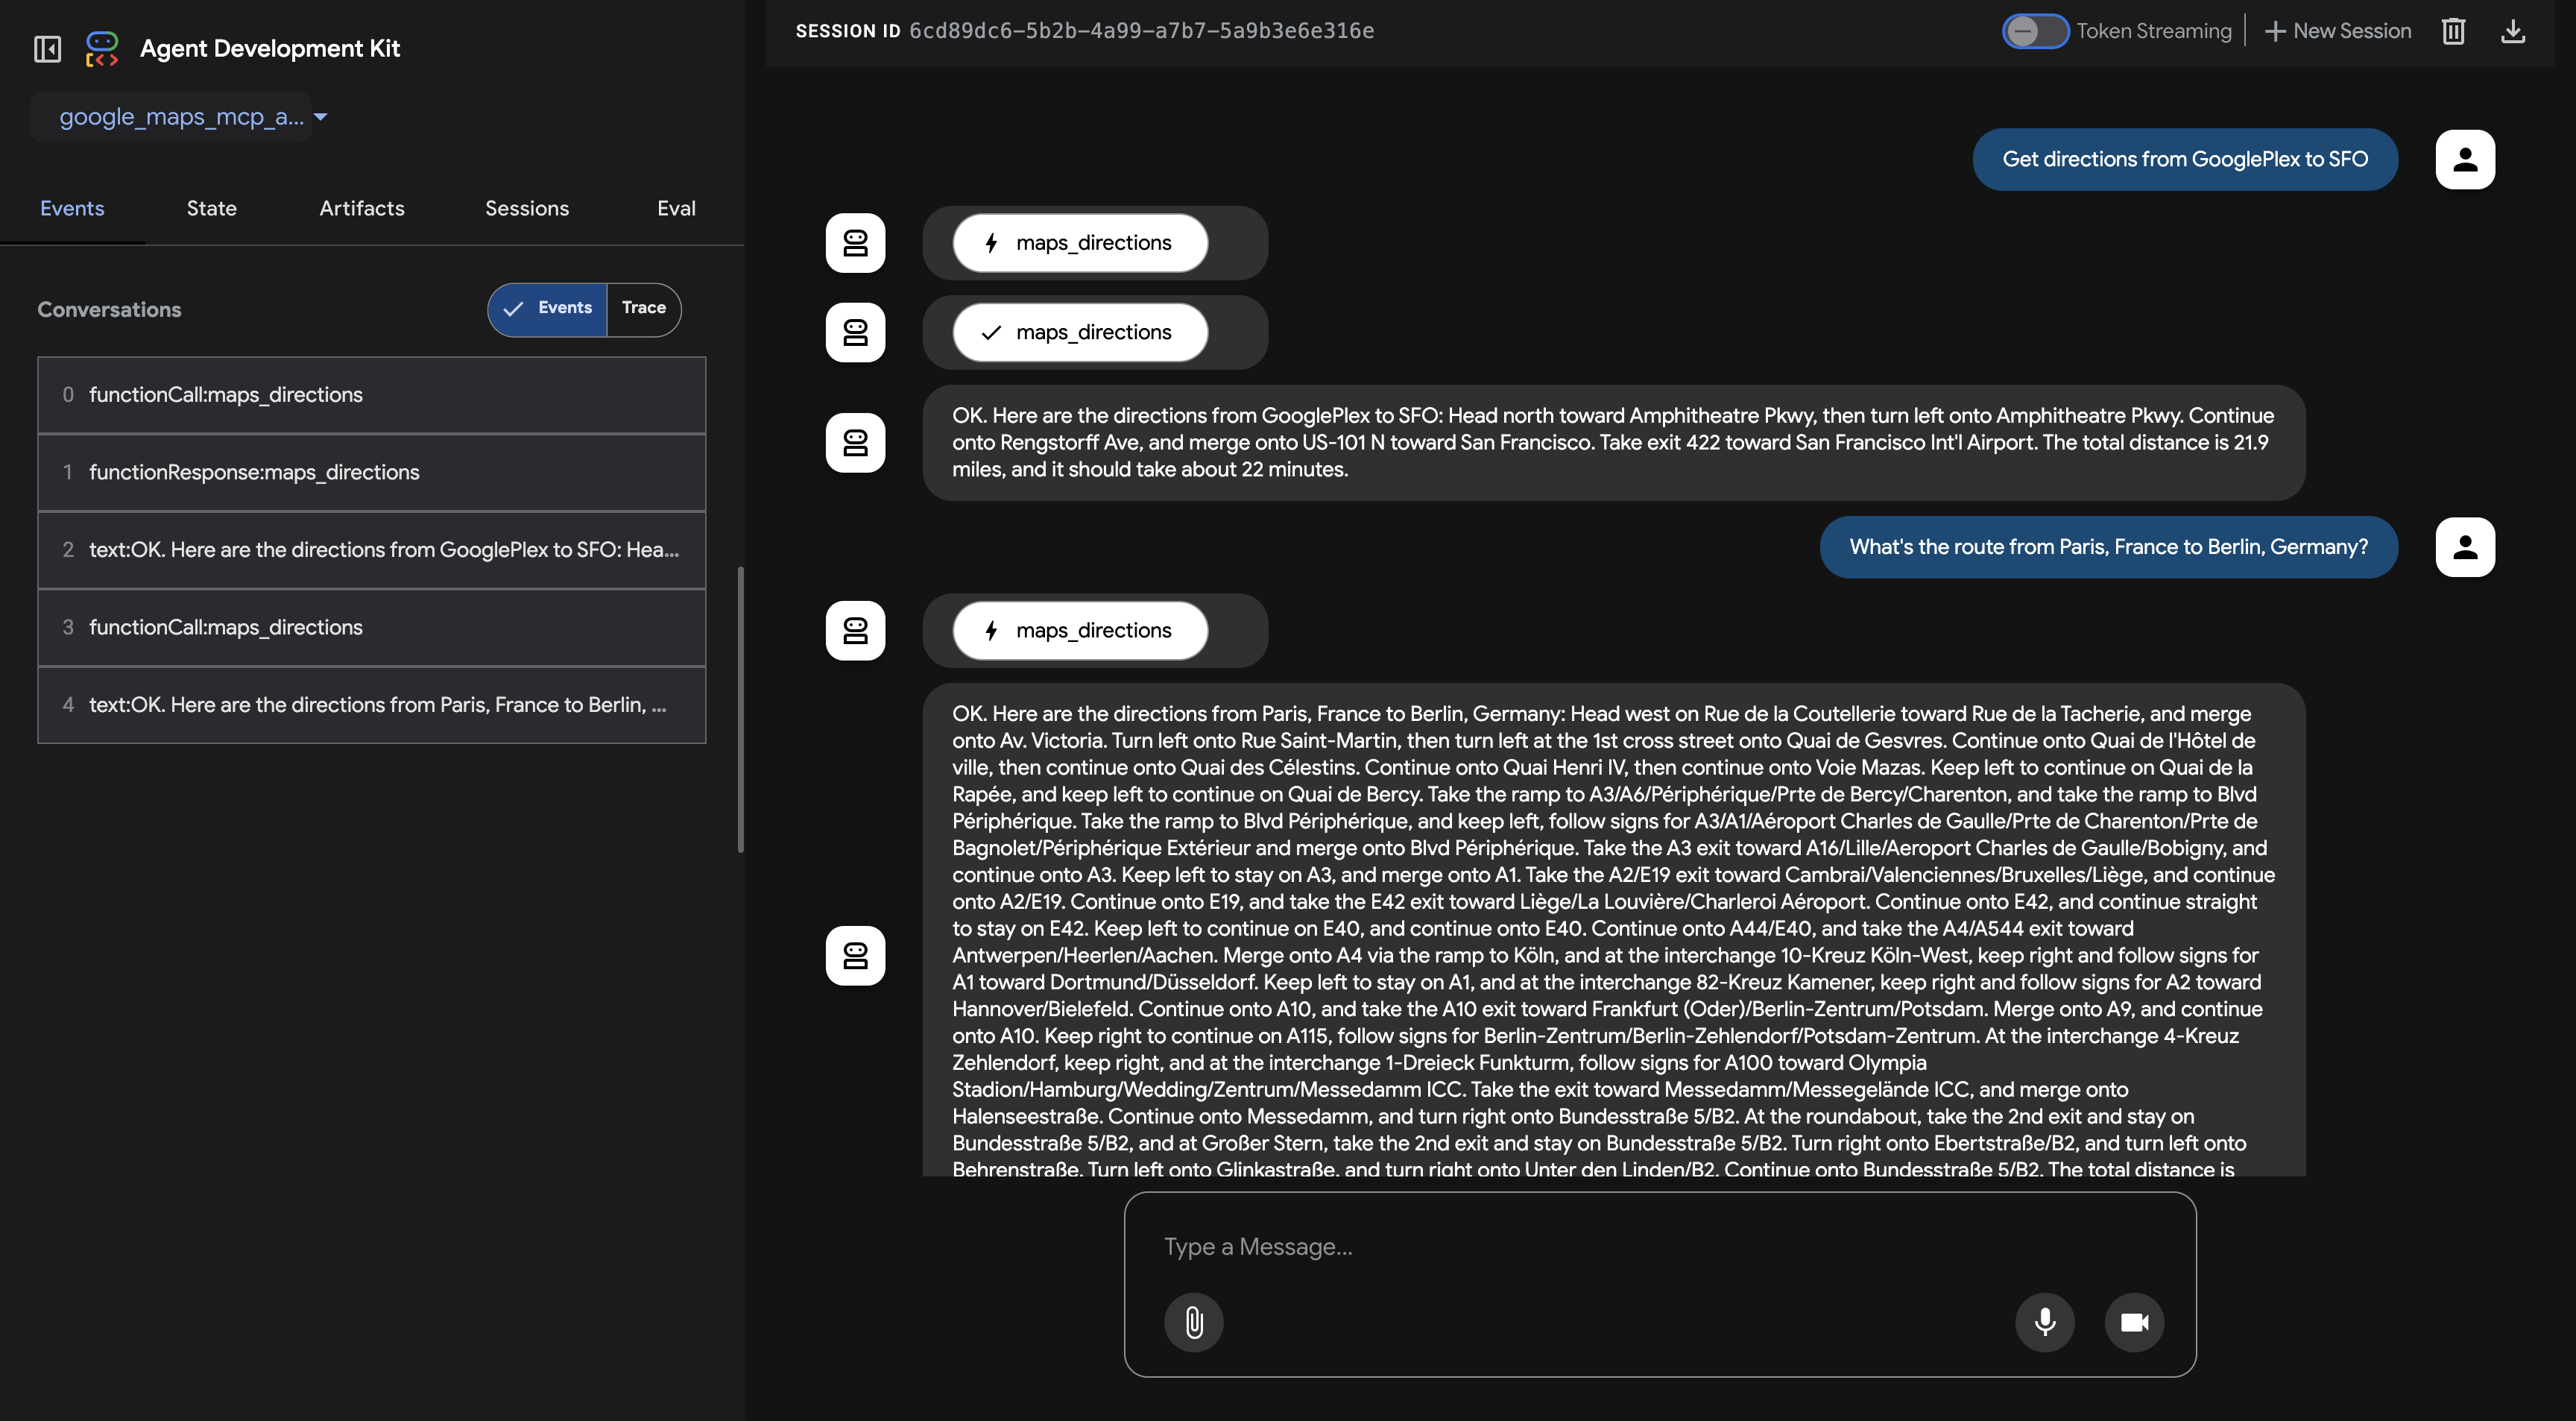
Start a conversation with the agent and run the following prompts:
Output:
Click the agent icon next to the agent's chat bubble with a lightning bolt, which indicates a function call. This opens up the Event inspector for this event.
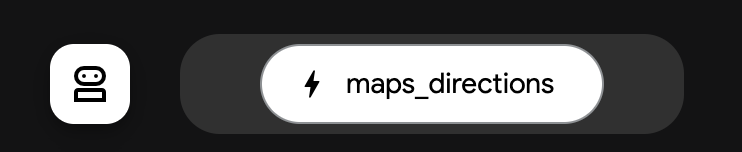
Notice that the agent graph indicates several different tools, identified by the wrench emoji (🔧). Even though you only imported one MCPToolset, that toolset came with the different tools you see listed here, such as maps_place_details and maps_directions.
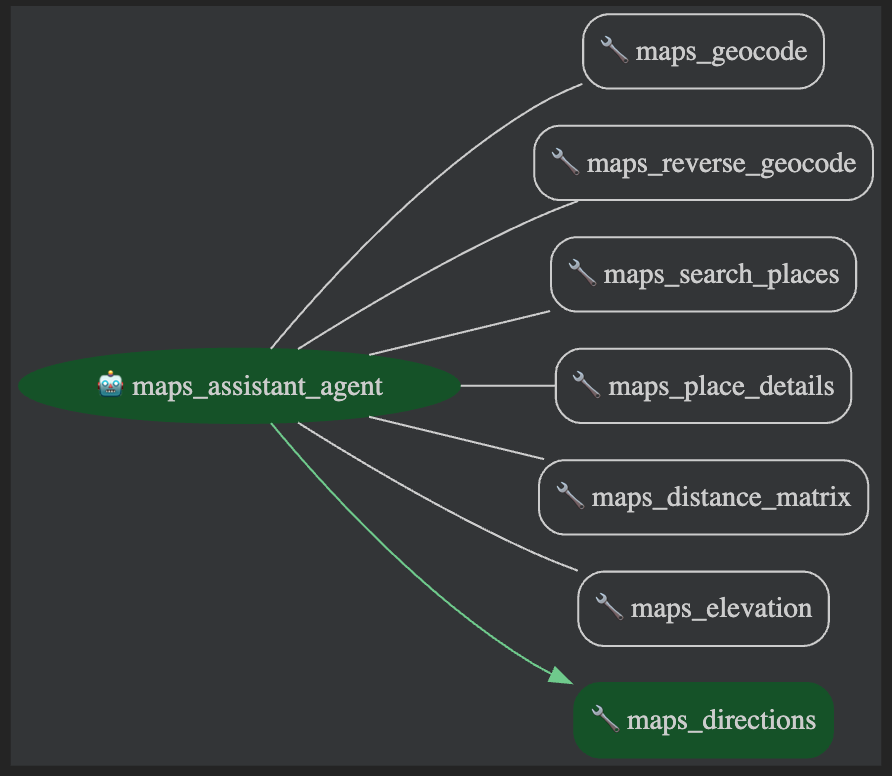
On the Event tab, you can see the structure of the request. You can use the arrows at the top of the Event inspector to browse the agent's thoughts, function calls, and responses.
When you are finished asking questions of this agent, close the Dev UI browser tab.
Go back to the Cloud Shell terminal panel and press CTRL+C to stop the server.
Click Check my progress to verify the objective.
In this section, you learn how to expose the ADK load_web_page tool through a custom-built MCP server. This pattern allows you to wrap existing ADK tools and make them accessible to any standard MCP client application.
Return to your Cloud Shell Editor and select the adk_mcp_tools/adk_mcp_server directory.
Open the Python file named adk_server.py. This file contains the logic for your custom MCP server. Review the code to understand how it wraps the ADK tool and serves it.
Take some time to review that file, reading the comments to understand how the code wraps a tool and serves it as an MCP server. Notice how it allows MCP clients to list available tools as well as invoke the ADK tool asynchronously, handling requests and responses in an MCP-compliant format.
Open agent.py in the adk_mcp_server directory.
In line 31, update the value of PATH_TO_YOUR_MCP_SERVER_SCRIPT to the following path so the agent can connect to your custom server script:
Next, add the following code in line 55, i.e. after where it says ## Add the MCPToolset below: in the agent.py file, to add the MCPToolset to your agent. An ADK agent acts as a client to the MCP server. This ADK agent uses MCPToolset to connect to your adk_server.py script.
Save the file.
To run the MCP server, start the adk_server.py script by running the following command in the Cloud Shell terminal:
Output:
Open a new Cloud Shell terminal tab by clicking the 
In the Cloud Shell terminal, from the adk_mcp_tools project directory, launch the Agent Development Kit Dev UI with the following command:
To view the web interface in a new tab, click the http://127.0.0.1:8000 link in the terminal output.
From the Select an agent drop-down on the left, select the adk_mcp_server.
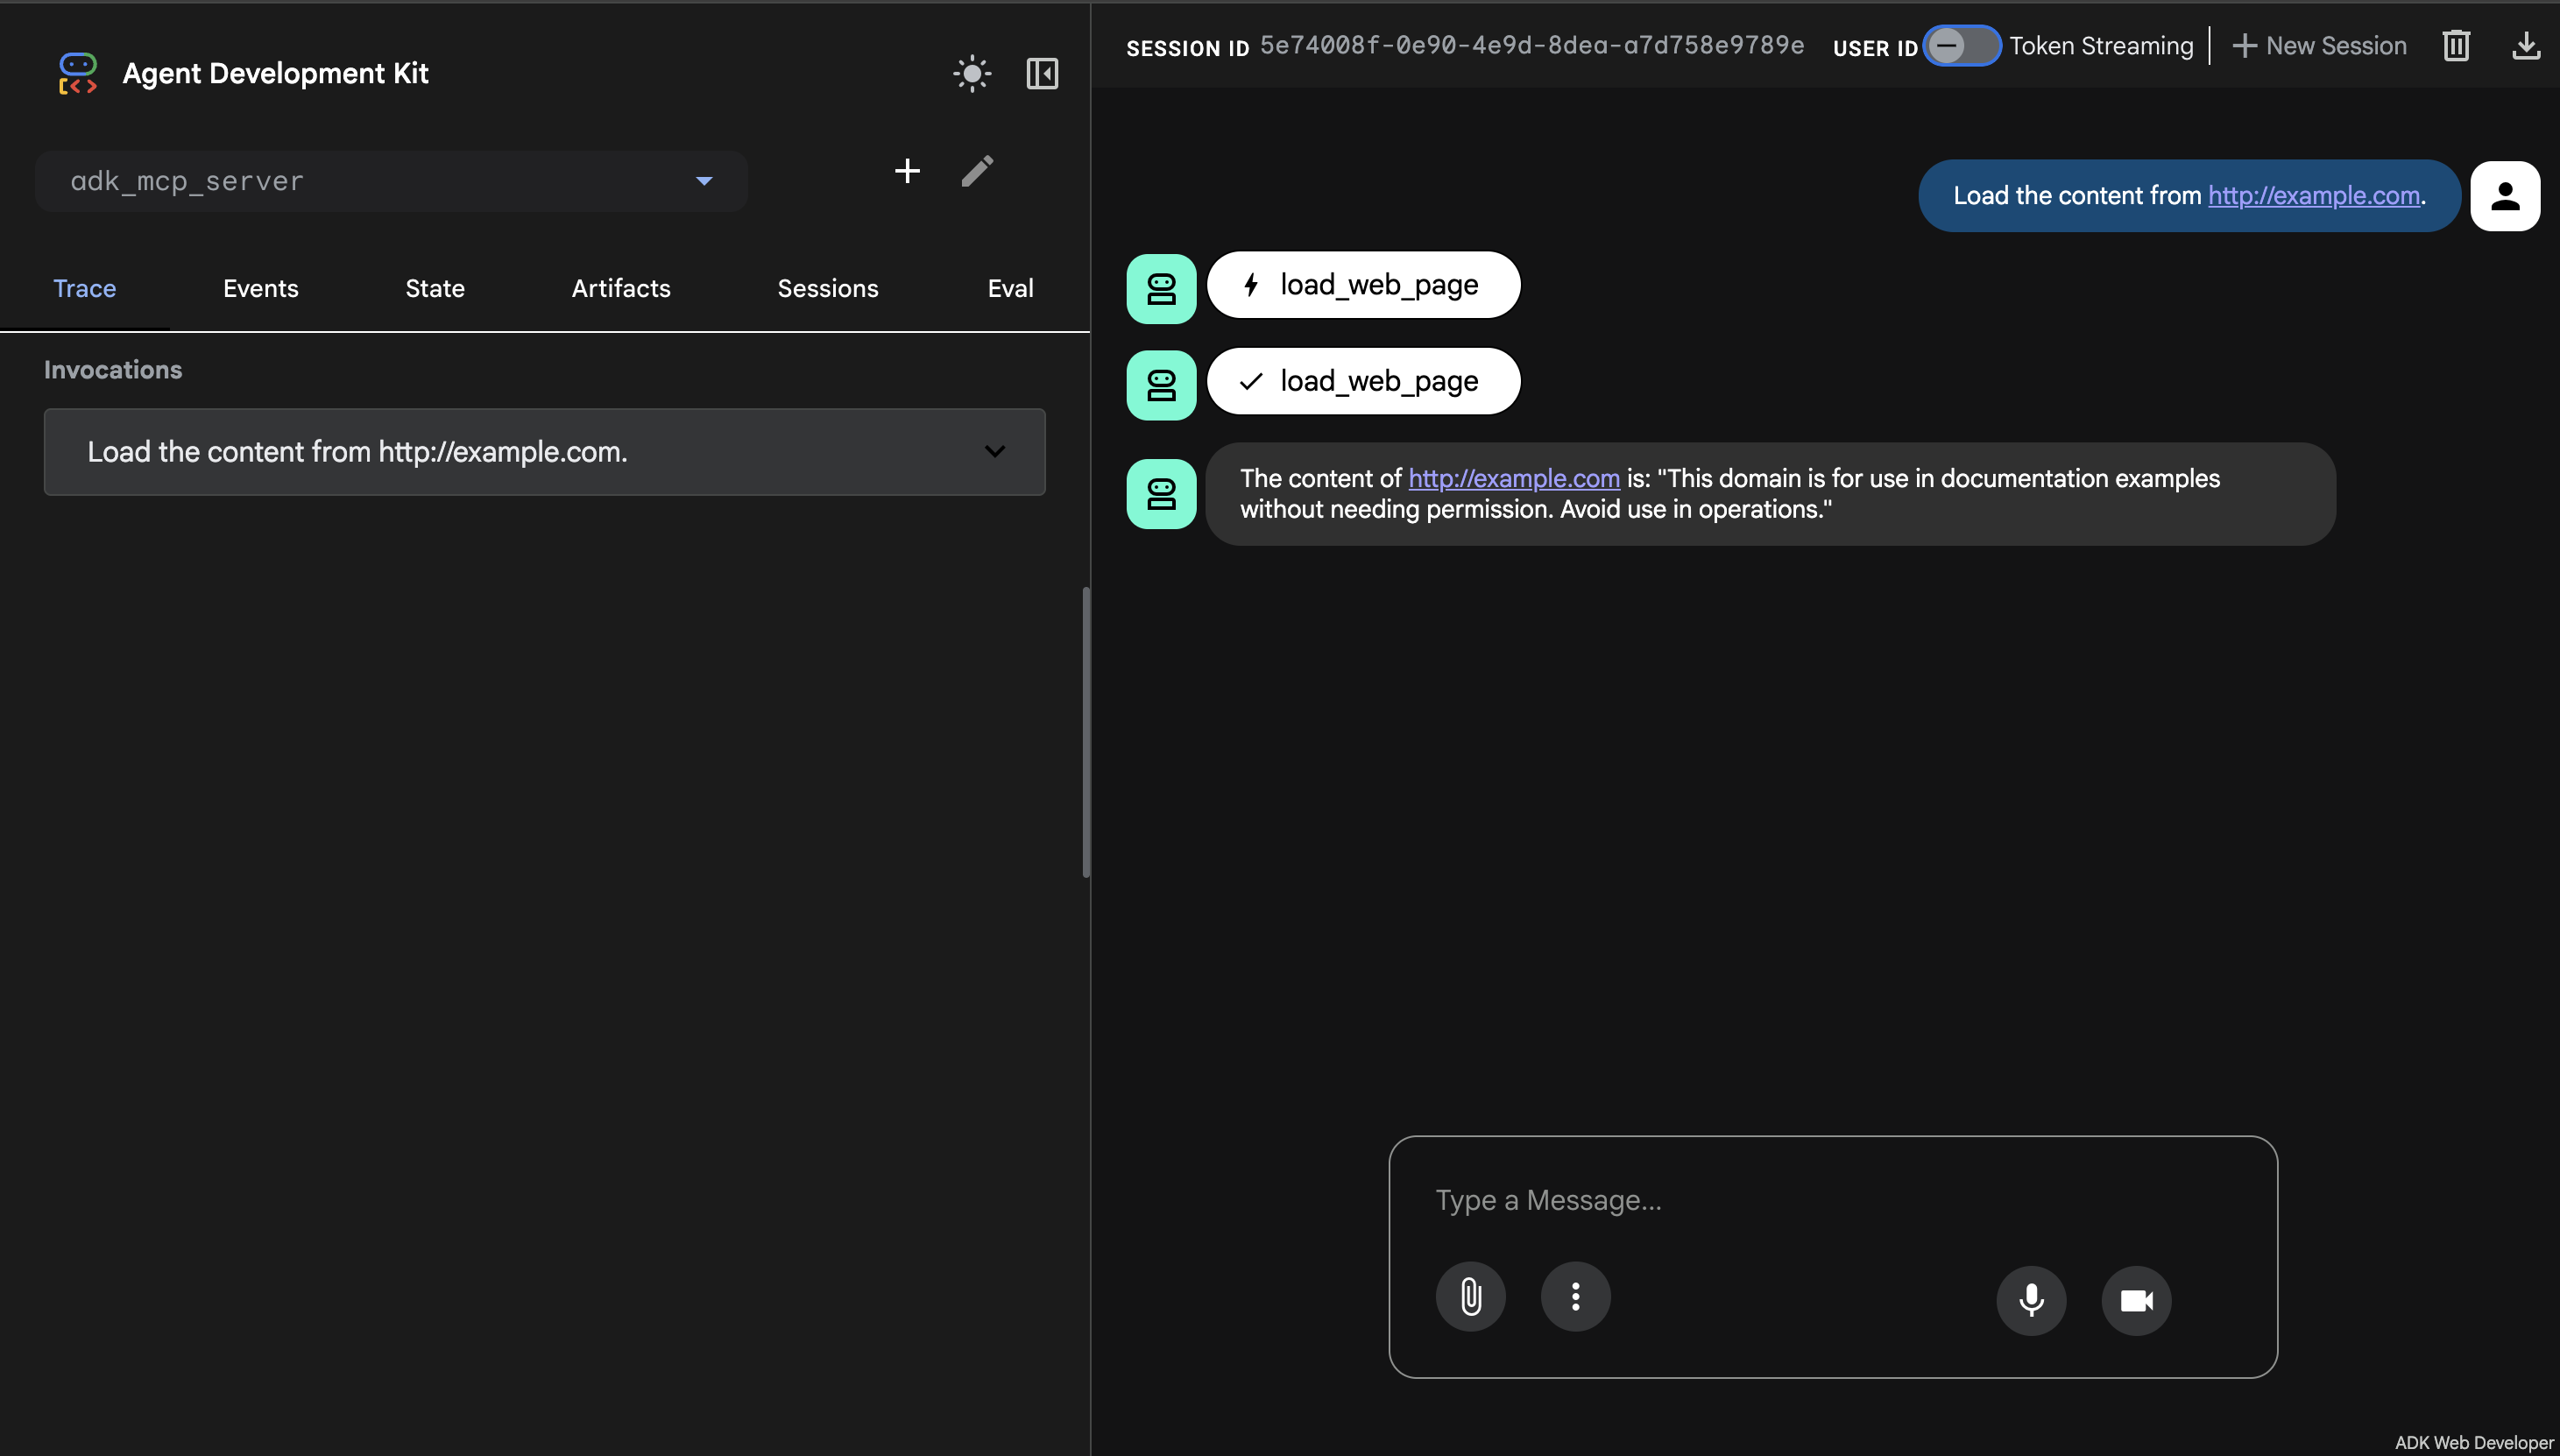
Prompt the agent with the following:
Output:
What happens here:
web_reader_mcp_client_agent) uses the MCPToolset to connect to your adk_server.py.call_tool request, executes the ADK load_web_page tool, and returns the result.adk_server.py terminal in the Cloud Shell terminal tab where it is running.This demonstrates that ADK tools can be encapsulated within an MCP server, making them accessible to a broad range of MCP-compliant clients, including ADK agents.
In this lab, you learned how to integrate external Model Context Protocol (MCP) tools into your Agent Development Kit (ADK) agents using the MCPToolset class. You discovered how to connect to an MCP server, use its tools within your agent, and expose ADK tools like load_web_page through a custom MCP server. These skills enable you to extend your ADK agents with powerful, external services, enhancing your web development workflows.
Manual Last Updated September 25, 2026
Lab Last Tested September 25, 2026
Copyright 2026 Google LLC. All rights reserved. Google and the Google logo are trademarks of Google LLC. All other company and product names may be trademarks of the respective companies with which they are associated.



This content is not currently available
We can notify you via email when it becomes available

Great!
We can contact you via email if it becomes available


One lab at a time
Confirm to end all existing labs and start this one