
Before you begin
- Labs create a Google Cloud project and resources for a fixed time
- Labs have a time limit and no pause feature. If you end the lab, you'll have to restart from the beginning.
- On the top left of your screen, click Start lab to begin
Create a VM instance with necessary firewall rule and an IAM service account
/ 30
Create Cloud Storage Buckets
/ 30
Install the nginx Web server and customize the welcome page
/ 40

In this lab, you become familiar with Google Cloud's web-based interface. Two integrated environments are available:
In this course, you use both environments.
You need to know a few things about the Google Cloud console:
In this lab, you learn how to perform the following tasks:
For each lab, you get a new Google Cloud project and set of resources for a fixed time at no cost.
Click the Start Lab button. If you need to pay for the lab, a pop-up opens for you to select your payment method. On the left is the Lab Details panel with the following:
Click Open Google Cloud console (or right-click and select Open Link in Incognito Window if you are running the Chrome browser).
The lab spins up resources, and then opens another tab that shows the Sign in page.
Tip: Arrange the tabs in separate windows, side-by-side.
If necessary, copy the Username below and paste it into the Sign in dialog.
You can also find the Username in the Lab Details panel.
Click Next.
Copy the Password below and paste it into the Welcome dialog.
You can also find the Password in the Lab Details panel.
Click Next.
Click through the subsequent pages:
After a few moments, the Google Cloud console opens in this tab.

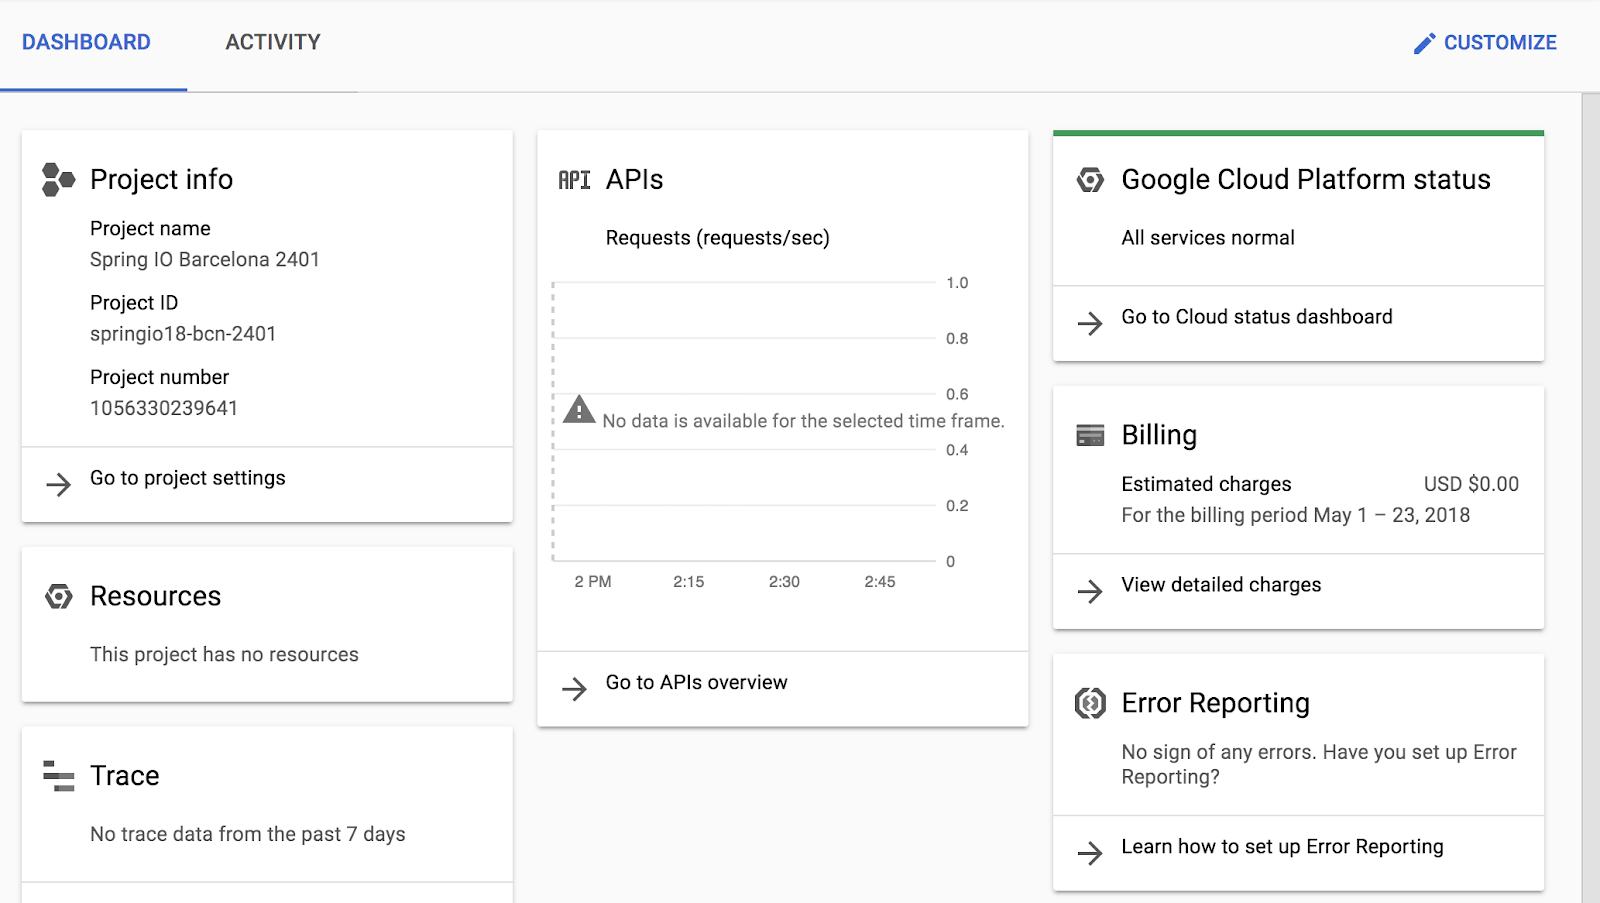
After you complete the initial sign-in steps, the project dashboard appears.
In this task, you wll explore the Google Cloud console interface. You learn how to navigate to different services and identify key details of a running Virtual Machine (VM).
Google Compute Engine offers virtual machines running in Google's datacenters and on its network as a service. Google Kubernetes Engine makes use of Compute Engine as a component of its architecture. For this reason, it's helpful to learn a bit about Compute Engine before learning about Google Kubernetes Engine.
 ), click Compute Engine > VM instances.
gcloud command to create a VM. To the right of the region, zone, and machine type is a per-month estimated cost.
How did the cost change?
The micro type is a shared-core VM that is inexpensive.
Wait until the new VM is created.
first-vm instance.Scroll down to the Management section and examine the On host maintenance and Automatic restart parameters.
Click Cancel.
An IAM service account is a special type of Google account that belongs to an application or a virtual machine, instead of to an individual end user.
test-service-account
Click Check my progress to verify the objective.
In this task, you activate Cloud Shell, a pre-configured command-line environment. You verify that it is automatically authenticated and ready to use.
Cloud Shell provides you with command-line access to your cloud resources directly from your browser. With Cloud Shell, Google Cloud CLI command-line tools such as gcloud are always available, up to date, and fully authenticated.
Cloud Shell provides the following features and capabilities:
$HOME dir)gcloud: for working with Compute Engine, Google Kubernetes Engine (GKE), and many Google Cloud servicesgcloud storage and gsutil: for working with Cloud Storagekubectl: for working with GKE and Kubernetesbq: for working with BigQueryAfter one hour of inactivity, the Cloud Shell instance is recycled. Only the /home directory persists. Any changes made to the system configuration, including environment variables, are lost between sessions.
 ).
).Cloud Shell opens at the bottom of the Google Cloud console window.
The following icons are on the far right of Cloud Shell toolbar:
In Cloud Shell, use the following command to list the accounts whose credentials are stored on the system.
Cloud Shell also automatically sets your environment to the current project ID.
Confirm that the output matches the Project ID displayed in the lab connection details panel.
Run the following command to print the Google Cloud Project ID that the current Cloud Shell session is associated with:
This variable allows you to run scripts without manually typing the project ID every time.
Your student directory is listed.
Use the arrow keys, or press enter or return to view more information.
In this task, you create Cloud Storage buckets and manage objects using both the Cloud Console (GUI) and Cloud Shell (CLI). You create buckets, copy a file between them using the command line, and verify the changes in the Console. Finally, you configure Identity and Access Management (IAM) permissions to make a bucket publicly accessible and view your file via a web browser.
This demonstrates that regardless of which tool you use, you are interacting with the same Google Cloud resources.
In the Google Cloud console, in the Navigation menu(
Click Create bucket.
For Name, type
Click Continue.
For Location Type, select Region and select
Click Continue.
In Choose how to store your data, accept the defaults and click Continue.
In Choose how to control access to objects, deselect Enforce public access prevention on this bucket,
For Access control, ensure Uniform is selected.
Click Continue, and then click Create.
You have now created a storage bucket using the graphical interface.
 ) icon. Feedback from the underlying commands is sometimes provided there. You can click the icon to check the notifications for additional information and history.
Now, you will use Cloud Shell to confirm that the bucket exists.
Return to your Cloud Shell terminal window.
Run the following command to list the storage buckets in your project:
Next, you will perform the same action—creating a bucket—using the command line.
gcloud storage command to create a bucket:), click Cloud Storage > Buckets, select both the buckets that you created, and verify that both contain the cat.jpg file.Select the first storage bucket, cat.jpg does not have Public access.
Click the Permissions tab.
In View by principals, click Grant access.
In New principals, type allUsers.
For Assign Roles, in Select a role, type Storage Object Viewer and select Storage Object Viewer.
Click Save.
In the make resource public dialog box, click Allow Public Access.
Click Back to parent page to return to the main screen.
Select the first storage bucket,
Verify that Public access for the bucket is now shown as, Access granted to public principals.
Click Copy URL to copy the link to the cat image.
Open a new incognito browser tab and paste the link into its address bar. You will see a picture of a cat. Leave this browser tab open.
Click Check my progress to verify the objective.
In this task, you explore using the Cloud Shell code editor.
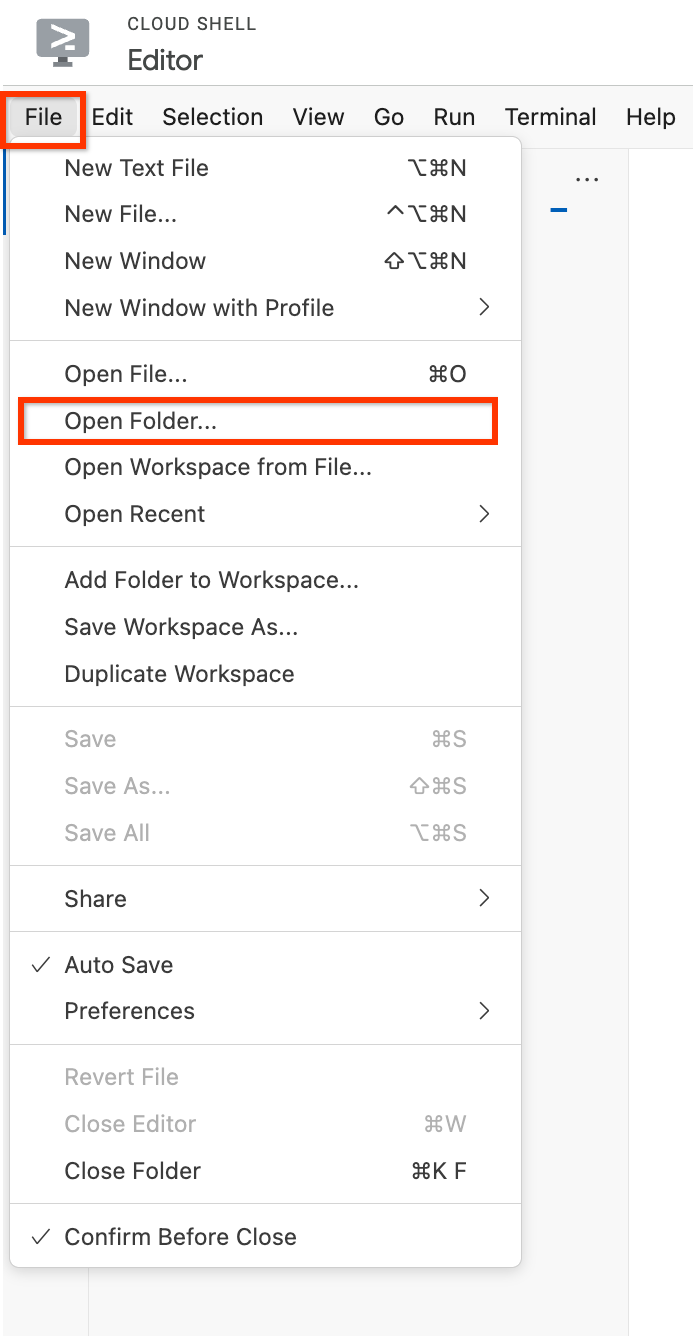
In Cloud Shell, click the Open Editor icon (
In Cloud Shell Editor, click on File > Open Folder.
The folder opens and displays a list of files and directories in the left pane.
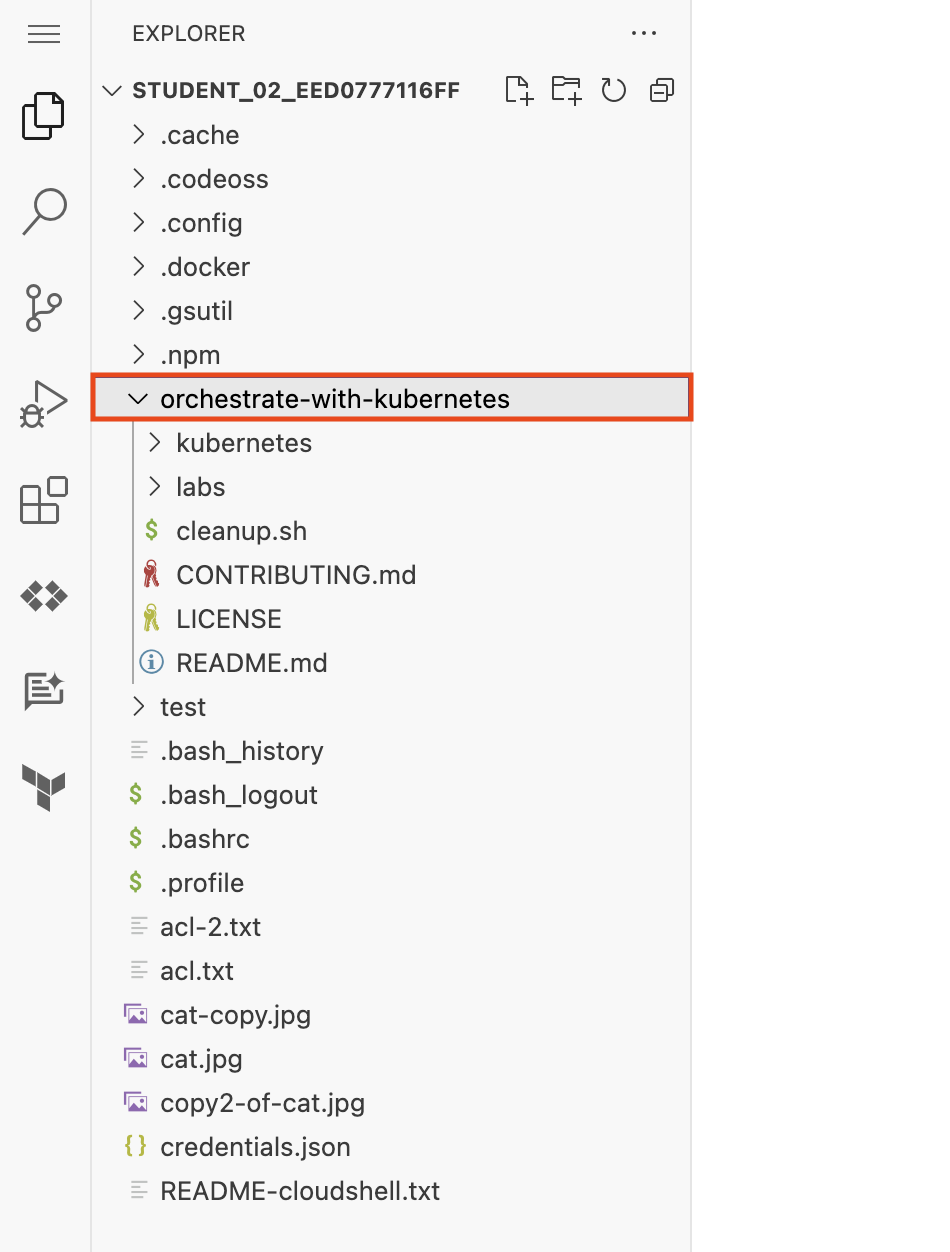
git repository:The orchestrate-with-kubernetes folder appears in the left pane of the Cloud Shell Editor window.
The test folder now appears in the left pane of the Cloud Shell Editor window.
orchestrate-with-kubernetes to expand the folder.In the left pane, click the cleanup.sh file to open it in the right pane of the Cloud Shell Editor window.
Add the following text as the last line of the cleanup.sh file:
cleanup.sh:Verify that the output of cat cleanup.sh includes the line of text that you added.
In the Cloud Shell code editor, right click the orchestrate-with-kubernetes folder, and select New File.
Name the file index.html.
Click Save.
In the right hand pane, paste in this HTML text:
REPLACE_WITH_CAT_URL with the URL of the cat image from an earlier task. The
URL will look like this:In the Navigation menu (
In the row for your first-vm, click the SSH button.
In the SSH login window that opens on your VM, install the nginx Web server:
Y to continue.nginx web server:Click Check my progress to verify the objective.
In the Navigation menu (
Click the link in the External IP column for your first-vm. If you see the message that the site does not support a secure connection, click Continue to site.
A new browser tab opens with a webpage that contains the cat image.
When you have completed your lab, click End Lab. Google Skills removes the resources you’ve used and cleans the account for you.
You will be given an opportunity to rate the lab experience. Select the applicable number of stars, type a comment, and then click Submit.
The number of stars indicates the following:
You can close the dialog box if you don't want to provide feedback.
For feedback, suggestions, or corrections, please use the Support tab.
Copyright 2026 Google LLC All rights reserved. Google and the Google logo are trademarks of Google LLC. All other company and product names may be trademarks of the respective companies with which they are associated.


This content is not currently available
We will notify you via email when it becomes available

Great!
We will contact you via email if it becomes available

One lab at a time
Confirm to end all existing labs and start this one