
Before you begin
- Labs create a Google Cloud project and resources for a fixed time
- Labs have a time limit and no pause feature. If you end the lab, you'll have to restart from the beginning.
- On the top left of your screen, click Start lab to begin

Deploy a Cloud Run service
/ 20
Enable and add policy to IAP
/ 30
Access User Identity Information
/ 25
Use Cryptographic Verification
/ 25
Deploy a Cloud Run service
/ 20
Enable and add policy to IAP
/ 30
Access User Identity Information
/ 25
Use Cryptographic Verification
/ 25


In this lab, you build a minimal web application with Cloud Run, then explore various ways to use Identity-Aware Proxy (IAP) to restrict access to the application and provide user identity information to it. Your app will:
In this lab, you learn how to perform the following tasks:
A basic knowledge of the Python programming language will enhance your learning experience.
This lab is focused on Cloud Run and IAP. Non-relevant concepts and code blocks are glossed over and are provided for you to simply copy and paste.
Authenticating users of your web app is often necessary, and usually requires special programming in your app. For Google Cloud apps you can hand those responsibilities off to the Identity-Aware Proxy service. If you only need to restrict access to selected users there are no changes necessary to the application. Should the application need to know the user's identity (such as for keeping user preferences server-side) Identity-Aware Proxy can provide that with minimal application code.
Identity-Aware Proxy (IAP) is a Google Cloud service that intercepts web requests sent to your application, authenticates the user making the request using the Google Identity Service, and only lets the requests through if they come from a user you authorize. In addition, it can modify the request headers to include information about the authenticated user.
Read these instructions. Labs are timed and you cannot pause them. The timer, which starts when you click Start Lab, shows how long Google Cloud resources are made available to you.
This hands-on lab lets you do the lab activities in a real cloud environment, not in a simulation or demo environment. It does so by giving you new, temporary credentials you use to sign in and access Google Cloud for the duration of the lab.
To complete this lab, you need:
Click the Start Lab button. If you need to pay for the lab, a dialog opens for you to select your payment method. On the right is the Lab setup and access panel with the following:
Note that the lab timer is located near the top of the page, showing the remaining time.
Click Open Google Cloud console (or right-click and select Open Link in Incognito Window if you are running the Chrome browser).
The lab spins up resources, and then opens another tab that shows the Sign in page.
Tip: Arrange the tabs in separate windows, side-by-side.
If necessary, copy the Username below and paste it into the Sign in dialog.
You can also find the Username in the Lab setup and access panel.
Click Next.
Copy the Password below and paste it into the Welcome dialog.
You can also find the Password in the Lab setup and access panel.
Click Next.
Click through the subsequent pages:
After a few moments, the Google Cloud console opens in this tab.

Cloud Shell is a virtual machine that is loaded with development tools. It offers a persistent 5GB home directory and runs on the Google Cloud. Cloud Shell provides command-line access to your Google Cloud resources.
Click Activate Cloud Shell 
Click through the following windows:
When you are connected, you are already authenticated, and the project is set to your Project_ID,
gcloud is the command-line tool for Google Cloud. It comes pre-installed on Cloud Shell and supports tab-completion.
Output:
Output:
gcloud, in Google Cloud, refer to the gcloud CLI overview guide.
Click the command line area in the Cloud Shell so you can type commands.
Download the code from a public storage bucket and then change to the code folder:
This folder contains one subfolder for each step of this lab. You will change to the correct folder to perform each step.
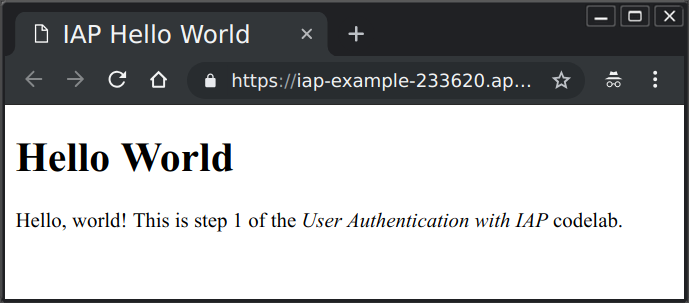
This is a Cloud Run service written in Python that simply displays a "Hello, World" welcome page. We will deploy and test it, then restrict access to it using IAP.
1-HelloWorld subfolder that contains code for this step.The application code is in the main.py file. It uses the Flask web framework to respond to web requests with the contents of a template. That template file is in templates/index.html, and for this step contains only plain HTML. A second template file contains a skeletal example privacy policy in templates/privacy.html.
There is one other file: requirements.txt lists all the non-default Python libraries the application uses.
You can list each file in the shell using the cat command, as in:
Or you can launch the Cloud Shell code editor by clicking the Open Editor (Pencil) icon in the Cloud Shell toolbar, and examine the code that way.
You do not need to change any files for this step.
In a few minutes the deployment completes. You will see a message with the Service URL.
Click Check my progress to verify the objective.
 ), click Security > Identity-Aware Proxy.
Click the toggle button in the IAP column next to user-auth-lab to turn IAP on.
Click Turn On to confirm.
Open a new browser tab and navigate to the URL for your app. A Sign in with Google page opens.
Sign in with the student account credentials you used to log into the console.
A screen denying you access appears. You have successfully protected your app with IAP, but you have not yet authorized any user accounts.
Return to the Identity-Aware Proxy page in the console.
Select the checkbox next to the user-auth-lab Cloud Run service to open the details sidebar on the right.
Click Add Principal.
For New principals, enter your student email address.
For Select a role, select Cloud IAP > IAP-Secured Web App User
Click Save. The message "Policy Updated" appears at the bottom of the page.
Navigate back to your app and reload the page. Since you are already logged in with an authorized account, you should now see your web app.
Click Check my progress to verify the objective.
If you still see the access denied page, clear the IAP login cookie:
/_gcp_iap/clear_login_cookie to the end of your service URL (e.g., https://user-auth-lab-[random-hash].run.app/_gcp_iap/clear_login_cookie) and open it.Once an app is protected with IAP, it can use the identity information that IAP provides in the web request headers it passes through. In this step, the application will get the logged-in user's email address and a persistent unique user ID assigned by the Google Identity Service to that user. That data will be displayed to the user in the welcome page.
In a few minutes the deployment should complete. While you are waiting you can examine the application files as described below.
cat command:This folder contains the same set of files as seen in the previous app you deployed, 1-HelloWorld, but two of the files have been changed: main.py and templates/index.html. The program has been changed to retrieve the user information that IAP provides in request headers, and the template now displays that data.
There are two lines in main.py that get the IAP-provided identity data:
The X-Goog-Authenticated-User- headers are provided by IAP, and the names are case-insensitive, so they could be given in all lower or all upper case if preferred. The render_template statement now includes those values so they can be displayed:
The index.html template can display those values by enclosing the names in double curly braces:
As you can see, the provided data is prefixed with accounts.google.com, showing where the information came from. Your application can remove everything up to and including the colon to get the raw values if desired.
What happens to this app if IAP is disabled or bypassed? Turn off IAP to see.
user-auth-lab) to turn IAP off.Since the application is now unprotected, a user could send a web request that appeared to have passed through IAP. For example, run the following curl command from the Cloud Shell (replace YOUR_URL with the URL of your app):
The web page will be displayed on the command line, showing the fake email:
There is no way for the application to know that IAP has been disabled or bypassed. For cases where that is a potential risk, Cryptographic Verification shows a solution.
Click Check my progress to verify the objective.
If there is a risk of IAP being turned off or bypassed, your app can check to make sure the identity information it receives is valid. This uses a third web request header added by IAP, called X-Goog-IAP-JWT-Assertion. The value of the header is a cryptographically signed object that also contains the user identity data. Your application can verify the digital signature and use the data provided in this object to be certain that it was provided by IAP without alteration.
Digital signature verification requires several extra steps, such as retrieving the latest set of Google public keys. You can decide whether your application needs these extra steps based on the risk that someone might be able to turn off or bypass IAP, and the sensitivity of the application.
Find the Signed Header JWT Audience Client ID for your IAP-secured Cloud Run service:
Go to the Identity-Aware Proxy page in the Cloud Console.
Locate the user-auth-lab in the list.
Note: You may need to scroll the resources table to the right (using the horizontal scrollbar at the bottom of the table) to reveal the Actions column on the far right.
Under Actions, click the three vertical dots button next to the resource and select Get JWT audience code.
From the modal that appears, copy and paste into a text editor the displayed Client ID string and select Ok.
Deploy the app to Cloud Run, setting the IAP_AUDIENCE environment variable with the Client ID value you copied:
In a few minutes the deployment should complete. While you are waiting you can examine the application files as described below.
Click Check my progress to verify the objective.
cat command:This folder contains the same set of files as seen in 2-HelloUser, with two files altered and one new file. The new file is auth.py, which provides a user() method to retrieve and verify the cryptographically signed identity information. The changed files are main.py and templates/index.html, which now use the results of that method. The unverified headers as found in the last deployment are also shown for comparison.
user() function:The assertion is the cryptographically signed data provided in the specified request header. The code uses a library to validate and decode that data. Validation uses the public keys that Google provides for checking data it signs, and knowing the audience that the data was prepared for (essentially, the Google Cloud project that is being protected). Helper functions keys() and audience() gather and return those values.
The signed object has two pieces of data we need: the verified email address, and the unique ID value (provided in the sub, for subscriber, standard field).
This completes Step 3.
When the deployment is ready, you can get the URL for your application with:
Notice that the email address provided by the verified method does not have the accounts.google.com: prefix.
If IAP is turned off or bypassed, the verified data would either be missing, or invalid, since it cannot have a valid signature unless it was created by the holder of Google's private keys.
You deployed a Cloud Run service. First, you restricted access to the application to only users you chose. Then you retrieved and displayed the identity of users that IAP allowed access to your application, and saw how that information might be spoofed if IAP were disabled or bypassed. Lastly, you verified cryptographically signed assertions of the user's identity, which cannot be spoofed.
...helps you make the most of Google Cloud technologies. Our classes include technical skills and best practices to help you get up to speed quickly and continue your learning journey. We offer fundamental to advanced level training, with on-demand, live, and virtual options to suit your busy schedule. Certifications help you validate and prove your skill and expertise in Google Cloud technologies.
Manual Last Updated August 18, 2026
Lab Last Tested August 18, 2026
Copyright 2026 Google LLC. All rights reserved. Google and the Google logo are trademarks of Google LLC. All other company and product names may be trademarks of the respective companies with which they are associated.



This content is not currently available
We can notify you via email when it becomes available

Great!
We can contact you via email if it becomes available


One lab at a time
Confirm to end all existing labs and start this one