


Before you begin
- Labs create a Google Cloud project and resources for a fixed time
- Labs have a time limit and no pause feature. If you end the lab, you'll have to restart from the beginning.
- On the top left of your screen, click Start lab to begin
Load conversations into Conversational insights
/ 25
Configure LLM Summarization
/ 25
Analyze conversations
/ 25
Export Conversations to BigQuery
/ 25
Load conversations into Conversational insights
/ 25
Configure LLM Summarization
/ 25
Analyze conversations
/ 25
Export Conversations to BigQuery
/ 25
Conversational Insights provides contact center interaction data to answer business questions or support decisions to drive efficiency. It uses Google’s ML and Large Language Models to turn contact center data into actionable insights. Based on the outcomes of the insights module various actions can be taken by contact center management like agent coaching, improved bots, improved contact center workflows.
In this lab, you will learn how to:
Read these instructions. Labs are timed and you cannot pause them. The timer, which starts when you click Start Lab, shows how long Google Cloud resources will be made available to you.
This Qwiklabs hands-on lab lets you do the lab activities yourself in a real cloud environment, not in a simulation or demo environment. It does so by giving you new, temporary credentials that you use to sign in and access Google Cloud for the duration of the lab.
To complete this lab, you need:
Note: If you already have your own personal Google Cloud account or project, do not use it for this lab.
Note: If you are using a Pixelbook, open an Incognito window to run this lab.
Cloud Shell is a virtual machine that is loaded with development tools. It offers a persistent 5GB home directory and runs on the Google Cloud. Cloud Shell provides command-line access to your Google Cloud resources.
In the Cloud Console, in the top right toolbar, click the Activate Cloud Shell button.
Click Continue.
It takes a few moments to provision and connect to the environment. When you are connected, you are already authenticated, and the project is set to your PROJECT_ID. For example:
gcloud is the command-line tool for Google Cloud. It comes pre-installed on Cloud Shell and supports tab-completion.
You can list the active account name with this command:
(Output)
(Example output)
You can list the project ID with this command:
(Output)
(Example output)
In the Google Cloud console, from the Navigation menu(
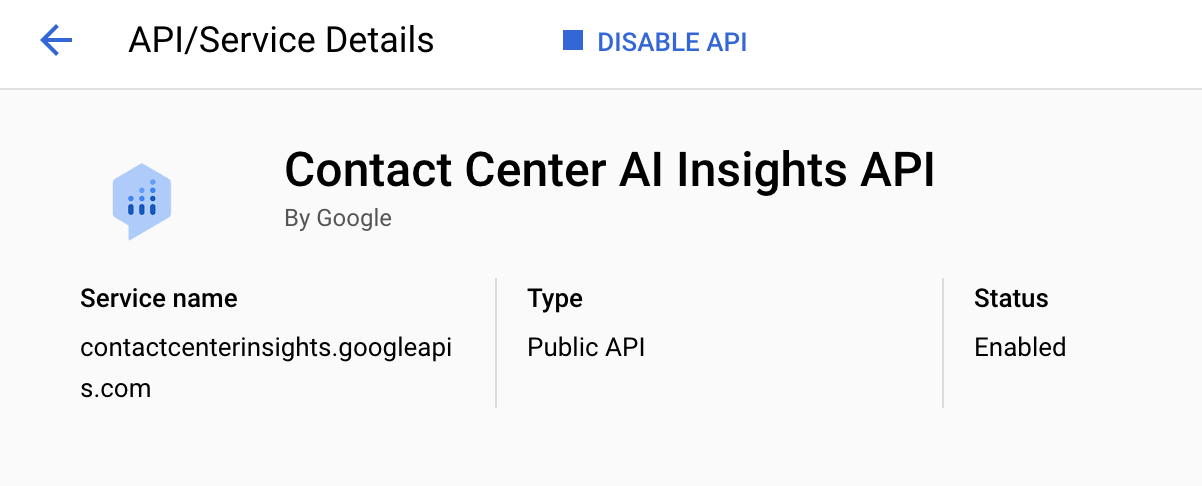
On the Google Cloud Console title bar, click Activate Cloud Shell. If prompted, click Continue. Run the following command to enable any missing APIs:
Alternatively, if one of these APIs are not listed, click on the ENABLE APIS AND SERVICES button at the top of the screen, type in the name of the missing API into the search box, select the API from the search results, then click on the Enable button.
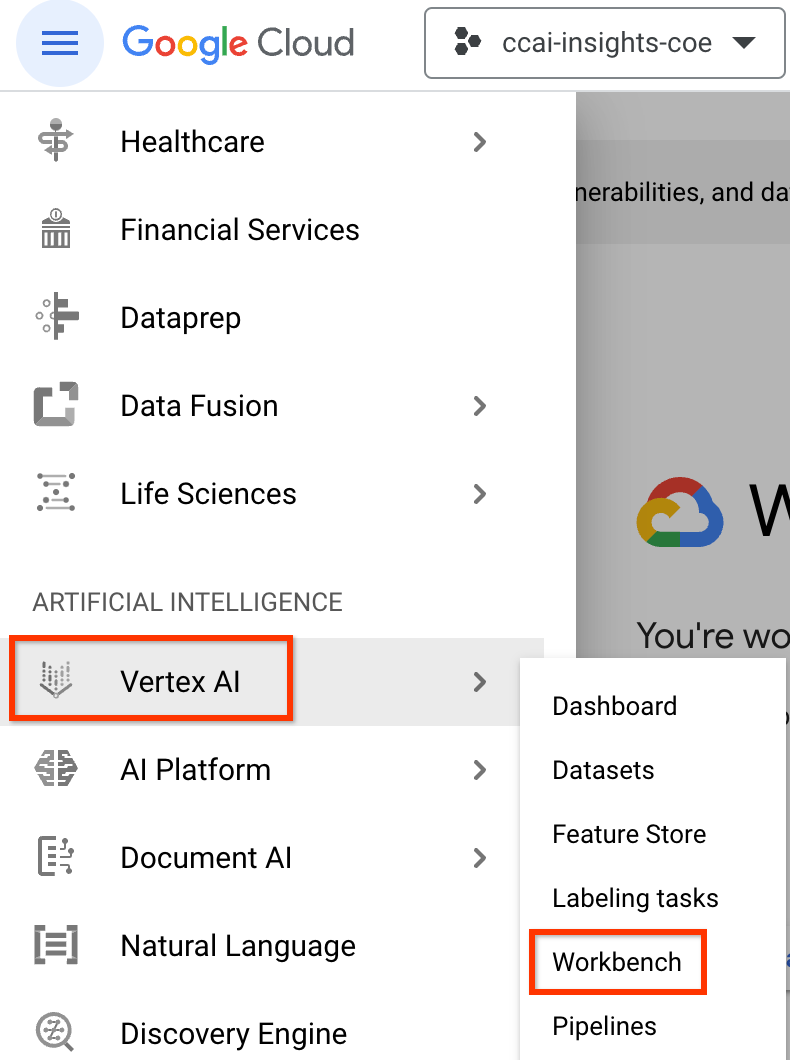
Navigate to Vertex AI > Workbench.
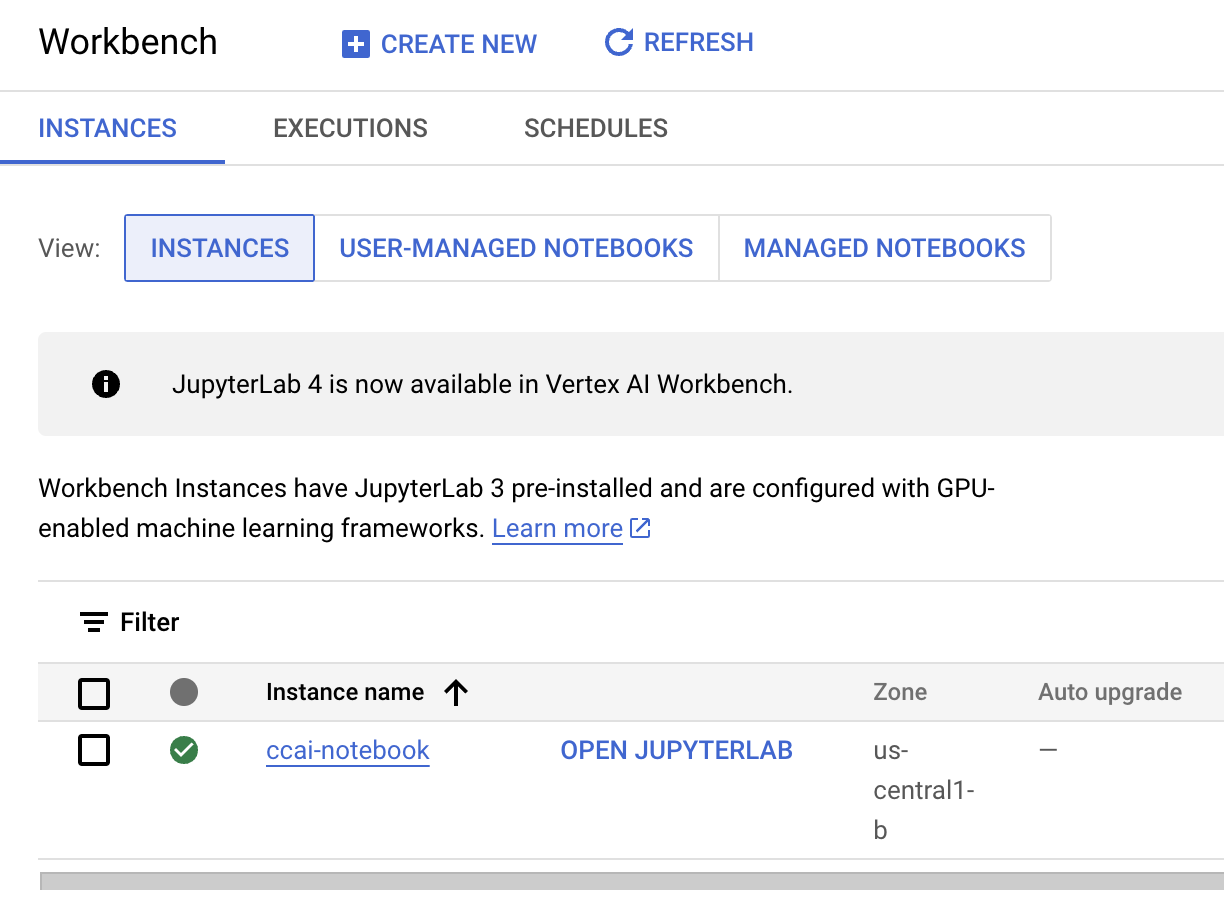
Select Instances and click on the Open JupyterLab button beside ccai-notebook. You may need to wait a few minutes while the instance is being provisioned.
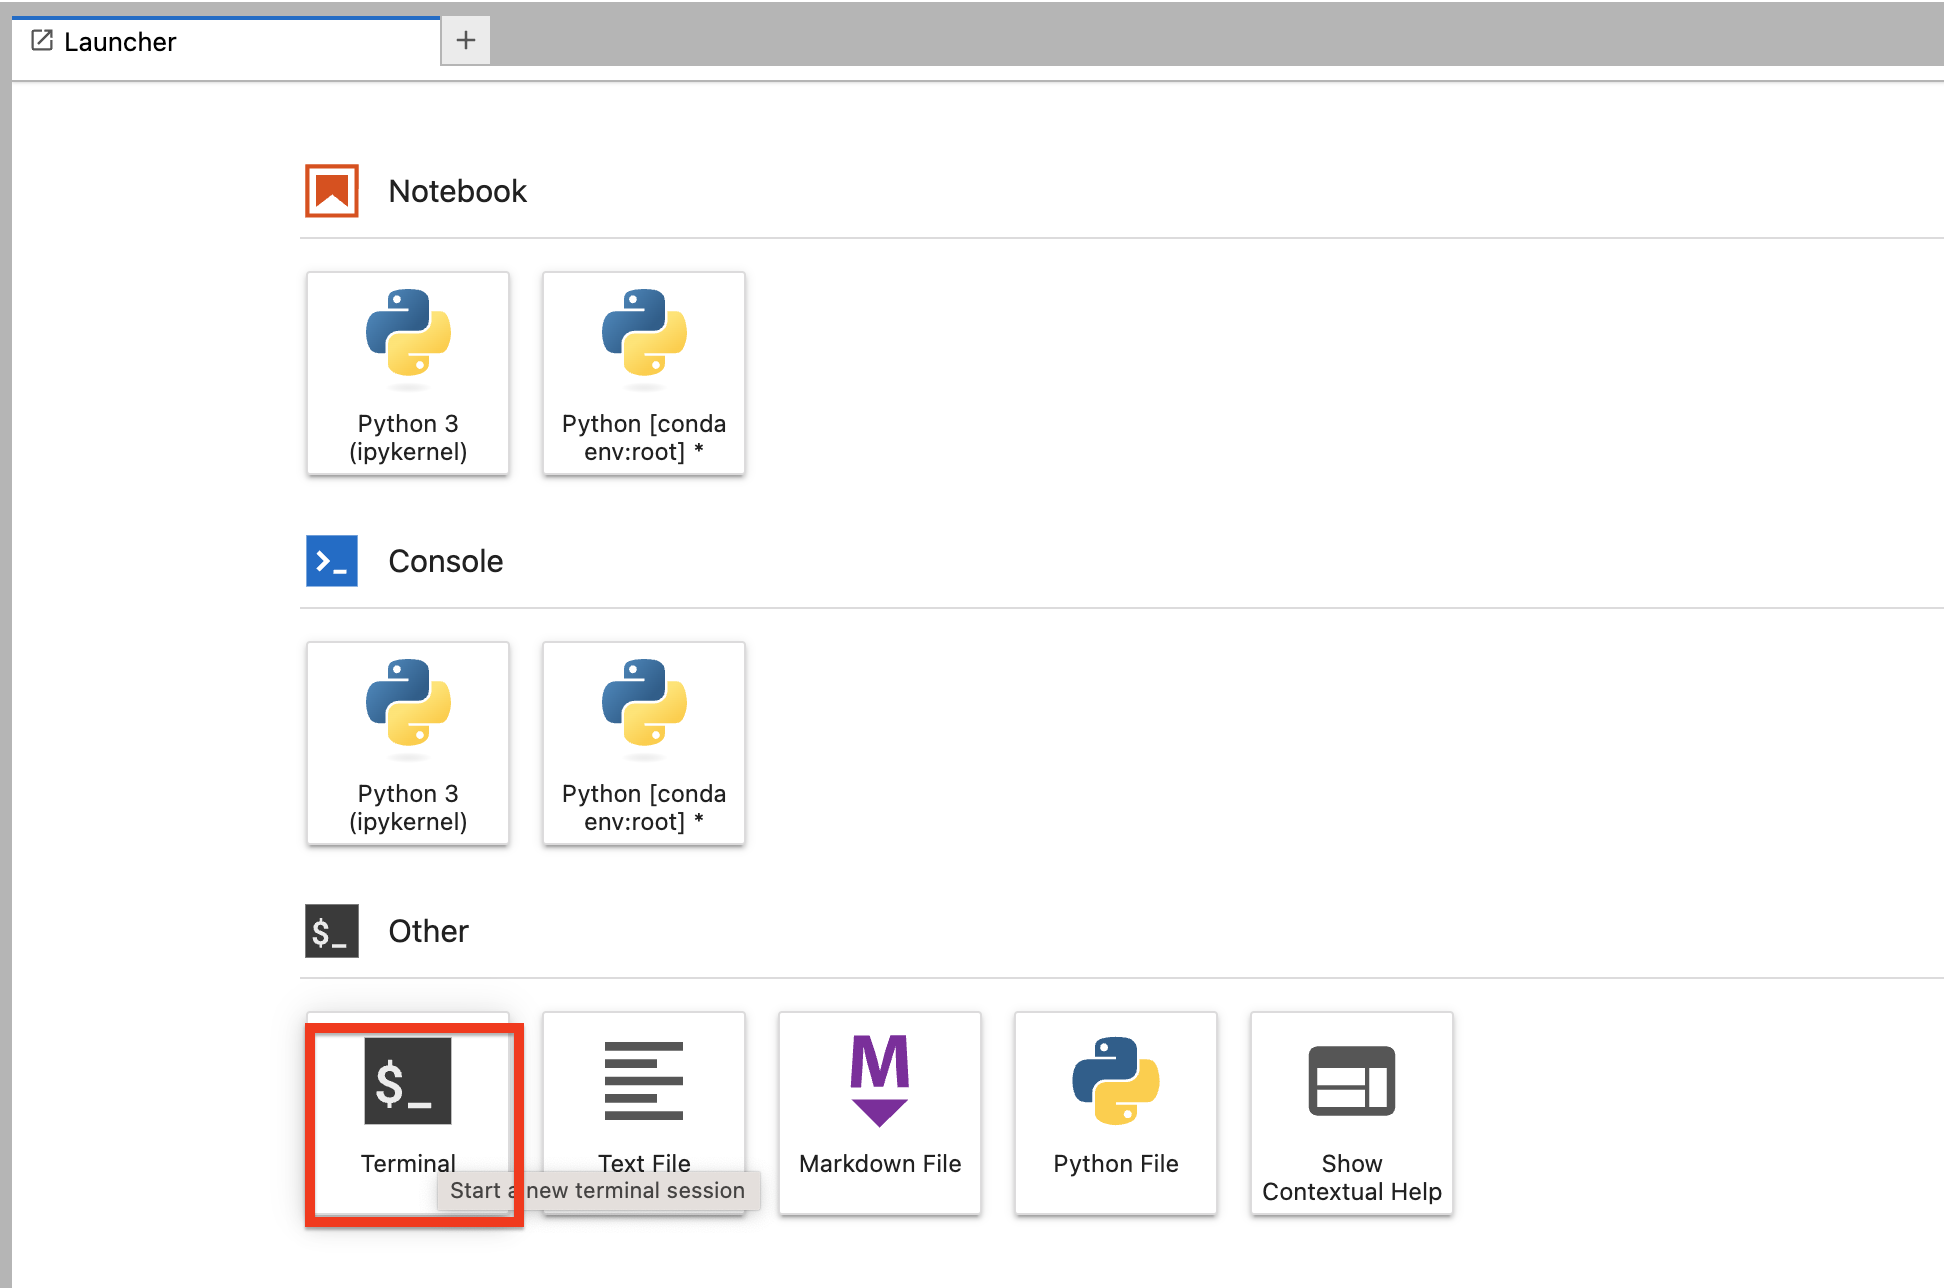
Once the notebook is open, click on the Terminal icon from Launcher. This will open up a new Terminal window.
Ensure that the conversations are preloaded into the expected Google Cloud Storage location by running the following commands in your terminal window:
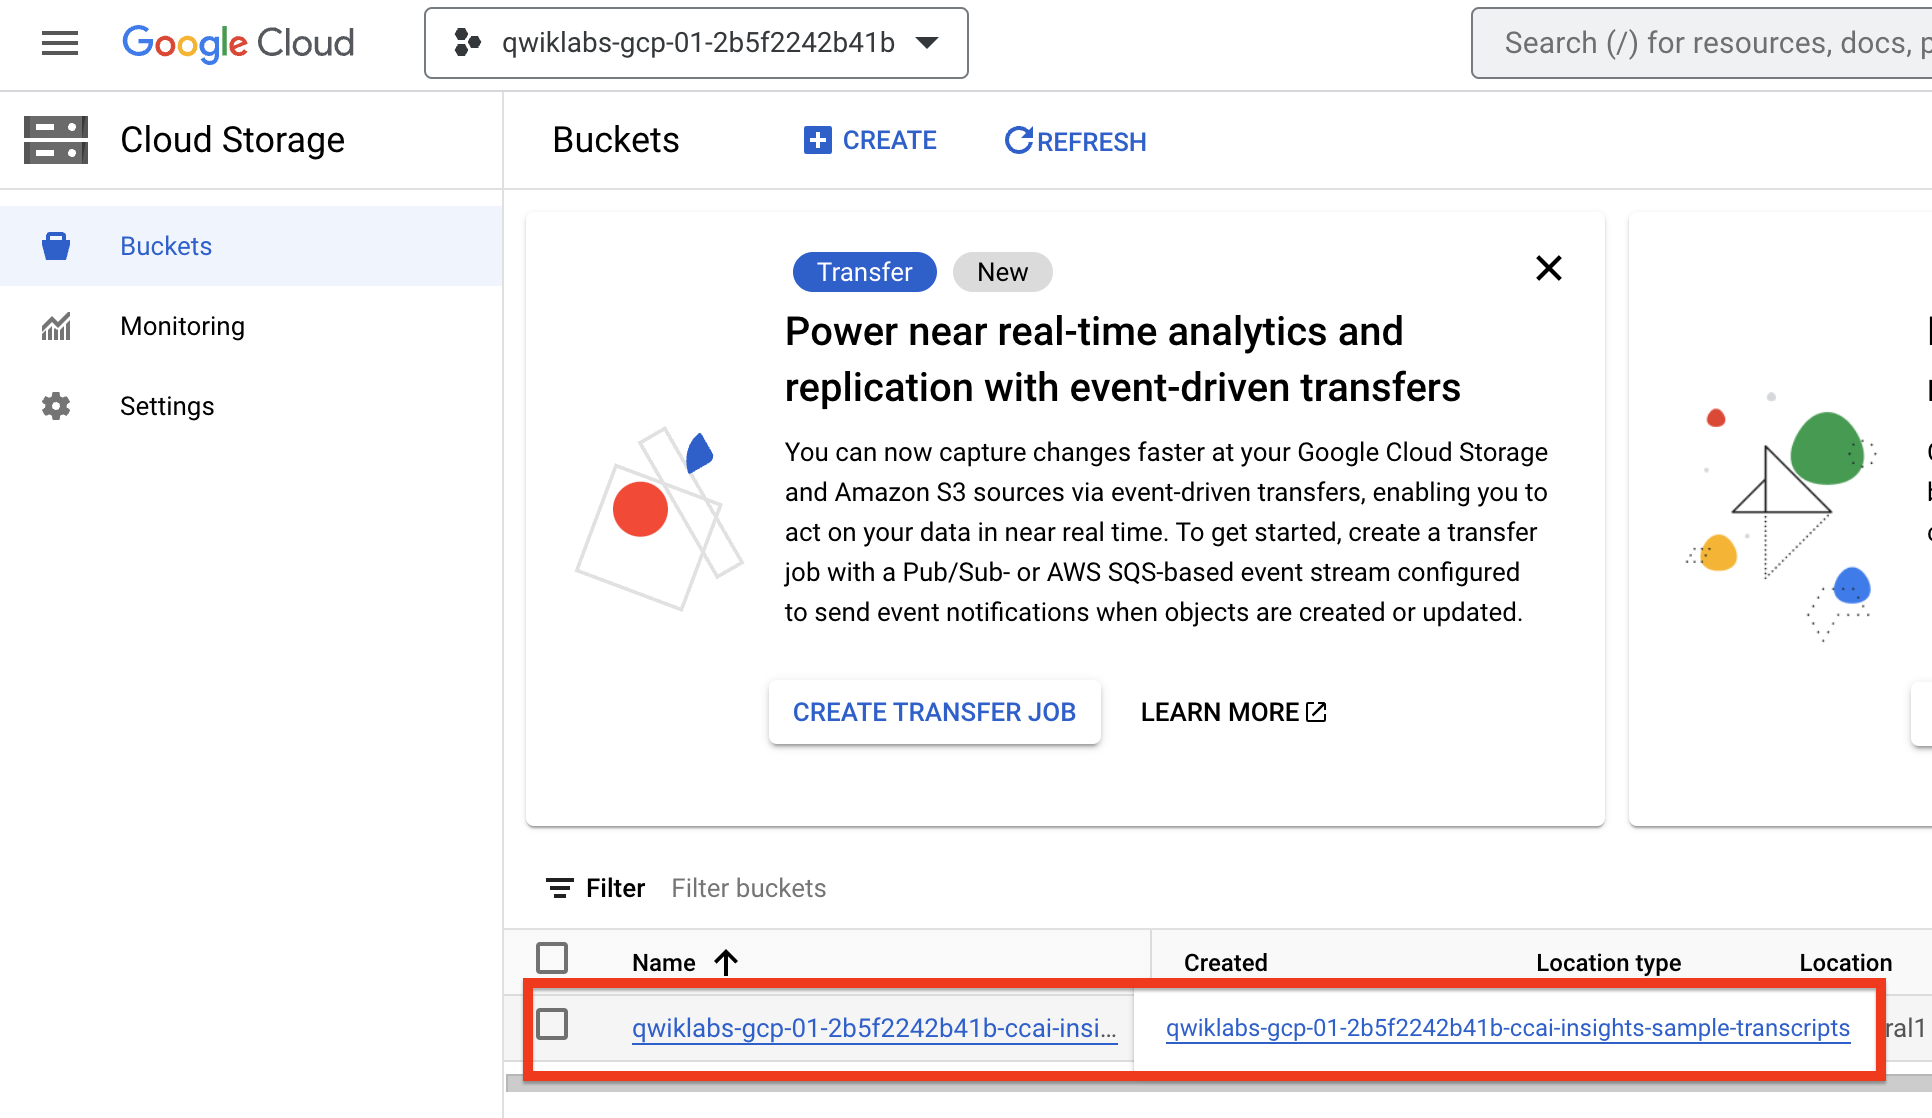
You can explore the conversations in the Cloud Console as well. Return to the Cloud Console and navigate to Cloud Storage > Buckets. Click on the pre-existing bucket with name:
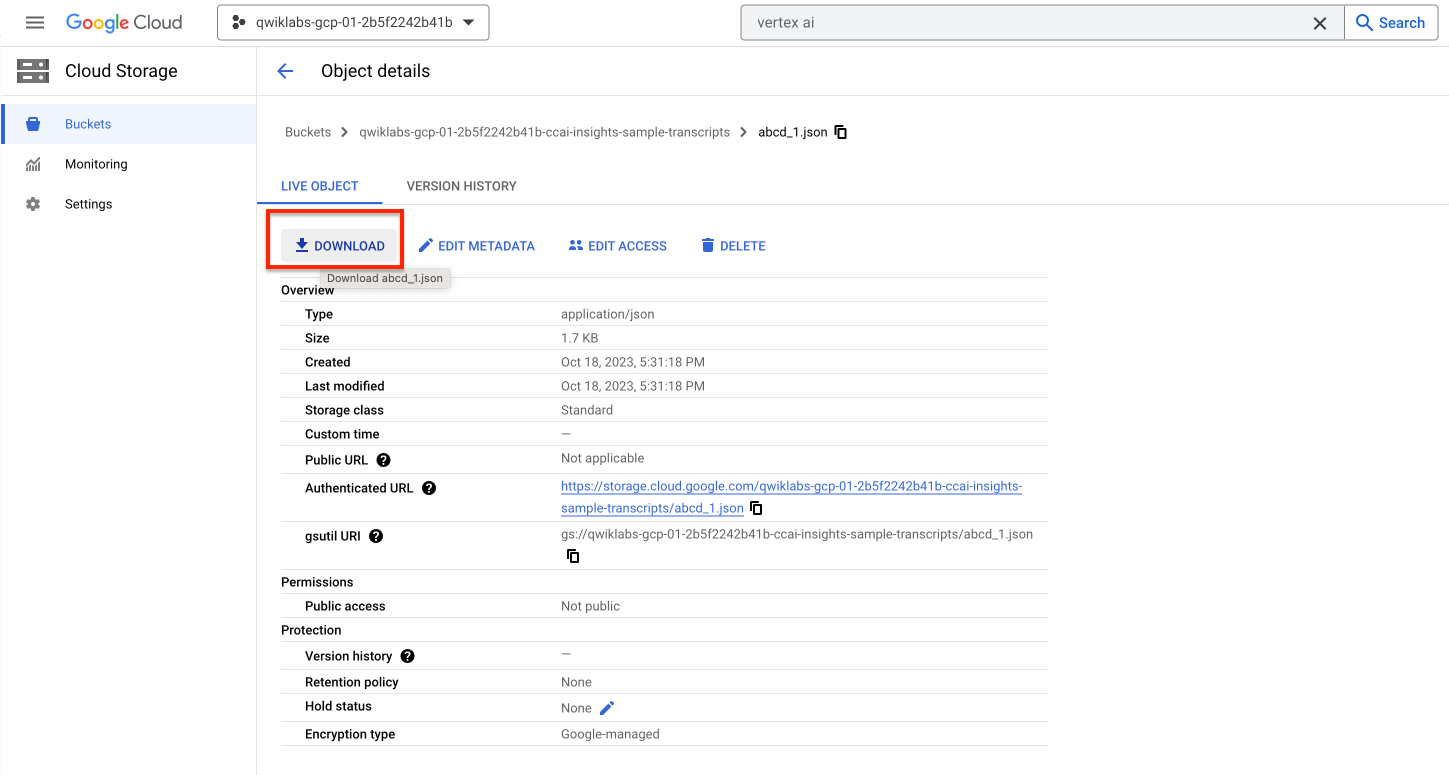
Click on abcd_1.json. Click on the Download button to download the file. Open the file on your machine and ensure that its format matches the recommended conversation format for chat transcripts.
The JSON file should have fields like entries, text, role and user_id as shown below.
This validation is important before proceeding the rest of the steps. If the format of the JSON transcript is not correct, then it would require some pre-processing first. Since it is correct in the sample data of this lab, you can proceed further.
Now return to your JupyterLab instance and open a new Terminal if you had closed the one from before. Enter following commands to start a Python virtual environment and install required packages.
This command will install all required packages mentioned within the requirements.txt file inside the notebook. Its output should look like this:
There are two files already created that are required to ingest data into Conversational Insights:
import_conversations_v2.pyingest_transcripts_from_gcs.shThis file contains the Python code necessary for several key tasks:
_TranscribeAsync function, if transcription is required._RedactTranscript function._GetMetaDataFromTranscription function._CreateInsightsConversation function to add conversations into Conversational Insights.Feel free to go through these functions if you would like an in depth understanding of what code we are executing.
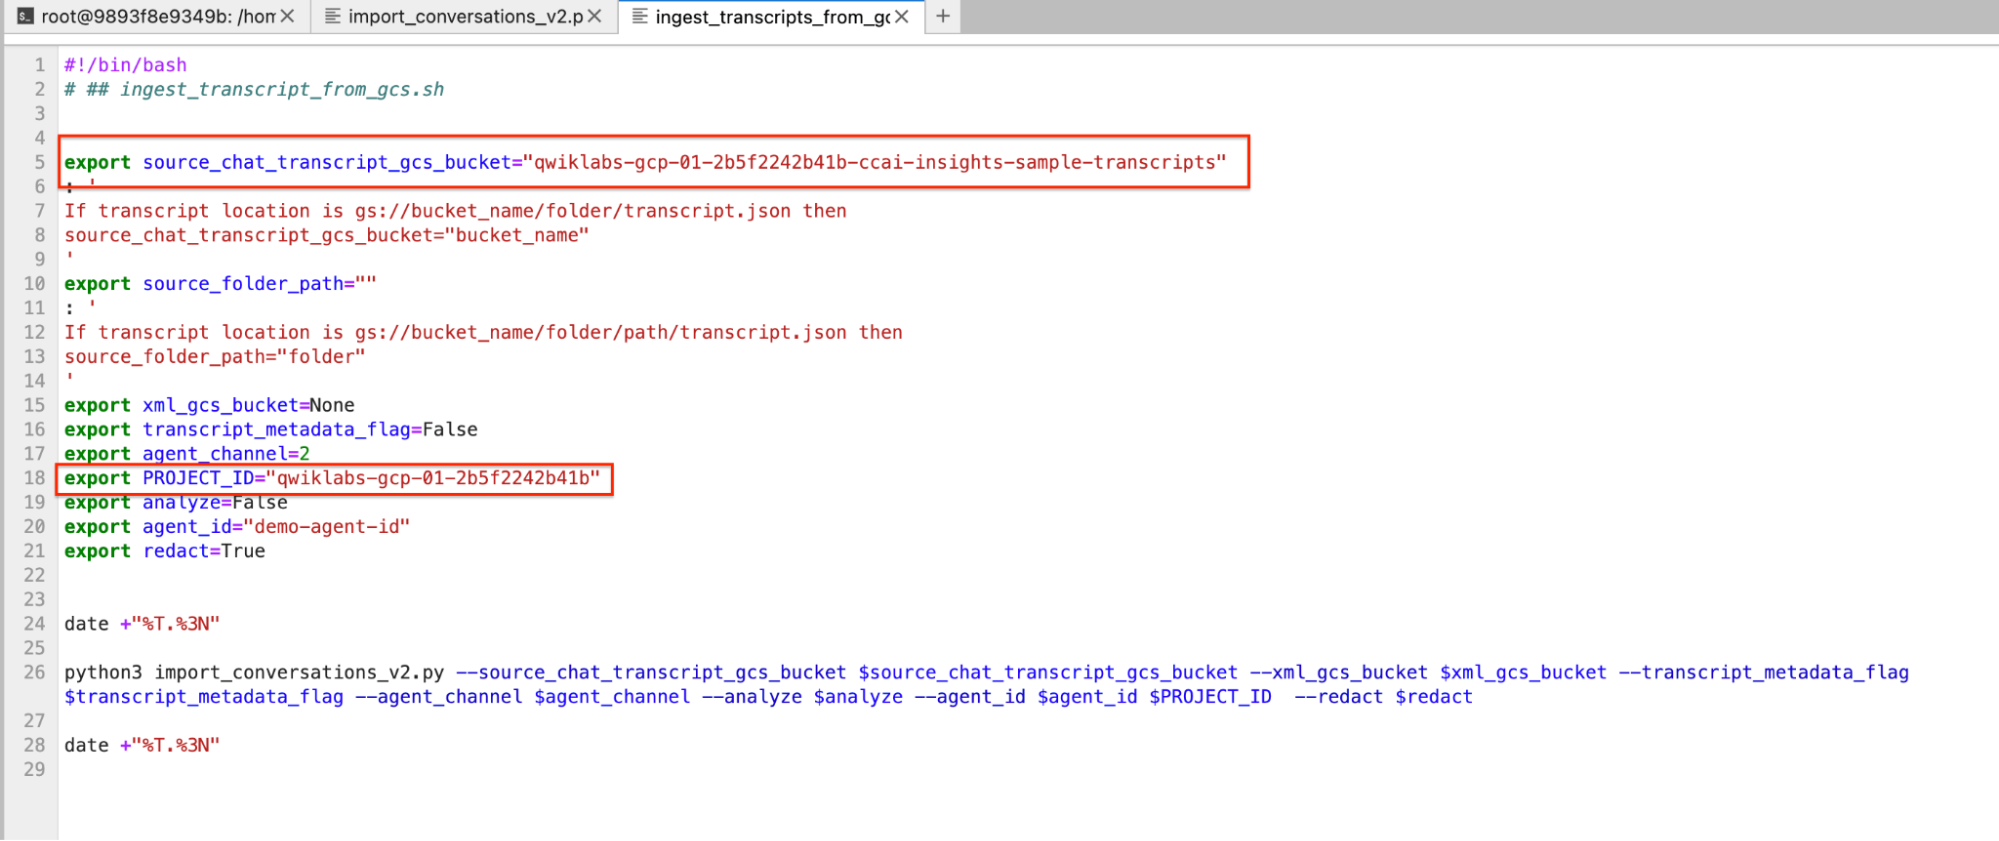
ingest_transcripts_from_gcs.sh is the wrapper file that takes configurable arguments from the user and executes the Python file mentioned above. We need to modify certain fields of this file to perform ingestion. Run the following terminal commands to update the required variables inside ingest_transcripts_from_gcs.sh.
After these modifications, the script should look like this:
Open the terminal again and execute the following command, this will trigger the ingestion process:
This will start ingesting conversations and the results will be visible on terminal as shown below:
Since 100 conversations will be ingested during this step, it will take ~2-3 minutes for this step to be completed.
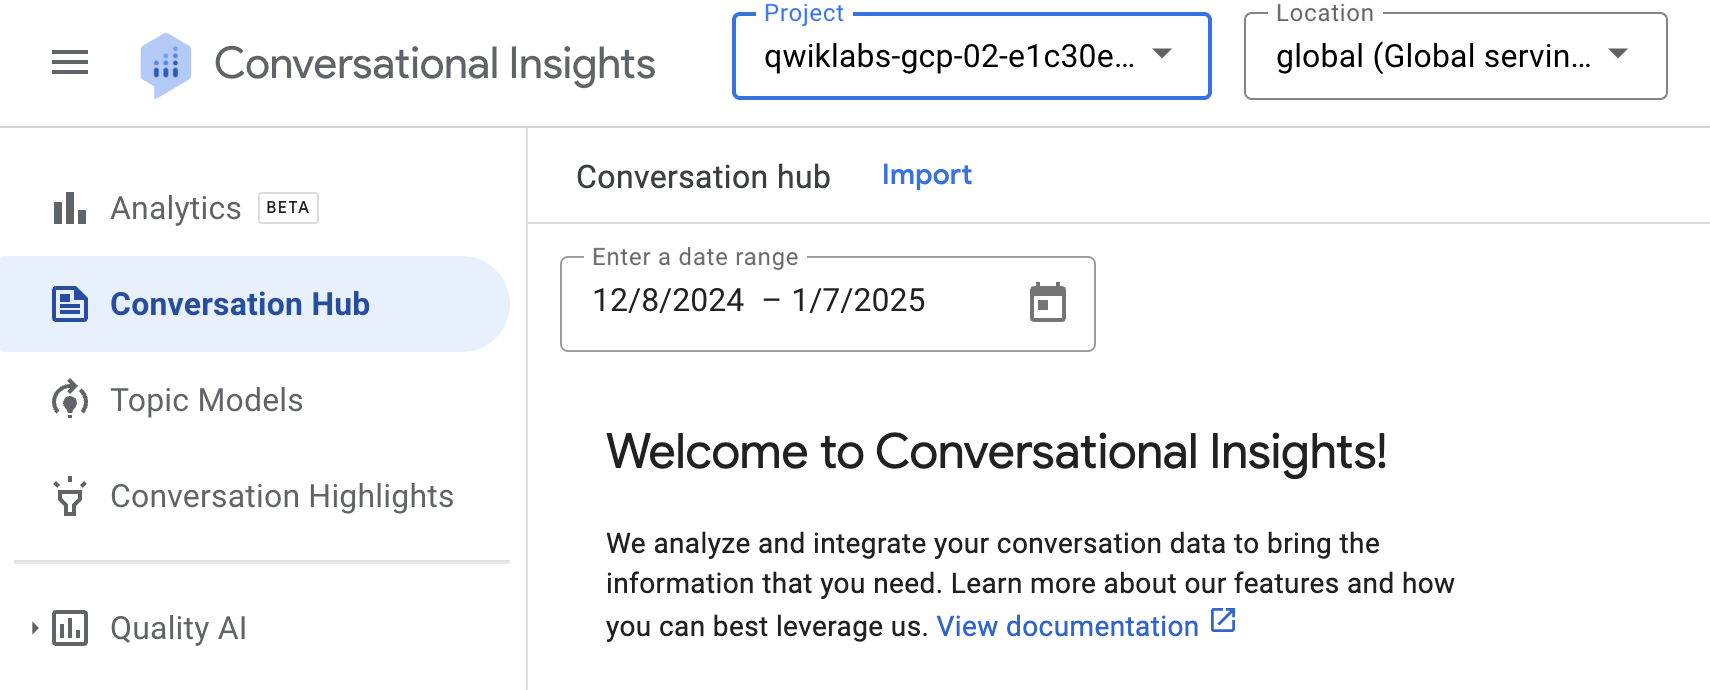
Navigate to Conversational Insights on a new tab. This will open up the Insights console. Once opened, select the project and global location as shown below.
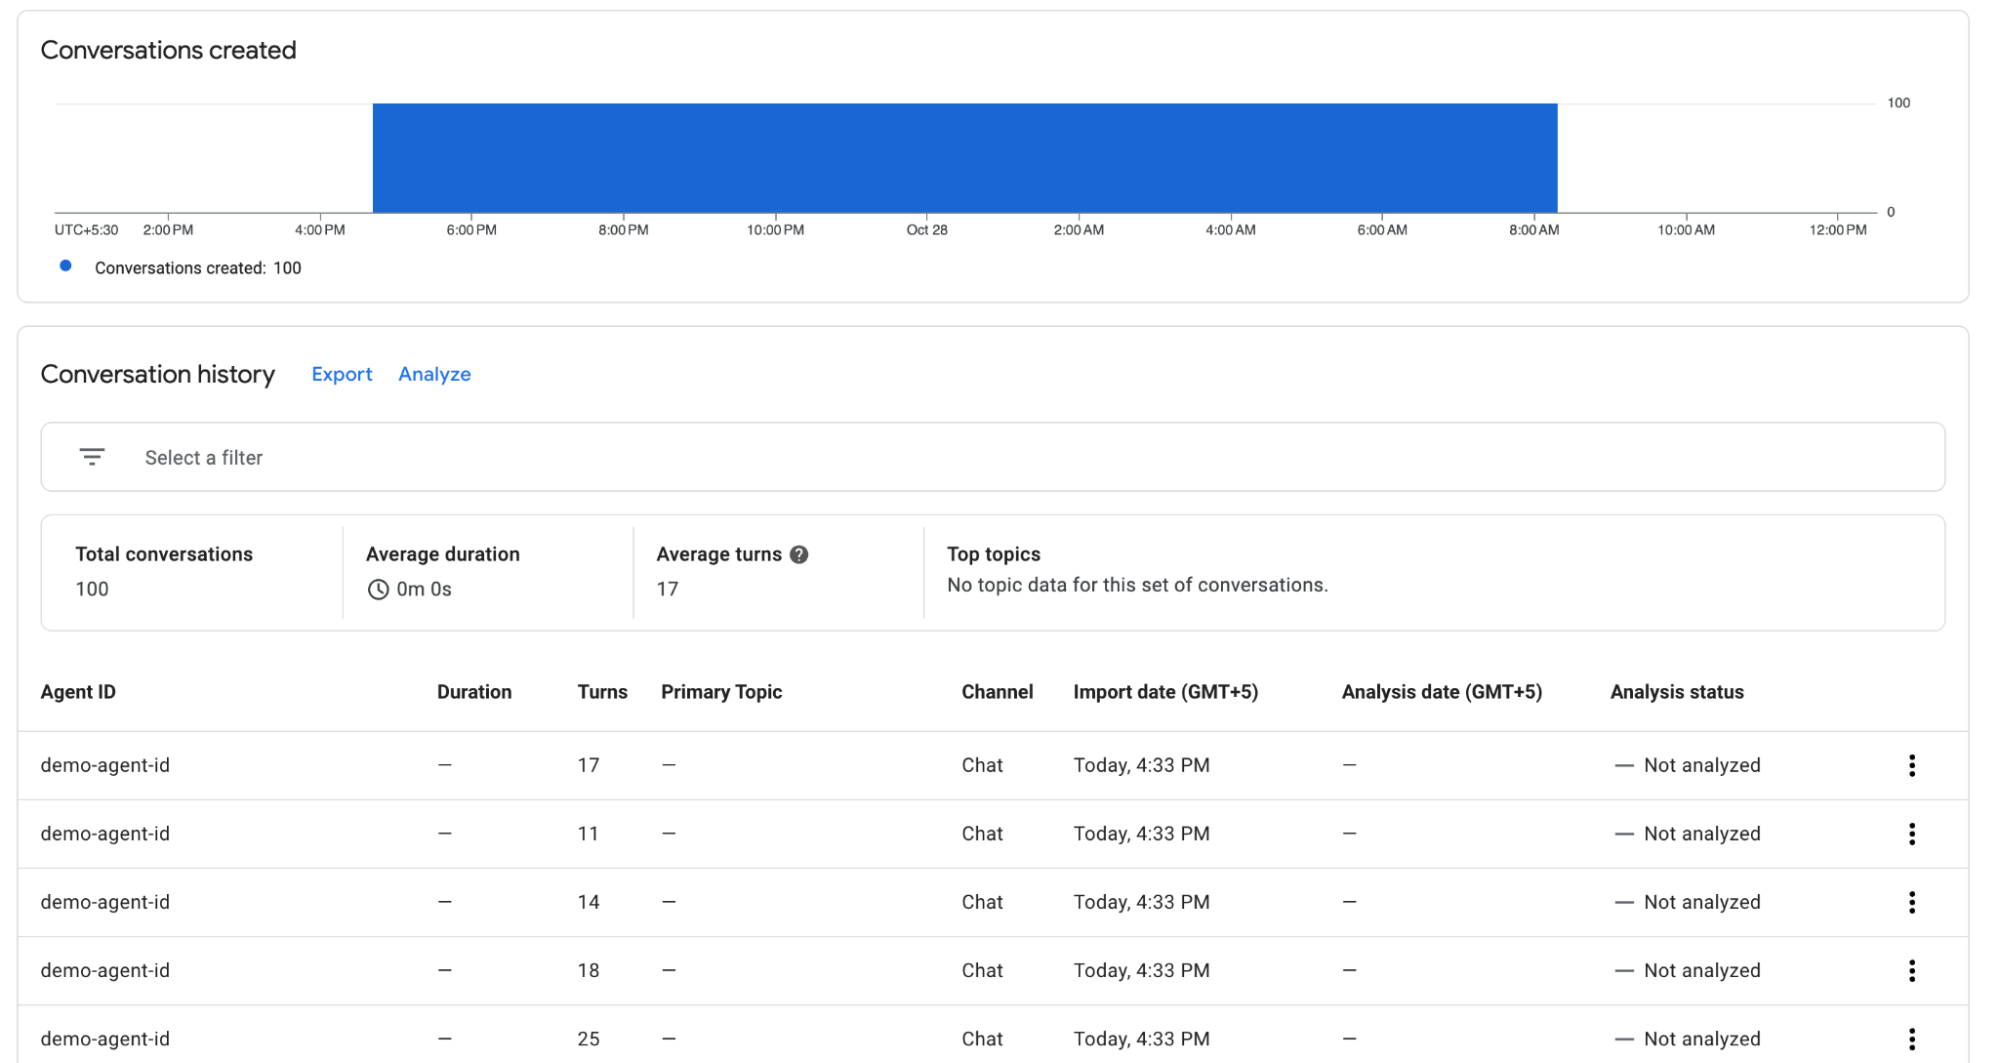
You should be able to see 100 conversations ingested as shown below:
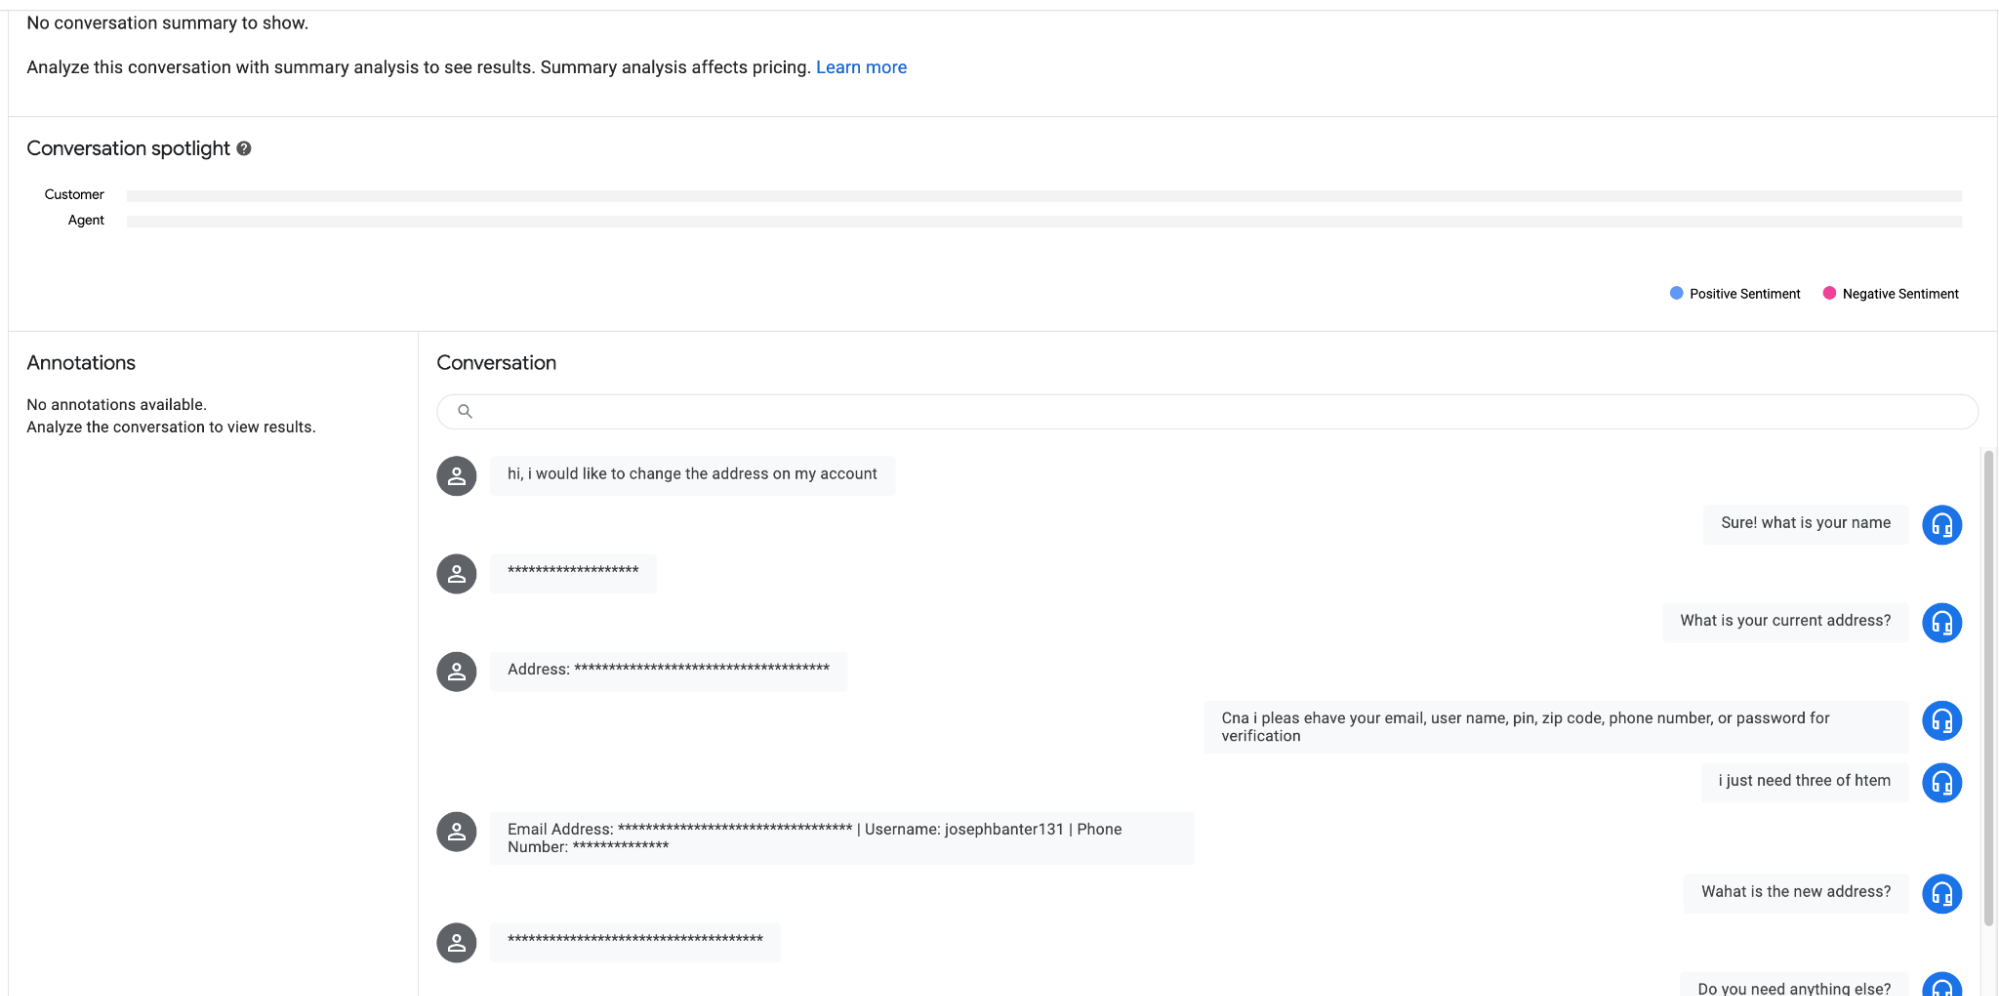
Explore all UI components including conversation filters. Click on any conversation to look at the transcript and ensure that PII data is masked properly as shown below.
Click Check my progress to verify the objective.
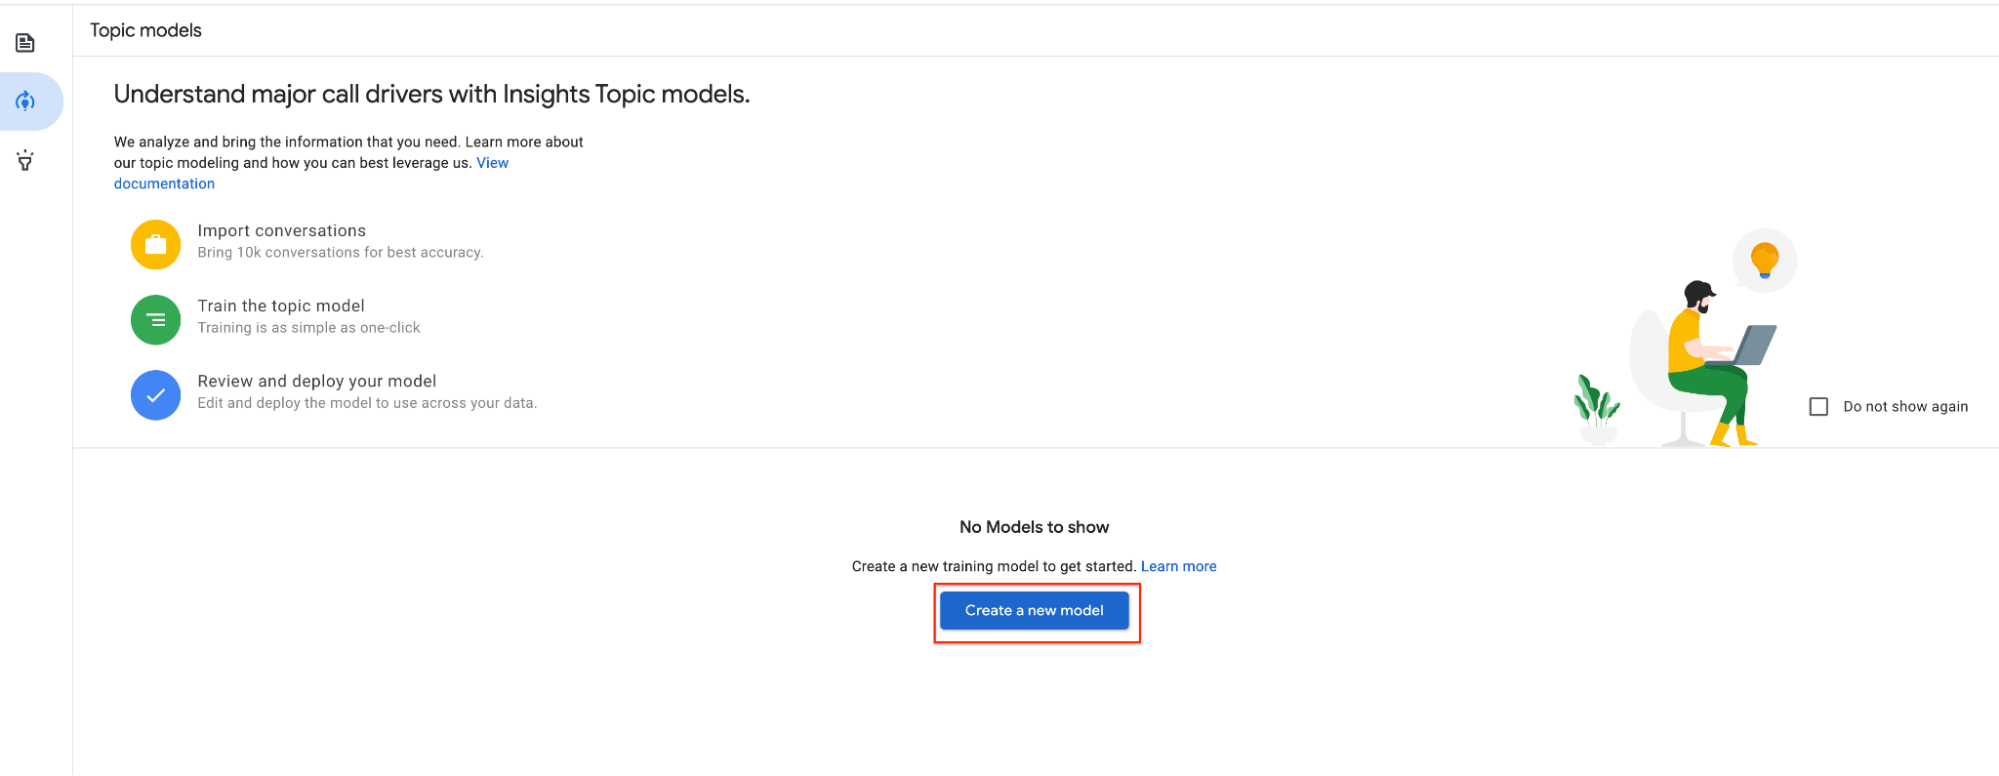
Navigate to Topic Models section in Insights console from the left bar and click on Create a new model
Input the following options for creating a new topic model:
| Option | Input |
|---|---|
| Model Name | ccai-demo-model |
| Model language | English |
Click Continue
You can also apply any additional filter on the conversations like turn count, agent ID or even label based filters and click on Start Training.
The purpose of this task was to guide you through the topic model configuration. Training a topic model would take around 90 minutes if done with 1000 conversations.
Now click on the main menu on the Conversational Insights page and navigate to the Agent Assist console in a new tab. Alternatively, you can type in the URL https://agentassist.cloud.google.com/ in a new tab and select the current project.
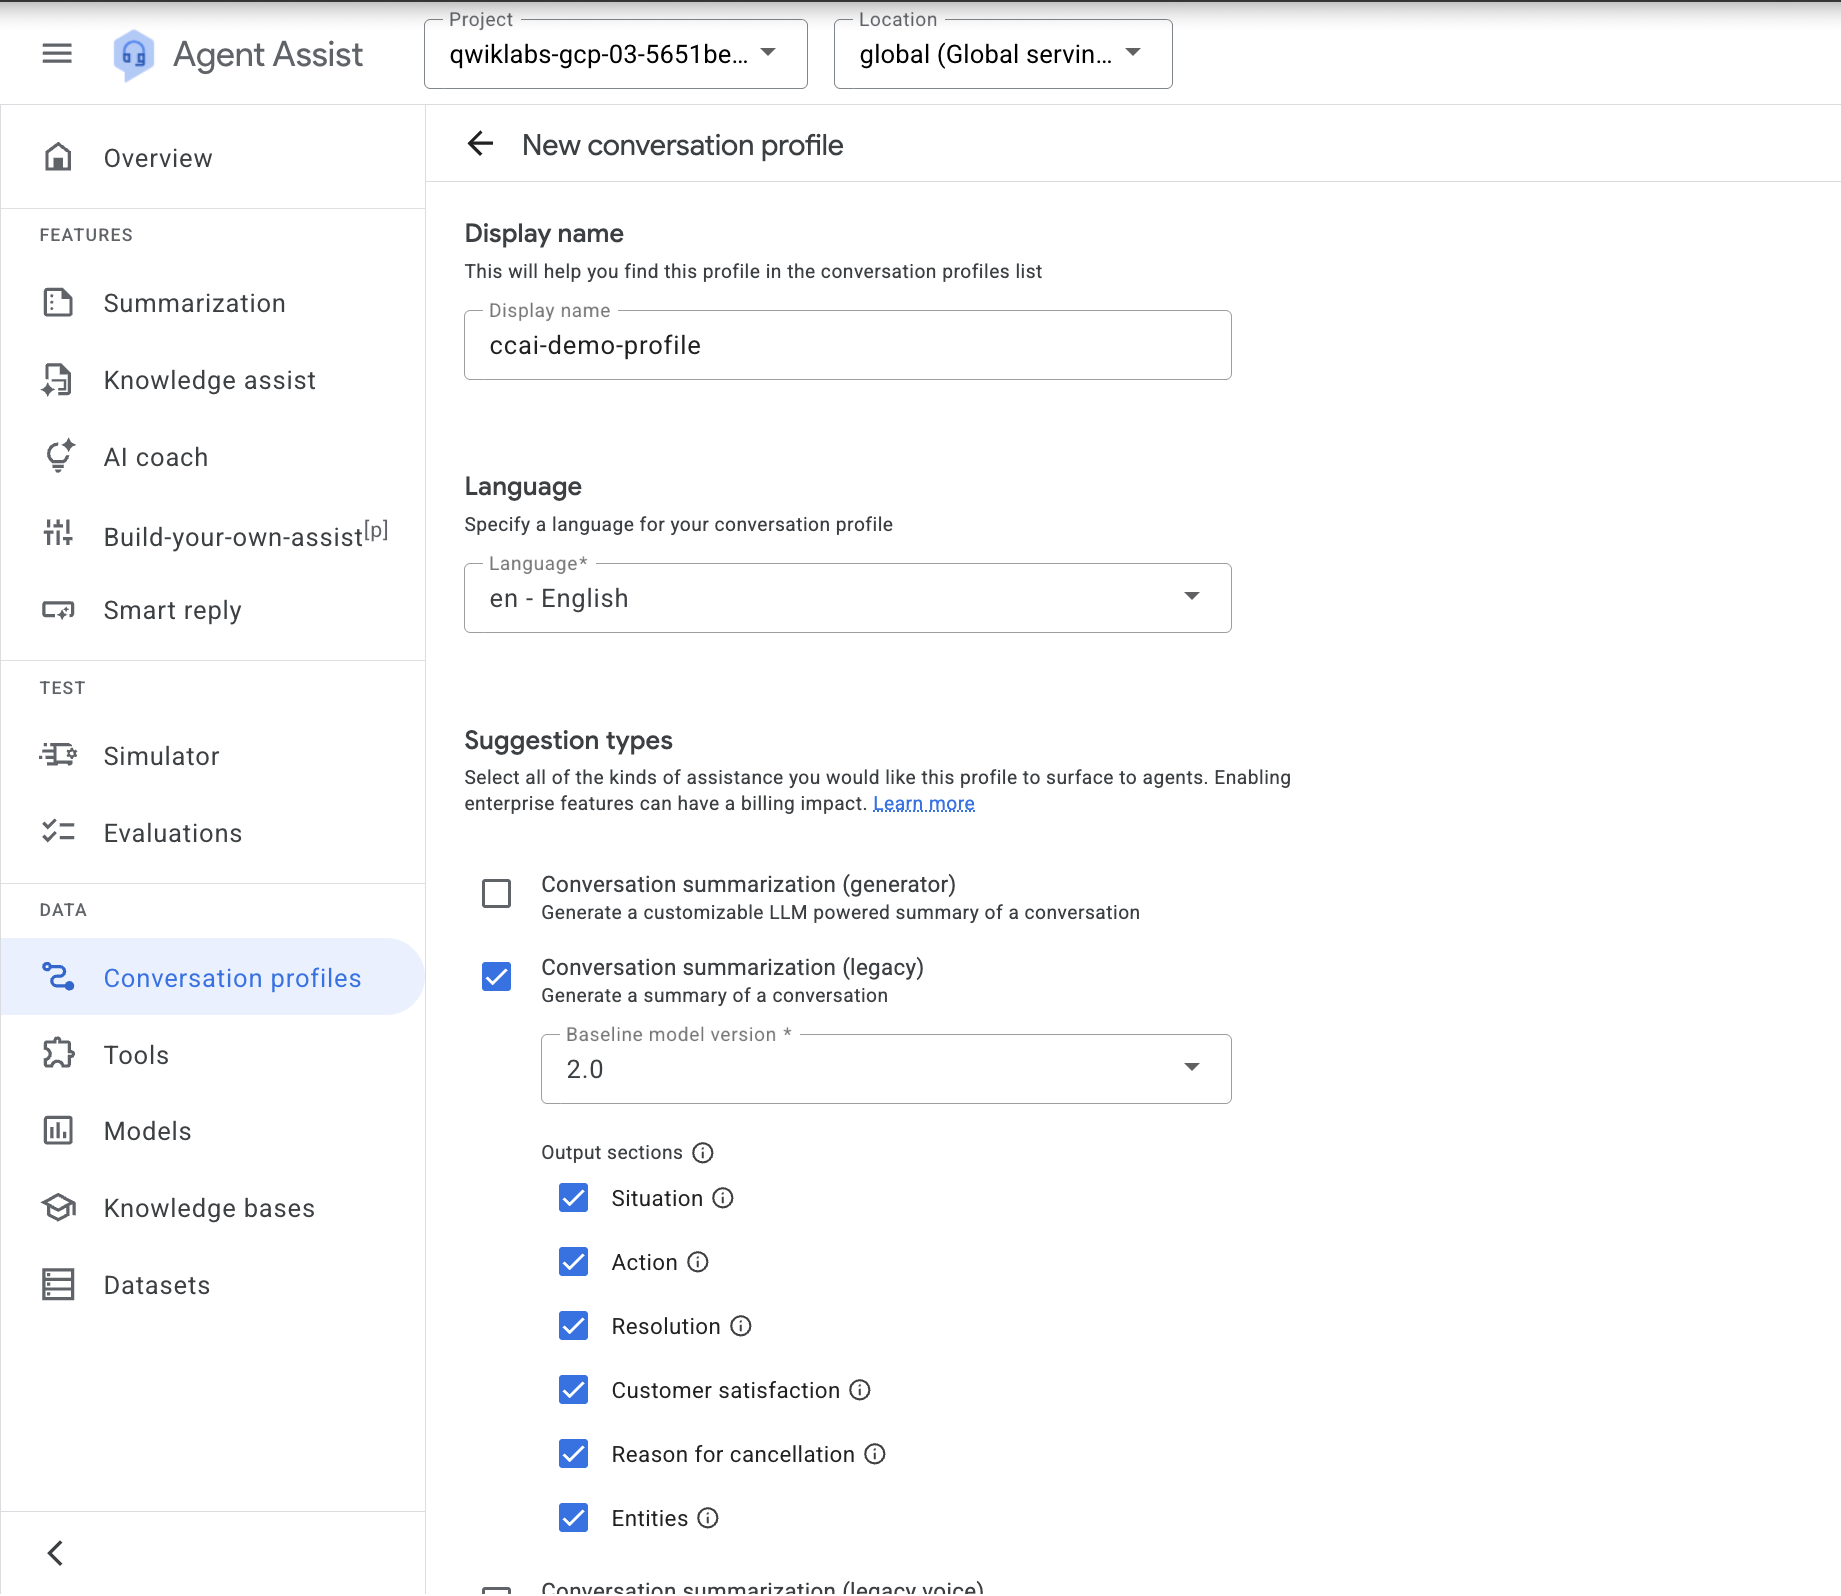
Go to Conversation Profiles and click on Create. Provide the following values for the options:
| Option | Input |
|---|---|
| Display name | ccai-demo-profile |
| Suggestion types | Conversation summarization (legacy) |
| Baseline model version | 2.0 |
Select all output sections (Situation, Action, Resolution, Customer satisfaction, Reason for cancellation and Entities).
Leave the rest of the values as their defaults and click the Create button.
This will create the conversation profile. Copy the integration ID and make a note of it. This will be used in the analyze section later.
Click Check my progress to verify the objective.
You can now get started by analyzing the conversations. There are 2 ways to analyze conversations, Bulk analyze and analyzing individual conversations.
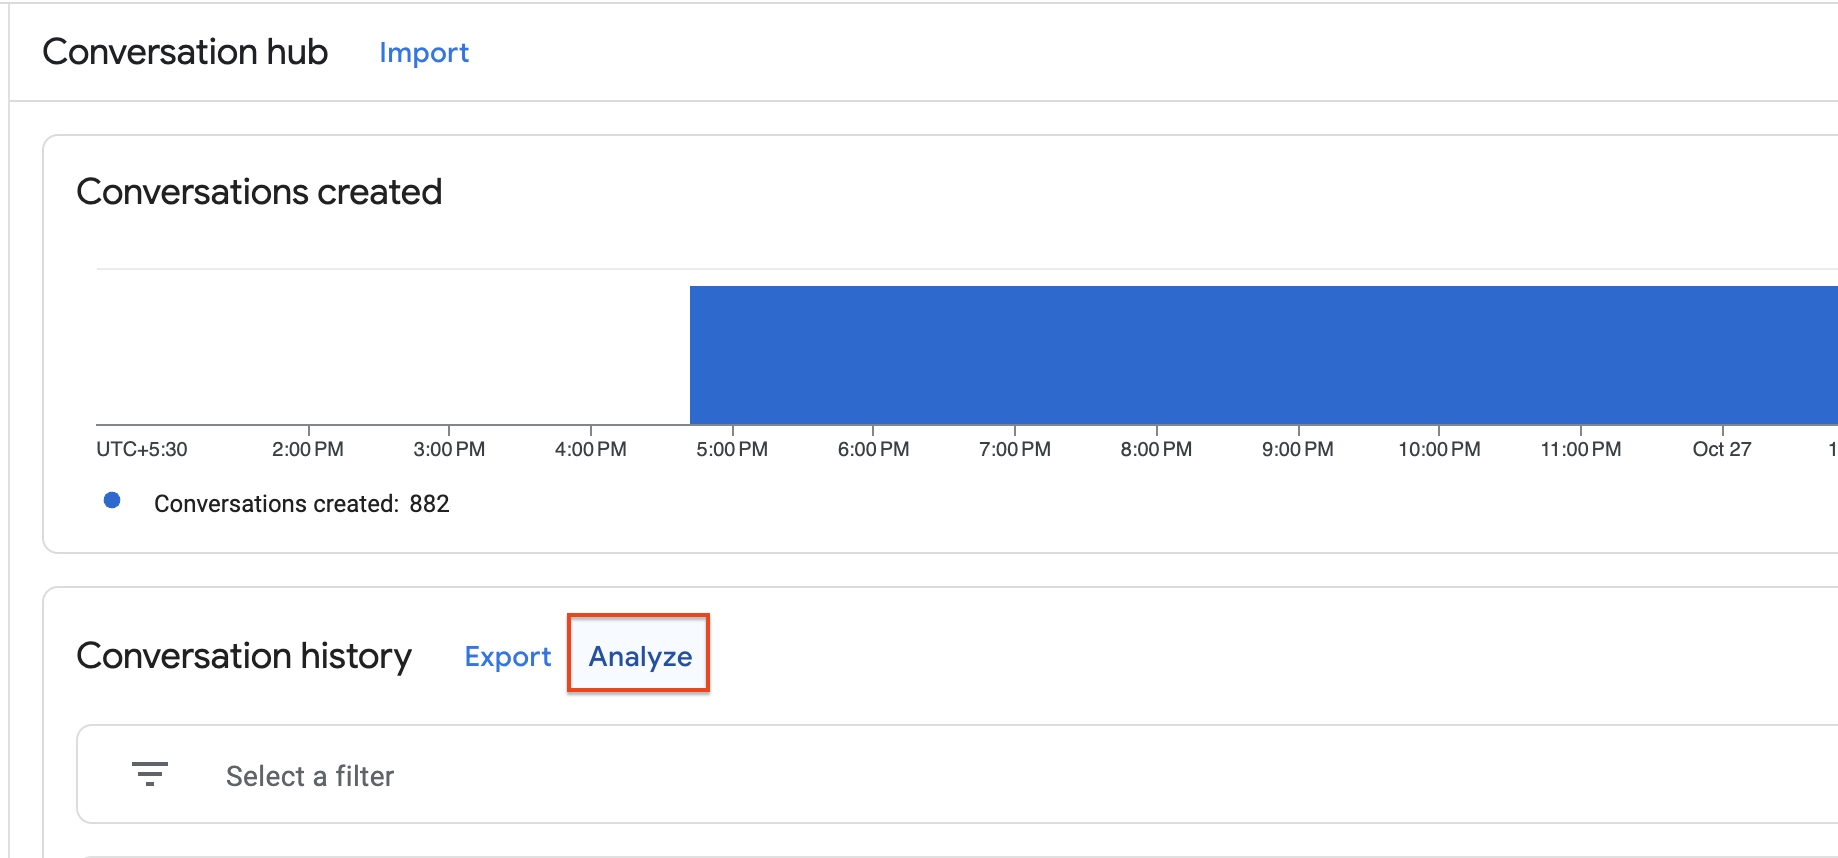
Navigate back to the Conversational Insights console. To bulk analyze the conversations from UI, we can click on Analyze button from the Conversation Hub directly as shown below:
Whatever filters you apply on this page will automatically propagate when you try to analyze conversations. For example, you can filter for conversations which are not analyzed yet and then only analyze those conversations as shown below. You can also select the percentage of the conversations that you want to analyze.
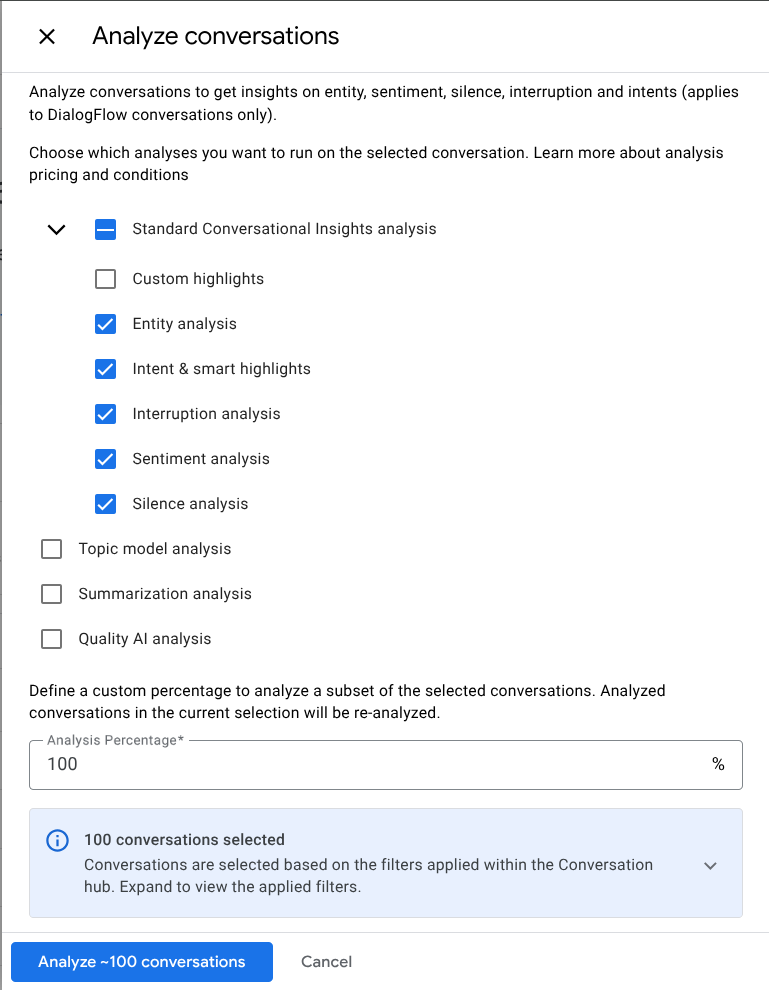
Click on Analyze ~100 conversations, this step will take about 5 minutes to complete. When the process completes, we will be able to see the completed analysis job in the notification bar on the top right corner of the Insights console.
Another way to analyze conversations is to open up a conversation and click on analyze separately. Select a conversation and then click the Analyze button.
Here, you have options to select which factors to include in analysis. Check the Conversational Insights Analysis and Summmary boxes, but leave the Topic Model labeling unchecked as you do not have a deployed Topic Model in your environment. Click the Analyze button to begin.
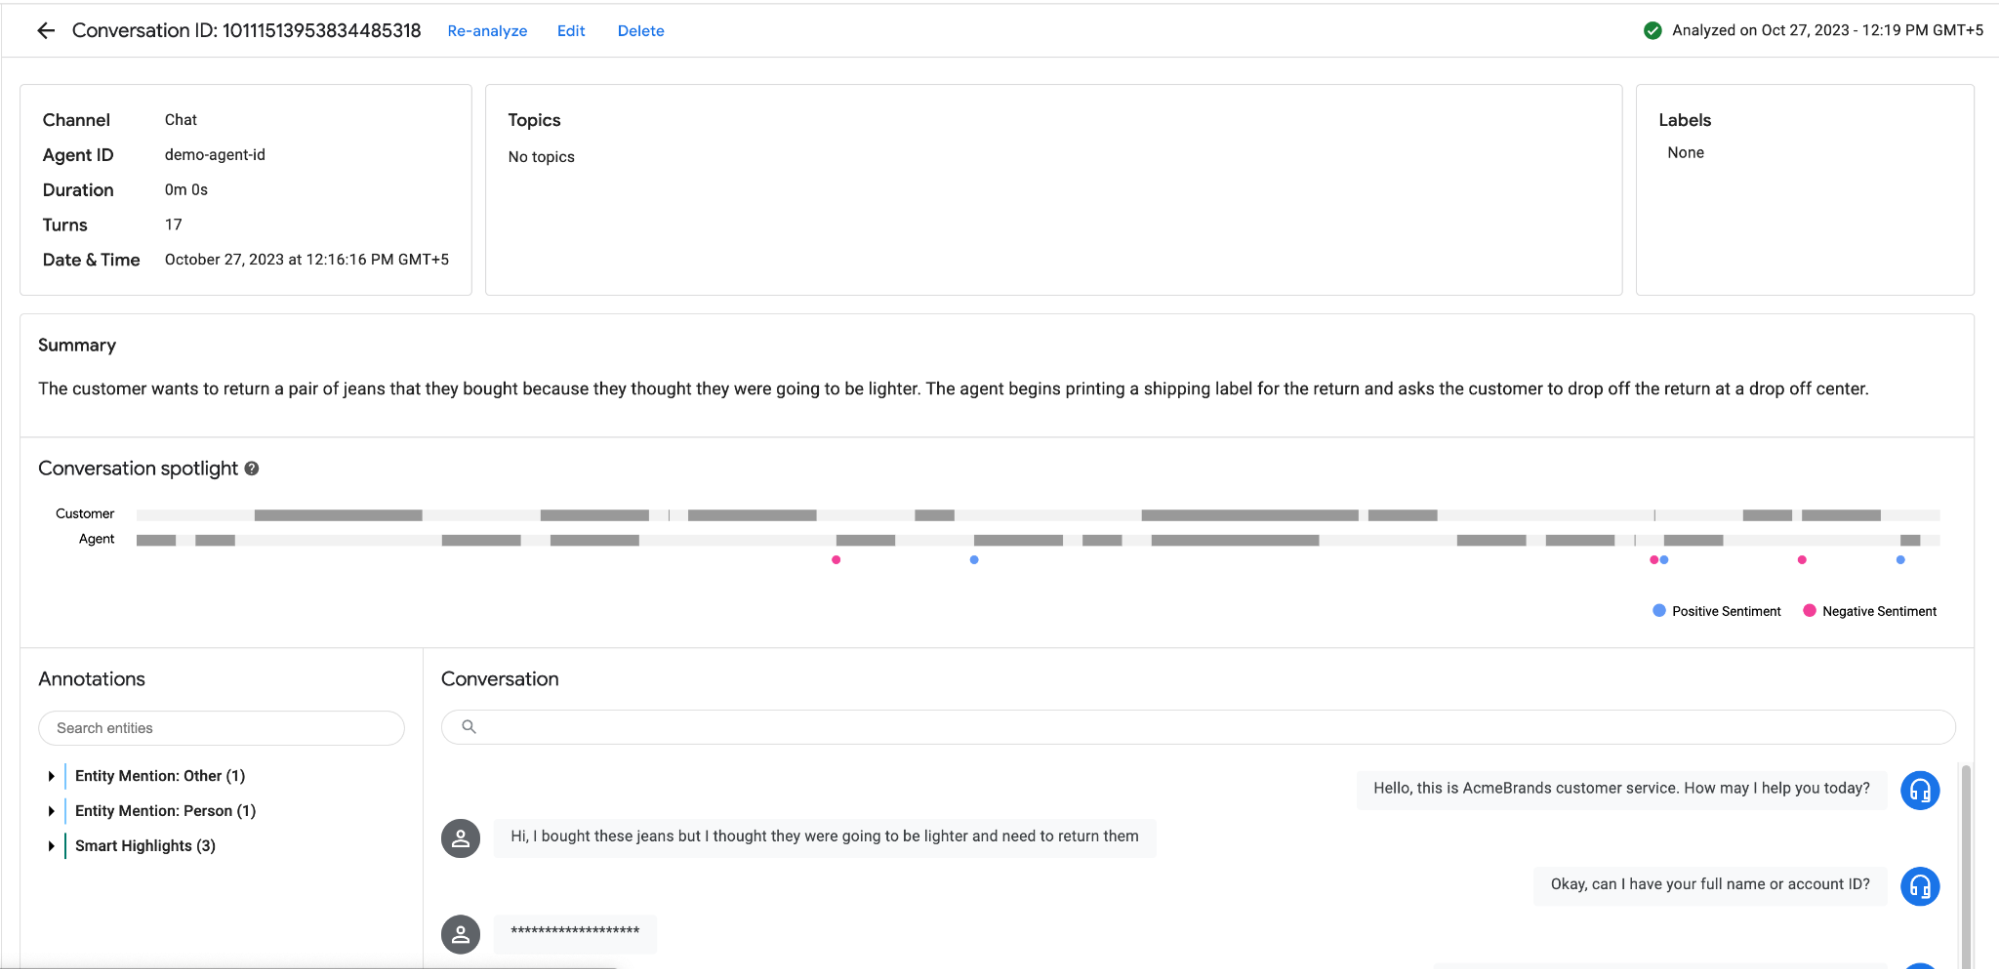
Once the conversation is analyzed, we can see the summary, sentiment analysis, entities and smart highlights of the conversation as shown below:
However, this does not use the conversation profile that we have created in the previous step, so the summary section contains only a single line summary and not sections that we had selected in conversation profile like customer satisfaction, resolution, situation, action, etc. To do this, we need to analyze the conversations through API. This is covered in the next step.
In order to analyze a conversation from API, copy the Conversation ID of any conversation from Insights Console.
Also copy the integration ID of the Conversation Profile created in the Agent Assist console. This is accessible at
Navigate back to your Vertex AI Workbench instance on another tab. If you closed this tab, then return to console and navigate to Vertex AI > Workbench. Select Instances and click on the Open JupyterLab button beside ccai-notebook. Once the notebook is open, click on the Terminal icon from Launcher if a terminal is not already open.
In your open terminal run the following commands, replacing YOUR_CONVERSATION_ID with your Conversation ID and YOUR_INTEGRATION_ID with the Integration ID copied before.
Run the following command to use LLM summarization for your chosen conversation
Upon execution of command, operation id will be returned which can be polled to view the status of LLM Summarization.
However, this should not take long (1-3 seconds) and if we go back to the Conversational AI console and refresh the same conversation, we will be able to see the updated summary section containing LLM Summarization. It contains all the sections we had configured in the earlier task. You can notice how different the summary is compared to the previous section.
Click Check my progress to verify the objective.
We can also export conversations into BigQuery to perform any custom analysis on the results or even connect it with a dashboard tool like Looker.
Before exporting conversations to BigQuery, create an empty table within a dataset in the BigQuery console.
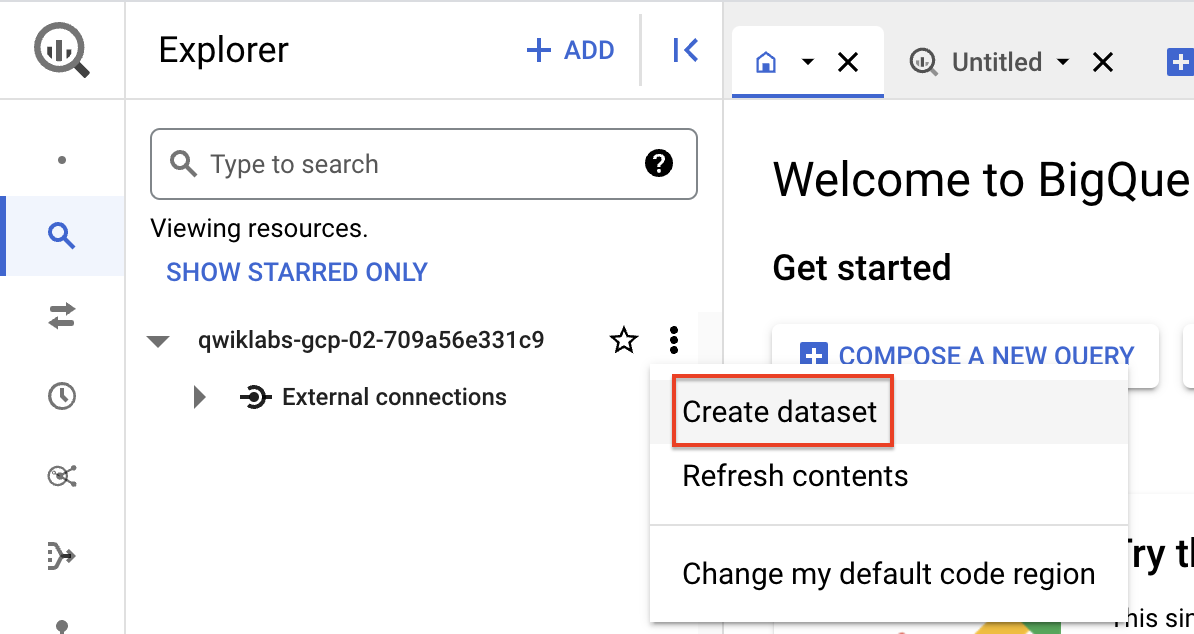
Return to the Cloud Console and navigate to BigQuery > BigQuery Studio and in the Explorer section, click on Create dataset within the current project as shown below:
Name the dataset ccai_demo_dataset. Select "Region" for Location type and select
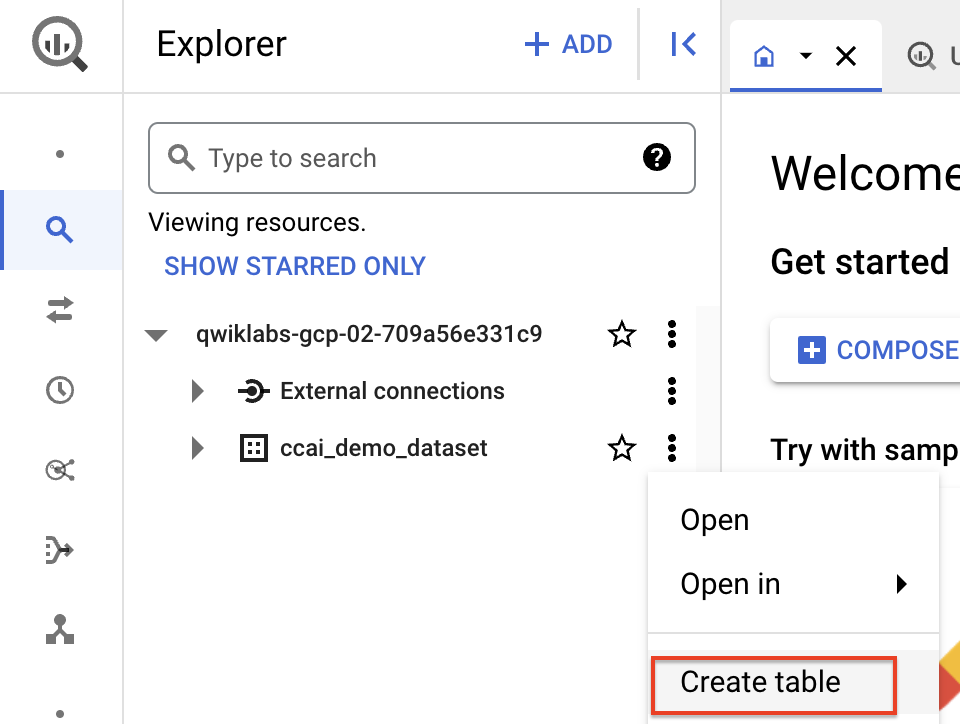
Once the dataset is created and visible on Explorer, click on Create Table as shown below:
Name the table ccai_demo_insights_table and click on Create Table without modifying anything else. This will create an empty table to export Insights data into..
Now, go back to the Insights console and from the conversation hub, click on Export. Note that any filter applied on the conversations automatically gets propagated to the export section as well.
Select the newly created Dataset and Table from the previous steps and click on Export ~100 conversations. This will trigger a long running job.
This job can take several minutes to be completed, status can be seen from the notification bar on the top right of the insights console.
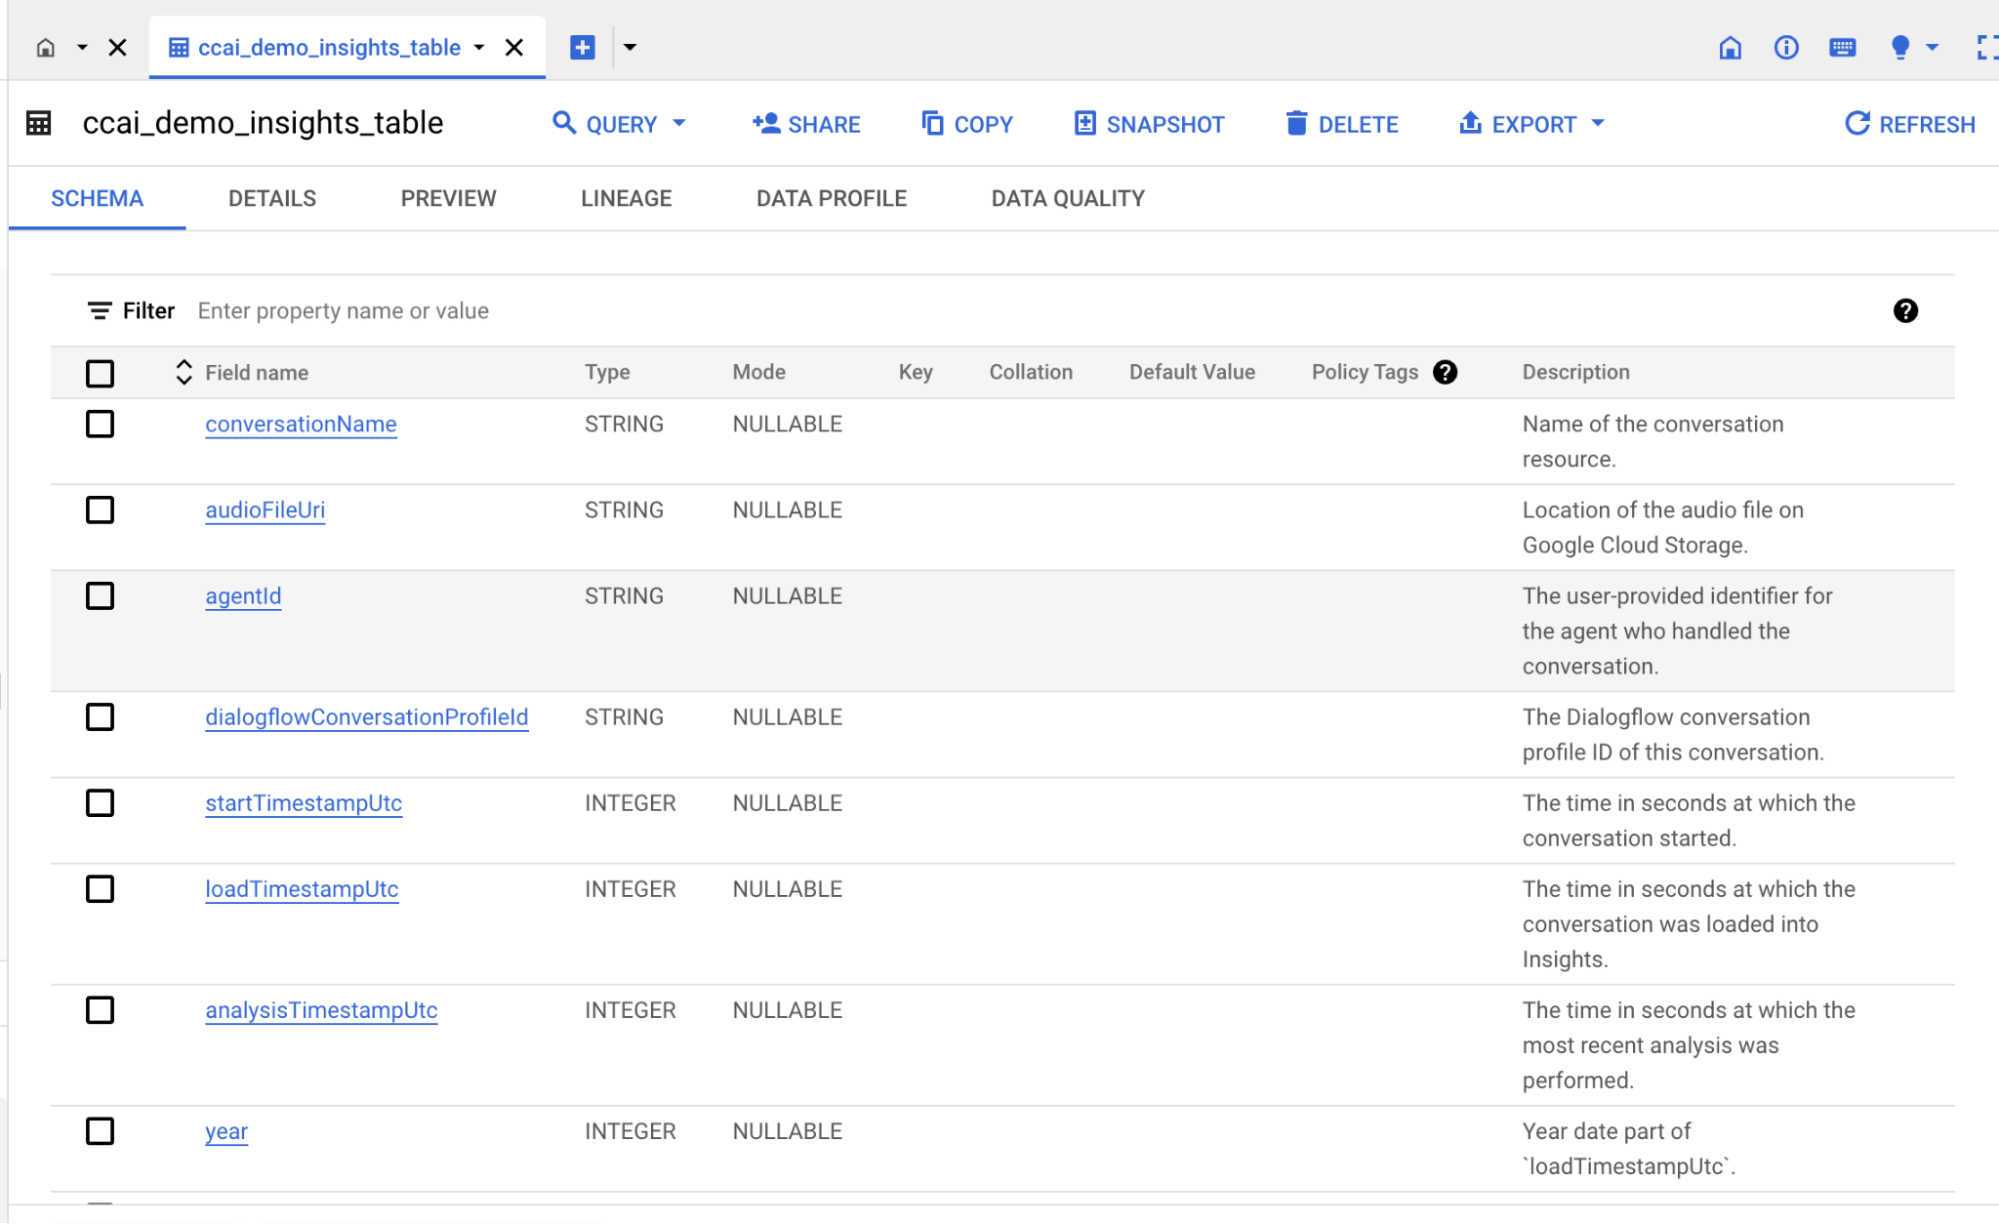
Return to the Cloud Console and navigate to BigQuery > BigQuery Studio In the Explorer, navigate under the ccai_demo_dataset and the ccai_demo_insights_table. Click on Schema to take a look at the overall schema of the BigQuery Insights table.
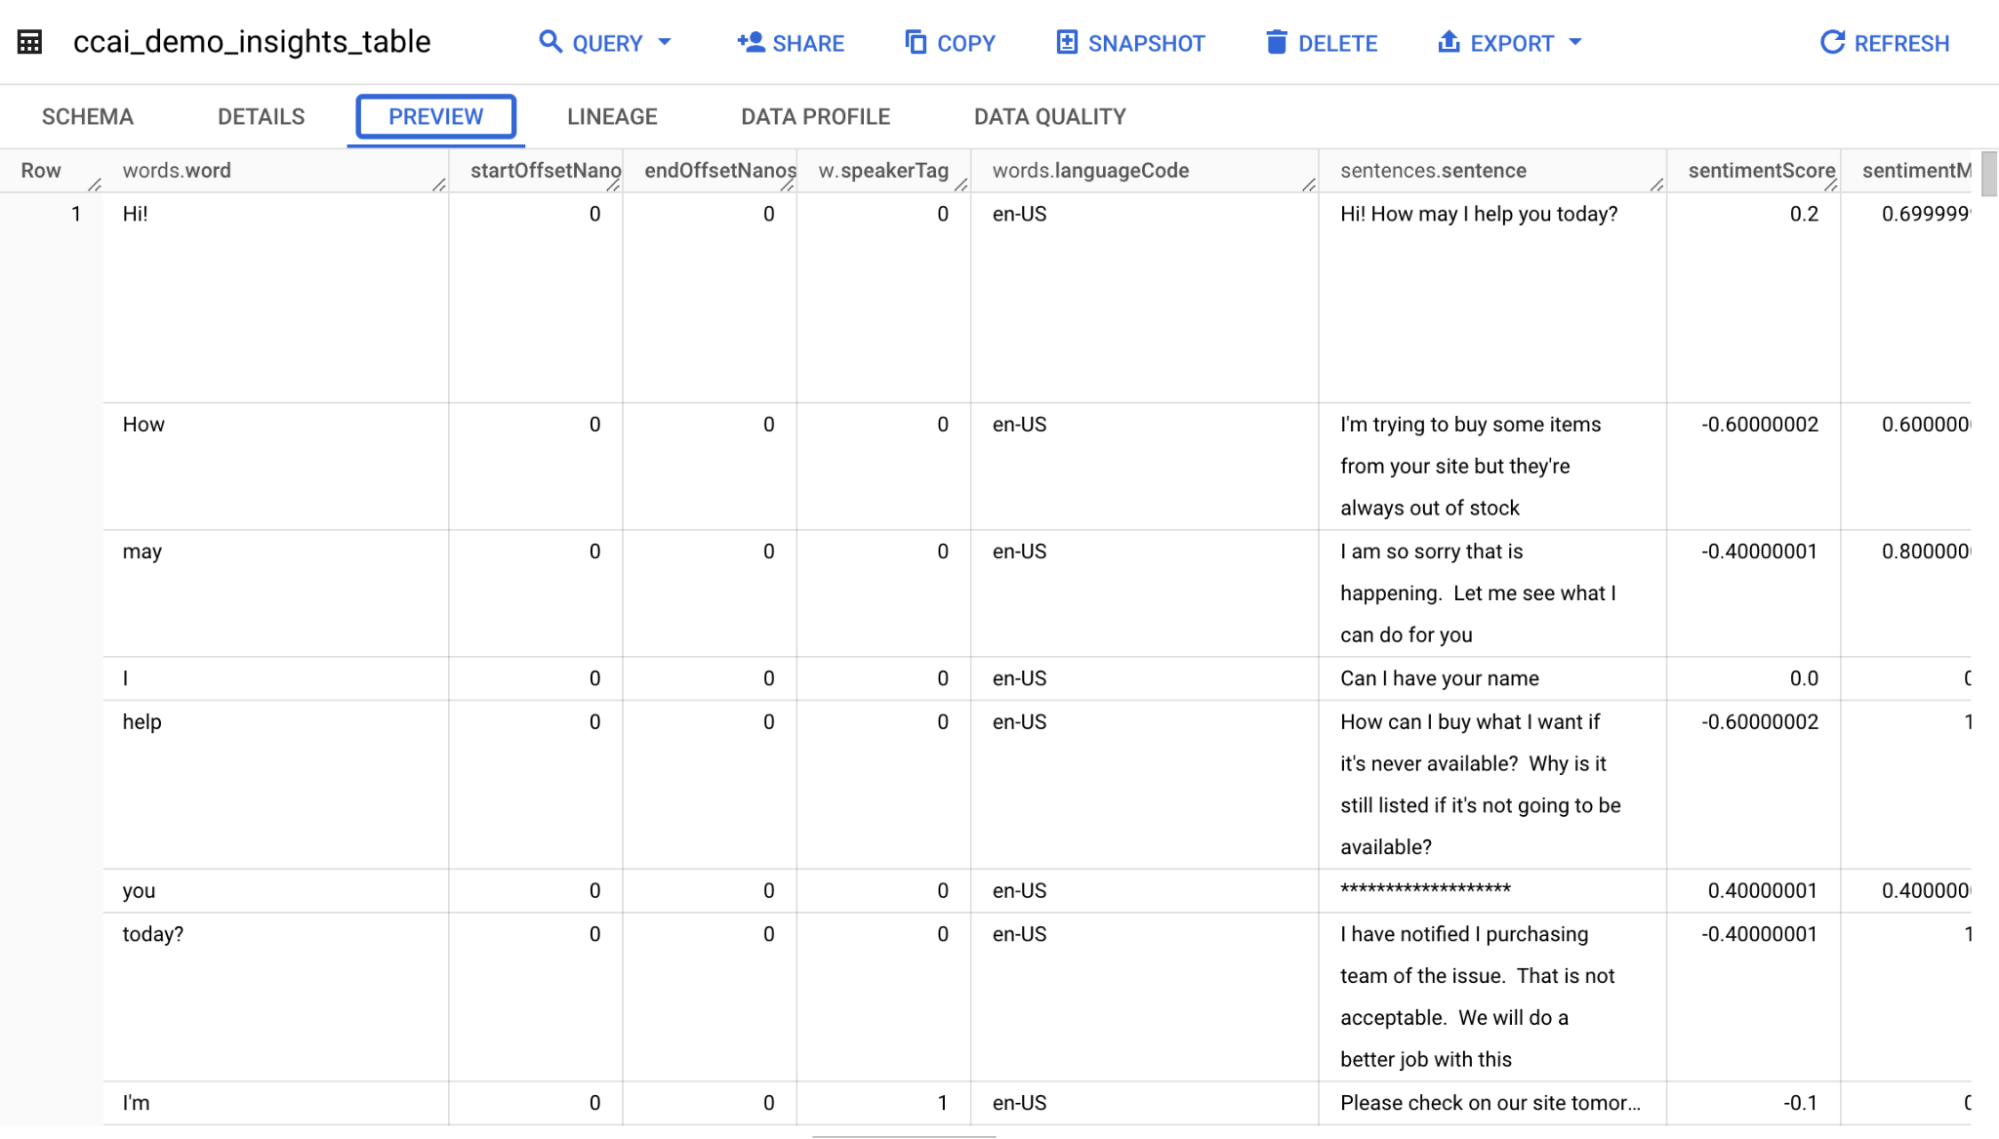
Click on Preview to observe the Data in the table.
You can also query the conversation summaries in BigQuery. Click Query, then In New tab. Copy the following query into the Query Editor and click Run to execute it.
Click Check my progress to verify the objective.
Congratulations! You have ingested conversations into Conversational Insights, configured a Topic Model to classify conversations into various topics, configured a LLM summarization module, analyzed conversations to find out information like sentiment, customer satisfaction, summary, resolution, highlights and more. You also export conversations to BigQuery for further analysis or possible dashboarding.
Manual Last Updated December 16, 2025
Lab Last Tested December 16, 2025
Copyright 2023 Google LLC All rights reserved. Google and the Google logo are trademarks of Google LLC. All other company and product names may be trademarks of the respective companies with which they are associated.


This content is not currently available
We will notify you via email when it becomes available

Great!
We will contact you via email if it becomes available

One lab at a time
Confirm to end all existing labs and start this one
Complete this quick step to start your lab.