Overview
To improve efficiency in an organization, it's important to be able to automate business processes. By automating certain tasks that are performed manually, you ensure that the tasks are correctly executed with minimal errors. Valuable time is then available to focus on other important activities. AppSheet enables you to automate business processes quickly and without the need to write any code.
Objectives
In this lab, you learn how to perform the following tasks:
-
Use AppSheet's automation capabilities to create bots, processes, events, and tasks in the AppSheet editor.
-
Trigger a bot to automatically send email when a new data row is created in an app.
-
Run a data action with automation to create rows in a table.
-
Execute a scheduled bot that processes multiple rows in a table.
Setup
Before you click the Start Lab button
Read these instructions. Labs are timed and you cannot pause them. The timer, which starts when you click Start Lab, shows how long lab resources will be made available to you.
This hands-on lab lets you do the lab activities in a real cloud environment, not in a simulation or demo environment. It gives you new, temporary credentials to sign in and access AppSheet for the duration of the lab.
What you need
To complete this lab, you need:
-
Make sure you sign in to the lab using an incognito window.
-
When ready, click  .
.
A new panel will appear with the temporary credentials that you must use for this lab.
If you need to pay for the lab, a pop-up will open for you to select your payment method.
-
Note your lab credentials. You will use them to sign in to AppSheet for this lab.
If you use other credentials, you will get errors or incur charges.
-
Click Open AppSheet to open the AppSheet UI in a separate browser tab or incognito window.
Note: If you are not already using an incognito browser window, use the right mouse click in Chrome to open AppSheet and select Open link in incognito window.
-
Click to sign in with Google.

-
In the Sign in with Google dialog, enter the provided Username, and click Next.
Note: If you see other accounts listed, click Use another account and then enter the provided Username and click Next.If you use other credentials, you'll get errors or incur charges.
-
Enter the provided Password and click Next.
-
Click Accept to accept the terms.
-
To enable AppSheet to access the Google Drive folders associated with your lab account, on the AppSheet consent page, click Allow.

-
You're now signed in to AppSheet.
To view the AppSheet MyApps page, click X in the top-right corner of the Tell us about you so we can make better recommendations dialog.
The MyApps page might be empty since you do not have any apps yet.
Task 1. Create the app
In this task, you create a new app by using the AppSheet UI to connect to a data source. In this lab, you use a sample Employee Onboarding app to manage newly hired employees in an organization.
Create the Employee Onboarding app and select data
-
On the Apps page in the AppSheet UI, click + Create > App > Start with existing data.
-
For App name, type Employee Onboarding
-
For Category, select Human Resources.
-
Click Choose your data.
-
In the Select data source dialog, select Google Sheets.
-
In the file picker, select the employees spreadsheet from your My Drive folder on Google Drive, and click Select.
This sheet was automatically provisioned for the lab.
AppSheet creates the app and displays it in the AppSheet editor UI.
-
Click Customize your app.
You are now in the AppSheet editor UI.
-
In the AppSheet UI, in the left navigation bar, click Data ( ) > Employee.
-
This will expand the Employee table definition.
-
For the Photo column, clear the Require? checkbox. If you are unable to see it, click on Edit pencil icon for Photo column and expand Data Validity.
For the purposes of this lab, you will not require a photo at the time an employee is onboarded via the app.
-
To save your changes to the app, click Save.
Click Check my progress to verify the objective.
Create the app.
Task 2. Create the automation bot
In this task, you create the automation bot. To run the automation process when an event occurs in your app, you need a bot.
Create the bot
-
To create a bot, in the AppSheet UI, in the left navigation bar, click Automation ( ), and then click Create my first automation.
-
Click Create a new bot.
-
For New Bot, click More ( ) and Rename to Employee Onboarded.
-
In the bot definition, click Configure event, and then click Create a custom event.
-
In the Settings tab, enable Linking.

Task 3. Create an event
With the bot created, you will configure an event in your app that will cause the process to run when the event is trigerred. In this task, you create and configure the event.
-
In the Settings tab, change the event name to New Employee Created.
-
For Event Type, select Data Change.
Note: Events can be triggered on a fixed schedule or based on a change in data in the app's tables.
-
Click Adds only.
This event will be triggered when a row is added to the table in the app.
-
For Table, select Employee.
-
Leave the remaining settings as their defaults.
Task 4. Create an automation process
Now that you've created a event, you must create a process that will execute the task. In AppSheet, a process consists of one or more steps. One type of step enables you to run a task.
-
In the Employee Onboarded definition, for Run this process, select Create new process, and then enable Linking.
-
To change the process name, click Process for Employee Onboarded - 1, and type New Employee
-
Click Go to: Process.

-
For Table, select Employee.
This process uses the Employee table.
-
To add a step to the process, click Add a step.
-
For Step name, type Send an email, and press ENTER.
Task 5. Create and test automation task
When a new employee is onboarded into the organization, one of the steps in the onboarding process is to send a confirmation email to human resources. You can implement this capability using AppSheet automation by creating the required automation constructs in your app.
In this task, you first create an automation task to send an email.
-
To create a task, in the Settings tab, enable Linking.

-
In the new task form, specify the following, and leave the remaining settings as their defaults:
Property |
Value
(type or select) |
Task name |
Send new hire email |
Task category |
Send an email |
Email Type |
Custom template |
Table name |
Employee |
-
To send the email to a specific list of email addresses, for To, click Add.
-
For the email address, enter your own email address that you can access.
Note: If you enter an email address that contains special characters such as hyphen or plus, you must enclose the email address in quotes, for example "test-email@gmail.com".
-
To customize the email content:
a. For Email Subject, type New Employee: <<[Name]>>
b. For Email Body, type Employee: <<[Name]>> has been onboarded.
Note: The email subject and body entered must include the angle (<<, >>) and square ([,]) brackets, which are used to denote template variables.The [Name] column variable is automatically substituted by AppSheet when the task is executed. The value is taken from the Name column of the current row in the Employee table that is configured for this task.
-
To save your changes, in the AppSheet UI, click Save.
Deploy the app
AppSheet will send messages from automation tasks only to the app creator while the app is in prototype state. For other users to receive messages, the app must pass a deployment check and be deployed.
-
To run a deployment check, in the AppSheet UI, navigate to the Manage ( ) > Deploy, and click Deployment Check.
-
Click Run deployment check.
-
There should not be any errors displayed for your app. Ignore the warnings, and click Move app to deployed state.
Test the automation
-
In the AppSheet UI, in the left navigation bar, click Data ().
-
In the app preview, in the navigation bar, click Employee.
-
To add a new employee, click Add ( ).
).
-
In the new employee form in the app preview, specify the following, and leave the remaining settings as their defaults:
Property |
Value
(type or select) |
Name |
Employee 16 |
Email |
employee16@company.com |
Phone Number |
1-415-736-0000 |
Work Address |
345 Spear Street San Francisco, CA 94105, USA |
-
To create the new employee record, in the app preview, click Save.
-
Wait a few seconds for the app to automatically sync the update to the backend, or to sync the data changes manually, click Sync ( ).
).
-
In the AppSheet UI, in the left navigation bar, click Data () > Employee, this expands the Employee table definition, and then click View data source.
-
Verify that the new employee row was added to the Google Sheet.
-
In a separate browser tab or window, access your email account that was used when configuring the automation task earlier.
-
Verify that an email was received with the subject New Employee: Employee 16.
-
Open the email to verify that its contents match the email body:
Employee: Employee 16 has been onboarded.
Click Check my progress to verify the objective.
Create and test the automation bot.
Task 6. Run a data action
AppSheet automation also enables you to update your app's data as part of a bot's process. To implement this, you configure an automation process with a type of step that runs a data action.
In this task, you enhance the New Employee process to add a row in a separate Training table that tracks an employee's training schedule in the app.
Add the Training table to the app
Before you can update the automation process, you must add the Training table to your app.
-
In the AppSheet UI, in the left navigation bar, click Data ().
-
To add the Training table, click Add new Data (+), and then select Add Table "Training" from the suggestions.
-
Click Add This Table.
-
In the Data () > Training, this expands the Training table definition.
The table schema is displayed.
-
To edit the Employee ID column definition, click Edit ( ) at the left of the column name.
-
In the Training: Employee ID form, for Type, select Ref.
-
For Source table under Type Details, select Employee.
Note: The Employee ID column in the Training table references the employee ID column in the Employee table. This configuration creates a reference relationship between the two tables.
-
Click Done in the form.
-
Click Save.
Modify the process
-
In the AppSheet UI, in the left navigation bar, click Automation () > Processes, and click the New Employee process that was created earlier.
-
To add a new step to the process, below the Send email step, click Add a step.
-
For Step name, type Add Training, and press ENTER.
-
Change the type of the Add Training step to Run a data action by selecting it from the list.
-
In the Settings tab, enable Linking.
a. For Action name, type Create training record
b. Select Add new rows.
c. For Add row to this table, select the Training table from the list.
d. Under With these values, select Employee ID from the list of column names.
This is the key column of the Training table.
e. To provide a value for Employee ID, click filter ( ).
).
f. In the Expression Assistant form, for New value for column Employee ID (Ref), type [ID], and click Save.
Note: In this step, you provide the value of the required key column Employee ID of the Training table. Because this column is a reference to the ID column of the Employee table, the value entered here instructs AppSheet to use the employee's ID from the Employee table when a row is added to the Training table.
Note: You can also view and edit the Create training record action in the Actions tab in the AppSheet UI.
-
To save your changes to the app, click Save.
Test the data action
-
In the AppSheet UI, in the left navigation bar, click Data ().
-
In the app preview, in the navigation bar, click Employee.
-
To add a new employee, click Add ().
-
In the new employee form in the app preview, specify the following, and leave the remaining settings as their defaults:
Property |
Value
(type or select) |
Name |
Employee 17 |
Email |
employee17@company.com |
Phone Number |
1-415-736-0000 |
Work Address |
345 Spear Street San Francisco, CA 94105, USA |
-
To create the new employee record, in the app preview, click Save.
-
Wait a few seconds for the app to automatically sync the update to the backend, or to sync the data changes manually, click Sync ().
-
In the AppSheet UI, in the left navigation bar, click Data () > Training, this expands the Training table definition, and then click View data source.
-
Verify that the new training row was added to the Training sheet, along with the new employee row in the Employee sheet.
Match the values in the Employee_ID and ID columns in the two sheets respectively.
Note: You did not provide initial values for the other columns in the Training table. Depending on your app's requirements, you could provide them from the action configuration or allow the app user to provide their values in the app.
Click Check my progress to verify the objective.
Run a data action.
Task 7. Create a scheduled bot
AppSheet supports automation bots that can be triggered to run on a regular schedule. In this task, you create a scheduled bot that performs a task on multiple rows of a table.
Use the sample employee onboarding app to send regular email reminders to employees that have not yet completed their new hire training.
Create automation objects: Bot and Event
In this subtask, you use AppSheet's intuitive capabilities to create the bot and event automation objects that are needed to implement this use case.
-
In the AppSheet UI, in the left navigation bar, click Automation () > Bots, and click Create a new Bot (+).
-
Click Create a new bot.
-
For New Bot, click More () and Rename to New hire training completion.
-
Click Configure event.
-
For Event name, type Check new hire training weekly, and press ENTER.
-
In the Settings tab, enable Linking.
a. For Event Type, click Schedule.
b. For Schedule, click Weekly.
c. For Day of the week, click the letter for the day of the week that is today.
For example, if today is a Monday, click M.
d. For Time, set a value that is a few minutes after the current time.
For example, 12:00 pm.
e. For Time zone, select the time zone that matches that of your region.
For example, (GMT-07:00) Pacific Standard Time.
f. Because you want the event to trigger for multiple rows in the table, enable the option ForEachRowInTable.
g. For Table, select the Training table from the list.
h. To select a subset of the table rows, for Filter Condition, click filter ().
i. In the Expression Assistant form, for Condition for event Check new hire training daily (Yes/No), type ISBLANK([New hire training completed])
Note: When the filter condition is specified, the event will only trigger for rows that do not have a value in the New hire training completed column in the Training table. An empty value in this column implies that the employee has not yet completed this training.
-
Save the changes to the app.
Create automation objects: Process and Step
Continue to create the process and step automation objects:
-
For Run this process, click the arrow, and click Create new process, and then enable Linking.
-
To change the process name, click the Process for New hire training completion - 1, and type New hire training.
-
Click Go to: Process.
-
To add a step in the process, click Add a step.
-
For Step name, type Send new hire training email, and press ENTER.
-
The process should only send the email if the employee's hire date is not in the future. To accomplish this, select the type of step from the list to Branch on a condition.
-
In the condition field, click filter ().
-
In the Expression Assistant form, for Condition for Send new hire training email (Yes/No), type [Employee ID].[Hire date] <= TODAY()
If the value in the employee's Hire date column in the Employee table is the current date or earlier, this expression returns true.
-
Click Save in the Expression Assistant.
-
Under the branch condition, for the YES branch, click add step ( ).
).
-
For the Step name, type Send new hire training reminder, and press ENTER.
-
Leave the default task type Run a task selected.
-
To create a task, in the Settings pane, enable Linking.
a. For Task name, type Send new hire training email
b. For the task category, click Send an email.
c. For Email Type, click Custom template.
d. For Table name, select the Training table from the list.
e. For the email address, under To, click Add.
f. Click filter (), and then click filter again in the field.
g. In the Expression Assistant form, for To Email address (Email), type [Employee ID].[Email]
h. Click Save in the Expression Assistant.
i. For Email Subject, type New hire training reminder.
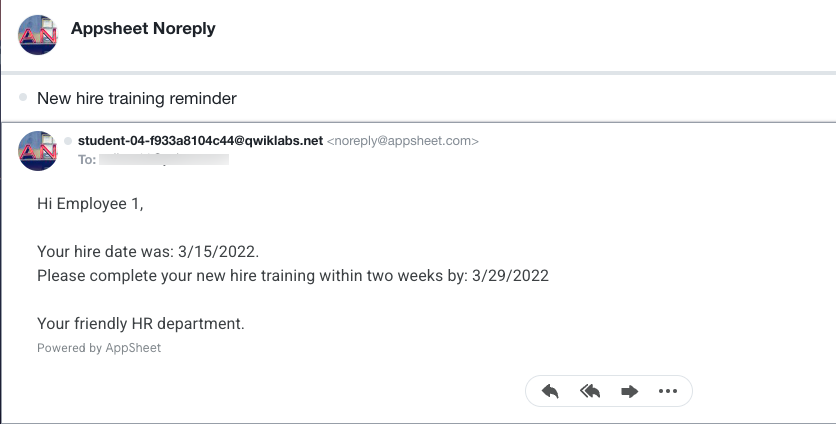
j. For Email Body, type:
Hi <<[Employee ID].[Name]>>,
Your hire date was: <<[Employee ID].[Hire date]>>.
Please complete your new hire training within two weeks by: <<WORKDAY([Employee ID].[Hire date], 10)>>
Your friendly HR department.
Note: The email body uses template variables to substitute column values from the Employee table for a row in the Training table. It also uses the AppSheet built-in function WORKDAY to compute the date that is ten working days from the employee's hire date.
-
To save your changes to the app, click Save.
Test the automation
-
In the AppSheet UI, in the left navigation bar, click Data ().
-
In the app preview, click Employee 1 to view details, and click Edit ( ).
).
-
Scroll the employee record in the app preview and update the email address. Change the email address to your own email address that you can access.
-
Click Save in the app preview.
-
Repeat the previous steps to change the email address for Employee 2. Use the same or a different email address that you can access.
-
In the AppSheet UI, in the left navigation bar, click Automation () > Events, and then expand the event: Check new hire training weekly.
-
Update the Time to set it to 1 minute past the current time, and click Save.
-
Wait for the event to trigger, then in a separate browser tab, access the email accounts that you used to configure the employee email addresses earlier.
-
Verify that the new hire training reminder email was received, and verify the email contents.
Note: If you do not see the email in your inbox, check your spam folder.
Note: If the email was not received and the current time is past the time set in the event, adjust the time in the event configuration to add additional minutes to give the app enough time to sync the changes to the AppSheet backend.
Congratulations!
You've successfully implemented automation in your AppSheet app.
In this lab you learned how to:
- Create bots, processes, events, and tasks in the AppSheet editor.
- Trigger a bot to automatically send email when a new data row is created in an app.
- Run a data action with automation to create rows in a table.
- Execute a scheduled bot that processes multiple rows in a table.
End your lab
When you have completed your lab, click End Lab. Qwiklabs removes the resources you’ve used and cleans the account for you.
You will be given an opportunity to rate the lab experience. Select the applicable number of stars, type a comment, and then click Submit.
The number of stars indicates the following:
- 1 star = Very dissatisfied
- 2 stars = Dissatisfied
- 3 stars = Neutral
- 4 stars = Satisfied
- 5 stars = Very satisfied
You can close the dialog box if you don't want to provide feedback.
For feedback, suggestions, or corrections, please use the Support tab.
Copyright 2022 Google LLC All rights reserved. Google and the Google logo are trademarks of Google LLC. All other company and product names may be trademarks of the respective companies with which they are associated.


