Questi contenuti non sono ancora ottimizzati per i dispositivi mobili.
Per un'esperienza ottimale, visualizza il sito su un computer utilizzando un link inviato via email.
GSP1204
Overview
Deploying a web application for the first time can be intimidating. Even after the first deployment, if the process is too much work, you might avoid deploying new versions of your application. With continuous deployment, you can automatically deploy changes of your application with ease.
In this lab, you write a Python web application and configure Cloud Run to automatically deploy your application when a change is made to the source code of your application. Then you modify your application and deploy it again.
Write a Python application with Cloud Shell Editor
Store your application code in GitHub
Automatically deploy your application to Cloud Run
Prerequisites
Note:The lab works best if you have an existing GitHub account.
If a new GitHub account is created for this lab, the account may be marked as spam by Cloud Build, and the Cloud Build app could show a 404 error after clicking on the Install CloudBuild App button on a new Github account.
Creating a new GitHub account in order to run this lab is not recommended.
Setup
Before you click the Start Lab button
Read these instructions. Labs are timed and you cannot pause them. The timer, which starts when you click Start Lab, shows how long Google Cloud resources will be made available to you.
This Qwiklabs hands-on lab lets you do the lab activities yourself in a real cloud environment, not in a simulation or demo environment. It does so by giving you new, temporary credentials that you use to sign in and access Google Cloud for the duration of the lab.
What you need
To complete this lab, you need:
Access to a standard internet browser (Chrome browser recommended).
Time to complete the lab.
Note: If you already have your own personal Google Cloud account or project, do not use it for this lab.
Note: If you are using a Pixelbook, open an Incognito window to run this lab.
How to start your lab and sign in to the Google Cloud Console
Click the Start Lab button. If you need to pay for the lab, a pop-up opens for you to select your payment method.
On the left is a panel populated with the temporary credentials that you must use for this lab.
Copy the username, and then click Open Google Console.
The lab spins up resources, and then opens another tab that shows the Sign in page.
Tip: Open the tabs in separate windows, side-by-side.
In the Sign in page, paste the username that you copied from the Connection Details panel. Then copy and paste the password.
Important: You must use the credentials from the Connection Details panel. Do not use your Qwiklabs credentials. If you have your own Google Cloud account, do not use it for this lab (avoids incurring charges).
Click through the subsequent pages:
Accept the terms and conditions.
Do not add recovery options or two-factor authentication (because this is a temporary account).
Do not sign up for free trials.
After a few moments, the Cloud Console opens in this tab.
Activate Cloud Shell
Cloud Shell is a virtual machine that is loaded with development tools. It offers a persistent 5GB home directory and runs on the Google Cloud. Cloud Shell provides command-line access to your Google Cloud resources.
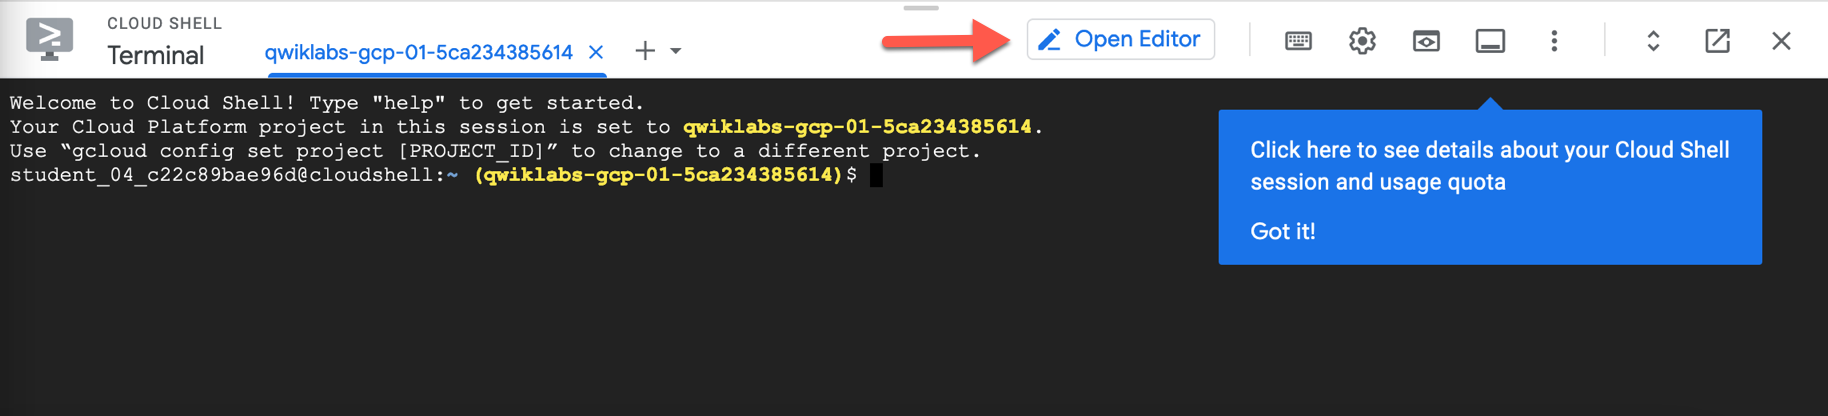
In the Cloud Console, in the top right toolbar, click the Activate Cloud Shell button.
Click Continue.
It takes a few moments to provision and connect to the environment. When you are connected, you are already authenticated, and the project is set to your PROJECT_ID. For example:
gcloud is the command-line tool for Google Cloud. It comes pre-installed on Cloud Shell and supports tab-completion.
You can list the active account name with this command:
Once you activate the Cloud Shell from the above screenshot, click on Open Editor
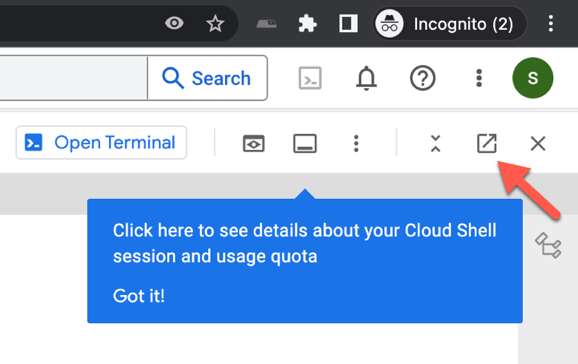
To make it easier to toggle between the Cloud console and the Editor, click on open in new window which should open up a separate tab:
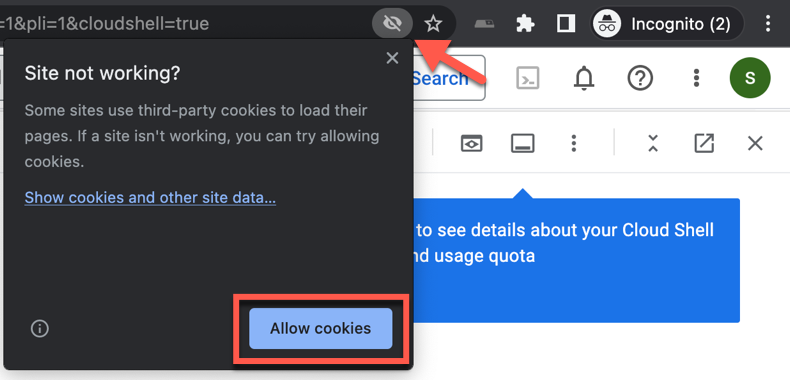
If you see a message that says We can't load the code editor here because third-party cookies are disabled. We will need to allow cookies. Click on the eye icon on the top of the browser and select Allow cookies:
In the bottom part of the screen, you should see a terminal window which is where we'll be running the commands in this lab. This is your Cloud Shell Terminal.
Task 1: Enable APIs
Run the following in Cloud Shell to ensure that you are using the correct project:
gcloud config set project "$(gcloud projects list | awk '/PROJECT_ID/{print $2}' | head -1)"
An empty file should now appear in the top part of the screen. This is where you can edit this main.py file.
Copy and paste this code into the empty main.py file:
import os
from flask import Flask
app = Flask(__name__)
app_version = "0.0.0"
@app.route("/")
def hello_world():
return f"Hello! This is version {app_version} of my application."
if __name__ == "__main__":
app.run(debug=True, host="0.0.0.0", port=int(os.environ.get("PORT", 8080)))
This code responds to requests with the greeting: "Hello! This is version 0.0.0 of my application."
Task 3: Create a repository
Return to the Cloud Shell terminal on the bottom of your screen.
Ensure that you are still in the correct directory:
Push your commit to main branch of the origin repository:
git push -u origin main
Run this command and visit the resulting URL to view your application code on GitHub:
echo -e "\n\nTo see your code, visit this URL:\n \
https://github.com/${GITHUB_USERNAME}/hello-world/blob/main/main.py \n\n"
Task 5: Set up automatic deployments
Visit the Cloud Run page:
https://console.cloud.google.com/run
Click CREATE SERVICE
Click Continuously deploy from a repository
Click SET UP CLOUD BUILD
Select GitHub as the Repository Provider
Click on the Authenticate and click on Continue.
If you're not logged into your GitHub account in the browser, log in with your credentials.
After logging in, you'll see a message on the Cloud Run page stating The GitHub App is not installed on any of your repositories.
Click on the INSTALL GOOGLE CLOUD BUILD button.
On the Installation Setup page, select Only select repositories and choose the hello-world repository which you created through CLI.
Click on Install
Note: If you have a lot of GitHub repositories, this can take a few minutes to load.
Select your-user-name/hello-world as the Repository
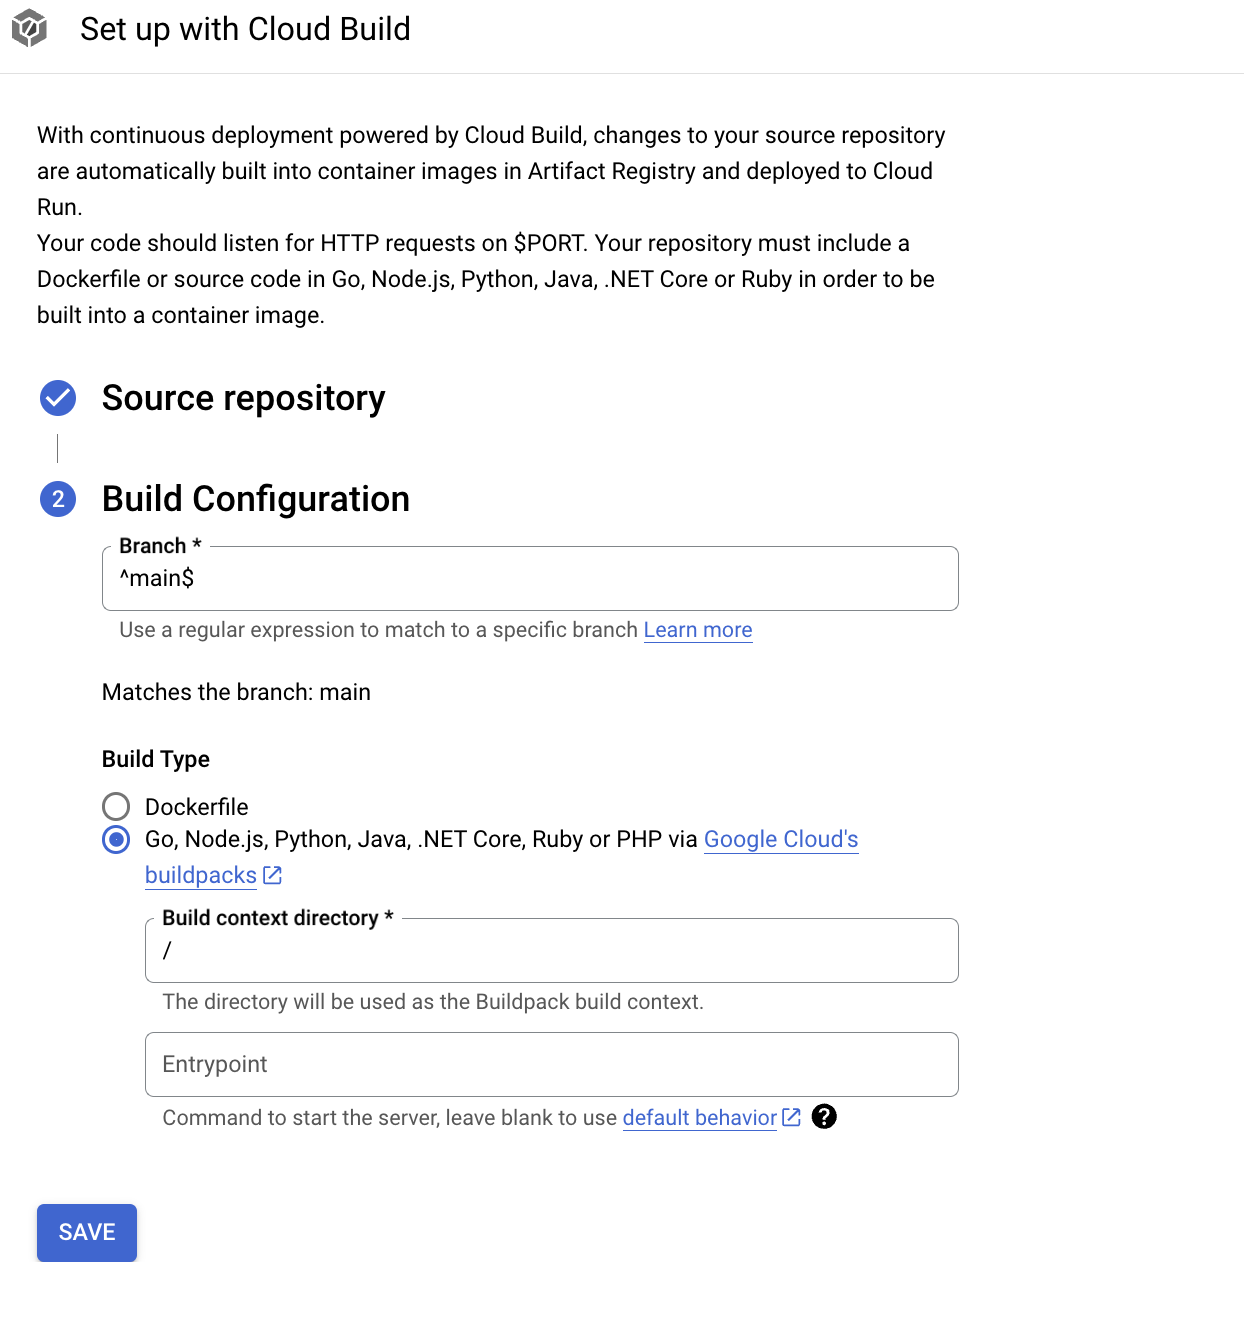
Leave Branch as ^main$
Click Go, Node.js, Python, Java, .NET Core, Ruby or PHP via Google Cloud's buildpacks
Leave Build context directory as /
Click Save
Scroll down to Authentication
Click Allow unauthenticated invocations
Click CREATE
Once the build finishes, run this command and visit the resulting URL to view your running application:
echo -e "\n\nOnce the build finishes, visit this URL to see your live application:\n \
"$(gcloud run services list | awk '/URL/{print $2}' | head -1)" \n\n"
It may take several minutes for the build to finish before you can see your changes.
Click Check my progress to verify the objective.
Create a service and check Cloud Run Deployment.
Task 6: Change and redeploy
In the helloworld direoctory, reopen main.py the Cloud Shell Editor
cloudshell edit ~/helloworld/main.py
Change 0.0.0 in main.py to 0.0.1. The code in main.py should now include the line:
app_version = "0.0.1"
Ensure that you are still in the correct directory in Cloud Shell:
cd ~/helloworld
Run these commands to commit a new version of your application to your local git repository:
git add .
git commit -m "update version to 0.0.1"
Push the changes to GitHub:
git push
Run this command and visit the resulting URL to view your updated application code on GitHub:
echo -e "\n\nTo see your code, visit this URL:\n \
https://github.com/${GITHUB_USERNAME}/hello-world/blob/main/main.py \n\n"
Once the build finishes, run this command and visit the resulting URL to view your deployed application:
echo -e "\n\nOnce the build finishes, visit this URL to see your live application:\n \
"$(gcloud run services list | awk '/URL/{print $2}' | head -1)" \n\n"
It may take several minutes for the build to finish before you can see your changes.
Click Check my progress to verify the objective.
Redeploy a new version of your application.
Congratulations
In this lab, you wrote a Python web application and configure Cloud Run to automatically deploy your application when a change was made to the source code of your application. Then you modified your application and deployed it again.
End your lab
When you have completed your lab, click End Lab. Qwiklabs removes the resources you’ve used and cleans the account for you.
You will be given an opportunity to rate the lab experience. Select the applicable number of stars, type a comment, and then click Submit.
The number of stars indicates the following:
1 star = Very dissatisfied
2 stars = Dissatisfied
3 stars = Neutral
4 stars = Satisfied
5 stars = Very satisfied
You can close the dialog box if you don't want to provide feedback.
For feedback, suggestions, or corrections, please use the Support tab.
Manual Last Updated April 3, 2024
Lab Last Tested April 3, 2024
Copyright 2022 Google LLC All rights reserved. Google and the Google logo are trademarks of Google LLC. All other company and product names may be trademarks of the respective companies with which they are associated.
I lab creano un progetto e risorse Google Cloud per un periodo di tempo prestabilito
I lab hanno un limite di tempo e non possono essere messi in pausa. Se termini il lab, dovrai ricominciare dall'inizio.
In alto a sinistra dello schermo, fai clic su Inizia il lab per iniziare
Utilizza la navigazione privata
Copia il nome utente e la password forniti per il lab
Fai clic su Apri console in modalità privata
Accedi alla console
Accedi utilizzando le tue credenziali del lab. L'utilizzo di altre credenziali potrebbe causare errori oppure l'addebito di costi.
Accetta i termini e salta la pagina di ripristino delle risorse
Non fare clic su Termina lab a meno che tu non abbia terminato il lab o non voglia riavviarlo, perché il tuo lavoro verrà eliminato e il progetto verrà rimosso
Questi contenuti non sono al momento disponibili
Ti invieremo una notifica via email quando sarà disponibile
Bene.
Ti contatteremo via email non appena sarà disponibile
Un lab alla volta
Conferma per terminare tutti i lab esistenti e iniziare questo
Utilizza la navigazione privata per eseguire il lab
Il modo migliore per eseguire questo lab è utilizzare una finestra del browser in incognito o privata. Ciò evita eventuali conflitti tra il tuo account personale e l'account studente, che potrebbero causare addebiti aggiuntivi sul tuo account personale.
Learn how to automatically deploy your changes from version control to Cloud Run
Durata:
Configurazione in 0 m
·
Accesso da 60 m
·
Completamento in 60 m