GSP1140

總覽
Document AI 是文件解讀解決方案,可以擷取並處理文件、電子郵件、應付憑據和表單等非結構化資料,方便您解讀、分析和使用。Document AI API 會透過內容分類、實體擷取、進階搜尋等功能,將文件轉換成結構化資料。
在本實驗室,您將瞭解如何使用 Document AI 專用處理器,透過 Python 剖析專用文件並將其分類。我們會以應付憑據為範例,說明如何剖析及擷取實體。這項程序和範例程式碼適用於 Document AI 支援的任何專用文件。
目標
在本實驗室中,您將瞭解如何執行下列工作:
設定和需求
瞭解以下事項後,再點選「Start Lab」按鈕
請詳閱以下操作說明。實驗室活動會計時,且中途無法暫停。點選「Start Lab」後就會開始計時,顯示可使用 Google Cloud 資源的時間。
您將在真正的雲端環境完成實作實驗室活動,而不是模擬或示範環境。為此,我們會提供新的暫時憑證,供您在實驗室活動期間登入及存取 Google Cloud。
為了順利完成這個實驗室,請先確認:
- 可以使用標準的網際網路瀏覽器 (Chrome 瀏覽器為佳)。
注意事項:請使用無痕模式 (建議選項) 或私密瀏覽視窗執行此實驗室,這可以防止個人帳戶和學員帳戶之間的衝突,避免個人帳戶產生額外費用。
- 是時候完成實驗室活動了!別忘了,活動一旦開始將無法暫停。
注意事項:務必使用實驗室專用的學員帳戶。如果使用其他 Google Cloud 帳戶,可能會產生額外費用。
如何開始研究室及登入 Google Cloud 控制台
-
點選「Start Lab」按鈕。如果實驗室會產生費用,畫面上會出現選擇付款方式的對話方塊。左側的「Lab Details」窗格會顯示下列項目:
- 「Open Google Cloud console」按鈕
- 剩餘時間
- 必須在這個研究室中使用的臨時憑證
- 完成這個實驗室所需的其他資訊 (如有)
-
點選「Open Google Cloud console」;如果使用 Chrome 瀏覽器,也能按一下滑鼠右鍵,選取「在無痕視窗中開啟連結」。
接著,實驗室會啟動相關資源,並開啟另一個分頁,顯示「登入」頁面。
提示:您可以在不同的視窗中並排開啟分頁。
注意:如果頁面中顯示「選擇帳戶」對話方塊,請點選「使用其他帳戶」。
-
如有必要,請將下方的 Username 貼到「登入」對話方塊。
{{{user_0.username | "Username"}}}
您也可以在「Lab Details」窗格找到 Username。
-
點選「下一步」。
-
複製下方的 Password,並貼到「歡迎使用」對話方塊。
{{{user_0.password | "Password"}}}
您也可以在「Lab Details」窗格找到 Password。
-
點選「下一步」。
重要事項:請務必使用實驗室提供的憑證,而非自己的 Google Cloud 帳戶憑證。
注意:如果使用自己的 Google Cloud 帳戶來進行這個實驗室,可能會產生額外費用。
-
按過後續的所有頁面:
- 接受條款及細則。
- 由於這是臨時帳戶,請勿新增救援選項或雙重驗證機制。
- 請勿申請免費試用。
Google Cloud 控制台稍後會在這個分頁開啟。
注意:如要使用 Google Cloud 產品和服務,請點選「導覽選單」,或在「搜尋」欄位輸入服務或產品名稱。
啟動 Cloud Shell
Cloud Shell 是搭載多項開發工具的虛擬機器,提供永久的 5 GB 主目錄,而且在 Google Cloud 中運作。Cloud Shell 提供指令列存取權,方便您使用 Google Cloud 資源。
-
點按 Google Cloud 控制台頂端的「啟用 Cloud Shell」圖示  。
。
-
系統顯示視窗時,請按照下列步驟操作:
- 繼續操作 Cloud Shell 視窗。
- 授權 Cloud Shell 使用您的憑證發出 Google Cloud API 呼叫。
連線建立完成即代表已通過驗證,而且專案已設為您的 Project_ID:。輸出內容中有一行文字,宣告本工作階段的 Project_ID:
Your Cloud Platform project in this session is set to {{{project_0.project_id | "PROJECT_ID"}}}
gcloud 是 Google Cloud 的指令列工具,已預先安裝於 Cloud Shell,並支援 Tab 鍵自動完成功能。
- (選用) 您可以執行下列指令來列出使用中的帳戶:
gcloud auth list
- 點按「授權」。
輸出內容:
ACTIVE: *
ACCOUNT: {{{user_0.username | "ACCOUNT"}}}
To set the active account, run:
$ gcloud config set account `ACCOUNT`
- (選用) 您可以使用下列指令來列出專案 ID:
gcloud config list project
輸出內容:
[core]
project = {{{project_0.project_id | "PROJECT_ID"}}}
注意:如需 gcloud 的完整說明,請前往 Google Cloud 參閱 gcloud CLI 總覽指南。
工作 1:啟用 Document AI API
您必須先啟用 API,才能使用 Document AI。
-
點選控制台頂端的「啟用 Cloud Shell」按鈕,開啟 Cloud Shell。
-
在 Cloud Shell 執行下列指令,啟用 Document AI API。
gcloud services enable documentai.googleapis.com
系統的回應大致如下:
Operation "operations/..." finished successfully.
您也必須安裝 pandas,這是 Python 的開放原始碼資料分析程式庫。
- 執行下列指令,安裝 pandas。
pip3 install --upgrade pandas
- 執行下列指令,安裝 Document AI 的 Python 用戶端程式庫。
pip3 install --upgrade google-cloud-documentai
系統的回應大致如下:
...
Installing collected packages: google-cloud-documentai
Successfully installed google-cloud-documentai-2.15.0
現在,您可以開始使用 Document AI API 了!
點選「Check my progress」,確認目標已達成。
啟用 Document AI API
工作 2:建立表單剖析器處理器
在本實驗室,您必須先建立表單剖析器的處理器執行個體,才能用於 Document AI 平台。
- 在「導覽選單」中,點按「查看所有產品」,然後在「人工智慧」,部分選取「Document AI」。
- 點按「探索處理器」,捲動至「專用」,然後點選「應付憑據剖析器」內的「建立處理器」。
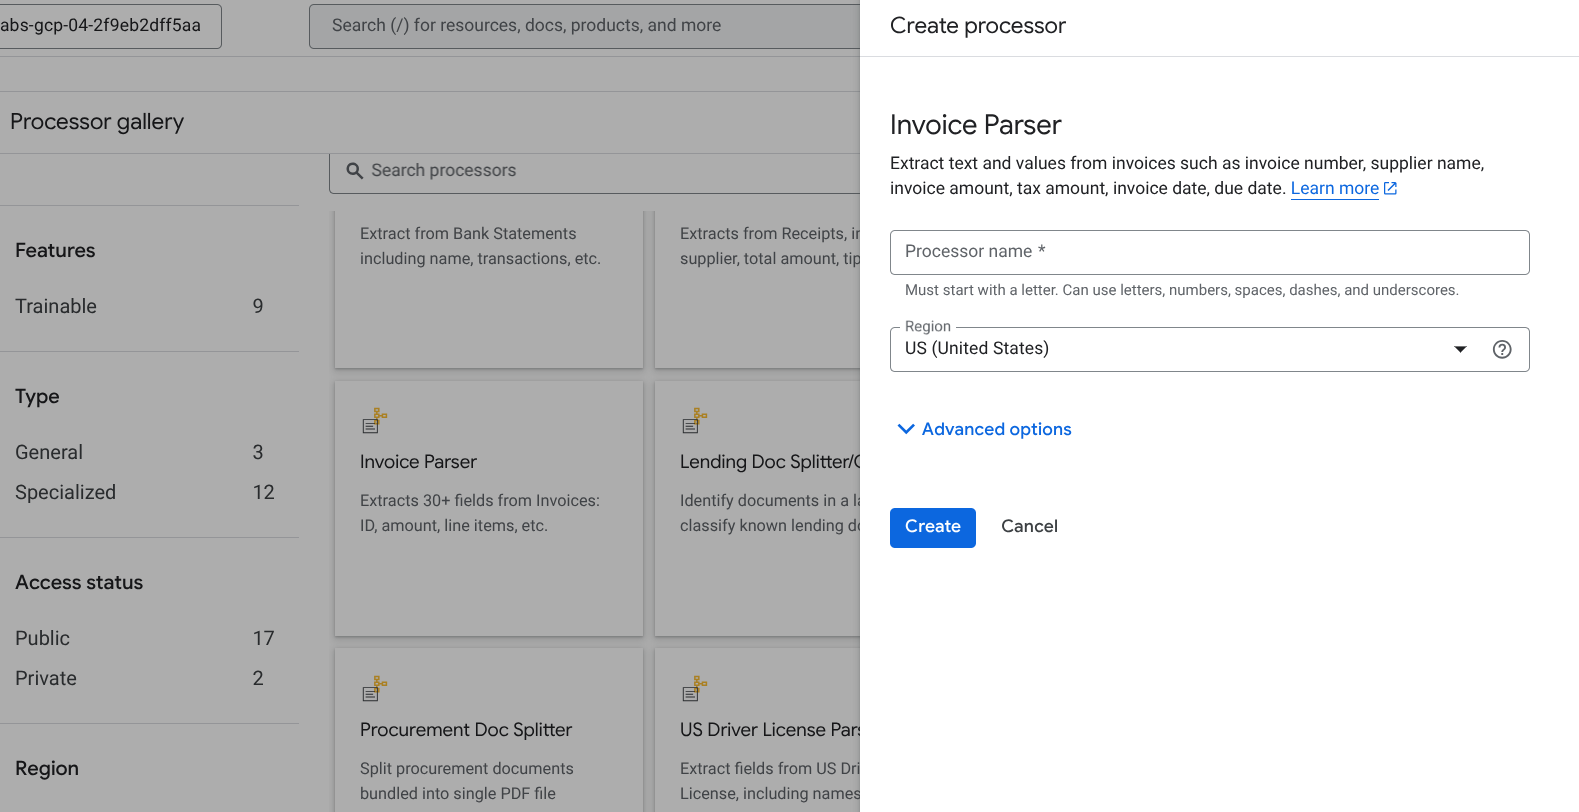
-
將處理器命名為 lab-invoice-parser,然後從清單中選取最接近的區域。
-
點按「建立」即可建立處理器
-
複製處理器 ID。您稍後必須在程式碼中使用此 ID。

建立處理器
下載範例文件
我們提供了幾個範例文件,可以用於這個實驗室。
- 執行下列指令,將範例表單下載至 Cloud Shell:
gcloud storage cp gs://cloud-samples-data/documentai/codelabs/specialized-processors/procurement_multi_document.pdf .
gcloud storage cp gs://cloud-samples-data/documentai/codelabs/specialized-processors/google_invoice.pdf .
- 執行下列指令,確認檔案已下載至 Cloud Shell:
ls
系統的回應大致如下:
google_invoice.pdf procurement_multi_document.pdf
工作 3:擷取實體
您現在可以從檔案中擷取擷取實體並加上結構定義,包括信心分數、屬性和正規化值。
發出 API 要求的程式碼與上一步相同,可以透過線上或批次要求完成。
您將從實體存取下列資訊:
-
實體類型
- 例如
invoice_date、receiver_name、total_amount
-
原始值
-
正規化值
-
信心值
部分實體類型 (如 line_item) 也可能包含屬性,屬性是巢狀實體,例如 line_item/unit_price 和 line_item/description。這個範例會攤平巢狀結構的資料,方便查看。
應付憑據剖析器
- 在 Cloud Shell 建立名為
extraction.py 的檔案,然後將下列程式碼貼入該檔案:
import pandas as pd
from google.cloud import documentai_v1 as documentai
def online_process(
project_id: str,
location: str,
processor_id: str,
file_path: str,
mime_type: str,
) -> documentai.Document:
"""
Processes a document using the Document AI Online Processing API.
"""
opts = {"api_endpoint": f"{location}-documentai.googleapis.com"}
# Instantiates a client
documentai_client = documentai.DocumentProcessorServiceClient(client_options=opts)
# The full resource name of the processor, e.g.:
# projects/project-id/locations/location/processor/processor-id
# You must create new processors in the Cloud Console first
resource_name = documentai_client.processor_path(project_id, location, processor_id)
# Read the file into memory
with open(file_path, "rb") as file:
file_content = file.read()
# Load Binary Data into Document AI RawDocument Object
raw_document = documentai.RawDocument(content=file_content, mime_type=mime_type)
# Configure the process request
request = documentai.ProcessRequest(name=resource_name, raw_document=raw_document)
# Use the Document AI client to process the sample form
result = documentai_client.process_document(request=request)
return result.document
PROJECT_ID = "YOUR_PROJECT_ID"
LOCATION = "YOUR_PROJECT_LOCATION" # Format is 'us' or 'eu'
PROCESSOR_ID = "INVOICE_PARSER_ID" # Create processor in Cloud Console
# The local file in your current working directory
FILE_PATH = "google_invoice.pdf"
# Refer to https://cloud.google.com/document-ai/docs/processors-list
# for supported file types
MIME_TYPE = "application/pdf"
document = online_process(
project_id=PROJECT_ID,
location=LOCATION,
processor_id=PROCESSOR_ID,
file_path=FILE_PATH,
mime_type=MIME_TYPE,
)
types = []
raw_values = []
normalized_values = []
confidence = []
# Grab each key/value pair and their corresponding confidence scores.
for entity in document.entities:
types.append(entity.type_)
raw_values.append(entity.mention_text)
normalized_values.append(entity.normalized_value.text)
confidence.append(f"{entity.confidence:.0%}")
# Get Properties (Sub-Entities) with confidence scores
for prop in entity.properties:
types.append(prop.type_)
raw_values.append(prop.mention_text)
normalized_values.append(prop.normalized_value.text)
confidence.append(f"{prop.confidence:.0%}")
# Create a Pandas Dataframe to print the values in tabular format.
df = pd.DataFrame(
{
"Type": types,
"Raw Value": raw_values,
"Normalized Value": normalized_values,
"Confidence": confidence,
}
)
print(df)
-
將 INVOICE_PARSER_ID 替換為先前建立的應付憑據剖析器處理器 ID,並使用 google_invoice.pdf 檔案。
-
將 YOUR_PROJECT_ID 和 YOUR_PROJECT_LOCATION 分別替換為 Google Cloud 專案 ID 和處理器位置。
-
執行指令碼:
python3 extraction.py
輸出內容大致如下:
Type Raw Value Normalized Value Confidence
0 due_date Sep 30, 2019 2019-09-30 99%
1 net_amount 22,379.39 22379.39 99%
2 total_amount 19,647.68 19647.68 99%
3 invoice_date Sep 24, 2019 2019-09-24 98%
4 total_tax_amount 1,767.97 1767.97 94%
5 receiver_name Jane Smith, 88%
6 receiver_address 1600 Amphitheatre Pkway Mountain View, CA 94043 77%
7 invoice_id 23413561D 60%
8 freight_amount 199.99 199.99 60%
9 invoice_type invoice_statement 59%
10 currency $ USD 58%
11 supplier_name Google Google 37%
12 line_item 9.99 12 12 ft HDMI cable 119.88 100%
13 line_item/unit_price 9.99 9.99 95%
14 line_item/quantity 12 12 75%
15 line_item/description 12 ft HDMI cable 64%
16 line_item/amount 119.88 119.88 90%
17 line_item 12 399.99 27" Computer Monitor 4,799.88 100%
18 line_item/quantity 12 12 76%
19 line_item/unit_price 399.99 399.99 95%
20 line_item/description 27" Computer Monitor 42%
21 line_item/amount 4,799.88 4799.88 93%
22 line_item Ergonomic Keyboard 12 59.99 719.88 100%
23 line_item/description Ergonomic Keyboard 42%
24 line_item/quantity 12 12 75%
25 line_item/unit_price 59.99 59.99 94%
26 line_item/amount 719.88 719.88 85%
27 line_item Optical mouse 12 19.99 239.88 100%
28 line_item/description Optical mouse 55%
29 line_item/quantity 12 12 72%
30 line_item/unit_price 19.99 19.99 94%
31 line_item/amount 239.88 239.88 81%
32 line_item Laptop 12 1,299.99 15,599.88 100%
33 line_item/description Laptop 65%
34 line_item/quantity 12 12 71%
35 line_item/unit_price 1,299.99 1299.99 94%
36 line_item/amount 15,599.88 15599.88 91%
37 line_item Misc processing fees 899.99 899.99 1 100%
38 line_item/description Misc processing fees 54%
39 line_item/unit_price 899.99 899.99 92%
40 line_item/amount 899.99 899.99 82%
41 line_item/quantity 1 1 68%
- 建立 Cloud Storage bucket,並將指令產生的輸出內容
docai_outputs.txt 上傳至 bucket。
# Create a bucket
export PROJECT_ID=$(gcloud config get-value project)
gsutil mb gs://$PROJECT_ID-docai
# Create and upload the file
python3 extraction.py > docai_outputs.txt
gsutil cp docai_outputs.txt gs://$PROJECT_ID-docai
建立 Cloud Storage bucket,並上傳輸出檔案
試用其他專用處理器 (如有需要)
您成功運用 Document AI for procurement 將文件分類,並剖析應付憑據。Document AI 也支援下列其他專用解決方案:
您可以按照同樣的程序、使用相同的程式碼,來操作任何專用處理器。
如要試用其他專用解決方案,您可以重新執行實驗室,改用其他處理器類型和專用範例文件。
注意:部分身分證明文件、貸款文件和合約處理器目前設有存取限制。如果貴公司有特定用途欲使用這類處理器,請先填寫並提交適當的申請表單。
範例文件
您可以利用下列範例文件,試用其他專用處理器。
如需其他範例文件和處理器輸出內容,請參閱說明文件。
恭喜!
恭喜!您成功運用 Document AI 剖析應付憑據,也學到如何透過 Python 用戶端程式庫呼叫 Document AI API。
後續步驟/瞭解詳情
如要進一步瞭解 Document AI 和 Python 用戶端程式庫,請參閱下列資源:
Google Cloud 教育訓練與認證
協助您瞭解如何充分運用 Google Cloud 的技術。我們的課程會介紹專業技能和最佳做法,讓您可以快速掌握要領並持續進修。我們提供從基本到進階等級的訓練課程,並有隨選、線上和虛擬課程等選項,方便您抽空參加。認證可協助您驗證及證明自己在 Google Cloud 技術方面的技能和專業知識。
使用手冊上次更新日期:2024 年 11 月 7 日
實驗室上次測試日期:2024 年 11 月 7 日
Copyright 2026 Google LLC 保留所有權利。Google 和 Google 標誌是 Google LLC 的商標,其他公司和產品名稱則有可能是其關聯公司的商標。


