Vertex AI is now Gemini Enterprise Agent Platform! We are currently updating our content to reflect this change. Please bear with us if you encounter naming inconsistencies during this transition.
Google Cloud 콘솔에서 기술 적용
체크포인트
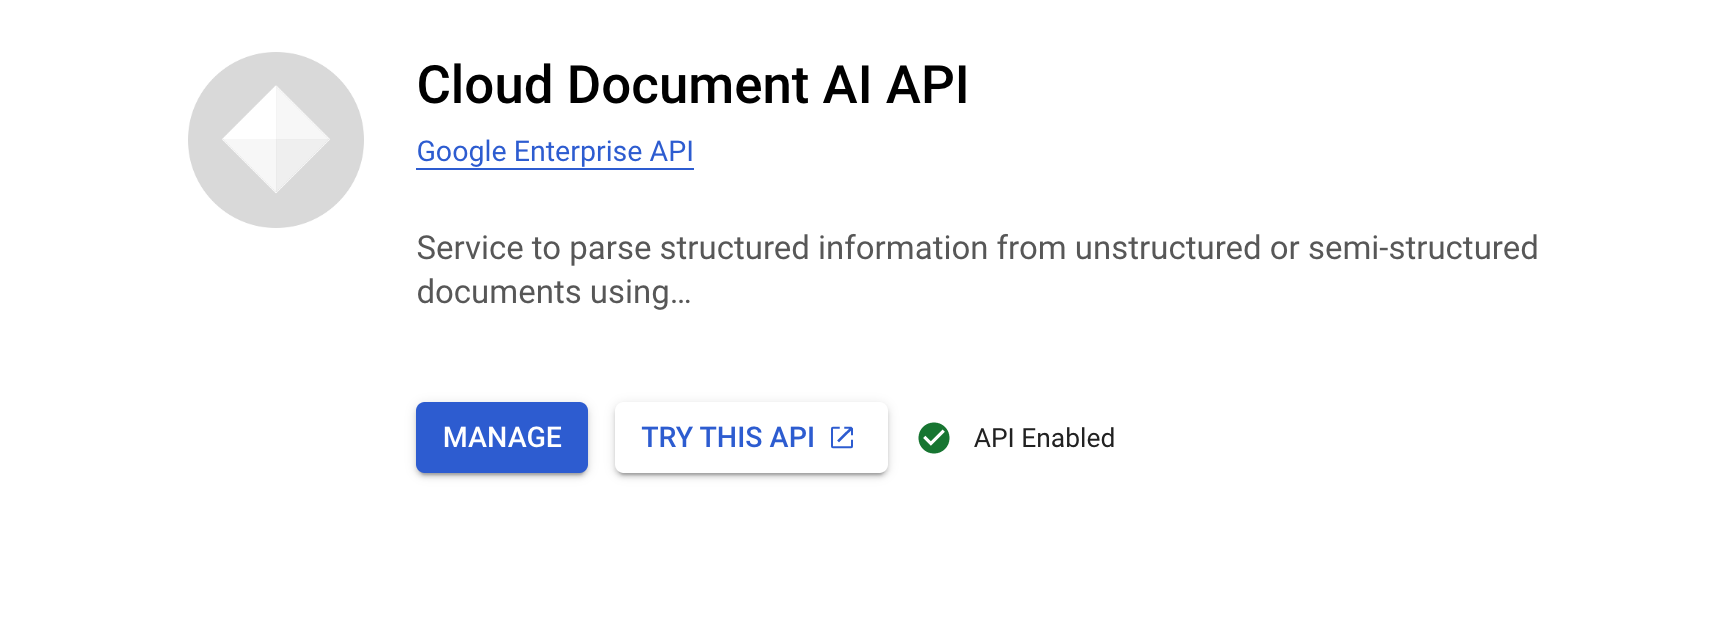
Enable the Document AI API
내 진행 상황 확인하기
/ 10
Create a processor
내 진행 상황 확인하기
/ 20
Authenticate API requests
내 진행 상황 확인하기
/ 30
Make a batch processing request
내 진행 상황 확인하기
/ 20
Make a batch processing request for a directory
내 진행 상황 확인하기
/ 20
실습 설정 안내 및 요구사항
계정과 진행 상황을 보호하세요. 이 실습을 실행하려면 항상 시크릿 브라우저 창과 실습 사용자 인증 정보를 사용하세요.
Document AI를 사용한 광학 문자 인식(OCR)(Python)
실습
25분
universal_currency_alt
크레딧 5개
show_chart
중급
내 진행 상황 확인하기를 클릭하여 목표를 확인합니다.
Document AI API 사용 설정
작업 2. 프로세서 만들기 및 테스트
먼저 추출을 수행할 문서 OCR 프로세서의 인스턴스를 만들어야 합니다. Cloud 콘솔 또는 Processor Management API를 사용하여 이 작업을 완료할 수 있습니다.
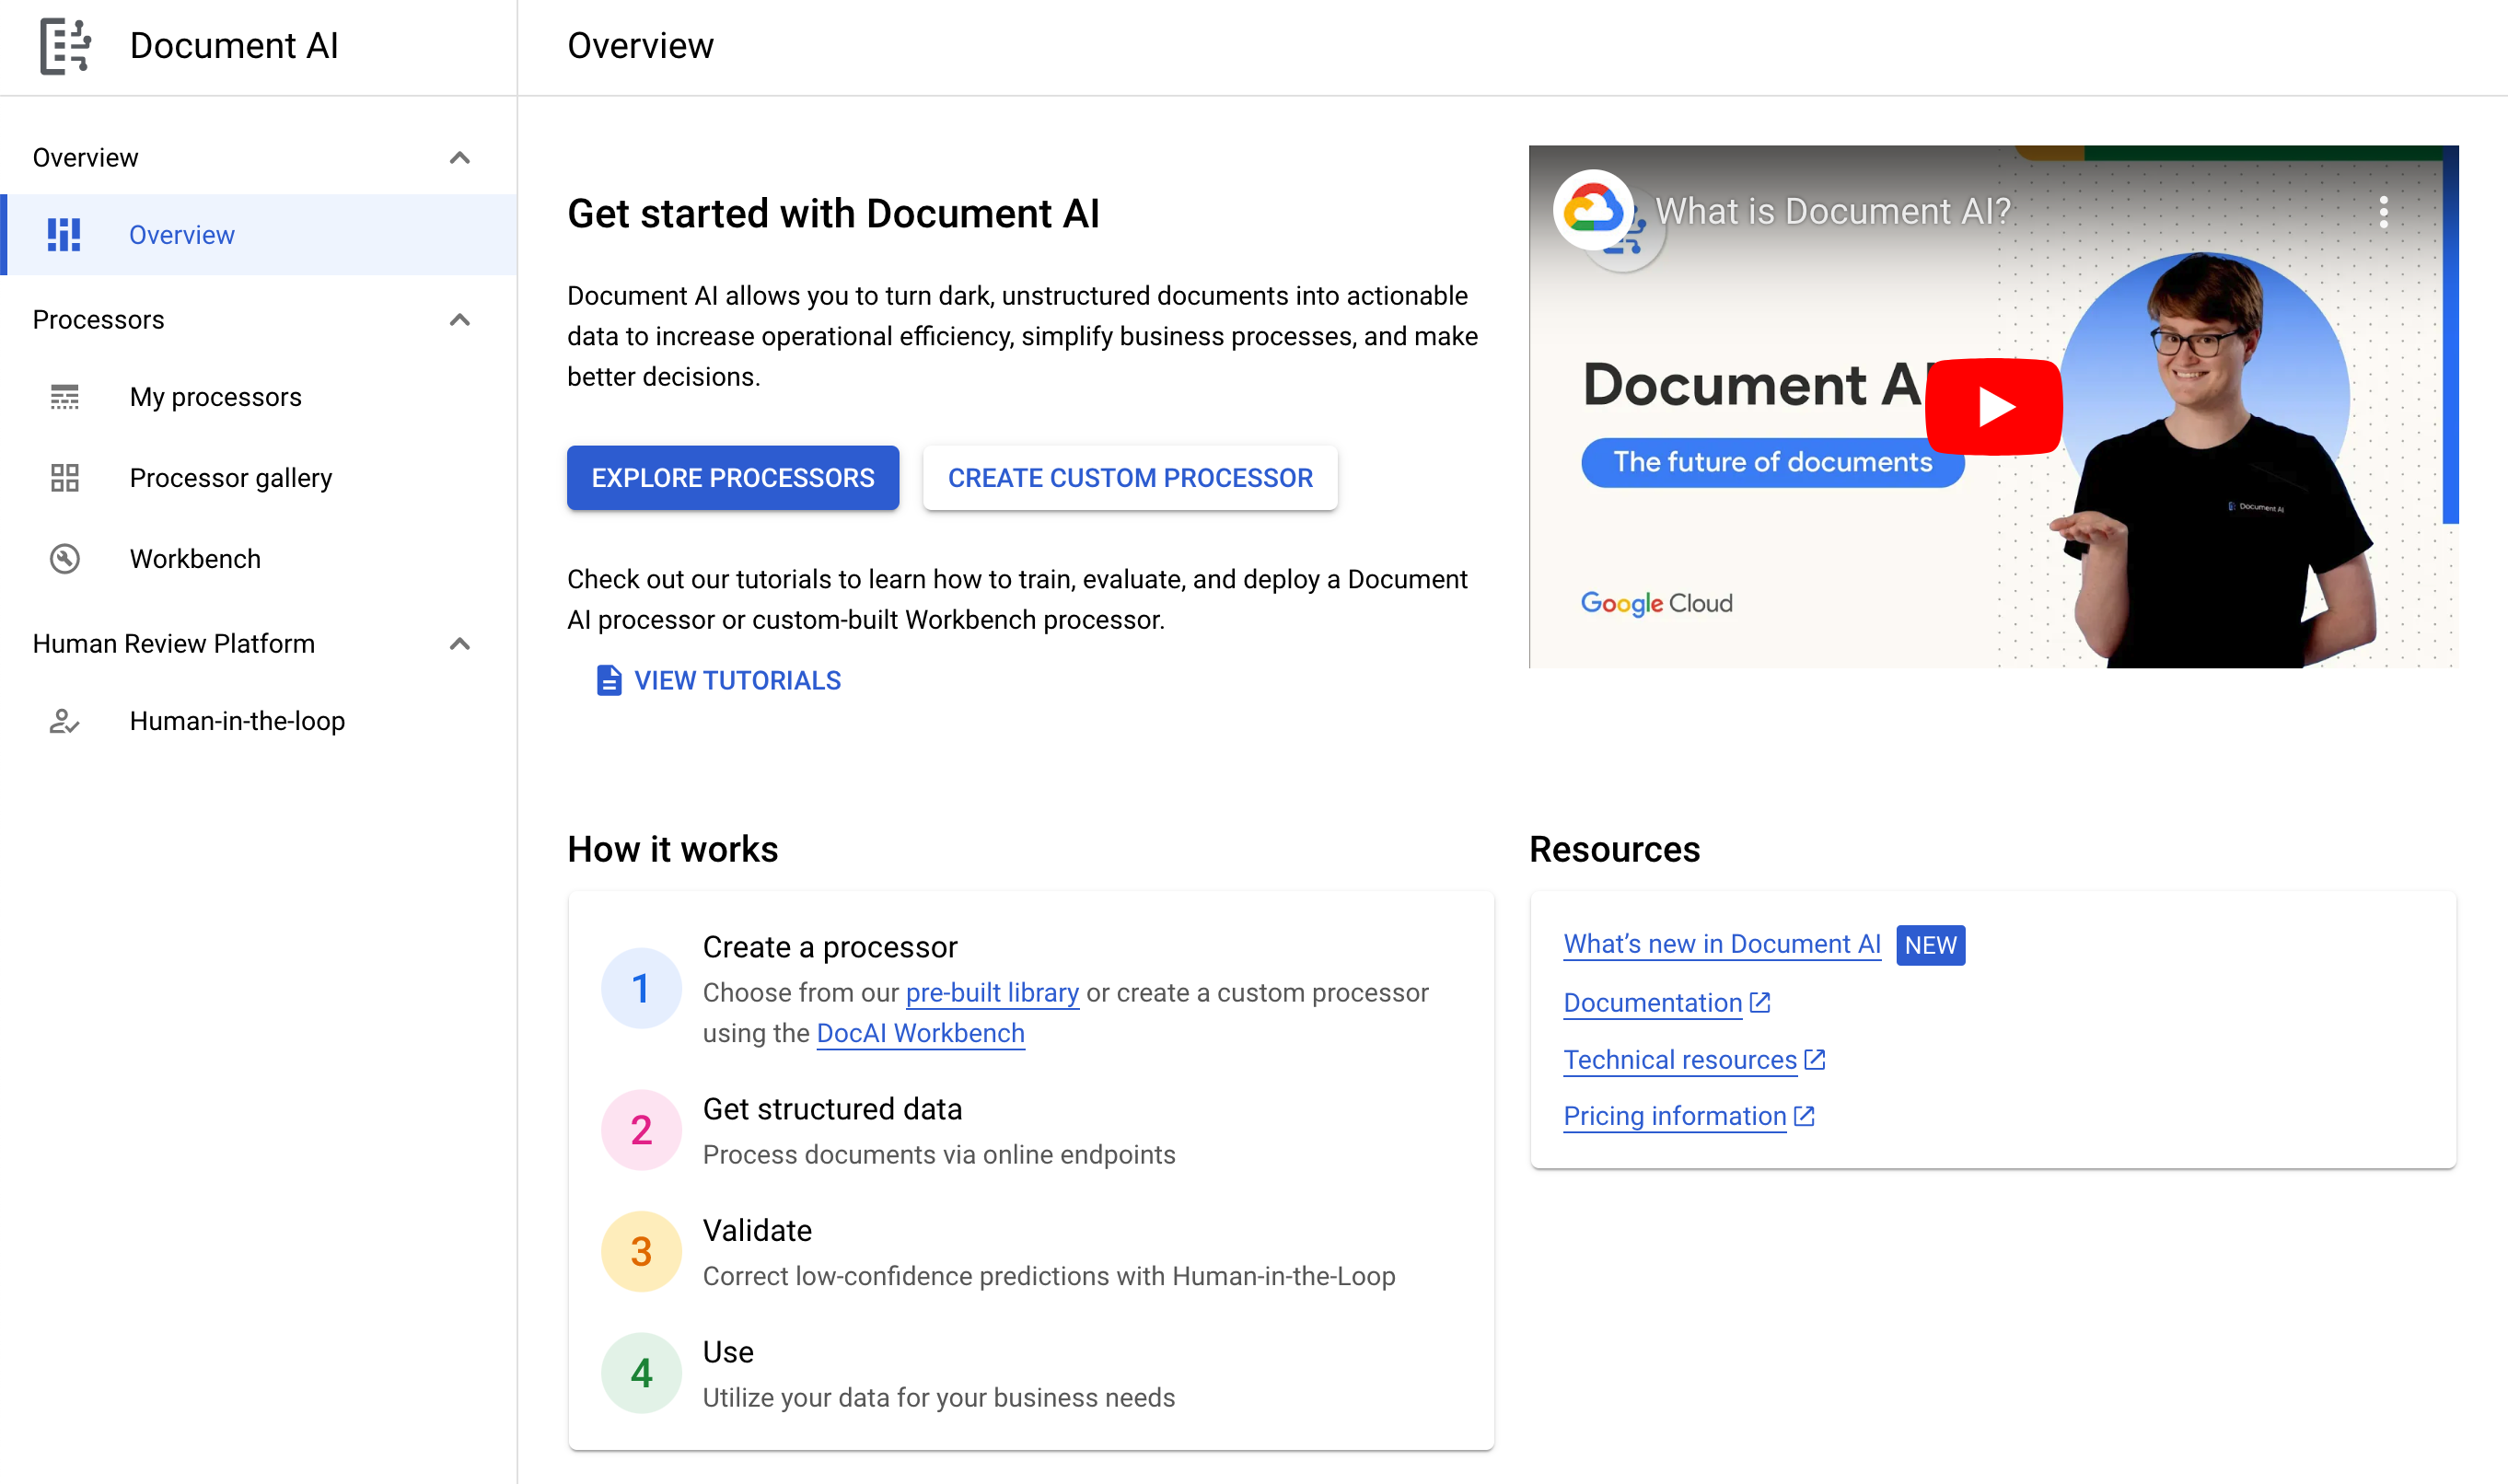
탐색 메뉴에서 모든 제품 보기를 클릭합니다. 인공지능에서 Document AI를 선택합니다.
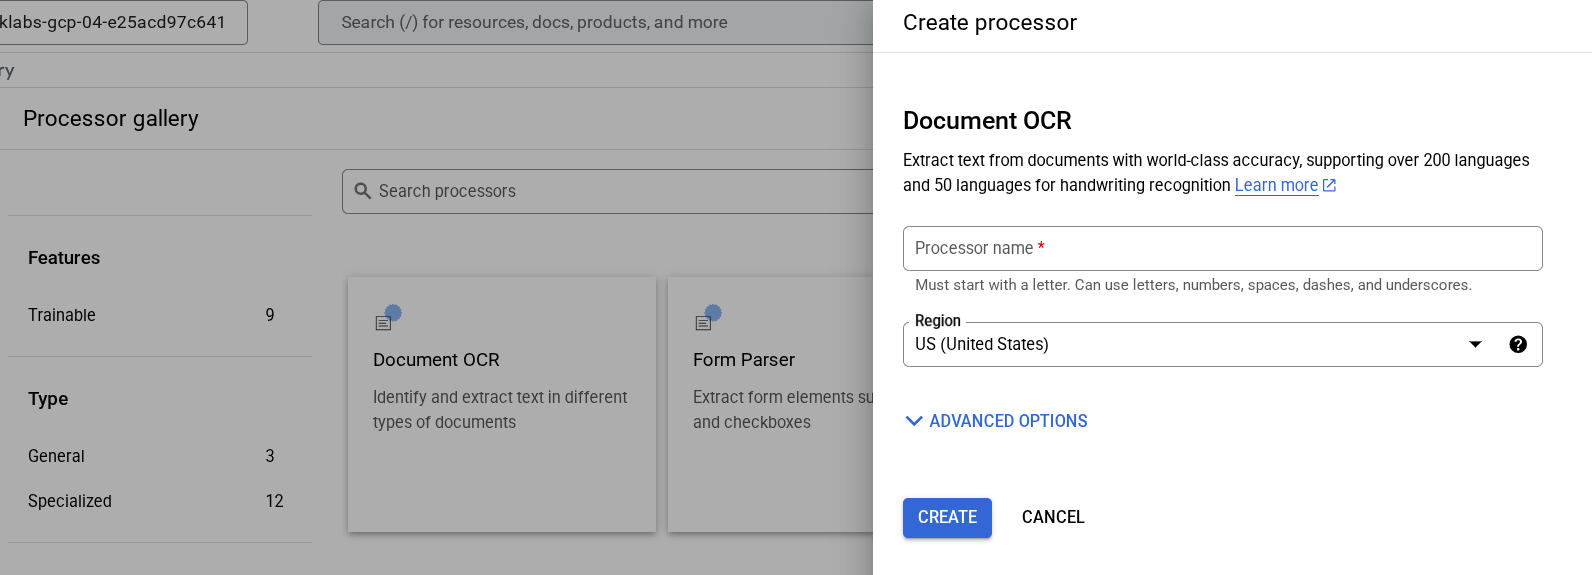
프로세서 살펴보기를 클릭하고 문서 OCR을 클릭합니다.
이름을 lab-ocr로 지정하고 목록에서 가장 가까운 리전을 선택합니다.
만들기를 클릭하여 프로세서를 만듭니다.
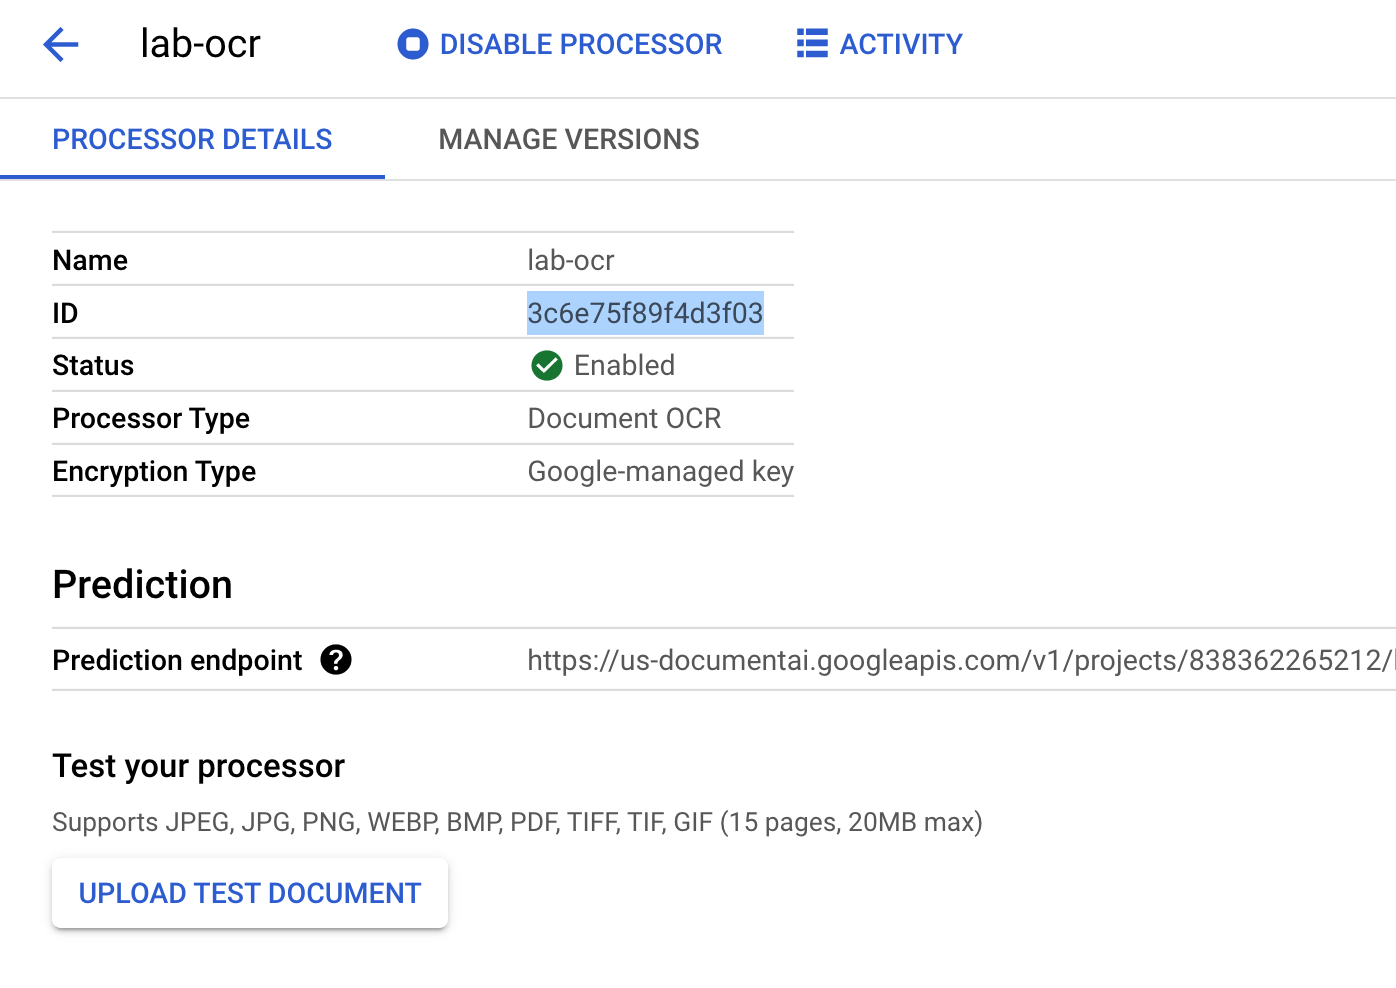
프로세서 ID를 복사합니다. 나중에 코드에서 이 ID를 사용해야 합니다.
아래에서 A.A. 밀른의 소설 '곰돌이 푸'의 처음 세 페이지를 포함하는 PDF 파일을 다운로드하세요.
이제 콘솔에서 문서를 업로드하여 프로세서를 테스트할 수 있습니다.
테스트 문서 업로드를 클릭하고 다운로드한 PDF 파일을 선택합니다.
출력은 다음과 같이 표시됩니다.
내 진행 상황 확인하기를 클릭하여 목표를 확인합니다.
프로세서 만들기 및 테스트
작업 3. API 요청 인증
Document AI API에 요청을 수행하려면 서비스 계정을 사용해야 합니다. 서비스 계정은 프로젝트에 속하며 Python 클라이언트 라이브러리에서 API 요청을 수행하는 데 사용합니다. 다른 사용자 계정과 마찬가지로 서비스 계정은 이메일 주소로 표현됩니다. 이 섹션에서는 Cloud SDK를 사용하여 서비스 계정을 만든 후 서비스 계정으로 인증하는 데 필요한 사용자 인증 정보를 만듭니다.
먼저 새 Cloud Shell 창을 열고 다음 명령어를 실행하여 프로젝트 ID로 환경 변수를 설정합니다.
이 단계에서는 온라인 처리(동기식) API를 사용하여 소설의 처음 세 페이지를 처리합니다. 이 방법은 로컬에 저장된 크기가 작은 문서에 가장 적합합니다. 각 프로세서 유형의 최대 페이지 수와 파일 크기는 전체 프로세서 목록을 참조하세요.
Cloud Shell에서 online_processing.py라는 파일을 만들고 다음 코드를 붙여넣습니다.
from google.api_core.client_options import ClientOptions
from google.cloud import documentai_v1 as documentai
PROJECT_ID = "YOUR_PROJECT_ID"
LOCATION = "YOUR_PROJECT_LOCATION" # Format is 'us' or 'eu'
PROCESSOR_ID = "YOUR_PROCESSOR_ID" # Create processor in Cloud Console
# The local file in your current working directory
FILE_PATH = "Winnie_the_Pooh_3_Pages.pdf"
# Refer to https://cloud.google.com/document-ai/docs/file-types
# for supported file types
MIME_TYPE = "application/pdf"
# Instantiates a client
docai_client = documentai.DocumentProcessorServiceClient(
client_options=ClientOptions(api_endpoint=f"{LOCATION}-documentai.googleapis.com")
)
# The full resource name of the processor, e.g.:
# projects/project-id/locations/location/processor/processor-id
# You must create new processors in the Cloud Console first
RESOURCE_NAME = docai_client.processor_path(PROJECT_ID, LOCATION, PROCESSOR_ID)
# Read the file into memory
with open(FILE_PATH, "rb") as image:
image_content = image.read()
# Load Binary Data into Document AI RawDocument Object
raw_document = documentai.RawDocument(content=image_content, mime_type=MIME_TYPE)
# Configure the process request
request = documentai.ProcessRequest(name=RESOURCE_NAME, raw_document=raw_document)
# Use the Document AI client to process the sample form
result = docai_client.process_document(request=request)
document_object = result.document
print("Document processing complete.")
print(f"Text: {document_object.text}")
YOUR_PROJECT_ID, YOUR_PROJECT_LOCATION, YOUR_PROCESSOR_ID, FILE_PATH를 환경에 적합한 값으로 바꿉니다.
참고:FILE_PATH는 이전 단계에서 Cloud Shell에 업로드한 파일의 이름입니다. 파일 이름을 바꾸지 않았다면 기본값인 Winnie_the_Pooh_3_Pages.pdf로 되어 있으며 변경할 필요가 없습니다.
코드를 실행하여 텍스트를 추출하고 콘솔에 출력합니다.
python3 online_processing.py
다음과 같은 출력이 표시됩니다.
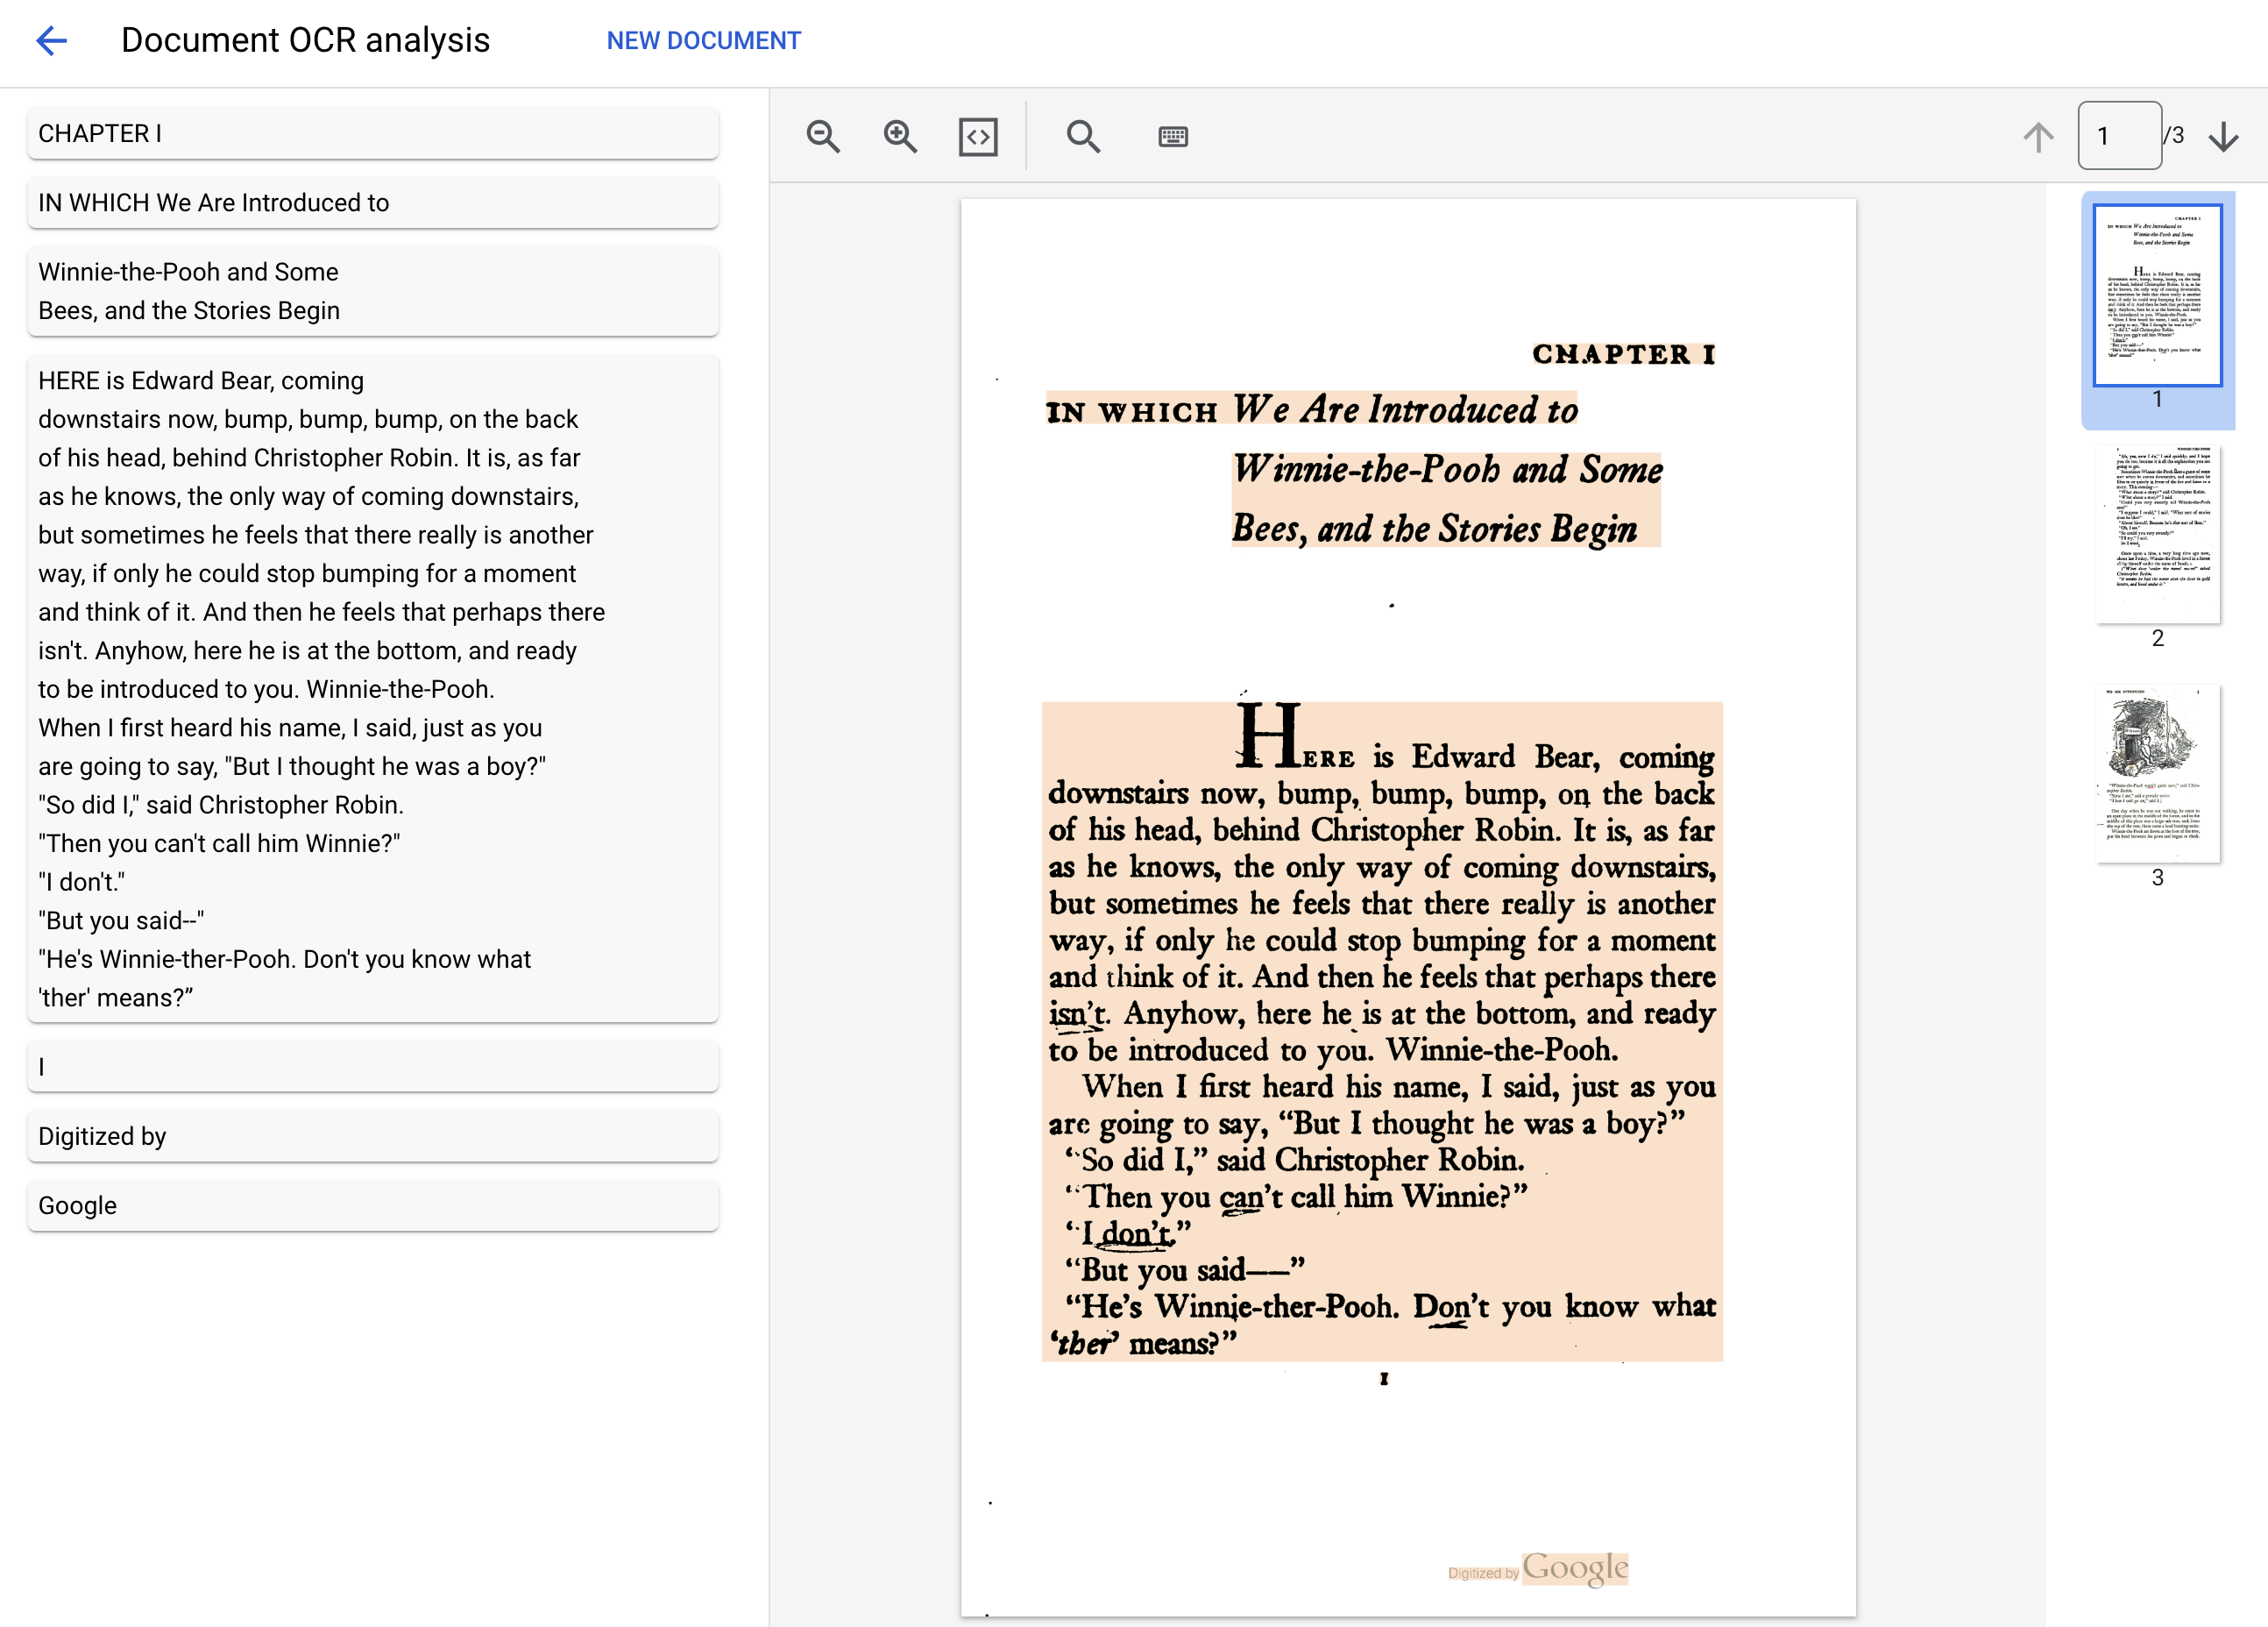
Document processing complete.
Text: IN WHICH We Are Introduced to
CHAPTER I
Winnie-the-Pooh and Some
Bees, and the Stories Begin
HERE is Edward Bear, coming
downstairs now, bump, bump, bump, on the back
of his head, behind Christopher Robin. It is, as far
as he knows, the only way of coming downstairs,
but sometimes he feels that there really is another
way, if only he could stop bumping for a moment
and think of it. And then he feels that perhaps there
isn't. Anyhow, here he is at the bottom, and ready
to be introduced to you. Winnie-the-Pooh.
When I first heard his name, I said, just as you
are going to say, "But I thought he was a boy?"
"So did I," said Christopher Robin.
"Then you can't call him Winnie?"
"I don't."
"But you said--"
...
작업 6. 일괄 처리 요청
이번에는 소설 전체의 텍스트를 읽고 싶다고 가정해 보겠습니다.
온라인 처리에는 전송 가능한 페이지 수와 파일 크기에 제한이 있으며 API 호출당 문서 파일 하나만 허용됩니다.
일괄 처리를 사용하면 큰 파일이나 여러 파일을 비동기식으로 처리할 수 있습니다.
이 섹션에서는 Document AI Batch Processing API를 사용하여 '곰돌이 푸' 소설 전체를 처리하고 텍스트를 Google Cloud Storage 버킷으로 출력합니다.
일괄 처리에서는 장기 실행 작업을 사용하여 비동기식으로 요청을 관리하므로, 온라인 처리와는 다른 방식으로 요청을 수행하고 출력을 검색해야 합니다.
그러나 온라인 처리를 사용하거나 일괄 처리를 사용하거나 출력은 동일한 Document 객체 형식입니다.
이 섹션에서는 Document AI에서 처리할 특정 문서를 제공하는 방법을 보여줍니다. 이후 섹션에서는 전체 문서 디렉터리를 처리하는 방법을 보여줍니다.
import re
from typing import List
from google.api_core.client_options import ClientOptions
from google.cloud import documentai_v1 as documentai
from google.cloud import storage
PROJECT_ID = "YOUR_PROJECT_ID"
LOCATION = "YOUR_PROJECT_LOCATION" # Format is 'us' or 'eu'
PROCESSOR_ID = "YOUR_PROCESSOR_ID" # Create processor in Cloud Console
# Format 'gs://input_bucket/directory/file.pdf'
GCS_INPUT_URI = "gs://cloud-samples-data/documentai/codelabs/ocr/Winnie_the_Pooh.pdf"
INPUT_MIME_TYPE = "application/pdf"
# Format 'gs://output_bucket/directory'
GCS_OUTPUT_URI = "YOUR_OUTPUT_BUCKET_URI"
# Instantiates a client
docai_client = documentai.DocumentProcessorServiceClient(
client_options=ClientOptions(api_endpoint=f"{LOCATION}-documentai.googleapis.com")
)
# The full resource name of the processor, e.g.:
# projects/project-id/locations/location/processor/processor-id
# You must create new processors in the Cloud Console first
RESOURCE_NAME = docai_client.processor_path(PROJECT_ID, LOCATION, PROCESSOR_ID)
# Cloud Storage URI for the Input Document
input_document = documentai.GcsDocument(
gcs_uri=GCS_INPUT_URI, mime_type=INPUT_MIME_TYPE
)
# Load GCS Input URI into a List of document files
input_config = documentai.BatchDocumentsInputConfig(
gcs_documents=documentai.GcsDocuments(documents=[input_document])
)
# Cloud Storage URI for Output directory
gcs_output_config = documentai.DocumentOutputConfig.GcsOutputConfig(
gcs_uri=GCS_OUTPUT_URI
)
# Load GCS Output URI into OutputConfig object
output_config = documentai.DocumentOutputConfig(gcs_output_config=gcs_output_config)
# Configure Process Request
request = documentai.BatchProcessRequest(
name=RESOURCE_NAME,
input_documents=input_config,
document_output_config=output_config,
)
# Batch Process returns a Long Running Operation (LRO)
operation = docai_client.batch_process_documents(request)
# Continually polls the operation until it is complete.
# This could take some time for larger files
# Format: projects/PROJECT_NUMBER/locations/LOCATION/operations/OPERATION_ID
print(f"Waiting for operation {operation.operation.name} to complete...")
operation.result()
# NOTE: Can also use callbacks for asynchronous processing
#
# def my_callback(future):
# result = future.result()
#
# operation.add_done_callback(my_callback)
print("Document processing complete.")
# Once the operation is complete,
# get output document information from operation metadata
metadata = documentai.BatchProcessMetadata(operation.metadata)
if metadata.state != documentai.BatchProcessMetadata.State.SUCCEEDED:
raise ValueError(f"Batch Process Failed: {metadata.state_message}")
documents: List[documentai.Document] = []
# Storage Client to retrieve the output files from GCS
storage_client = storage.Client()
# One process per Input Document
for process in metadata.individual_process_statuses:
# output_gcs_destination format: gs://BUCKET/PREFIX/OPERATION_NUMBER/0
# The GCS API requires the bucket name and URI prefix separately
output_bucket, output_prefix = re.match(
r"gs://(.*?)/(.*)", process.output_gcs_destination
).groups()
# Get List of Document Objects from the Output Bucket
output_blobs = storage_client.list_blobs(output_bucket, prefix=output_prefix)
# DocAI may output multiple JSON files per source file
for blob in output_blobs:
# Document AI should only output JSON files to GCS
if ".json" not in blob.name:
print(f"Skipping non-supported file type {blob.name}")
continue
print(f"Fetching {blob.name}")
# Download JSON File and Convert to Document Object
document = documentai.Document.from_json(
blob.download_as_bytes(), ignore_unknown_fields=True
)
documents.append(document)
# Print Text from all documents
# Truncated at 100 characters for brevity
for document in documents:
print(document.text[:100])
YOUR_PROJECT_ID, YOUR_PROJECT_LOCATION, YOUR_PROCESSOR_ID, GCS_INPUT_URI, GCS_OUTPUT_URI를 환경에 적합한 값으로 바꿉니다.
GCS_INPUT_URI의 경우 이전 단계에서 버킷에 업로드한 파일의 URI(예: gs:///Winnie_the_Pooh.pdf)를 사용합니다.
GCS_OUTPUT_URI의 경우 이전 단계에서 만든 버킷의 URI(예: gs://)를 사용합니다.
코드를 실행하면 전체 소설 텍스트가 추출되어 콘솔에 출력되어야 합니다.
python3 batch_processing.py
참고: 이전 예시보다 파일이 훨씬 크므로 완료되는 데 다소 시간이 걸릴 수 있습니다. 그러나 Batch Processing API는 작업이 완료된 후 Cloud Storage에서 출력을 가져오는 데 사용할 수 있는 작업 ID를 제공합니다.
다음과 비슷한 결과가 출력됩니다.
Document processing complete.
Fetching 16218185426403815298/0/Winnie_the_Pooh-0.json
Fetching 16218185426403815298/0/Winnie_the_Pooh-1.json
Fetching 16218185426403815298/0/Winnie_the_Pooh-10.json
Fetching 16218185426403815298/0/Winnie_the_Pooh-11.json
Fetching 16218185426403815298/0/Winnie_the_Pooh-12.json
Fetching 16218185426403815298/0/Winnie_the_Pooh-13.json
Fetching 16218185426403815298/0/Winnie_the_Pooh-14.json
Fetching 16218185426403815298/0/Winnie_the_Pooh-15.json
..
This is a reproduction of a library book that was digitized
by Google as part of an ongoing effort t
0
TAM MTAA
Digitized by
Google
Introduction
(I₂
F YOU happen to have read another
book about Christo
84
Eeyore took down his right hoof from his right
ear, turned round, and with great difficulty put u
94
..
좋습니다. 이제 Document AI Batch Processing API를 사용하여 PDF 파일에서 텍스트를 추출했습니다.
내 진행 상황 확인하기를 클릭하여 목표를 확인합니다.
일괄 처리 요청
작업 7. 디렉터리 일괄 처리 요청
각 문서를 개별적으로 나열하지 않고 문서 디렉터리 전체를 처리해야 하는 경우도 있습니다. batch_process_documents() 메서드는 특정 문서 목록이나 디렉터리 경로를 입력하는 방법을 지원합니다.
이 섹션에서는 문서 파일의 전체 디렉터리를 처리하는 방법을 알아봅니다. 대부분의 코드는 이전 단계와 동일하며 BatchProcessRequest와 함께 전송하는 GCS URI만 다릅니다.
다음 명령어를 실행하여 샘플 디렉터리(소설의 여러 페이지를 별도의 파일로 포함)를 Cloud Storage 버킷에 복사합니다.
파일을 직접 읽을 수도 있고 자체 Cloud Storage 버킷으로 복사할 수도 있습니다.
batch_processing_directory.py라는 파일을 만들고 다음 코드를 붙여넣습니다.
import re
from typing import List
from google.api_core.client_options import ClientOptions
from google.cloud import documentai_v1 as documentai
from google.cloud import storage
PROJECT_ID = "YOUR_PROJECT_ID"
LOCATION = "YOUR_PROJECT_LOCATION" # Format is 'us' or 'eu'
PROCESSOR_ID = "YOUR_PROCESSOR_ID" # Create processor in Cloud Console
# Format 'gs://input_bucket/directory'
GCS_INPUT_PREFIX = "gs://cloud-samples-data/documentai/codelabs/ocr/multi-document"
# Format 'gs://output_bucket/directory'
GCS_OUTPUT_URI = "YOUR_OUTPUT_BUCKET_URI"
# Instantiates a client
docai_client = documentai.DocumentProcessorServiceClient(
client_options=ClientOptions(api_endpoint=f"{LOCATION}-documentai.googleapis.com")
)
# The full resource name of the processor, e.g.:
# projects/project-id/locations/location/processor/processor-id
# You must create new processors in the Cloud Console first
RESOURCE_NAME = docai_client.processor_path(PROJECT_ID, LOCATION, PROCESSOR_ID)
# Cloud Storage URI for the Input Directory
gcs_prefix = documentai.GcsPrefix(gcs_uri_prefix=GCS_INPUT_PREFIX)
# Load GCS Input URI into Batch Input Config
input_config = documentai.BatchDocumentsInputConfig(gcs_prefix=gcs_prefix)
# Cloud Storage URI for Output directory
gcs_output_config = documentai.DocumentOutputConfig.GcsOutputConfig(
gcs_uri=GCS_OUTPUT_URI
)
# Load GCS Output URI into OutputConfig object
output_config = documentai.DocumentOutputConfig(gcs_output_config=gcs_output_config)
# Configure Process Request
request = documentai.BatchProcessRequest(
name=RESOURCE_NAME,
input_documents=input_config,
document_output_config=output_config,
)
# Batch Process returns a Long Running Operation (LRO)
operation = docai_client.batch_process_documents(request)
# Continually polls the operation until it is complete.
# This could take some time for larger files
# Format: projects/PROJECT_NUMBER/locations/LOCATION/operations/OPERATION_ID
print(f"Waiting for operation {operation.operation.name} to complete...")
operation.result()
# NOTE: Can also use callbacks for asynchronous processing
#
# def my_callback(future):
# result = future.result()
#
# operation.add_done_callback(my_callback)
print("Document processing complete.")
# Once the operation is complete,
# get output document information from operation metadata
metadata = documentai.BatchProcessMetadata(operation.metadata)
if metadata.state != documentai.BatchProcessMetadata.State.SUCCEEDED:
raise ValueError(f"Batch Process Failed: {metadata.state_message}")
documents: List[documentai.Document] = []
# Storage Client to retrieve the output files from GCS
storage_client = storage.Client()
# One process per Input Document
for process in metadata.individual_process_statuses:
# output_gcs_destination format: gs://BUCKET/PREFIX/OPERATION_NUMBER/0
# The GCS API requires the bucket name and URI prefix separately
output_bucket, output_prefix = re.match(
r"gs://(.*?)/(.*)", process.output_gcs_destination
).groups()
# Get List of Document Objects from the Output Bucket
output_blobs = storage_client.list_blobs(output_bucket, prefix=output_prefix)
# DocAI may output multiple JSON files per source file
for blob in output_blobs:
# Document AI should only output JSON files to GCS
if ".json" not in blob.name:
print(f"Skipping non-supported file type {blob.name}")
continue
print(f"Fetching {blob.name}")
# Download JSON File and Convert to Document Object
document = documentai.Document.from_json(
blob.download_as_bytes(), ignore_unknown_fields=True
)
documents.append(document)
# Print Text from all documents
# Truncated at 100 characters for brevity
for document in documents:
print(document.text[:100])
PROJECT_ID, LOCATION, PROCESSOR_ID, GCS_INPUT_PREFIX, GCS_OUTPUT_URI를 환경에 적합한 값으로 바꿉니다.
GCS_INPUT_PREFIX의 경우 이전 섹션에서 버킷에 업로드한 디렉터리의 URI(예: gs:///multi-document)를 사용합니다.
GCS_OUTPUT_URI의 경우 이전 섹션에서 만든 버킷의 URI(예: gs://)를 사용합니다.
다음 명령어를 사용하여 코드를 실행하면 Cloud Storage 디렉터리의 모든 문서 파일에서 추출한 텍스트가 표시됩니다.
python3 batch_processing_directory.py
다음과 비슷한 결과가 출력됩니다.
Document processing complete.
Fetching 16354972755137859334/0/Winnie_the_Pooh_Page_0-0.json
Fetching 16354972755137859334/1/Winnie_the_Pooh_Page_1-0.json
Fetching 16354972755137859334/2/Winnie_the_Pooh_Page_10-0.json
..
Introduction
(I₂
F YOU happen to have read another
book about Christopher Robin, you may remember
th
IN WHICH We Are Introduced to
CHAPTER I
Winnie-the-Pooh and Some
Bees, and the Stories Begin
HERE is
..
좋습니다. Document AI Python 클라이언트 라이브러리를 사용하여 Document AI 프로세서를 통해 문서 디렉터리를 처리하고 결과를 Cloud Storage에 출력했습니다.
내 진행 상황 확인하기를 클릭하여 목표를 확인합니다.
디렉터리 일괄 처리 요청
수고하셨습니다
수고하셨습니다 이 실습에서는 Document AI Python 클라이언트 라이브러리를 사용하여 Document AI 프로세서로 문서 디렉터리를 처리하고 결과를 Cloud Storage에 출력하는 방법을 알아봤습니다. 서비스 계정 키 파일을 사용하여 API 요청을 인증하고, Document AI Python 클라이언트 라이브러리를 설치하고, 온라인(동기식) 및 일괄(비동기식) API를 사용하여 요청을 처리하는 방법도 알아봤습니다.
다음 단계/더 학습하기
Document AI 및 Python 클라이언트 라이브러리에 대해 자세히 알아보려면 다음 리소스를 확인하세요.
Google Cloud 기술을 최대한 활용하는 데 도움이 됩니다. Google 강의에는 빠른 습득과 지속적인 학습을 지원하는 기술적인 지식과 권장사항이 포함되어 있습니다. 기초에서 고급까지 수준별 학습을 제공하며 바쁜 일정에 알맞은 주문형, 실시간, 가상 옵션이 포함되어 있습니다. 인증은 Google Cloud 기술에 대한 역량과 전문성을 검증하고 입증하는 데 도움이 됩니다.
설명서 최종 업데이트: 2024년 6월 13일
실습 최종 테스트: 2024년 6월 13일
Copyright 2026 Google LLC. All rights reserved. Google 및 Google 로고는 Google LLC의 상표입니다. 기타 모든 회사명 및 제품명은 해당 업체의 상표일 수 있습니다.