Lab setup instructions and requirements
Protect your account and progress. Always use a private browser window and lab credentials to run this lab.

透過 Ops Agent 監控 Apache 網路伺服器

Lab 15 minutes universal_currency_alt 1 Credit show_chart Introductory
info This lab may incorporate AI tools to support your learning.
This content is not yet optimized for mobile devices.
For the best experience, please visit us on a desktop computer using a link sent by email.

GSP1108

Google Cloud 自學實驗室

總覽

在本實驗室中,您將使用 Cloud Monitoring 產生流量,並前往 Google Cloud 控制台,在預先定義的 Apache 資訊主頁查看指標。

Apache 網路伺服器整合功能會收集流量相關指標 (如公開連線數或傳入要求數),以及存取和錯誤記錄。存取記錄會剖析為 JSON 酬載,著重於要求詳細資料,錯誤記錄則會剖析為錯誤代碼和訊息。

目標

在本實驗室中,您將瞭解如何執行下列工作:

  • 建立 Compute Engine VM 執行個體。
  • 安裝 Apache 網路伺服器。
  • 為 Apache 網路伺服器安裝及設定 Ops Agent。
  • 產生流量,並在預先定義的 Apache 資訊主頁查看指標。
  • 建立警告政策。

工作 1:建立 Compute Engine VM 執行個體

  1. 在 Google Cloud 控制台,依序選取「導覽選單」圖示 >「Compute Engine」>「VM 執行個體」

  2. 點選「建立執行個體」,建立 VM 執行個體。

  3. 前往「機器設定」專區。

    選取下列值:

    屬性 值 (按照指示輸入值或選取選項)
    名稱 quickstart-vm
    可用區
    系列 E2
    機型 e2-small
  4. 點選「OS 和儲存空間」

    點選「變更」,開始設定開機磁碟:

    • 確保「開機磁碟」的設定值適用 Debian GNU/Linux 12 (Bookworm)

    點選「選取」

  5. 點選「網路」

    • 在「防火牆」欄位中,選取「允許 HTTP 流量」和「允許 HTTPS 流量」
  6. 點選「建立」。VM 準備就緒後,就會出現在「執行個體」分頁的執行個體清單中。

點選「Check my progress」確認目標已達成。

建立 Compute Engine VM 執行個體

工作 2:安裝 Apache 網路伺服器

請執行下列操作,在 Compute Engine VM 執行個體上部署 Apache 網路伺服器:

  1. 點選「SSH」按鈕,開啟執行個體的終端機。

  2. 執行下列指令,更新執行個體上的套件清單:

sudo apt-get update
  1. 安裝 Apache2 HTTP Server:
sudo apt-get install apache2 php7.0 注意:如果以上指令失敗,請改用 sudo apt-get install apache2 php。如果系統詢問是否繼續安裝,請輸入 Y
  1. 複製 VM 執行個體「外部 IP」欄中的位址。
  2. 開啟瀏覽器,透過 
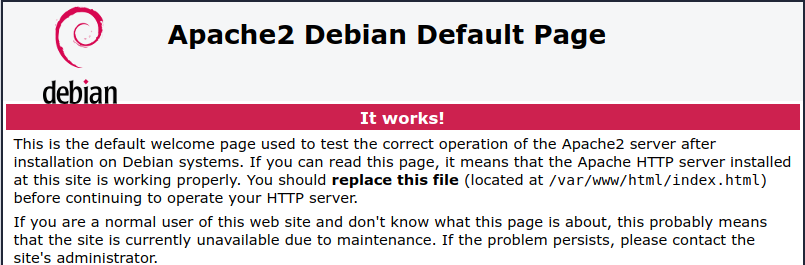
http://EXTERNAL_IP 網址連線至 Apache2 HTTP Server,其中的 EXTERNAL_IP 是您的 VM 外部 IP 位址。

Apache2 訊息:It works!

注意:如果彈出式視窗顯示「EXTERNAL_IP 不支援安全連線」,請點選「繼續造訪網站」

點選「Check my progress」確認目標已達成。

安裝 Apache 網路伺服器

工作 3:安裝及設定 Ops Agent

下列指令會建立設定,收集及擷取 Apache 網路伺服器的遙測資料,並透過終端機重新啟動 Ops Agent

  1. 在 SSH 視窗中,執行下列指令來安裝 Ops Agent:
curl -sSO https://dl.google.com/cloudagents/add-google-cloud-ops-agent-repo.sh sudo bash add-google-cloud-ops-agent-repo.sh --also-install

您應該會看到 google-cloud-ops-agent 安裝成功的訊息。

  1. 接著要建立設定,收集及擷取 Apache 網路伺服器中的記錄和指標。請詳閱註解,瞭解各項指令的作用:
# Configures Ops Agent to collect telemetry from the app and restart Ops Agent. set -e # Create a back up of the existing file so existing configurations are not lost. sudo cp /etc/google-cloud-ops-agent/config.yaml /etc/google-cloud-ops-agent/config.yaml.bak # Configure the Ops Agent. sudo tee /etc/google-cloud-ops-agent/config.yaml > /dev/null << EOF metrics: receivers: apache: type: apache service: pipelines: apache: receivers: - apache logging: receivers: apache_access: type: apache_access apache_error: type: apache_error service: pipelines: apache: receivers: - apache_access - apache_error EOF sudo service google-cloud-ops-agent restart sleep 60

要進一步瞭解如何擷取 Apache 網路伺服器中的記錄,請參閱「針對 Apache 網路伺服器設定 Ops Agent」一節。

點選「Check my progress」確認目標已達成。

安裝 Ops Agent

工作 4:產生流量及查看指標

您可以透過 Monitoring 資訊主頁查看及分析服務的相關指標。在本實驗室中,您將在 Apache 網路伺服器產生指標,並在自動建立的「Apache 總覽」資訊主頁上查看指標資料。

  • 透過執行個體的 SSH 視窗執行下列指令,在 Apache 網路伺服器上產生流量:
timeout 120 bash -c -- 'while true; do curl localhost; sleep $((RANDOM % 4)) ; done'

以上指令每四秒就會向 Apache 網路伺服器發出要求,藉此產生流量。

請按照下列步驟操作,查看「Apache 總覽」資訊主頁:

  1. 在控制台頂端的搜尋列搜尋「Monitoring」,然後前往「Monitoring」服務。

  2. 在導覽窗格,選取「資訊主頁」

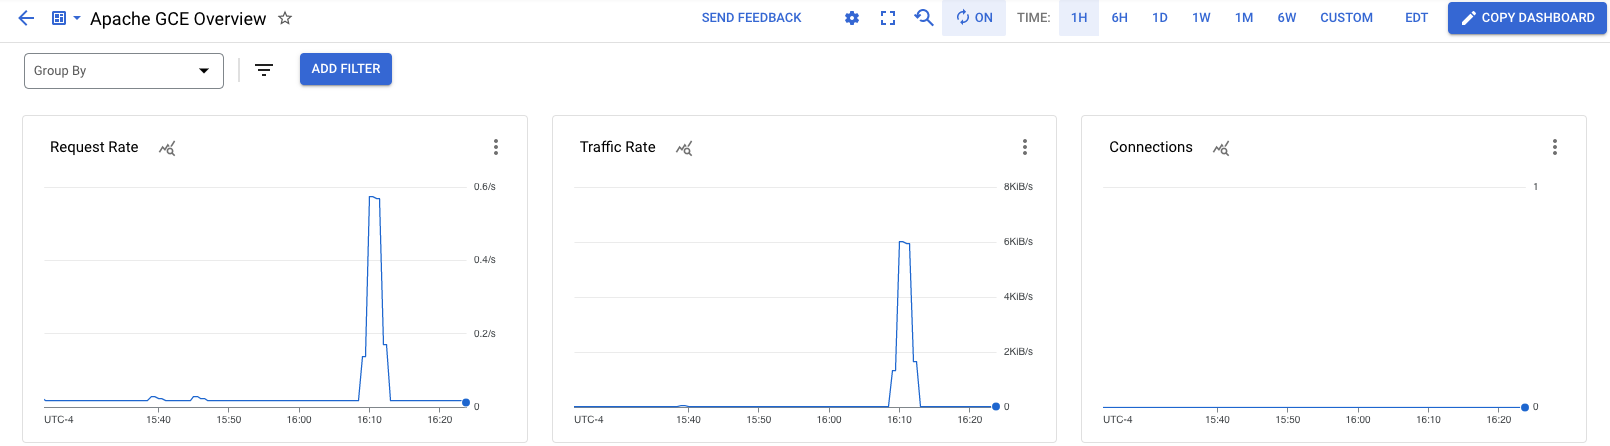
  3. 在「所有資訊主頁」窗格中,選取「Apache 總覽」資訊主頁。系統會開啟「Apache GCE 總覽」資訊主頁。

資訊主頁中有多個圖表,顯示 Apache 和 Compute Engine 整合的相關資訊:

Apache 資訊主頁

工作 5:建立警告政策

警告政策會指示 Cloud Monitoring 在發生指定情況時通知您。

  1. 按照下列步驟操作,設定電子郵件通知管道:

    • 在 Google Cloud 控制台,依序選取「導覽選單」圖示 >「Monitoring」>「警告」,然後點選「Edit notification channels」
    • 向下捲動頁面,在「電子郵件」部分點選「新增」
    • 為電子郵件管道命名您可以存取的電子郵件地址
    • 輸入顯示名稱
    • 點選「儲存」
注意:如果輸入自己的電子郵件地址,您可能會持續收到警告,直到專案中的資源全都刪除為止。

請按照下列步驟操作,建立警告政策來監控指標,並在 Apache 網路伺服器的流量速率超過每秒 4 KiB時傳送電子郵件通知:

  1. 在 Google Cloud 控制台,依序選取「導覽選單」圖示 >「Monitoring」>「警告」,然後點選「建立政策」

  2. 選取要監控的時間序列:

    • 點選「選取指標」,然後在篩選列中輸入「VM 執行個體」
    • 在「使用中的指標類別」清單中,選取「Apache」
    • 在「使用中的指標」清單中,選取「workload/apache.traffic」。點選「套用」

系統就會顯示 Apache 流量圖表。

  1. 在「轉換資料」專區,選取下列值並點選「下一步」

    • 「滾動週期」1 分鐘
    • 「滾動週期函式」rate
  2. 在「Configure alert trigger」專區,選取下列值並點選「下一步」

    • 「Alert trigger」時間序列不符合條件時
    • 「門檻位置」高於門檻
    • 門檻值4000
  3. 在「Configure notifications and finalize alert」專區,選取下列值:

    • 「通知管道」:選取先前建立的顯示名稱,然後點選「確定」
    • 「事件自動關閉期限」30 分鐘
    • 「Name the alert policy」Apache traffic above threshold
  4. 點選「建立政策」。警告政策此時便會生效。

點選「Check my progress」確認目標已達成。

建立警告政策

工作 6:測試警告政策

請按照下列步驟操作,測試剛建立的警告政策:

  1. 在控制台,依序選取「導覽選單」圖示 >「Compute Engine」

  2. 在「連線」欄點選「SSH」,開啟 VM 執行個體的終端機。

  3. 在終端機輸入下列指令:

timeout 120 bash -c -- 'while true; do curl localhost; sleep $((RANDOM % 4)) ; done'

以上指令會在 Apache 網路伺服器中產生流量。

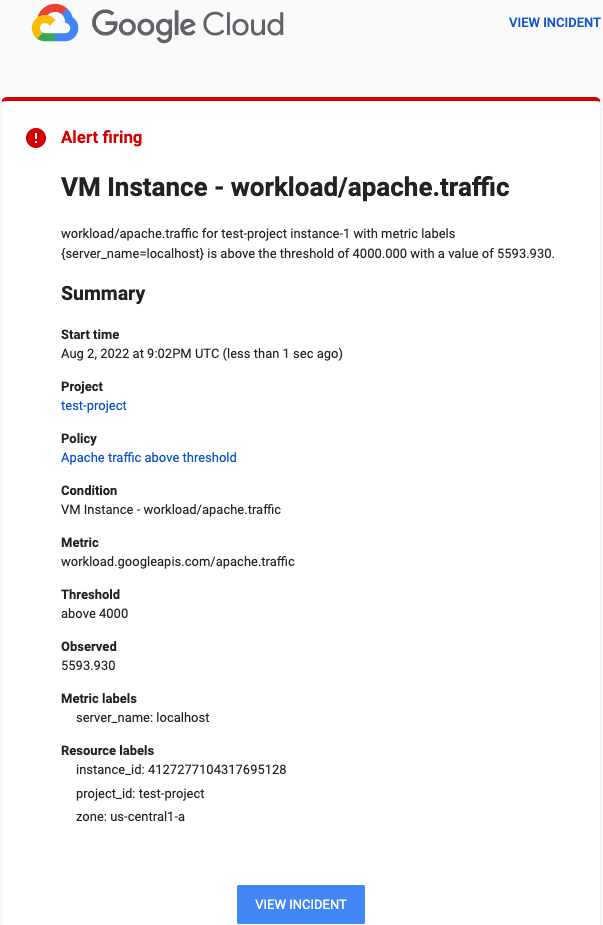
如果 Apache 網路伺服器的流量速率超過門檻值 (每秒 4 KiB),系統就會傳送電子郵件通知。這項程序可能需要幾分鐘才會完成。

您收到的電子郵件通知看起來會像下圖這樣:

警告通知

恭喜!

在本實驗室中,您已學會如何在 VM 上安裝 Ops Agent,並透過該工具設定警告政策,在執行個體發生潛在問題時通知指定收件者。

使用手冊上次更新日期:2025 年 9 月 16 日

實驗室上次測試日期:2025 年 9 月 16 日

Copyright 2026 Google LLC 保留所有權利。Google 和 Google 標誌是 Google LLC 的商標,其他公司和產品名稱則有可能是其關聯公司的商標。

Before you begin

  1. Labs create a Google Cloud project and resources for a fixed time
  2. Labs have a time limit and no pause feature. If you end the lab, you'll have to restart from the beginning.
  3. On the top left of your screen, click Start lab to begin

Use private browsing

  1. Copy the provided Username and Password for the lab
  2. Click Open console in private mode

Sign in to the Console

  1. Sign in using your lab credentials. Using other credentials might cause errors or incur charges.
  2. Accept the terms, and skip the recovery resource page
  3. Don't click End lab unless you've finished the lab or want to restart it, as it will clear your work and remove the project

This content is not currently available

We will notify you via email when it becomes available

Great!

We will contact you via email if it becomes available

One lab at a time

Confirm to end all existing labs and start this one

Use private browsing to run the lab

Using an Incognito or private browser window is the best way to run this lab. This prevents any conflicts between your personal account and the Student account, which may cause extra charges incurred to your personal account.