Este contenido aún no está optimizado para dispositivos móviles.
Para obtener la mejor experiencia, visítanos en una computadora de escritorio con un vínculo que te enviaremos por correo electrónico.
Overview
Duration is 1 min
In this notebook, we will implement text models to recognize the probable source (Github, Tech-Crunch, or The New-York Times) of the titles we have in the title dataset we constructed a related AutoML processed lab.
Learning objectives
In this lab, you will:
Learn how to tokenize and integerize a corpus of text for training in Keras
Learn how to do one-hot-encodings in Keras
Learn how to use embedding layers to represent words in Keras
Learn about the bag-of-word representation for sentences
Learn how to use DNN/CNN/RNN model to classify text in keras
Setup and requirements
For each lab, you get a new Google Cloud project and set of resources for a fixed time at no cost.
Sign in to Google Skills using an incognito window.
Note the lab's access time (for example, 1:15:00), and make sure you can finish within that time.
There is no pause feature. You can restart if needed, but you have to start at the beginning.
When ready, click Start lab.
Note your lab credentials (Username and Password). You will use them to sign in to the Google Cloud Console.
Click Open Google Console.
Click Use another account and copy/paste credentials for this lab into the prompts.
If you use other credentials, you'll receive errors or incur charges.
Accept the terms and skip the recovery resource page.
Task 1. Launch Vertex AI Workbench instance
In the Google Cloud console, from the Navigation menu (), select Vertex AI > Dashboard.
Click Enable All Recommended APIs.
In the Navigation menu, click Workbench.
At the top of the Workbench page, ensure you are in the Instances view.
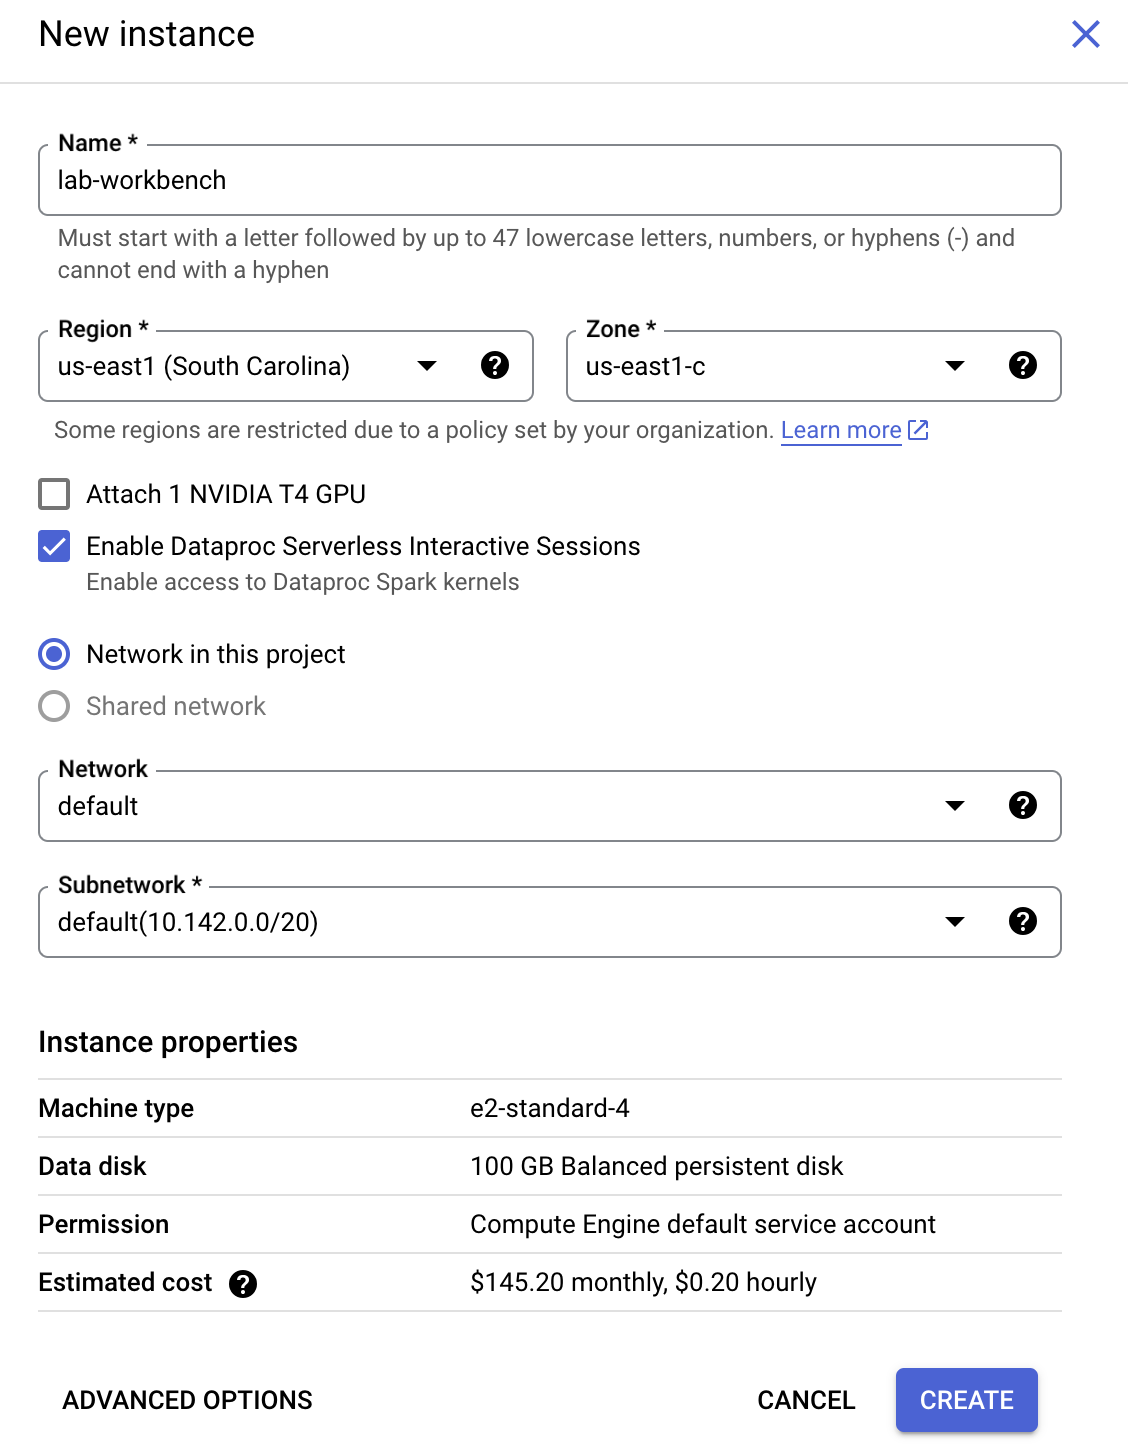
Click Create New.
Configure the Instance:
Name: lab-workbench
Region: Set the region to
Zone: Set the zone to
Advanced Options (Optional): If needed, click "Advanced Options" for further customization (e.g., machine type, disk size).
Click Create.
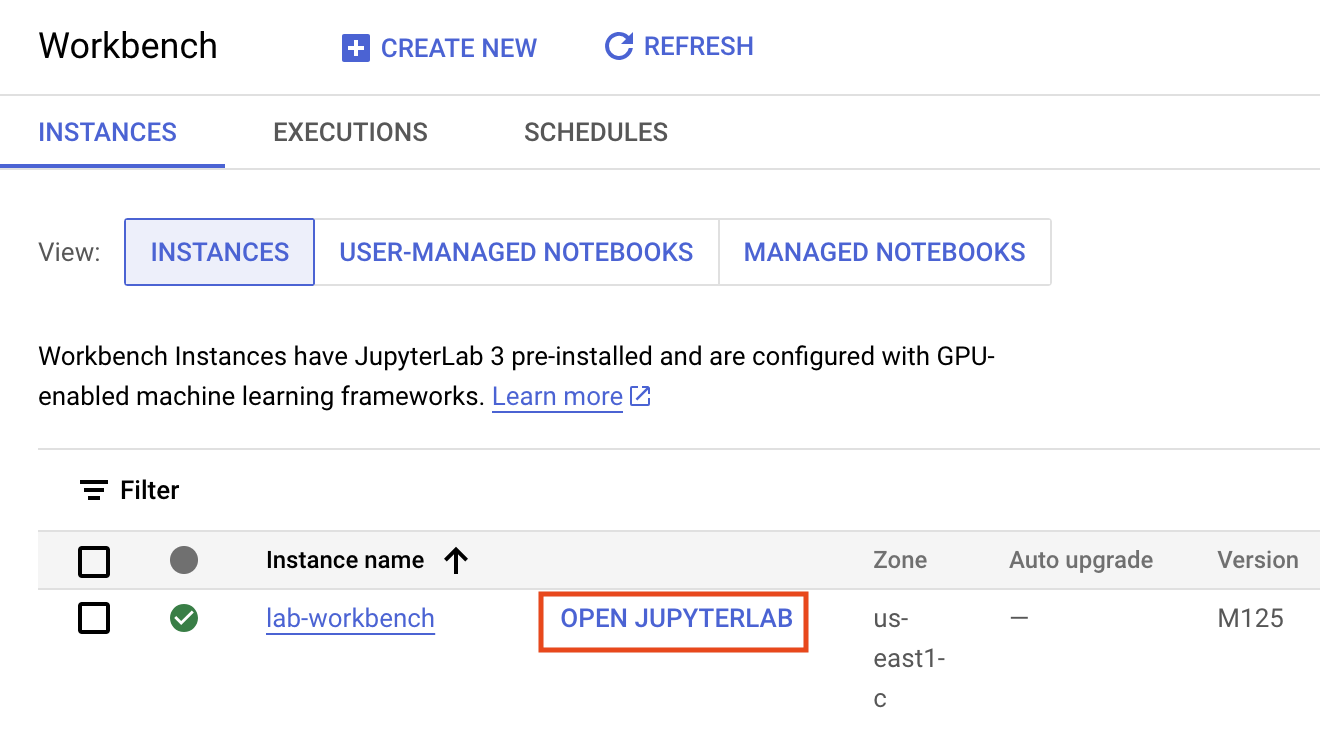
This will take a few minutes to create the instance. A green checkmark will appear next to its name when it's ready.
Click Open Jupyterlab next to the instance name to launch the JupyterLab interface. This will open a new tab in your browser.
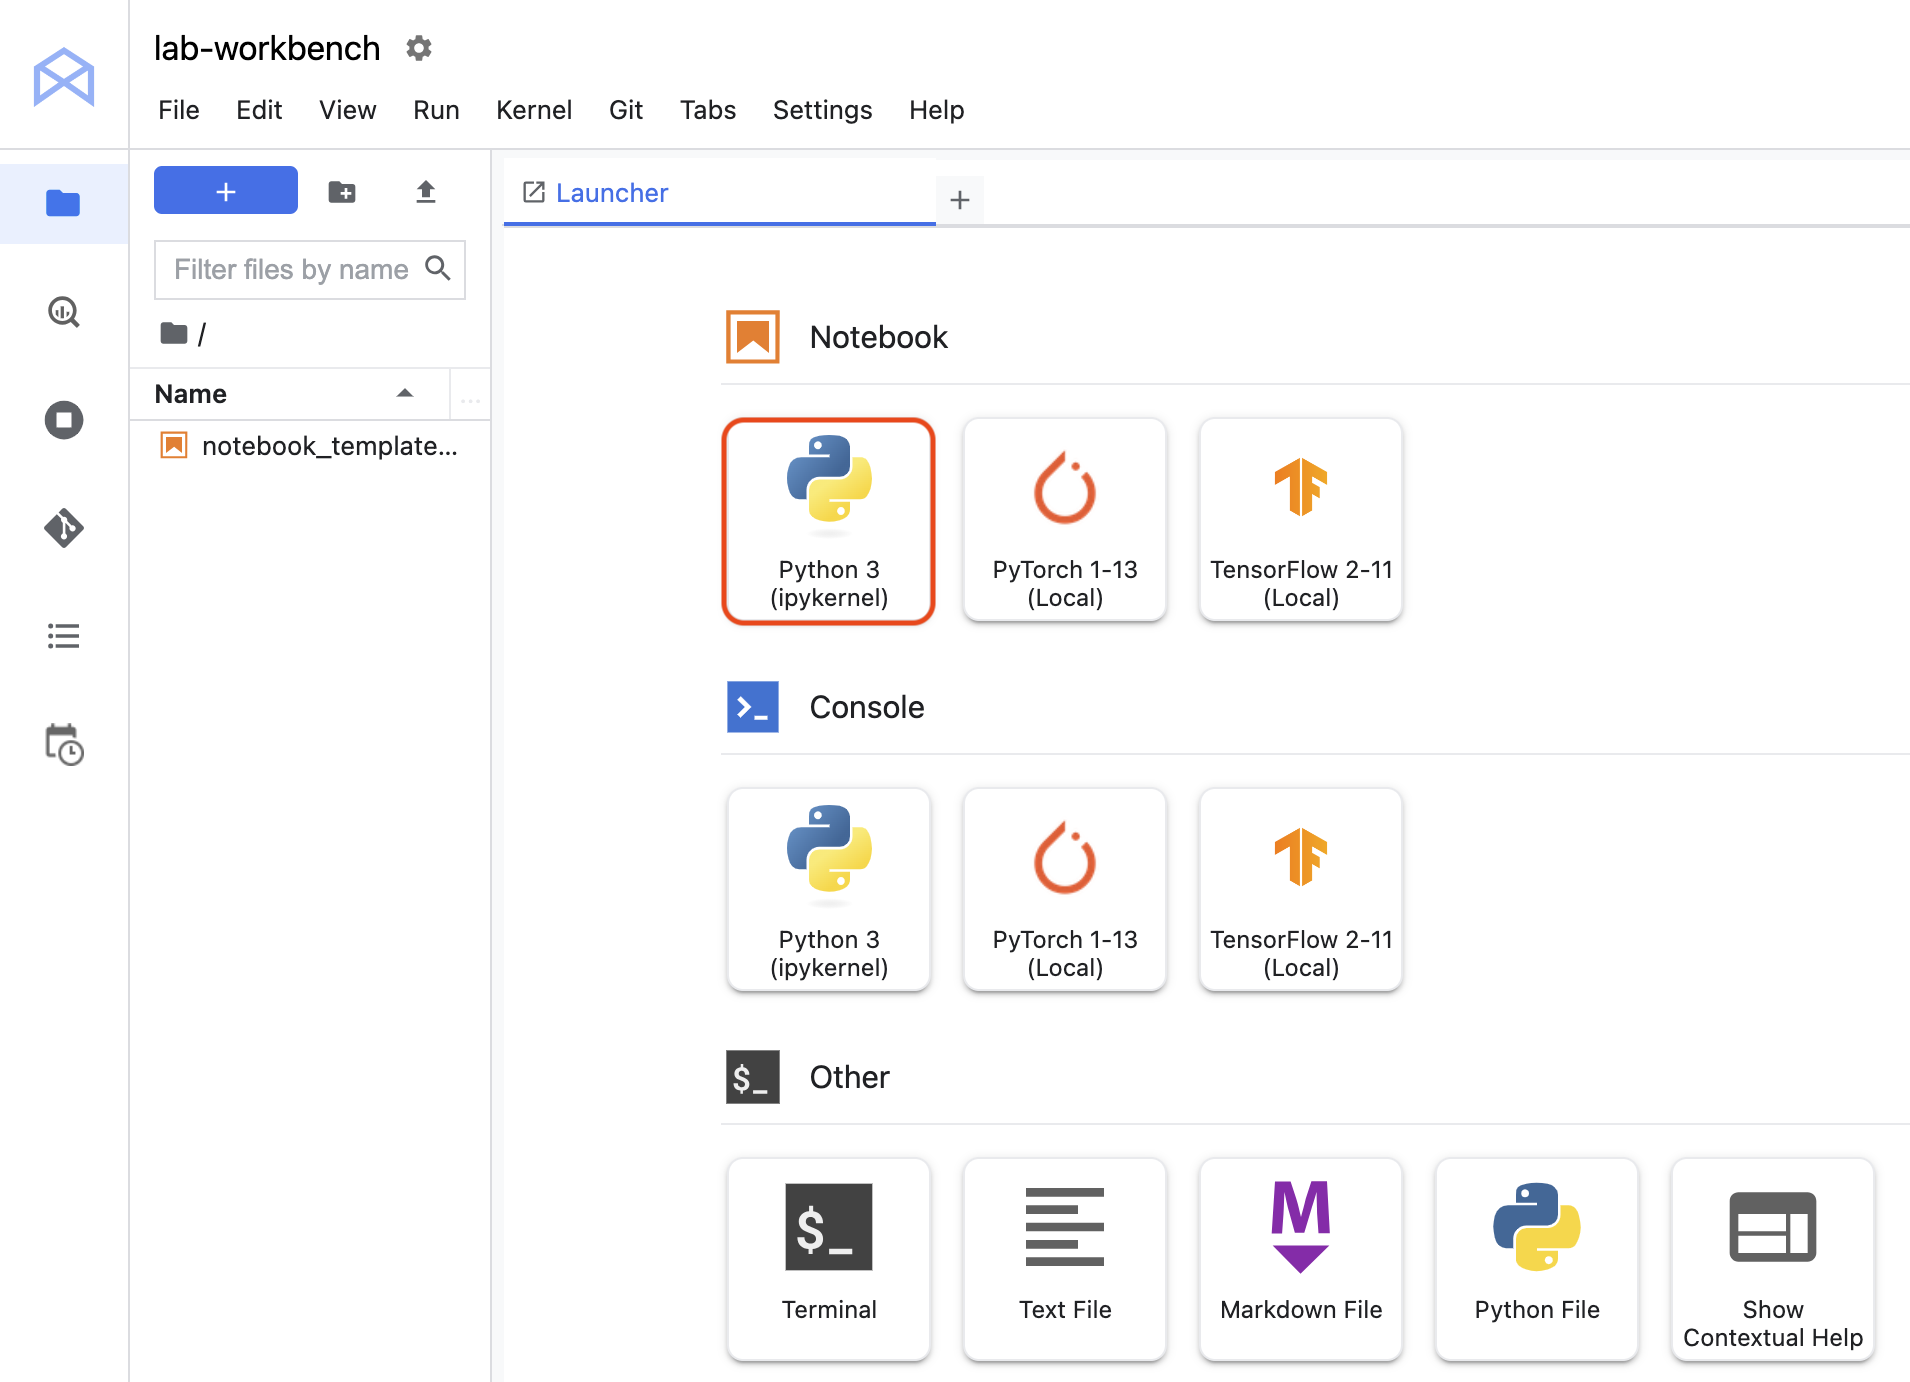
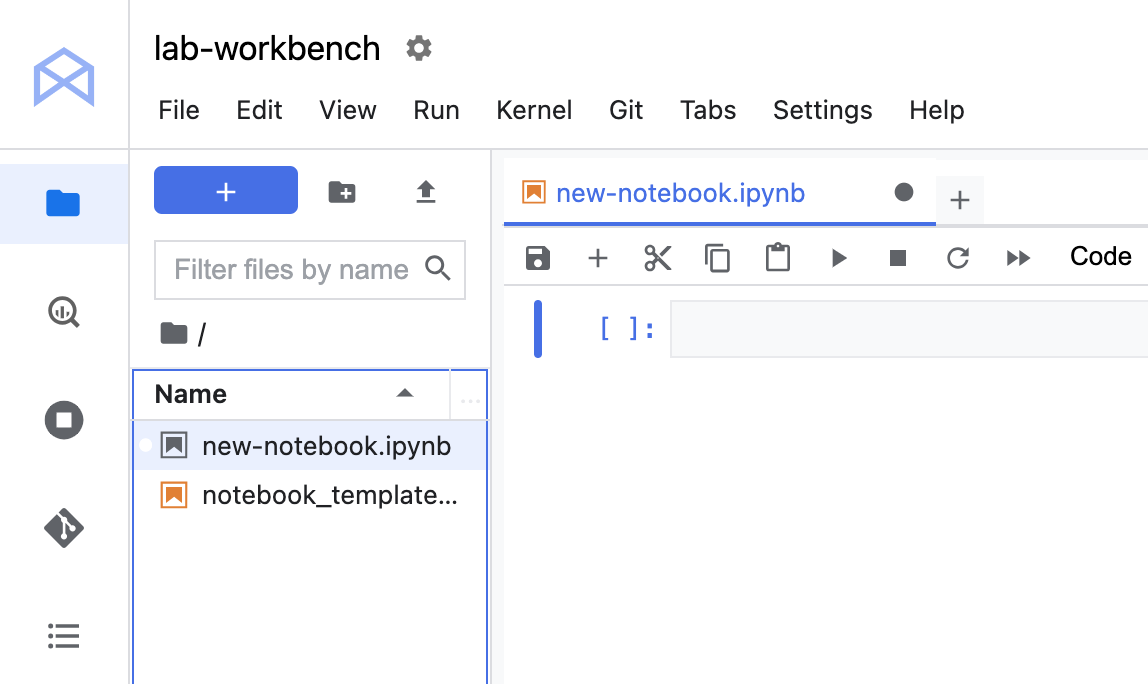
Click the Python 3 icon to launch a new Python notebook.
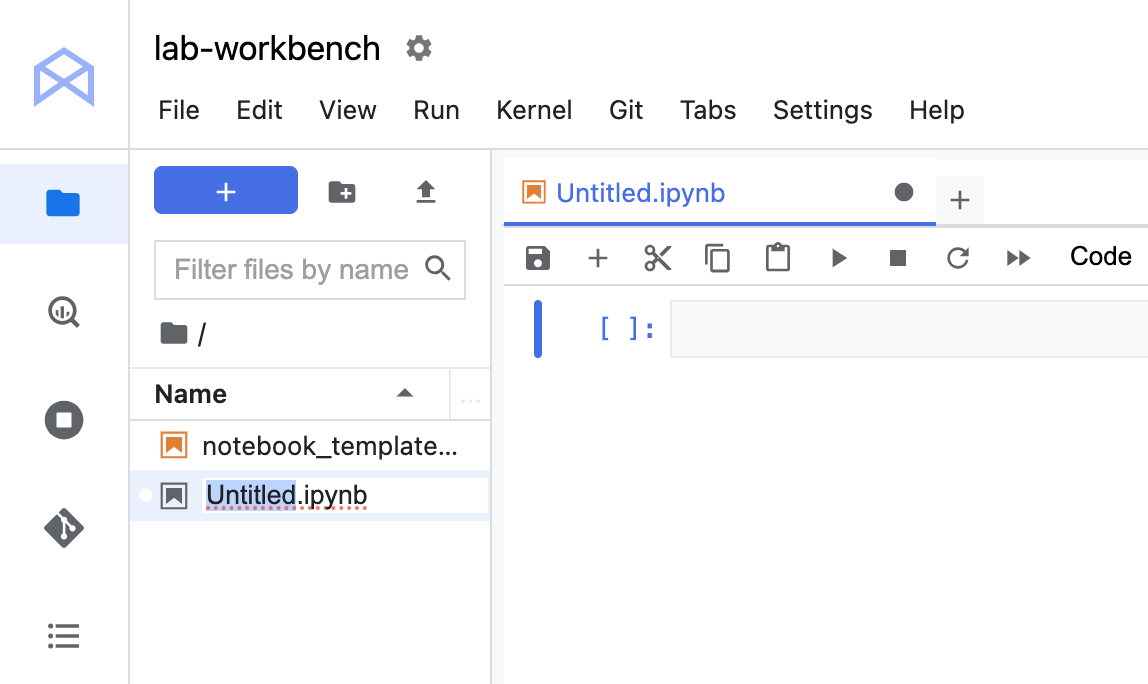
Right-click on the Untitled.ipynb file in the menu bar and select Rename Notebook to give it a meaningful name.
Your environment is set up. You are now ready to start working with your Vertex AI Workbench notebook.
Click Check my progress to verify the objective.
Launch Vertex AI Workbench instance
Task 2. Clone course repo within your Vertex AI Workbench instance
The GitHub repo contains both the lab file and solutions files for the course.
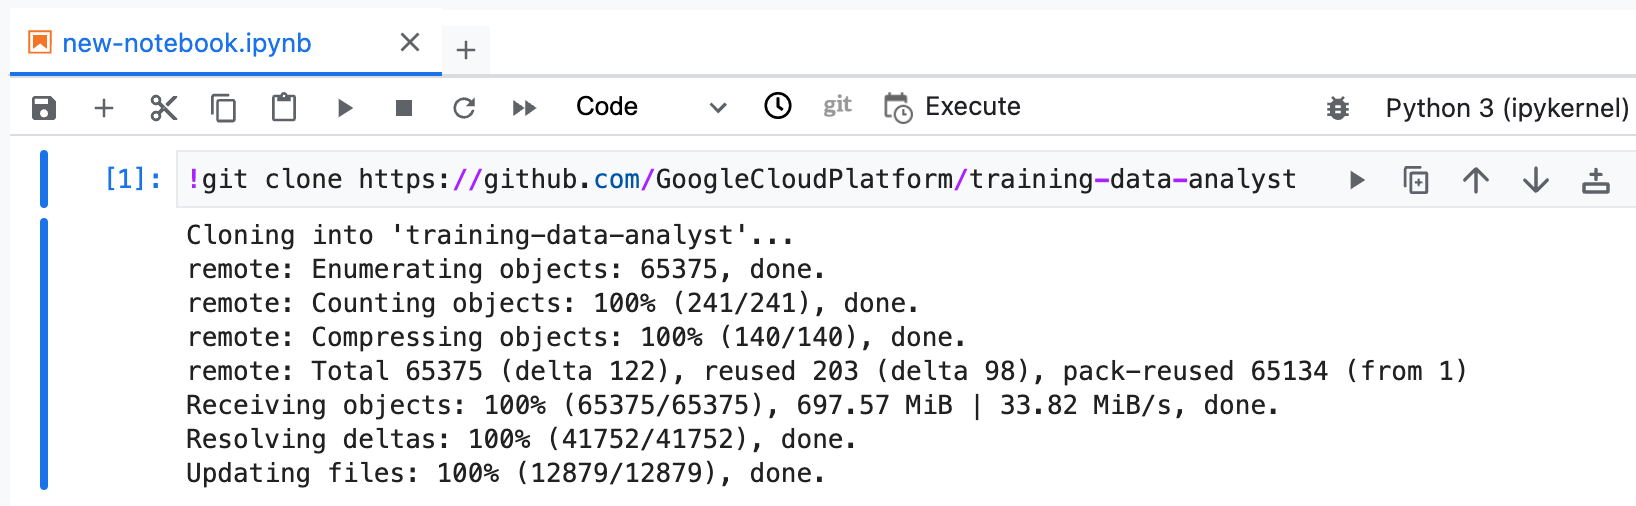
Copy and run the following code in the first cell of your notebook to clone the training-data-analyst repository.
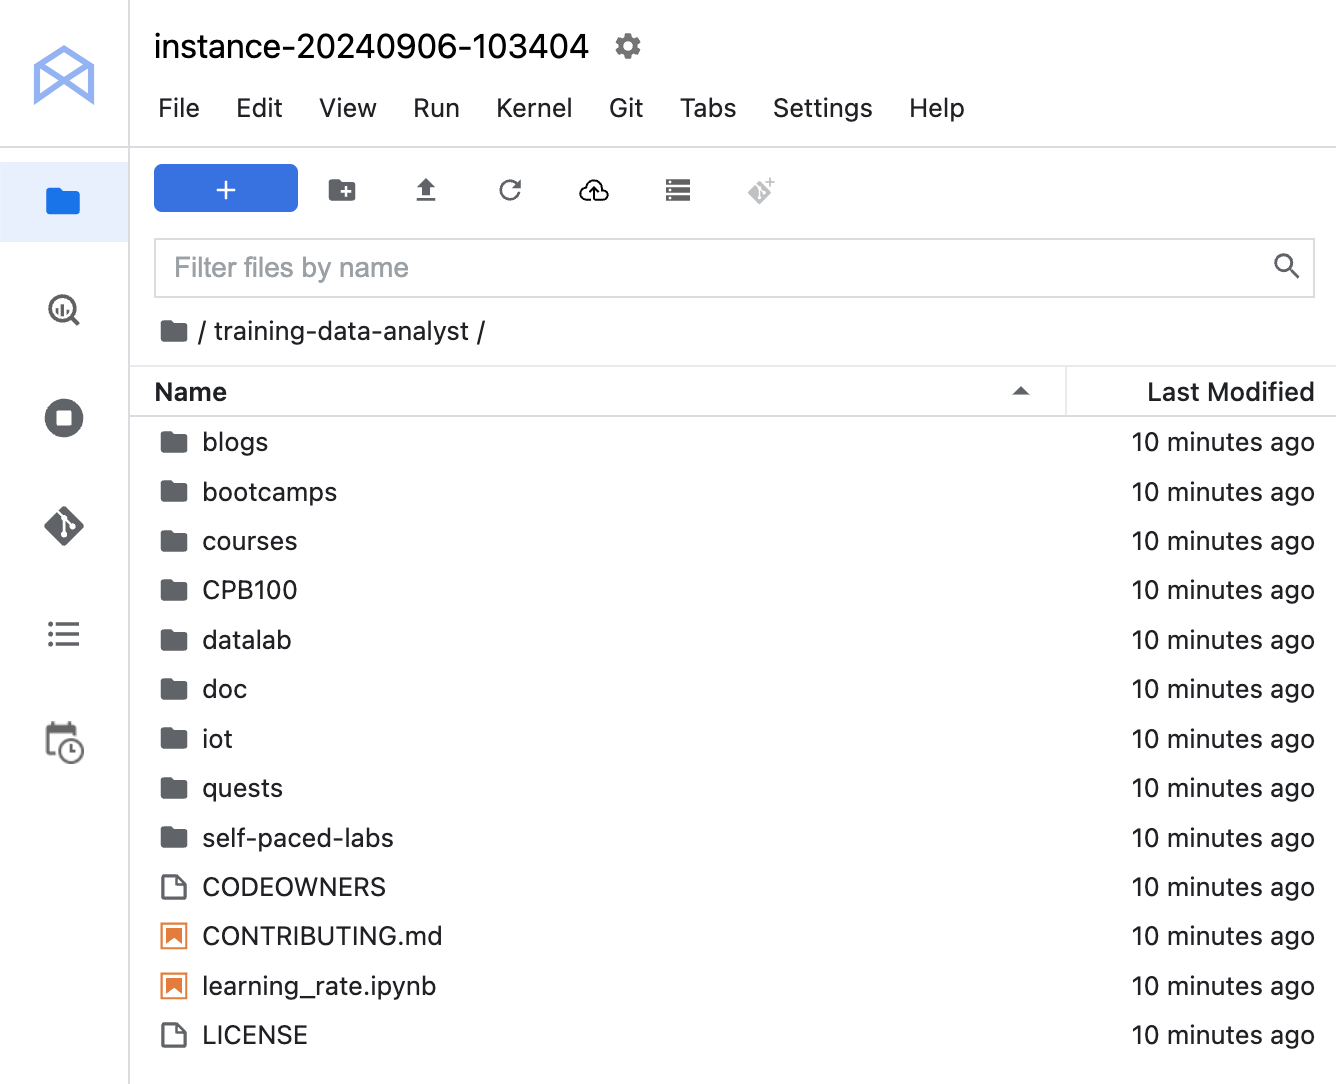
Confirm that you have cloned the repository. Double-click on the training-data-analyst directory and ensure that you can see its contents.
Click Check my progress to verify the objective.
Clone course repo within your Vertex AI Workbench instance
Task 3. Keras for text classification using Vertex AI
Duration is 60 min
In the notebook interface, navigate to training-data-analyst > courses > machine_learning > deepdive2 > text_classification > labs > keras_for_text_classification.ipynb.
In the Select Kernel dialog, choose TensorFlow 2-11 (Local) from the list of available kernels.
In the notebook interface, click on Edit > Clear All Outputs.
Carefully read through the notebook instructions and fill in lines marked with #TODO where you need to complete the code.
Tip: To run the current cell, click the cell and press SHIFT+ENTER. Other cell commands are listed in the notebook UI under Run.
Hints may also be provided for the tasks to guide you along. Highlight the text to read the hints (they are in white text).
To see the complete solution, navigate to training-data-analyst > courses > machine_learning > deepdive2 > text_classification > solutions and open keras_for_text_classification.ipynb.
End your lab
When you have completed your lab, click End Lab. Google Skills removes the resources you’ve used and cleans the account for you.
You will be given an opportunity to rate the lab experience. Select the applicable number of stars, type a comment, and then click Submit.
The number of stars indicates the following:
1 star = Very dissatisfied
2 stars = Dissatisfied
3 stars = Neutral
4 stars = Satisfied
5 stars = Very satisfied
You can close the dialog box if you don't want to provide feedback.
For feedback, suggestions, or corrections, please use the Support tab.
Copyright 2026 Google LLC All rights reserved. Google and the Google logo are trademarks of Google LLC. All other company and product names may be trademarks of the respective companies with which they are associated.
Los labs crean un proyecto de Google Cloud y recursos por un tiempo determinado
.
Los labs tienen un límite de tiempo y no tienen la función de pausa. Si finalizas el lab, deberás reiniciarlo desde el principio.
En la parte superior izquierda de la pantalla, haz clic en Comenzar lab para empezar
Usa la navegación privada
Copia el nombre de usuario y la contraseña proporcionados para el lab
Haz clic en Abrir la consola en modo privado
Accede a la consola
Accede con tus credenciales del lab. Si usas otras credenciales, se generarán errores o se incurrirá en cargos.
Acepta las condiciones y omite la página de recursos de recuperación
No hagas clic en Finalizar lab, a menos que lo hayas terminado o quieras reiniciarlo, ya que se borrará tu trabajo y se quitará el proyecto
Este contenido no está disponible en este momento
Te enviaremos una notificación por correo electrónico cuando esté disponible
¡Genial!
Nos comunicaremos contigo por correo electrónico si está disponible
Un lab a la vez
Confirma para finalizar todos los labs existentes y comenzar este
Usa la navegación privada para ejecutar el lab
Usar una ventana de incógnito o de navegación privada es la mejor forma de ejecutar
este lab. Así evitarás cualquier conflicto entre tu cuenta personal
y la cuenta de estudiante, lo que podría generar cargos adicionales en
tu cuenta personal.
In this lab, we will implement text models to recognize the probable source (Github, Tech-Crunch, or The New-York Times) of the titles we have in the title dataset we constructed a related AutoML processed lab.
Duración:
0 min de configuración
·
Acceso por 120 min
·
90 min para completar

 ), select Vertex AI > Dashboard.
 Create New.