Questi contenuti non sono ancora ottimizzati per i dispositivi mobili.
Per un'esperienza ottimale, visualizza il sito su un computer utilizzando un link inviato via email.
Overview
This lab is the second in a series of labs, each of which is intended to build
skills related to the setup and operation of Anthos clusters on bare metal. In
this lab, you start with the admin workstation and admin cluster in place;
you then build the user cluster. After the user cluster is running,
you deploy stateless and stateful workloads and expose the workloads using
LoadBalancer services and Ingresses.
Objectives
In this lab, you learn how to perform the following tasks:
Configure and create your Anthos on bare metal user cluster.
Launch workloads on your user cluster.
Expose L4 and L7 services on your created user cluster using the bundled
MetalLB load balancer.
Install a CSI driver and deploy stateful workloads.
Setup and requirements
In this task, you perform initialization steps for your lab.
For each lab, you get a new Google Cloud project and set of resources for a fixed time at no cost.
Sign in to Google Skills using an incognito window.
Note the lab's access time (for example, 1:15:00), and make sure you can finish within that time.
There is no pause feature. You can restart if needed, but you have to start at the beginning.
When ready, click Start lab.
Note your lab credentials (Username and Password). You will use them to sign in to the Google Cloud Console.
Click Open Google Console.
Click Use another account and copy/paste credentials for this lab into the prompts.
If you use other credentials, you'll receive errors or incur charges.
Accept the terms and skip the recovery resource page.
After you complete the initial sign-in steps, the project dashboard appears.
Click Select a project, highlight your Google Cloud Project ID, and click
Open to select your project.
Activate Google Cloud Shell
Google Cloud Shell is a virtual machine that is loaded with development tools. It offers a persistent 5GB home directory and runs on the Google Cloud.
Google Cloud Shell provides command-line access to your Google Cloud resources.
In Cloud console, on the top right toolbar, click the Open Cloud Shell button.
Click Continue.
It takes a few moments to provision and connect to the environment. When you are connected, you are already authenticated, and the project is set to your PROJECT_ID. For example:
gcloud is the command-line tool for Google Cloud. It comes pre-installed on Cloud Shell and supports tab-completion.
You can list the active account name with this command:
[core]
project = qwiklabs-gcp-44776a13dea667a6
Note:
Full documentation of gcloud is available in the
gcloud CLI overview guide
.
Task 1. Prepare your environment and connect to the admin cluster
Note: To reflect real-world best practices, your project has been configured as follows:
The Default network has been deleted.
A customer subnet network has been created.
Several firewall rules have been created:
abm-allow-cp: allows traffic to the
control plane servers.
abm-allow-worker: allows inbound traffic
to the worker nodes.
abm-allow-lb / abm-allow-gfe-to-lb: allows
inbound traffic to the load balancer nodes. In our case,
the load balancer is hosted in the same node as the admin
cluster control plane node.
abm-allow-multi: allows multicluster
traffic. This allows the communication between the admin
and the user cluster.
iap: allows traffic from Identity Aware
Proxy (IAP), so you can SSH internal VMs without opening
port 22 to the internet.
vxlan: allow vxlan networking, a network
virtualization technology that encapsulates L2 Ethernet
frames on an underlying L3 network.
Your admin workstation has been created.
Your admin cluster has been created.
Set the Zone environment variable
ZONE={{{ project_0.default_zone| "Zone added at lab start" }}}
In Cloud Shell, SSH into the admin workstation with the following
commands:
Create a token that you can use to log in to the cluster from the Console:
kubectl create token admin-user -n kube-system
Select the token in the SSH session (this will copy the token - don't try to copy with CTRL+C).
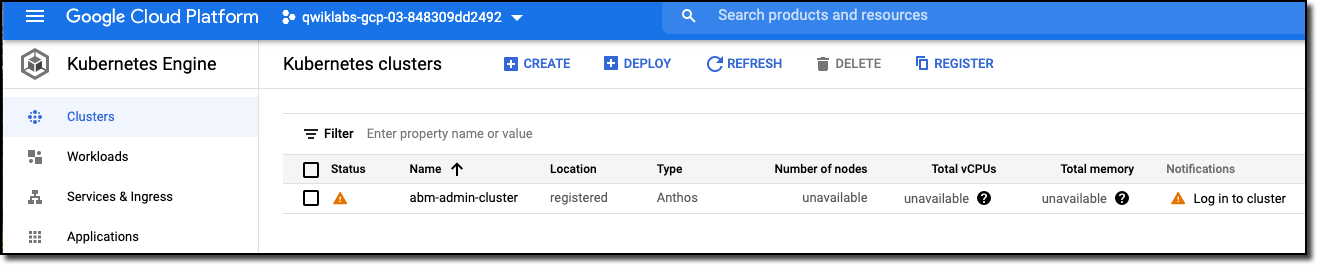
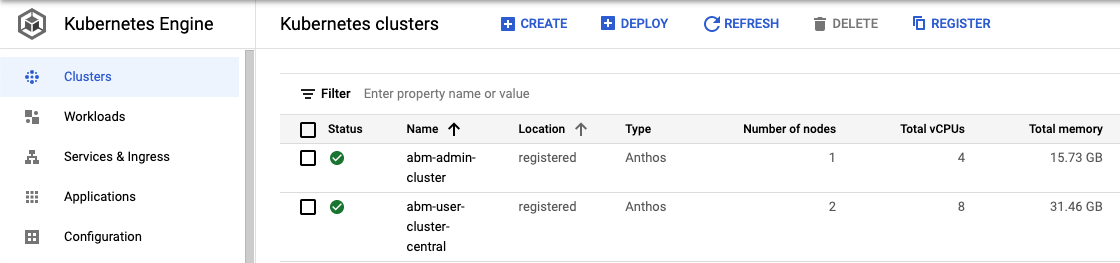
Find the abm-admin-cluster entry in the cluster list showing in the
Console and click the three-dots menu at the far right of the row.
Select Log in, select Token, then paste the token from your
Clipboard into the provided field. Click Login. When you're done,
it should look like this:
Note: Now that you can connect from the the admin workstation to the admin cluster, you are ready to create your user cluster.
Task 2. Create your user cluster
In Cloud Shell, while SSH'd into the admin workstations, create the config
file for the user cluster:
Get a token that you can use to log in to the cluster from the Console:
kubectl create token admin-user -n kube-system
Select the token in the SSH session (this will copy the token - don't try to copy with CTRL+C).
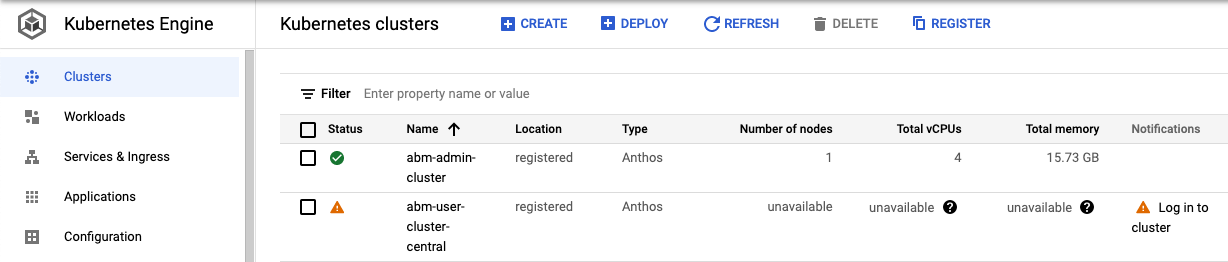
Find the abm-user-cluster-central entry in the cluster list showing in the
Console and click the three-dots menu at the far right of the row.
Select Log in, select Token, then paste the token from your
Clipboard into the provided field. Click Login. When you're done,
it should look like this:
Task 4. Deploy and manage applications in your Anthos user cluster
Deploy an application and expose it via a L4 load balancer Service
In Cloud Shell, create a deployment for the hello-app application:
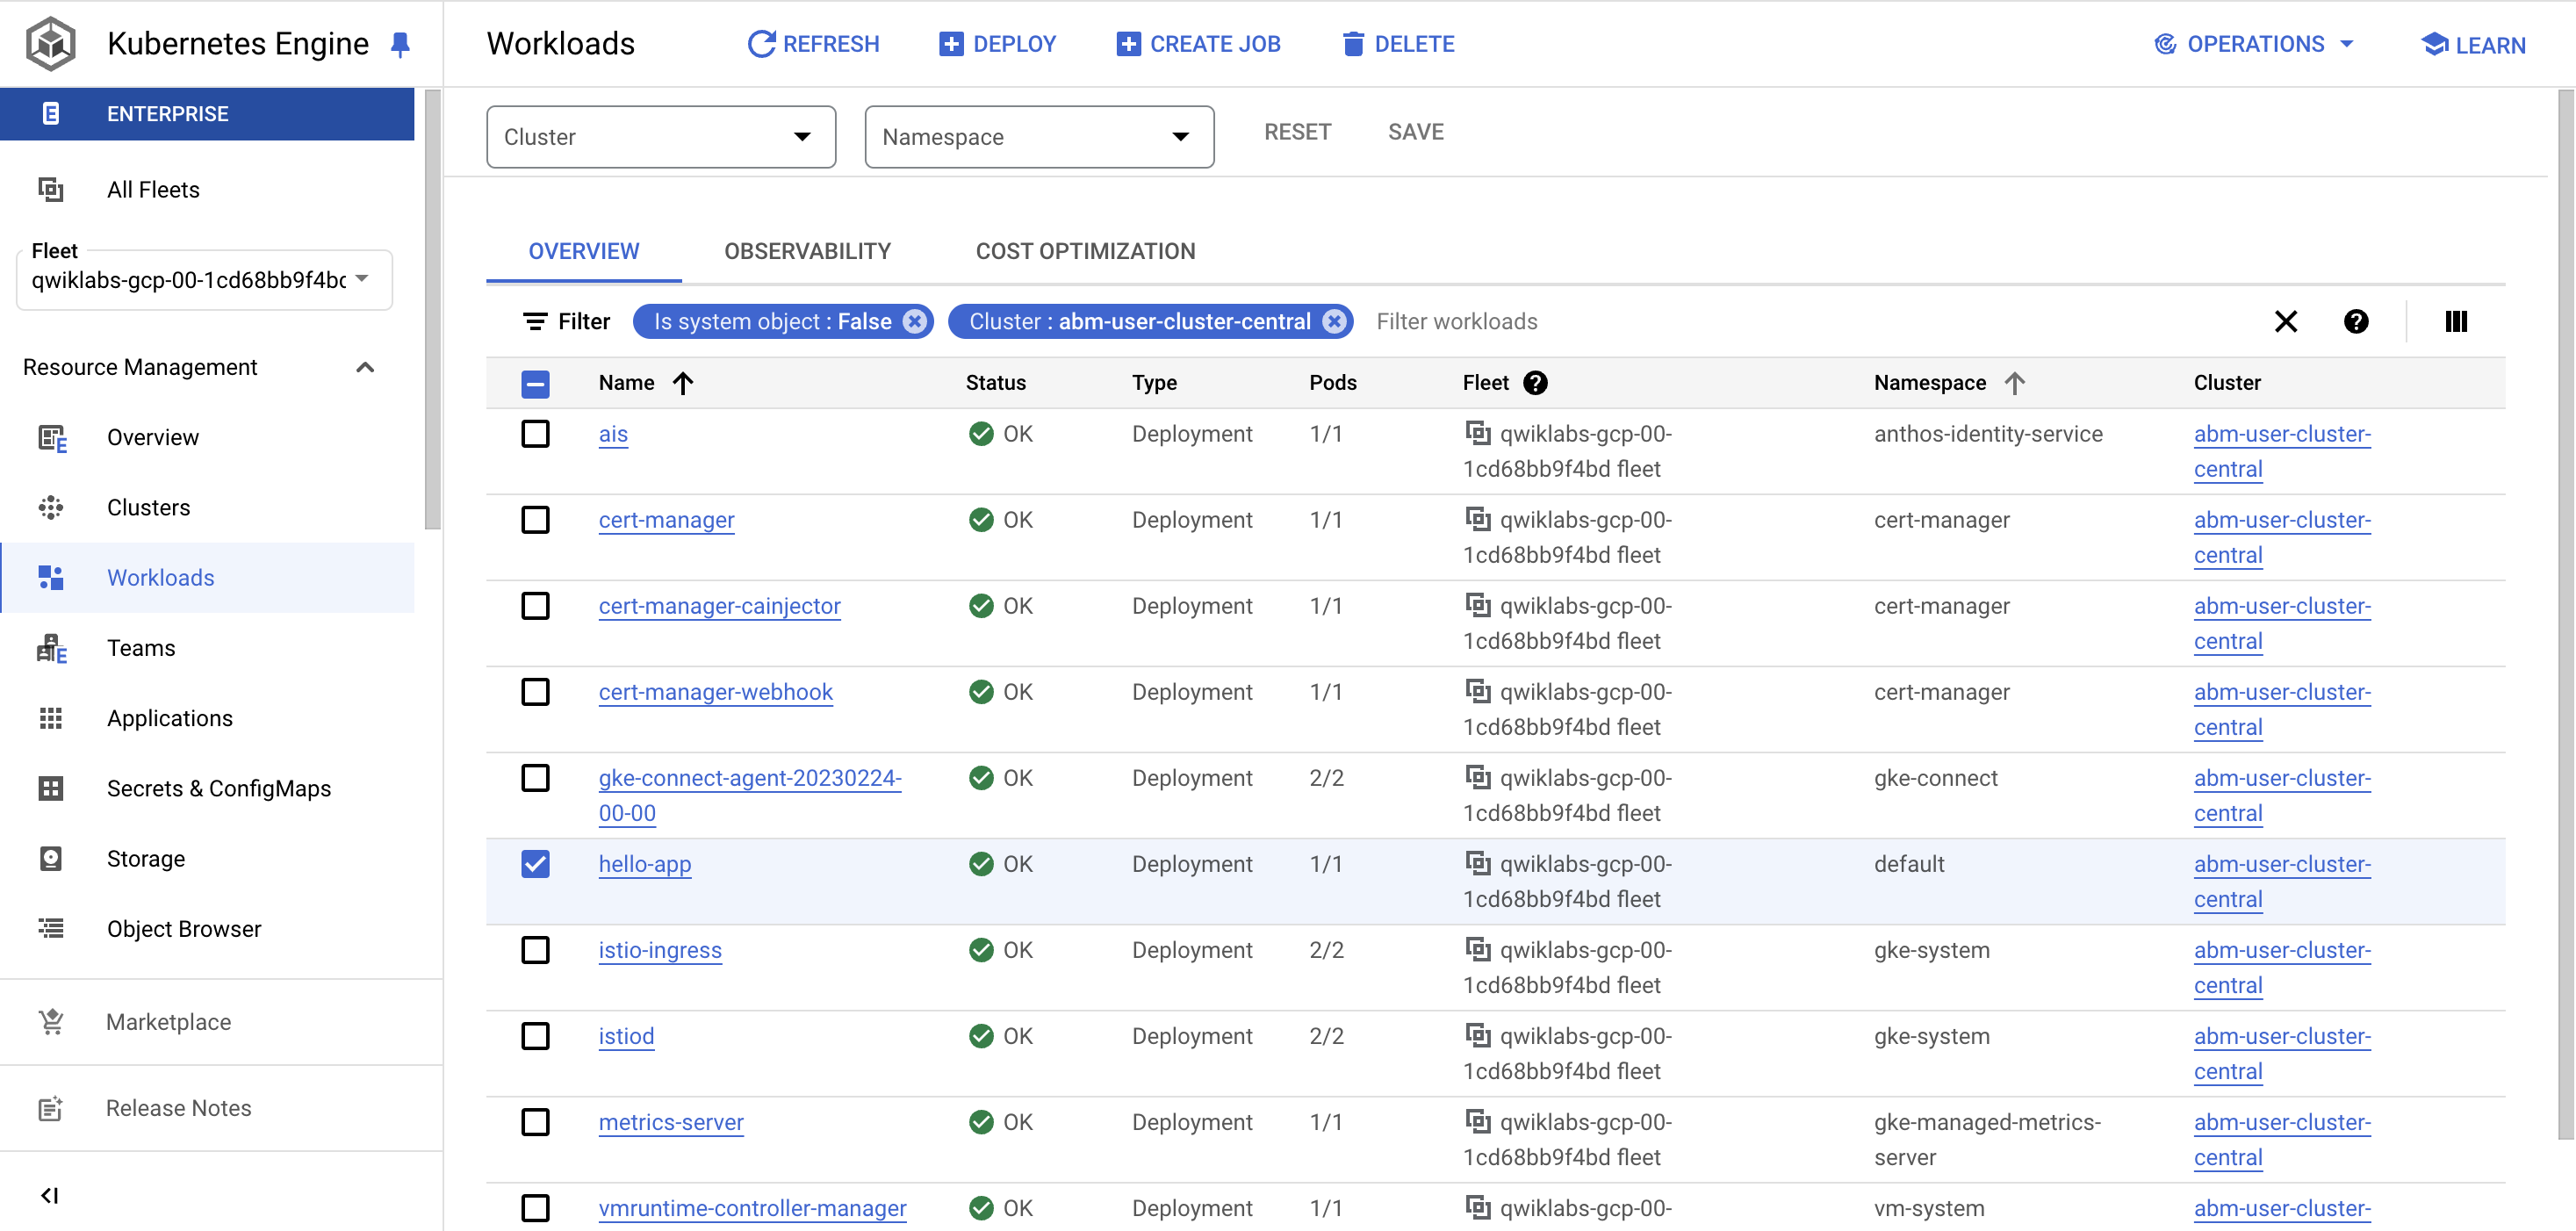
In the UI, visit Navigation > Kubernetes Engine > Workloads. On top of
the table displaying all the cluster workloads, add a filter for the
Cluster to be abm-user-cluster-central. Find the hello-app
deployment that you just created.
In Cloud Shell, create a Kubernetes Service of type LoadBalancer to
access the app:
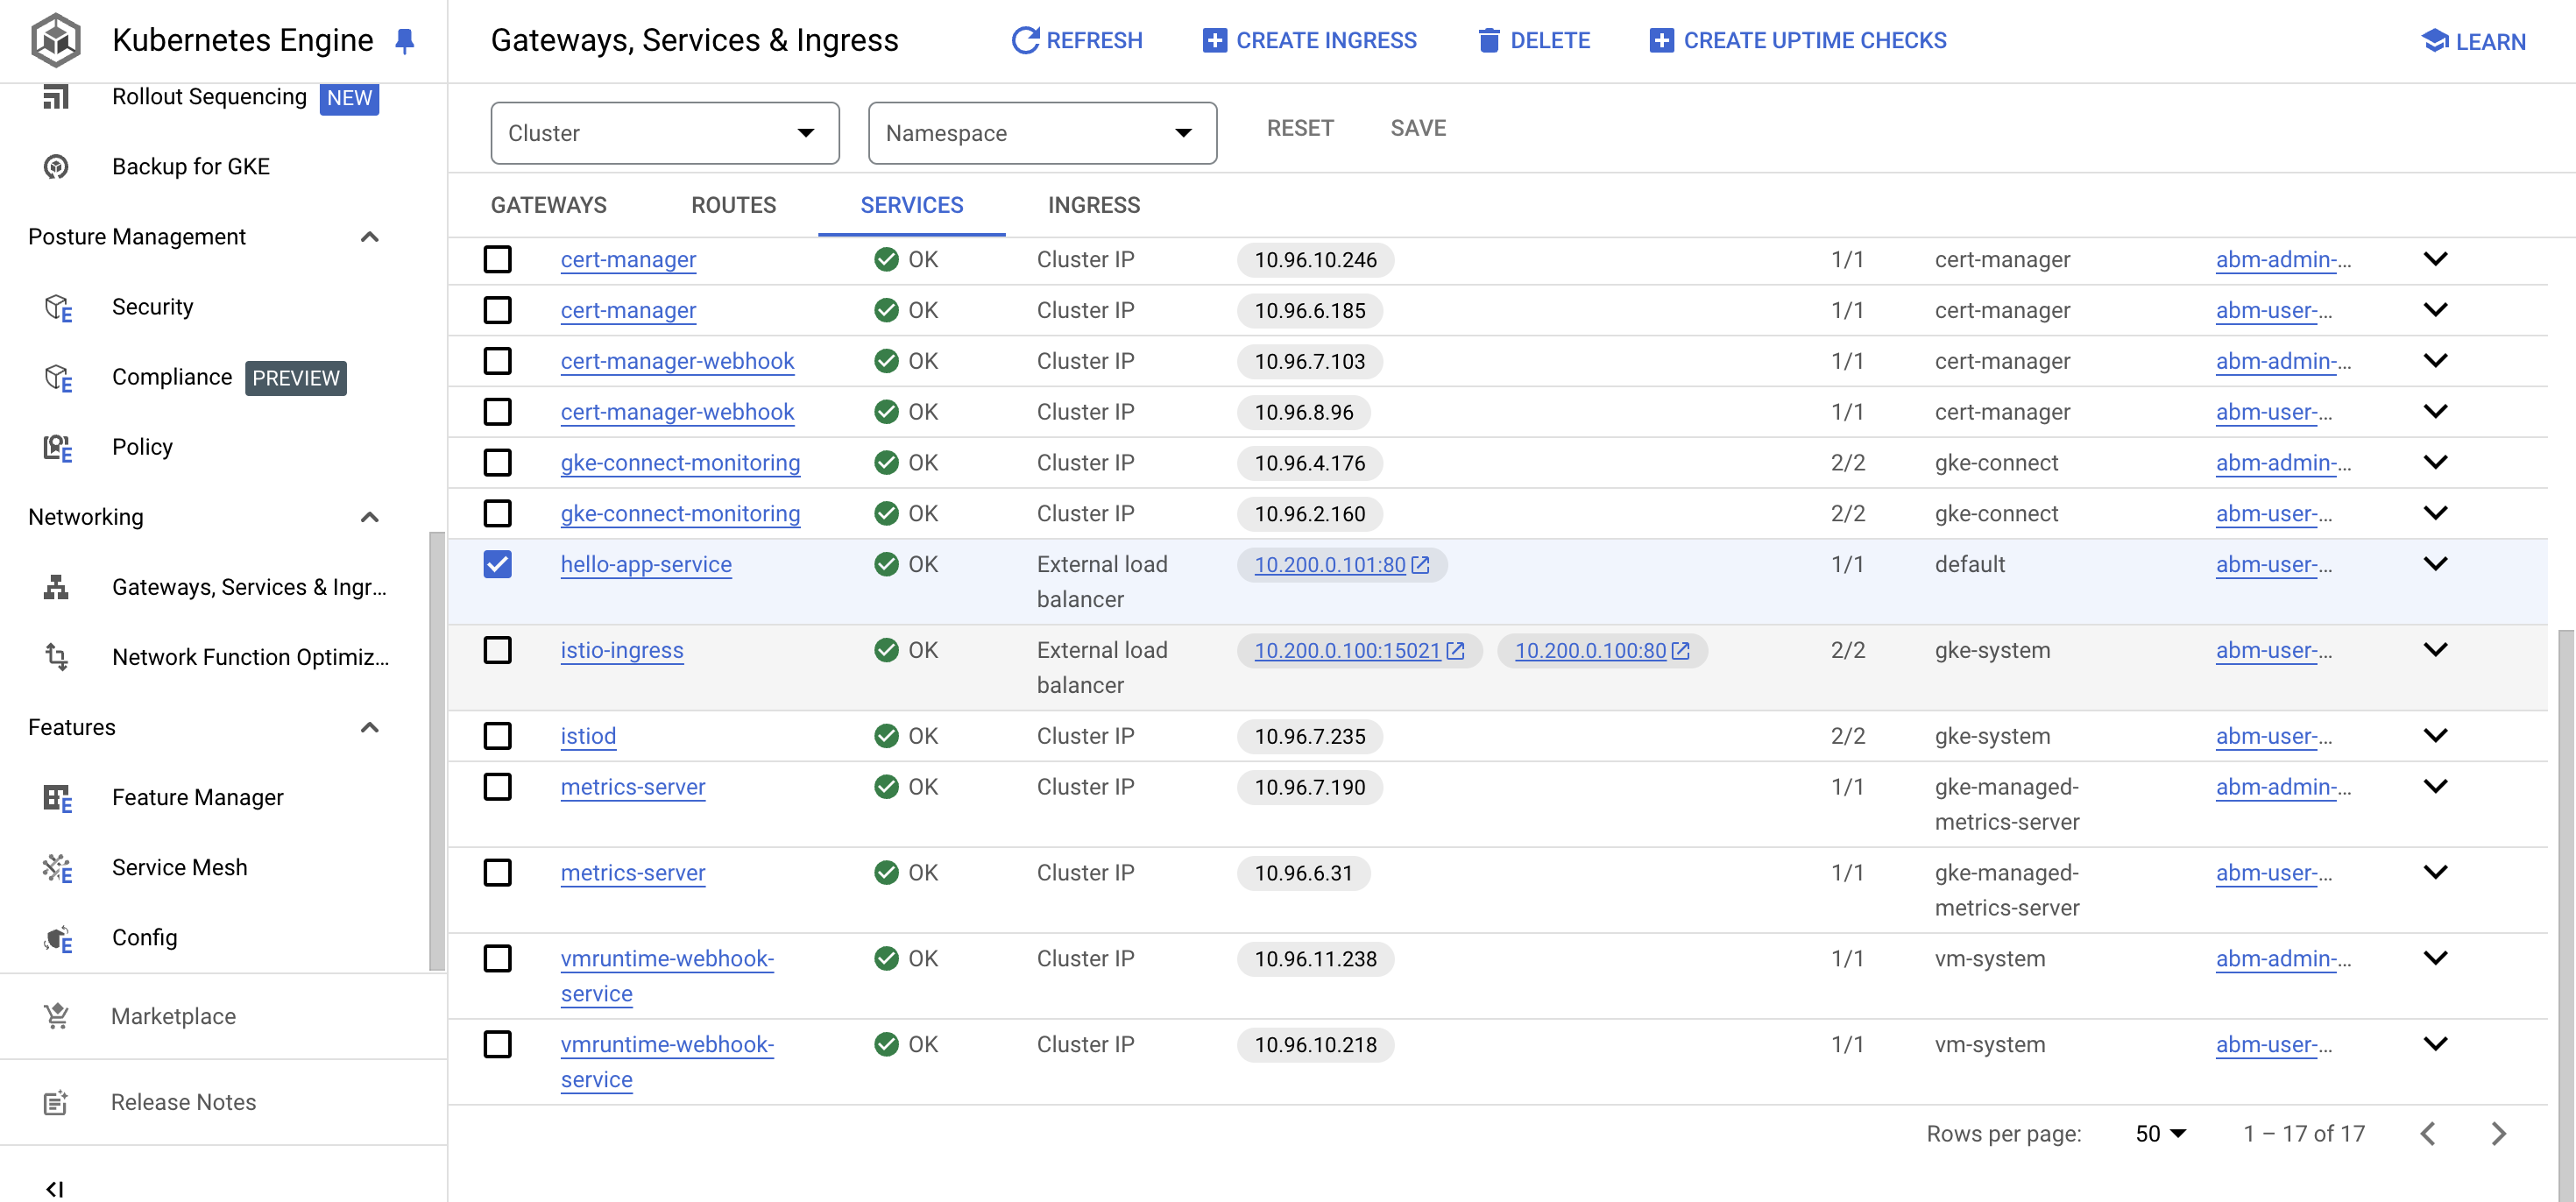
In the UI, visit Navigation > Kubernetes Engine > Gateways, Services & Ingress. Find the
hello-app service that you just created. You can see that it contains an
external IP in the range that you configured earlier (10.200.0.100-10.200.0.200)
in the user-cluster creation process.
In Cloud Shell, get the services and check that you have the same
external IP. Copy the IP for this service, as you need it in the next
task.
kubectl get svc
NAME TYPE CLUSTER-IP EXTERNAL-IP PORT(S) AGE
hello-app-service LoadBalancer 10.96.3.48 10.200.0.101 80:32014/TCP 10m
kubernetes ClusterIP 10.96.0.1 <none> 443/TCP 3d23h
Access the external IP provided by the hello-app-service:
Note:
Notice that this IP is only accessible within VMs that are deployed in
the same VXLAN. If you want internet routable IPs, you need to provide
them in the yaml file used for the creation of the user cluster.
Deploy an application and expose it via a L7 load balancer Ingress
Anthos clusters on bare metal are compatible with
Container Storage Interface (CSI) v1.0 drivers. CSI is an open-standard API supported by many major storage vendors that enables Kubernetes to expose arbitrary storage systems to
containerized workloads.
To use a CSI driver, you need to install the driver and you need to create a
Kubernetes StorageClass. You set the CSI driver as the provisioner for the
StorageClass. Then, you can set the StorageClass as the cluster's default, or
configure your workloads to explicitly use the StorageClass.
Installing a vendor's CSI driver
Storage vendors develop their own CSI drivers, and they are responsible for
providing installation instructions. In simple cases, installation might only
involve deploying manifests to your clusters. See the list of
CSI drivers in the CSI
documentation.
In this lab, you install theCompute Engine Persistent Disk CSI driver, since
the Anthos bare metal deployment is running on GCE and needs that type of
driver to communicate with the GCE persistent disks. For production storage, we
recommend installing a CSI driver from an
Anthos Ready storage partner.
Initialize the environment variables used in the installation commands:
Note that the script is creating a service account, downloading the
corresponding key file, defining a customer role, and assigning roles to
the service account.
Create a new StorageClass on your user cluster, referencing your driver in
the provisioner field:
cat <<EOF > pd-storage-class.yaml
apiVersion: storage.k8s.io/v1
kind: StorageClass
metadata:
name: gce-pd
annotations:
storageclass.kubernetes.io/is-default-class: "true"
provisioner: pd.csi.storage.gke.io # CSI driver
parameters: # You provide vendor-specific parameters to this specification
type: pd-standard # Be sure to follow the vendor's instructions, in our case pd-ssd, pd-standard, or pd-balanced
volumeBindingMode: WaitForFirstConsumer
allowVolumeExpansion: true
EOF
kubectl apply -f pd-storage-class.yaml
Note:
When you request storage with a PersistentVolumeClaim (PVC), you can
specify a StorageClass. If you do not specify a StorageClass, the
default StorageClass is used if one is configured in the cluster.
Anthos clusters on bare metal do not configure a default
StorageClass.
As a cluster administrator, you might want to change set default
storage class, so that unspecified requests use the StorageClass of your
choice. To accomplish that, notice the annotation that was added in the
creation of the StorageClass above.
storageclass.kubernetes.io/is-default-class: "true"
Deploy an application comprised of a PersistentVolumeClaim (PVC)
and a pod that uses that PVC. A persistent volume
will be provisioned via the new StorageClass and CSI driver.
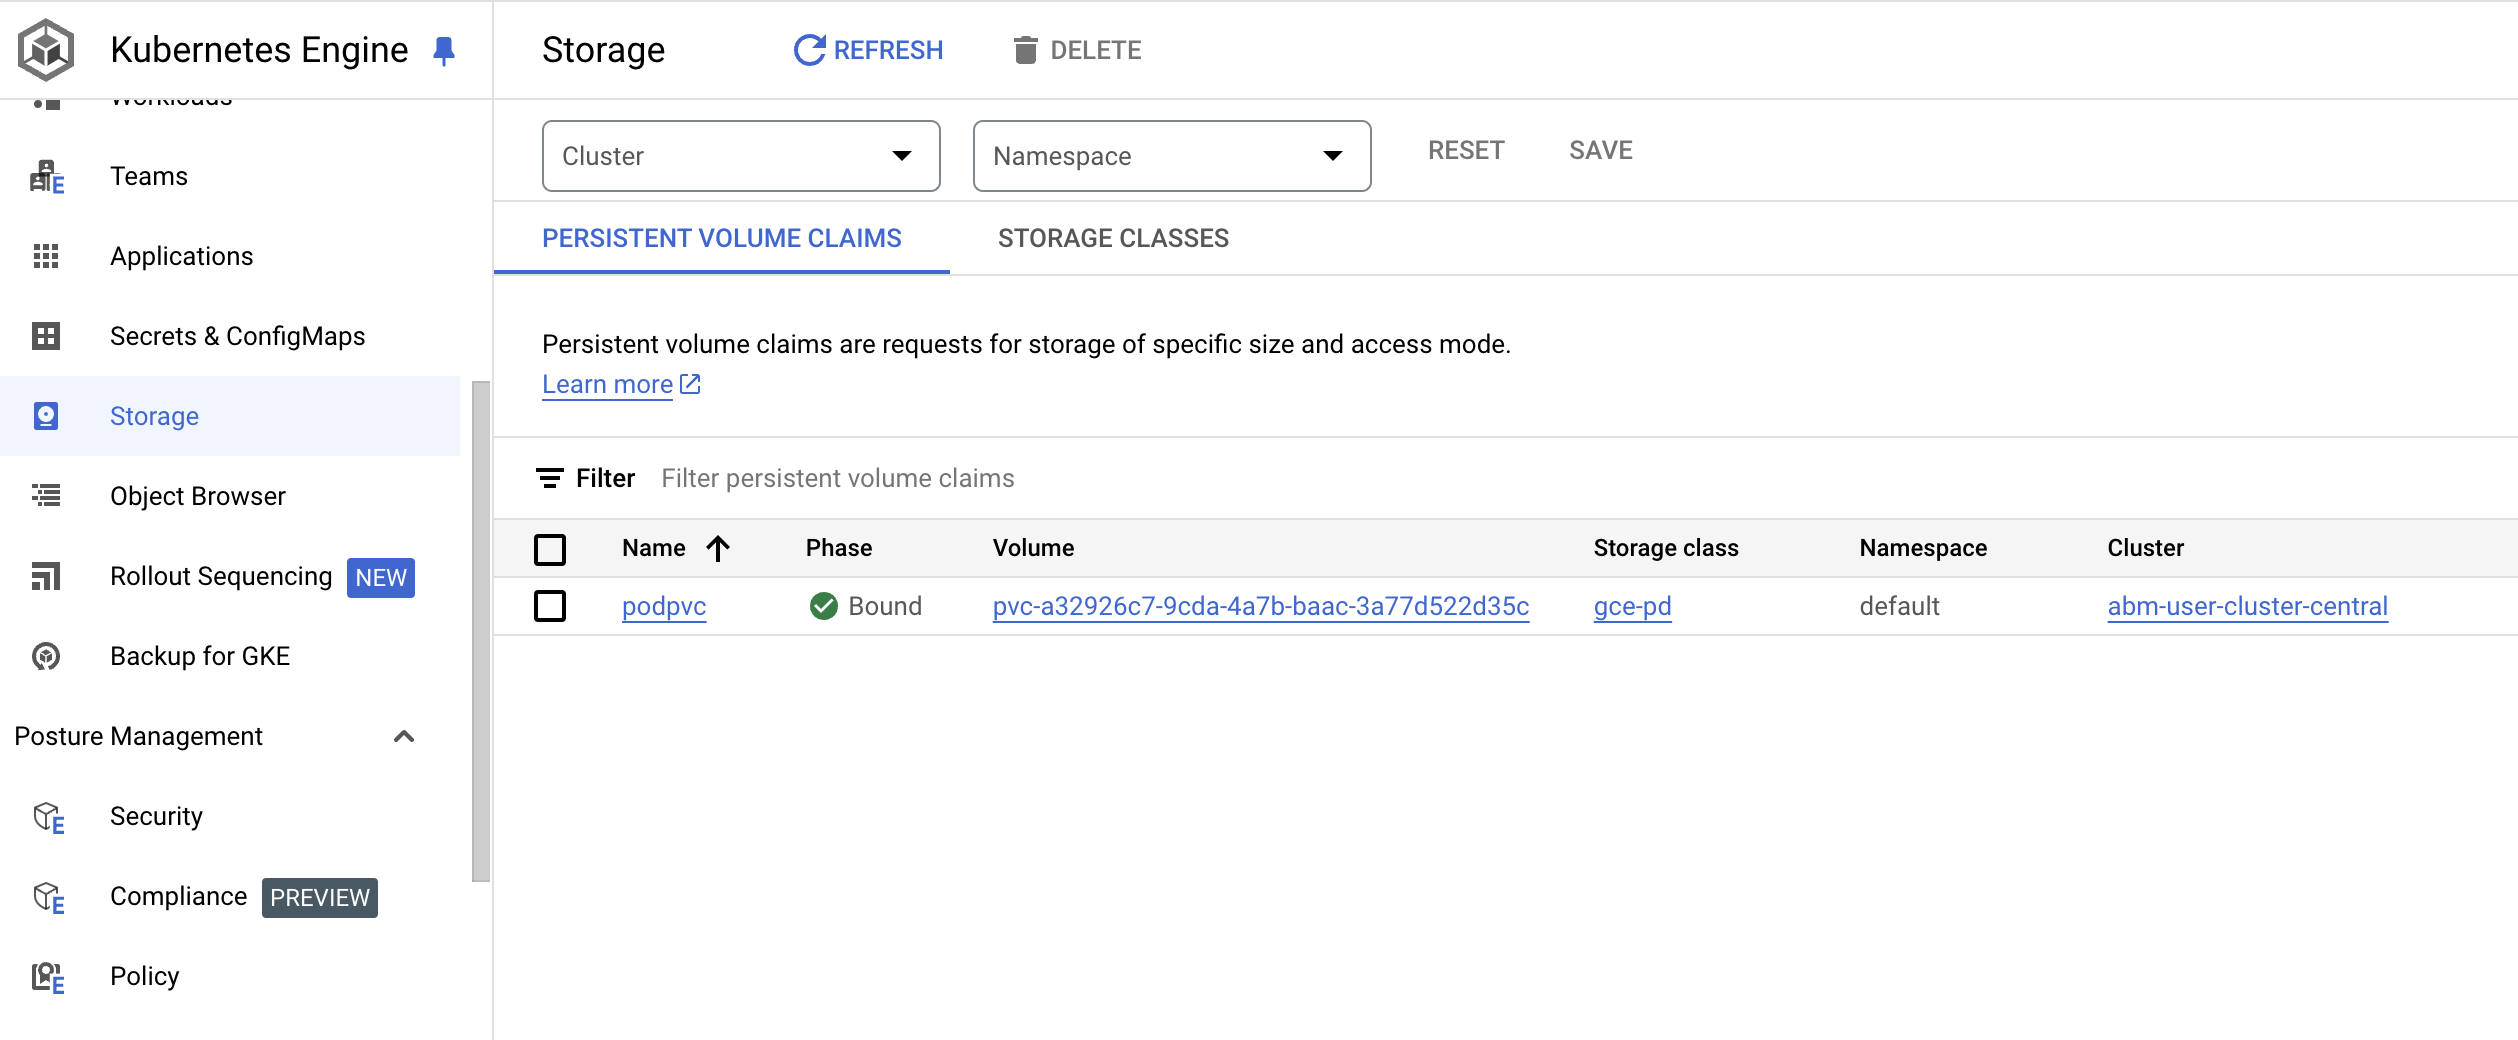
In the UI, visit Navigation > Kubernetes Engine > Storage. Check the
Persistent Volume Claims list, and you should see a new PVC, of storage
class gce-pd, called podpvc.
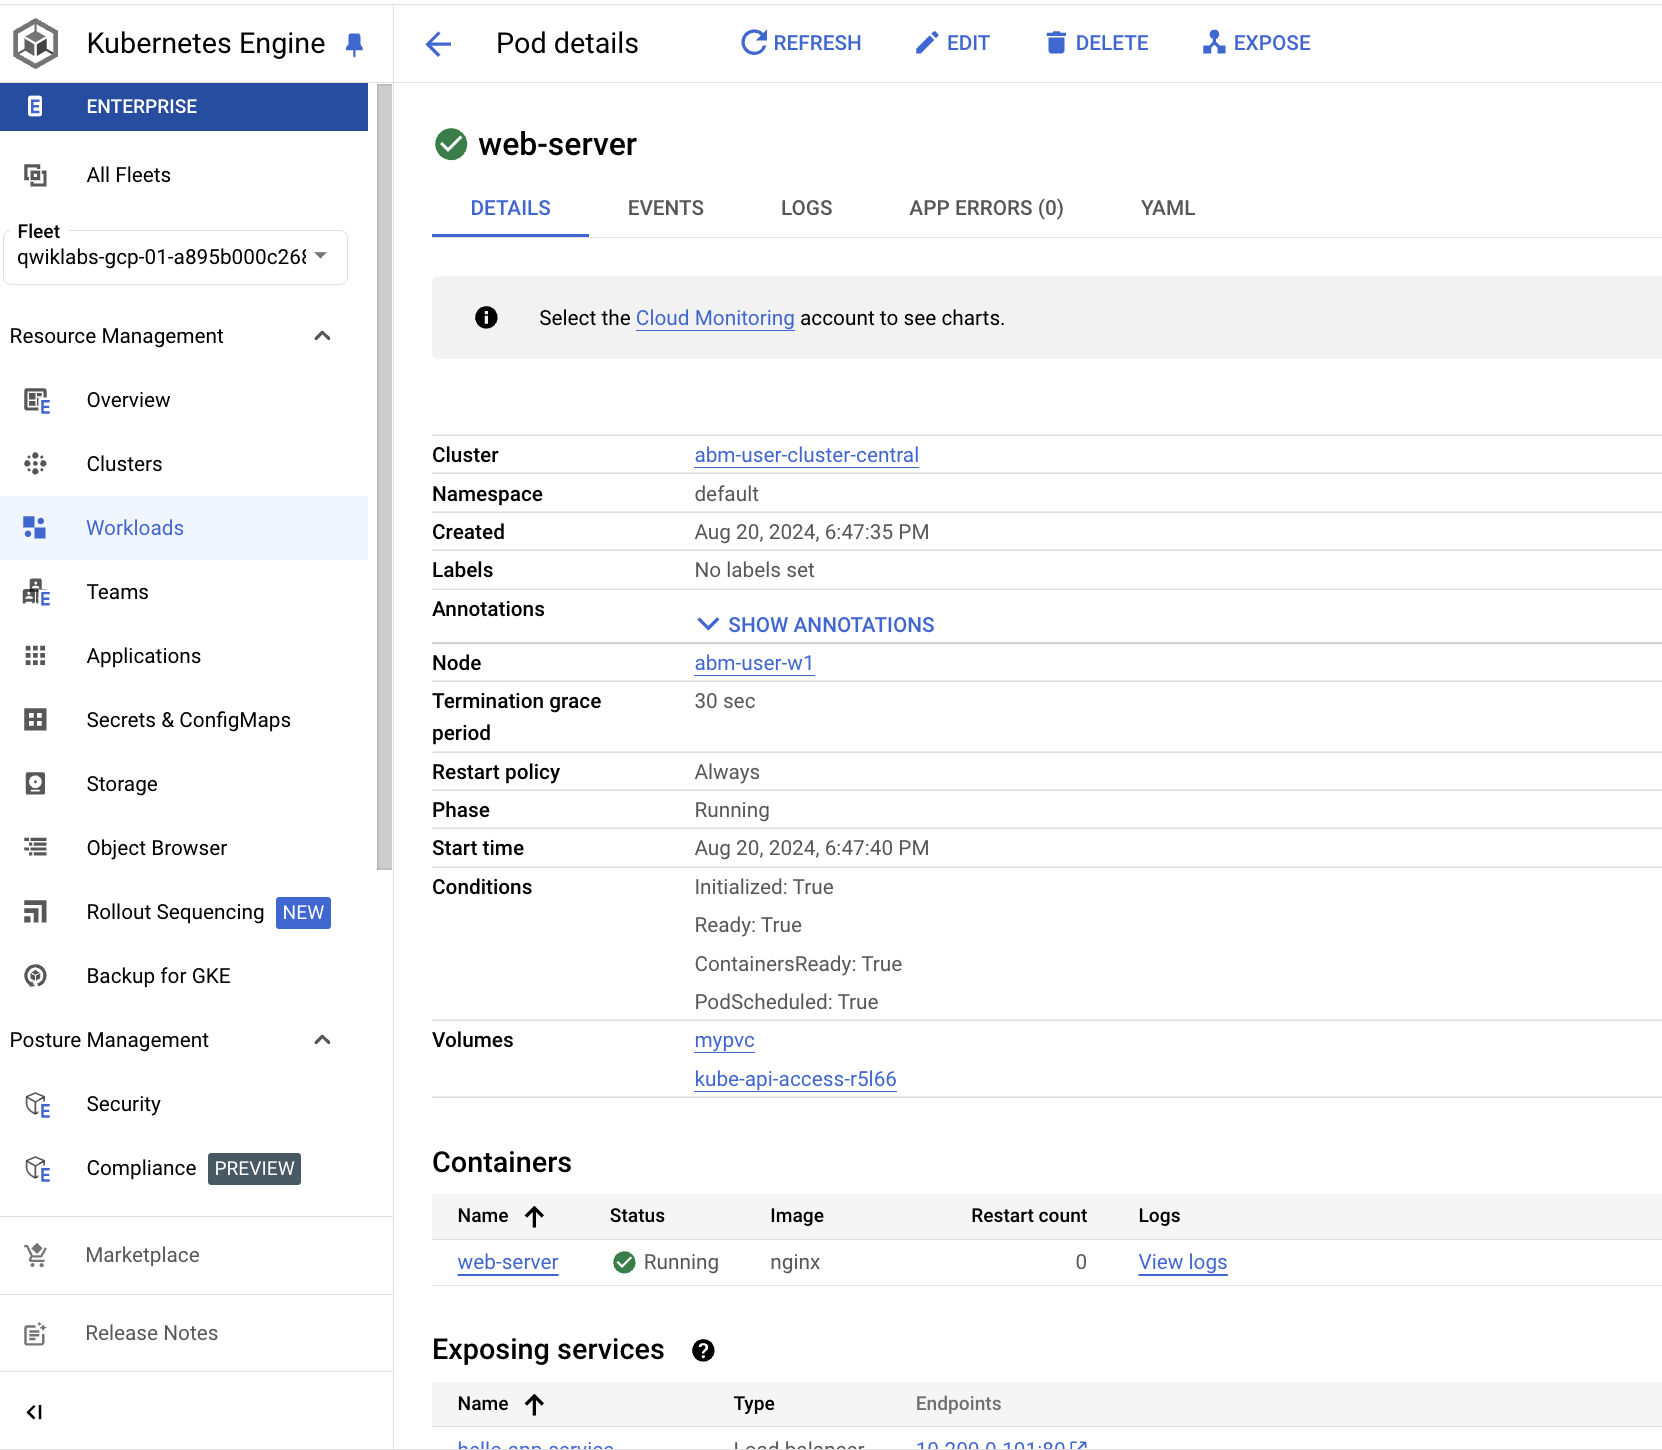
In the UI, visit Navigation > Kubernetes Engine > Workloads. Find the
web-server pod that you just created and verify that is running. (It
may take 1-2 minutes for the pod to become fully operational - you can
wait and refresh the page to see the results).
Task 6. Troubleshooting
If you get disconnected from Cloud Shell and want to sign back into the admin workstation:
If you get disconnected from Cloud Shell and want to connect to the admin cluster:
# From the admin workstation (root@abm-ws)
export KUBECONFIG=$KUBECONFIG:~/baremetal/bmctl-workspace/abm-admin-cluster/abm-admin-cluster-kubeconfig
kubectx admin
kubectl get nodes
If you get disconnected from Cloud Shell and want to connect to the user cluster:
# From the admin workstation (root@abm-ws)
export KUBECONFIG=$KUBECONFIG:~/baremetal/bmctl-workspace/abm-user-cluster-central/abm-user-cluster-central-kubeconfig
kubectx user-central
kubectl get nodes
Review
In this lab, you used the provisioned bare metal infrastructure to install an
Anthos cluster on bare metal user cluster. You also deployed applications
running in the user cluster load balancing in L4 with services exposed in the
MetalLB load balancer, as well as L7 load balancing with the Ingress resource.
In addition, you installed a CSI driver and deployed a stateful workload.
End your lab
When you have completed your lab, click End Lab. Google Skills removes the resources you’ve used and cleans the account for you.
You will be given an opportunity to rate the lab experience. Select the applicable number of stars, type a comment, and then click Submit.
The number of stars indicates the following:
1 star = Very dissatisfied
2 stars = Dissatisfied
3 stars = Neutral
4 stars = Satisfied
5 stars = Very satisfied
You can close the dialog box if you don't want to provide feedback.
For feedback, suggestions, or corrections, please use the Support tab.
Copyright 2026 Google LLC All rights reserved. Google and the Google logo are trademarks of Google LLC. All other company and product names may be trademarks of the respective companies with which they are associated.
I lab creano un progetto e risorse Google Cloud per un periodo di tempo prestabilito
I lab hanno un limite di tempo e non possono essere messi in pausa. Se termini il lab, dovrai ricominciare dall'inizio.
In alto a sinistra dello schermo, fai clic su Inizia il lab per iniziare
Utilizza la navigazione privata
Copia il nome utente e la password forniti per il lab
Fai clic su Apri console in modalità privata
Accedi alla console
Accedi utilizzando le tue credenziali del lab. L'utilizzo di altre credenziali potrebbe causare errori oppure l'addebito di costi.
Accetta i termini e salta la pagina di ripristino delle risorse
Non fare clic su Termina lab a meno che tu non abbia terminato il lab o non voglia riavviarlo, perché il tuo lavoro verrà eliminato e il progetto verrà rimosso
Questi contenuti non sono al momento disponibili
Ti invieremo una notifica via email quando sarà disponibile
Bene.
Ti contatteremo via email non appena sarà disponibile
Un lab alla volta
Conferma per terminare tutti i lab esistenti e iniziare questo
Utilizza la navigazione privata per eseguire il lab
Il modo migliore per eseguire questo lab è utilizzare una finestra del browser in incognito o privata. Ciò evita eventuali conflitti tra il tuo account personale e l'account studente, che potrebbero causare addebiti aggiuntivi sul tuo account personale.
Qwikstart - Anthos clusters on bare metal
Durata:
Configurazione in 31 m
·
Accesso da 80 m
·
Completamento in 80 m