
시작하기 전에
- 실습에서는 정해진 기간 동안 Google Cloud 프로젝트와 리소스를 만듭니다.
- 실습에는 시간 제한이 있으며 일시중지 기능이 없습니다. 실습을 종료하면 처음부터 다시 시작해야 합니다.
- 화면 왼쪽 상단에서 실습 시작을 클릭하여 시작합니다.
Enable Vertex AI API and Notebooks API
/ 25
Deploy Vertex Notebook instance
/ 25
Clone the lab repository
/ 25
Classify images using data augmentation
/ 25

In this lab, you learn how to set up preprocessing to ensure reproducibility in production, and then delve into ways to implement a variety of preprocessing operations in Keras/TensorFlow. You also learn how to carry out data augmentation to improve the model's resilience and accuracy.
You learn how to apply data augmentation in two ways:
For each lab, you get a new Google Cloud project and set of resources for a fixed time at no cost.
Sign in to Google Skills using an incognito window.
Note the lab's access time (for example, 1:15:00), and make sure you can finish within that time.
There is no pause feature. You can restart if needed, but you have to start at the beginning.
When ready, click Start lab.
Note your lab credentials (Username and Password). You will use them to sign in to the Google Cloud Console.
Click Open Google Console.
Click Use another account and copy/paste credentials for this lab into the prompts.
If you use other credentials, you'll receive errors or incur charges.
Accept the terms and skip the recovery resource page.
In the Google Cloud Console, on the Navigation menu, click APIs & Services > Library.
Search for Notebooks API and press ENTER.
Click on the Notebooks API result, and if the API is not enabled, click Enable.
In the Google Cloud Console, on the Navigation menu, click APIs & Services > Library.
Search for Vertex AI API and press ENTER.
Click on the Vertex AI API result, and if the API is not enabled, click Enable.
In the Google Cloud console, from the Navigation menu (
Click Enable All Recommended APIs.
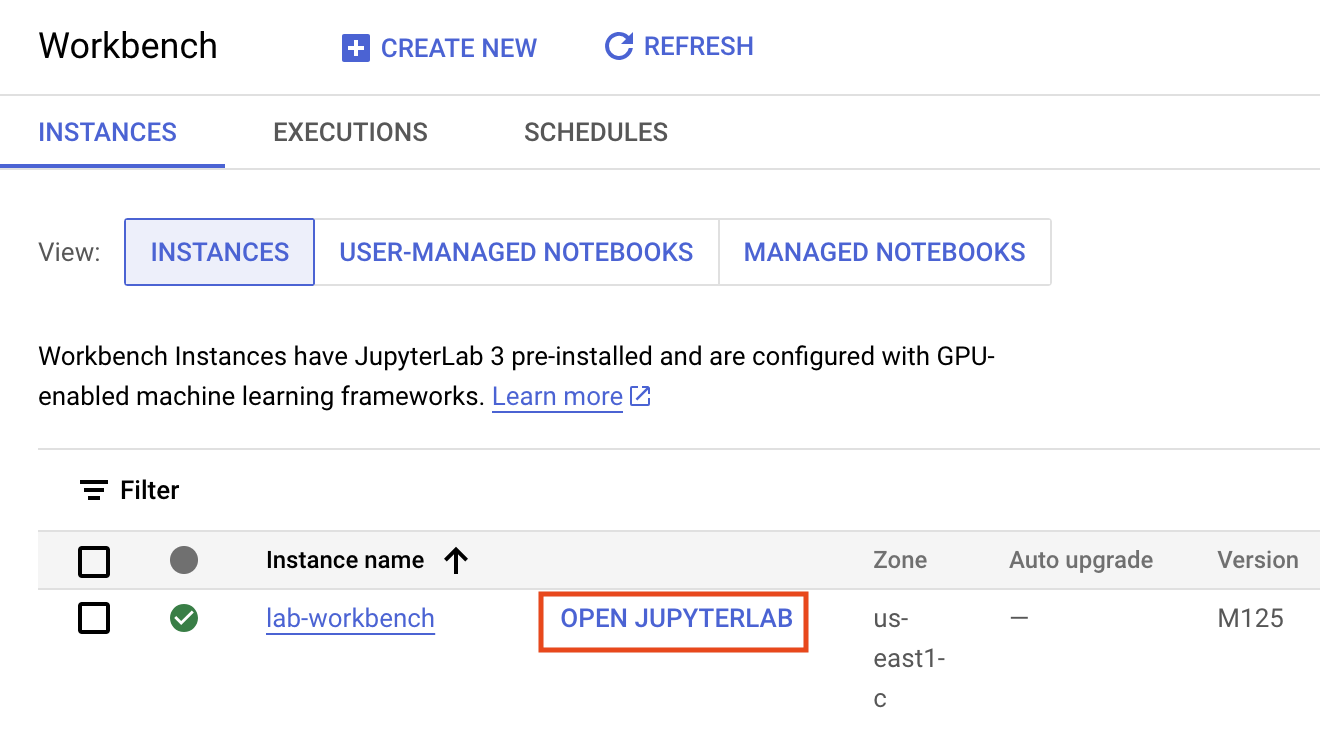
In the Navigation menu, click Workbench.
At the top of the Workbench page, ensure you are in the Instances view.
Click 
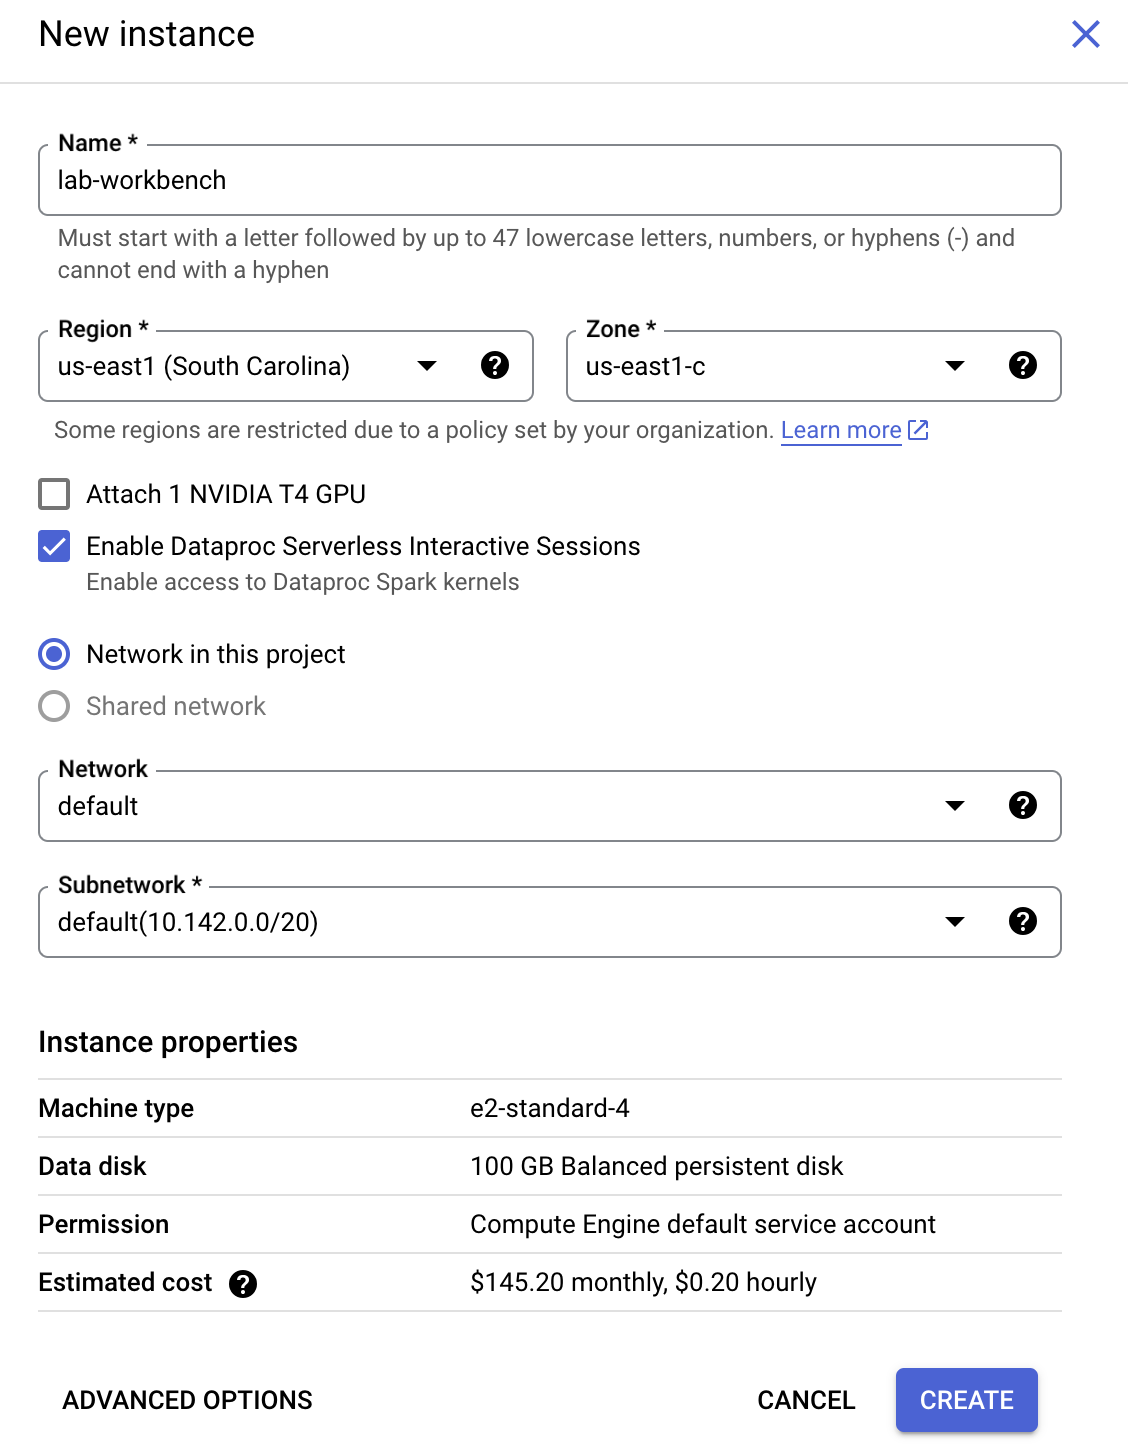
Configure the Instance:
This will take a few minutes to create the instance. A green checkmark will appear next to its name when it's ready.
To clone the training-data-analyst notebook in your JupyterLab instance:
Step 1
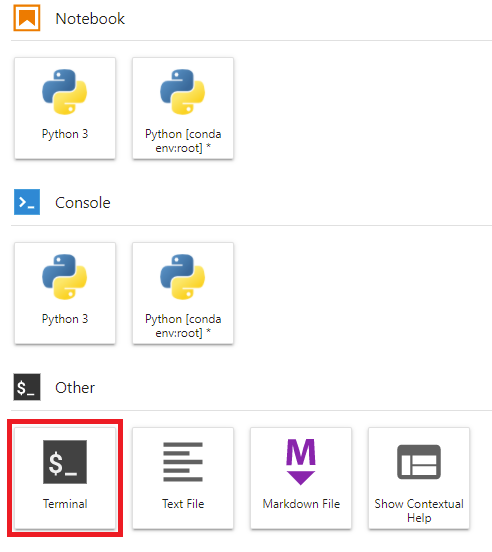
In JupyterLab, click the Terminal icon to open a new terminal.
Step 2
At the command-line prompt, type in the following command and press Enter.
Step 3
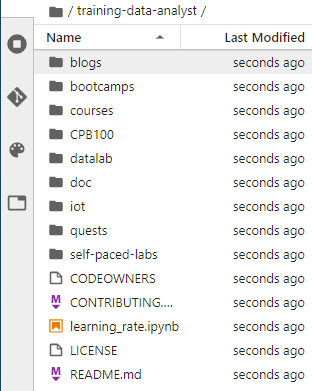
Confirm that you have cloned the repository by double clicking on the training-data-analyst directory and ensuring that you can see its contents. The files for all the Jupyter notebook-based labs throughout this course are available in this directory.
In the notebook interface, navigate to training-data-analyst > courses > machine_learning > deepdive2 > computer_vision_fun > labs and open classifying_images_using_data_augmentation.ipynb.
In the notebook interface, click Edit > Clear All Outputs.
In the JupyterLab menu bar click Kernel > Change Kernel, select Tensorflow 2.11, and then click Select.
Carefully read through the notebook instructions and fill in lines marked with #TODO where you need to complete the code.
Tip: To run the current cell, click the cell and press SHIFT+ENTER. Other cell commands are listed in the notebook UI under Run.
When you have completed your lab, click End Lab. Google Skills removes the resources you’ve used and cleans the account for you.
You will be given an opportunity to rate the lab experience. Select the applicable number of stars, type a comment, and then click Submit.
The number of stars indicates the following:
You can close the dialog box if you don't want to provide feedback.
For feedback, suggestions, or corrections, please use the Support tab.
Copyright 2026 Google LLC All rights reserved. Google and the Google logo are trademarks of Google LLC. All other company and product names may be trademarks of the respective companies with which they are associated.


현재 이 콘텐츠를 이용할 수 없습니다
이용할 수 있게 되면 이메일로 알려드리겠습니다.

감사합니다
이용할 수 있게 되면 이메일로 알려드리겠습니다.

한 번에 실습 1개만 가능
모든 기존 실습을 종료하고 이 실습을 시작할지 확인하세요.