


시작하기 전에
- 실습에서는 정해진 기간 동안 Google Cloud 프로젝트와 리소스를 만듭니다.
- 실습에는 시간 제한이 있으며 일시중지 기능이 없습니다. 실습을 종료하면 처음부터 다시 시작해야 합니다.
- 화면 왼쪽 상단에서 실습 시작을 클릭하여 시작합니다.
In this lab, you learn about Google Cloud buildpacks, which allow developers to create containerized applications and deploy them without the need to install Docker locally, or create a Dockerfile. You will then take the same image and learn to deploy it directly on Cloud Run, allowing Cloud Run to do the building for you.
In this lab, you learn to:
For each lab, you get a new Google Cloud project and set of resources for a fixed time at no cost.
Sign in to Google Skills using an incognito window.
Note the lab's access time (for example, 1:15:00), and make sure you can finish within that time.
There is no pause feature. You can restart if needed, but you have to start at the beginning.
When ready, click Start lab.
Note your lab credentials (Username and Password). You will use them to sign in to the Google Cloud Console.
Click Open Google Console.
Click Use another account and copy/paste credentials for this lab into the prompts. If you use other credentials, you'll receive errors or incur charges.
Accept the terms and skip the recovery resource page.
Click the Start Lab button. If you need to pay for the lab, a pop-up opens for you to select your payment method. On the left is a panel populated with the temporary credentials that you must use for this lab.
Copy the username, and then click Open Google Console. The lab spins up resources, and then opens another tab that shows the Choose an account page.
On the Choose an account page, click Use Another Account. The Sign in page opens.
Paste the username that you copied from the Connection Details panel. Then copy and paste the password.
After a few moments, the Cloud console opens in this tab.

Google Cloud Shell is a virtual machine that is loaded with development tools. It offers a persistent 5GB home directory and runs on the Google Cloud.
Google Cloud Shell provides command-line access to your Google Cloud resources.
In Cloud console, on the top right toolbar, click the Open Cloud Shell button.
Click Continue.
It takes a few moments to provision and connect to the environment. When you are connected, you are already authenticated, and the project is set to your PROJECT_ID. For example:
gcloud is the command-line tool for Google Cloud. It comes pre-installed on Cloud Shell and supports tab-completion.
Output:
Example output:
Output:
Example output:
Below you will find a reference list of a few very basic Linux commands which may be included in the instructions or code blocks for this lab.
| Command --> | Action | . | Command --> | Action |
|---|---|---|---|---|
| mkdir (make directory) | create a new folder | . | cd (change directory) | change location to another folder |
| ls (list ) | list files and folders in the directory | . | cat (concatenate) | read contents of a file without using an editor |
| apt-get update | update package manager library | . | ping | signal to test reachability of a host |
| mv (move ) | moves a file | . | cp (copy) | makes a file copy |
| pwd (present working directory ) | returns your current location | . | sudo (super user do) | gives higher administration privileges |
From Cloud Shell, enable the Cloud Run API:
If you are asked to authorize the use of your credentials, do so. You should then see a successful message similar to this one:
Set the compute region:
The pack CLI has already been installed on your lab account.
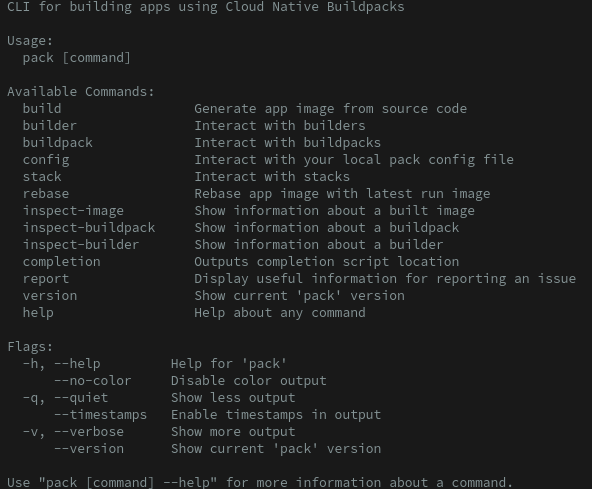
To see the list of pack commands available to you, open your cloud shell terminal and type pack. You should see output similar to the example below:
Scan the list.
Google Cloud Buildpack helps developers focus on writing code, not on containerizing it. Buildpack supports the following languages: Java, Node, Go, Python, and .NET (C#). Google provides a Buildpack Repository containing sample code you can use to practice using Buildpack to easily containerize and deploy applications.
To use the provided sample applications in the language of your choice, you will first need to clone the Buildpack repository and then select a sample to build with the pack build command.
Clone the buildpacks samples repository to your local directory using the command below:
pack binary in Cloud Shell:A new browser will open showing the "hello, world" message.
In the tasks above, we have built a container image locally using pack. After this, the next step would generally be pushing the container to Artifact Registry and then deploy to Cloud Run. However, it is also possible to have Cloud Run do all of the building and deployment for you.
Use the one-step gcloud command to deploy your container:
When prompted:
Y and press Enter.Wait a few minutes until the deployment is complete. The output should look similar to the below example:
You have completed this lab!
For more information on building a stateless HTTP container suitable for Cloud Run from code source and pushing it to Container Registry, see:
When you have completed your lab, click End Lab. Google Skills removes the resources you’ve used and cleans the account for you.
You will be given an opportunity to rate the lab experience. Select the applicable number of stars, type a comment, and then click Submit.
The number of stars indicates the following:
You can close the dialog box if you don't want to provide feedback.
For feedback, suggestions, or corrections, please use the Support tab.
Copyright 2026 Google LLC All rights reserved. Google and the Google logo are trademarks of Google LLC. All other company and product names may be trademarks of the respective companies with which they are associated.


현재 이 콘텐츠를 이용할 수 없습니다
이용할 수 있게 되면 이메일로 알려드리겠습니다.

감사합니다
이용할 수 있게 되면 이메일로 알려드리겠습니다.

한 번에 실습 1개만 가능
모든 기존 실습을 종료하고 이 실습을 시작할지 확인하세요.
실습을 시작하려면 이 간단한 단계를 완료하세요.