

Before you begin
- Labs create a Google Cloud project and resources for a fixed time
- Labs have a time limit and no pause feature. If you end the lab, you'll have to restart from the beginning.
- On the top left of your screen, click Start lab to begin
In this lab, learn how to install and use Kubeflow Pipelines to orchestrate various Google Cloud services in an end-to-end ML pipeline. After Kubeflow Pipelines is installed, you create an AI Platform Notebook and complete 2 example notebooks to demonstrate the services used and how to author a pipeline.
In this lab, you will perform the following tasks:
Read these instructions. Labs are timed and you cannot pause them. The timer, which starts when you click Start Lab, shows how long Google Cloud resources will be made available to you.
This hands-on lab lets you do the lab activities yourself in a real cloud environment, not in a simulation or demo environment. It does so by giving you new, temporary credentials that you use to sign in and access Google Cloud for the duration of the lab.
To complete this lab, you need:
Since this is a temporary account, which will last only as long as this lab:
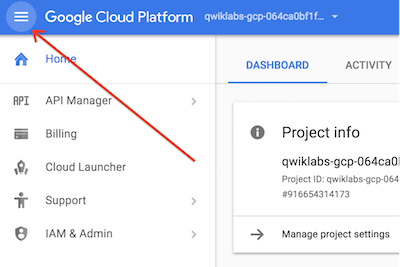
 ) at the top-left.
You will deploy Kubeflow Pipelines as a Kubernetes app, which is a solution that you can simply click to deploy to Google Kubernetes Engine. Kubernetes apps also have the flexibility to be deployed to Kubernetes clusters on-premises or in third-party clouds. You will see Kubeflow Pipelines integrated into your Google Cloud environment as AI Platform Pipelines. You can learn more about Kubeflow Pipelines in the Kubeflow Introduction documentation during installation steps.
In the Google Cloud Console, on the Navigation menu, scroll down to AI Platform and pin the section for easier access later in the lab.
Hold the pointer over AI Platform, and click Pipelines.
Click New instance.
A new tab opens.
Click Configure.
Select Allow access to the following Cloud APIs and then click CREATE NEW CLUSTER.
This should take 2-3 minutes to complete. Wait for the cluster to finish before proceeding to the next step.
On the first tab, in the Google Cloud Console, do one of the following:
When the cluster creation is complete, navigate back to Deploy Kubeflow Pipelines tab and check the GCP Marketplace Terms of Service checkbox.
Leave other settings unchanged, and then click Deploy. The individual services of Kubeflow Pipelines are deployed to your GKE cluster. Continue to the next task while installation occurs.
In the Google Cloud Console, on the Navigation Menu, click Vertex AI > Workbench. Select User-Managed Notebooks.
On the Notebook instances page, Click Create New and choose the latest version of TensorFlow Enterprise 2.6 (with LTS) in Environment.
In the New notebook instance dialog, confirm the name of the deep learning VM, if you don’t want to change the region and zone, leave all settings as they are and then click Create. The new VM will take 2-3 minutes to start.
Click Open JupyterLab.
A JupyterLab window will open in a new tab.
In JupyterLab, click the Terminal icon to open a new terminal.
At the command-line prompt, run the following commands:
To confirm that you have cloned the repository, double-click on the training-data-analyst directory and confirm that you can see its contents.
Open the samples/core folder, which contains the files for all the Jupyter notebook-based examples throughout this lab.
Complete a few more steps before starting the example notebooks.
In the Google Cloud Console, create a Cloud Storage bucket for use in your pipelines. Name it the same as your Project ID.
In the Terminal window in your notebook environment, run the following code:
Identify your Kubeflow Pipelines host ID.
In the Google Cloud Console, on the AI Platform page, click Pipelines. Your installed pipelines instance should be listed.
Click Settings, and then note the host value in the kfp.Client() method. You will use this value in the example notebook to connect to your Kubeflow Pipelines environment ENDPOINT.
Kubeflow Pipelines is fully installed when a green checkmark appears next to your pipeline instance.
To open the UI, click Open pipelines dashboard.
In the left navigation pane, click Pipelines and examine some of the existing sample pipelines (but don't run any). Also take note of the Experiments section. You will generally group multiple related pipeline runs in a single experiment for later comparison, although this lab will use the 'Default' experiment.
Now you will author and execute a pipeline from your AI Platform Notebook using the Kubeflow Pipelines SDK and specifically the Kubeflow Pipelines DSL (Domain Specific Language) to actually build the pipeline. This pipeline will use pre-built components that will call out to various Google Cloud services such as BigQuery and AI Platform training instead of executing all the pipeline logic in the local GKE cluster.
training-data-analyst/courses/machine_learning/deepdive2/production_ml/labs/samples > core if you haven't already.Both notebooks you will complete are located here.
Open ai_platform.ipynb located in training-data-analyst/courses/machine_learning/deepdive2/production_ml/labs/samples/core/ai_platform.
Complete this notebook, being sure to insert the appropriate values for project_id and the Cloud Storage bucket location.
Your cell should become:
The pipeline will take about 10 minutes to execute.
Open lightweight_component.ipynb located in training-data-analyst/courses/machine_learning/deepdive2/production_ml/labs/samples/core > lightweight_component.
Complete the steps in this notebook, modifying the kfp.Client() method as before.
Click Run details to examine the pipeline output in the UI. It will take a couple of minutes to complete.
When you have completed your lab, click End Lab. Google Skills removes the resources you’ve used and cleans the account for you.
You will be given an opportunity to rate the lab experience. Select the applicable number of stars, type a comment, and then click Submit.
The number of stars indicates the following:
You can close the dialog box if you don't want to provide feedback.
For feedback, suggestions, or corrections, please use the Support tab.
Copyright 2026 Google LLC All rights reserved. Google and the Google logo are trademarks of Google LLC. All other company and product names may be trademarks of the respective companies with which they are associated.


This content is not currently available
We will notify you via email when it becomes available

Great!
We will contact you via email if it becomes available

One lab at a time
Confirm to end all existing labs and start this one
Complete this quick step to start your lab.