Questi contenuti non sono ancora ottimizzati per i dispositivi mobili.
Per un'esperienza ottimale, visualizza il sito su un computer utilizzando un link inviato via email.
Overview
BigQuery is Google's fully managed, NoOps, low cost analytics database. With BigQuery you can query terabytes and terabytes of data without having any infrastructure to manage or needing a database administrator. BigQuery uses SQL and can take advantage of the pay-as-you-go model. BigQuery allows you to focus on analyzing data to find meaningful insights.
The dataset you'll use is an ecommerce dataset that has millions of Google Analytics records for the Google Merchandise Store loaded into BigQuery. You have a copy of that dataset for this lab and will explore the available fields and row for insights.
In this lab you will query partitioned datasets and create your own dataset partitions to improve query performance and reduce cost.
Setup and requirements
For each lab, you get a new Google Cloud project and set of resources for a fixed time at no cost.
Sign in to Google Skills using an incognito window.
Note the lab's access time (for example, 1:15:00), and make sure you can finish within that time.
There is no pause feature. You can restart if needed, but you have to start at the beginning.
When ready, click Start lab.
Note your lab credentials (Username and Password). You will use them to sign in to the Google Cloud Console.
Click Open Google Console.
Click Use another account and copy/paste credentials for this lab into the prompts.
If you use other credentials, you'll receive errors or incur charges.
Accept the terms and skip the recovery resource page.
Open BigQuery Console
In the Google Cloud Console, select Navigation menu > BigQuery.
The Welcome to BigQuery in the Cloud Console message box opens. This message box provides a link to the quickstart guide and lists UI updates.
Click Done.
Task 1. Create a new dataset
First, you will create a dataset to store your tables.
Switch to the Explorer pane, near your project id, click View actions, then click Create dataset.
Set Dataset ID to ecommerce.
Leave the other options at their default values (Data Location, Default table Expiration).
Click Create dataset.
Task 2. Creating tables with date partitions
A partitioned table is a table that is divided into segments, called partitions, that make it easier to manage and query your data. By dividing a large table into smaller partitions, you can improve query performance, and control costs by reducing the number of bytes read by a query.
Now you will create a new table and bind a date or timestamp column as a partition. Before we do that, let's explore the data in the non-partitioned table first.
Query webpage analytics for a sample of visitors in 2017
In the Query Editor, add the below query. Before running, note the total amount of data it will process as indicated next to the query validator icon: "This query will process 1.74 GB when run".
#standardSQL
SELECT DISTINCT
fullVisitorId,
date,
city,
pageTitle
FROM `data-to-insights.ecommerce.all_sessions_raw`
WHERE date = '20170708'
LIMIT 5
Click RUN.
The query returns 5 results.
Query webpage analytics for a sample of visitors in 2018
Let's modify the query to look at visitors for 2018 now.
In the Query Editor, add the below query:
#standardSQL
SELECT DISTINCT
fullVisitorId,
date,
city,
pageTitle
FROM `data-to-insights.ecommerce.all_sessions_raw`
WHERE date = '20180708'
LIMIT 5
The Query results will tell you how much data this query will process.
Click RUN.
Notice that the query still processes 1.74 GB even though it returns 0 results. Why? The query engine needs to scan all records in the dataset to see if they satisfy the date matching condition in the WHERE clause. It must look at each record to compare the date against the condition of ‘20180708'.
Additionally, the LIMIT 5 does not reduce the total amount of data processed, which is a common misconception.
Common use-cases for date-partitioned tables
Scanning through the entire dataset everytime to compare rows against a WHERE condition is wasteful. This is especially true if you only really care about records for a specific period of time like:
All transactions for the last year
All visitor interactions within the last 7 days
All products sold in the last month
Instead of scanning the entire dataset and filtering on a date field like we did in the earlier queries, we will now setup a date-partitioned table. This will allow us to completely ignore scanning records in certain partitions if they are irrelevant to our query.
Create a new partitioned table based on date
Click "+" (SQL query) and add the below query, then RUN:
#standardSQL
CREATE OR REPLACE TABLE ecommerce.partition_by_day
PARTITION BY date_formatted
OPTIONS(
description="a table partitioned by date"
) AS
SELECT DISTINCT
PARSE_DATE("%Y%m%d", date) AS date_formatted,
fullvisitorId
FROM `data-to-insights.ecommerce.all_sessions_raw`
In this query, note the new option - PARTITION BY a field. The two options available to partition are DATE and TIMESTAMP. The PARSE_DATE function is used on the date field (stored as a string) to get it into the proper DATE type for partitioning.
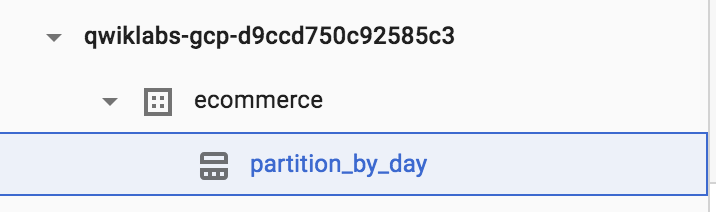
Click on the ecommerce dataset, then select the new partiton_by_day table:
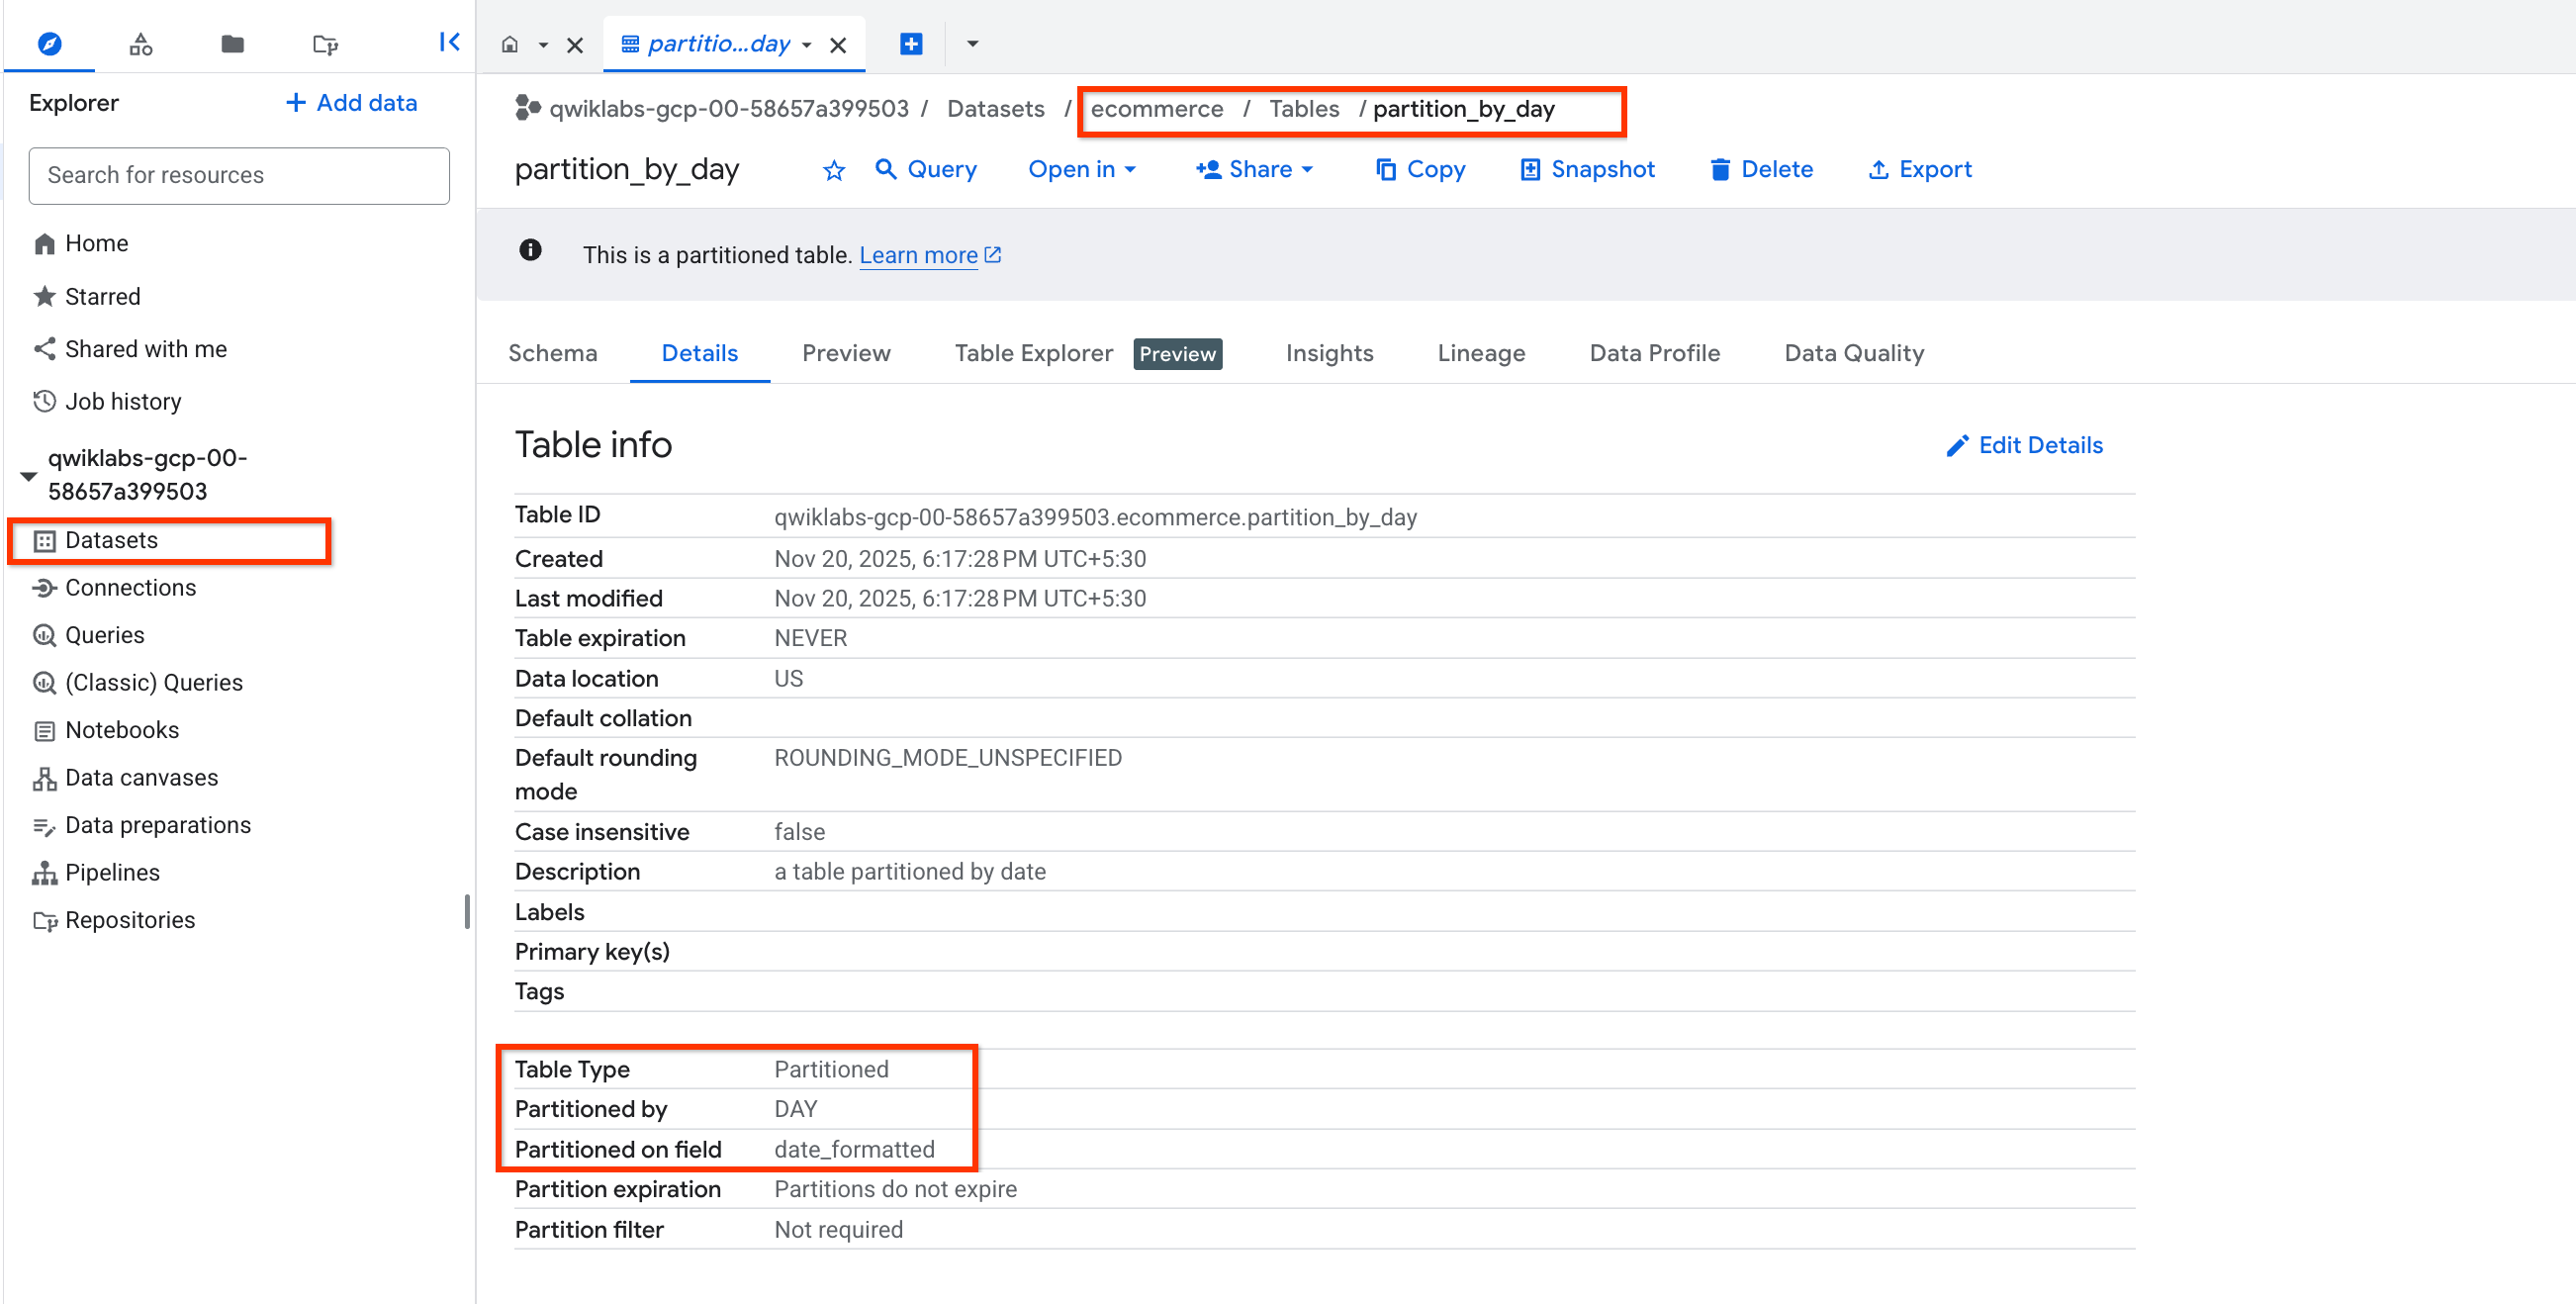
Click on the Details tab.
Confirm that you see:
Partitioned by: Day
Partitioning on: date_formatted
Note: Partitions within partitioned tables on your Google Skills account will auto-expire after 60 days from the value in your date column. Your personal Google Cloud account with billing-enabled will let you have partitioned tables that don't expire.
For the purposes of this lab, the remaining queries will be ran against partitioned tables that have already been created.
Task 3. View data processed with a partitioned table
Run the below query, and note the total bytes to be processed:
#standardSQL
SELECT *
FROM `data-to-insights.ecommerce.partition_by_day`
WHERE date_formatted = '2016-08-01'
This time ~25 KB or 0.025MB is processed, which is a fraction of what you queried.
Now run the below query, and note the total bytes to be processed:
#standardSQL
SELECT *
FROM `data-to-insights.ecommerce.partition_by_day`
WHERE date_formatted = '2018-07-08'
You should see This query will process 0 B when run.
Why is there 0 bytes processed?
Task 4. Creating an auto-expiring partitioned table
Auto-expiring partitioned tables are used to comply with data privacy statutes, and can be used to avoid unnecessary storage (which you'll be charged for in a production environment). If you want to create a rolling window of data, add an expiration date so the partition disappears after you're finished using it.
Explore the available NOAA weather data tables
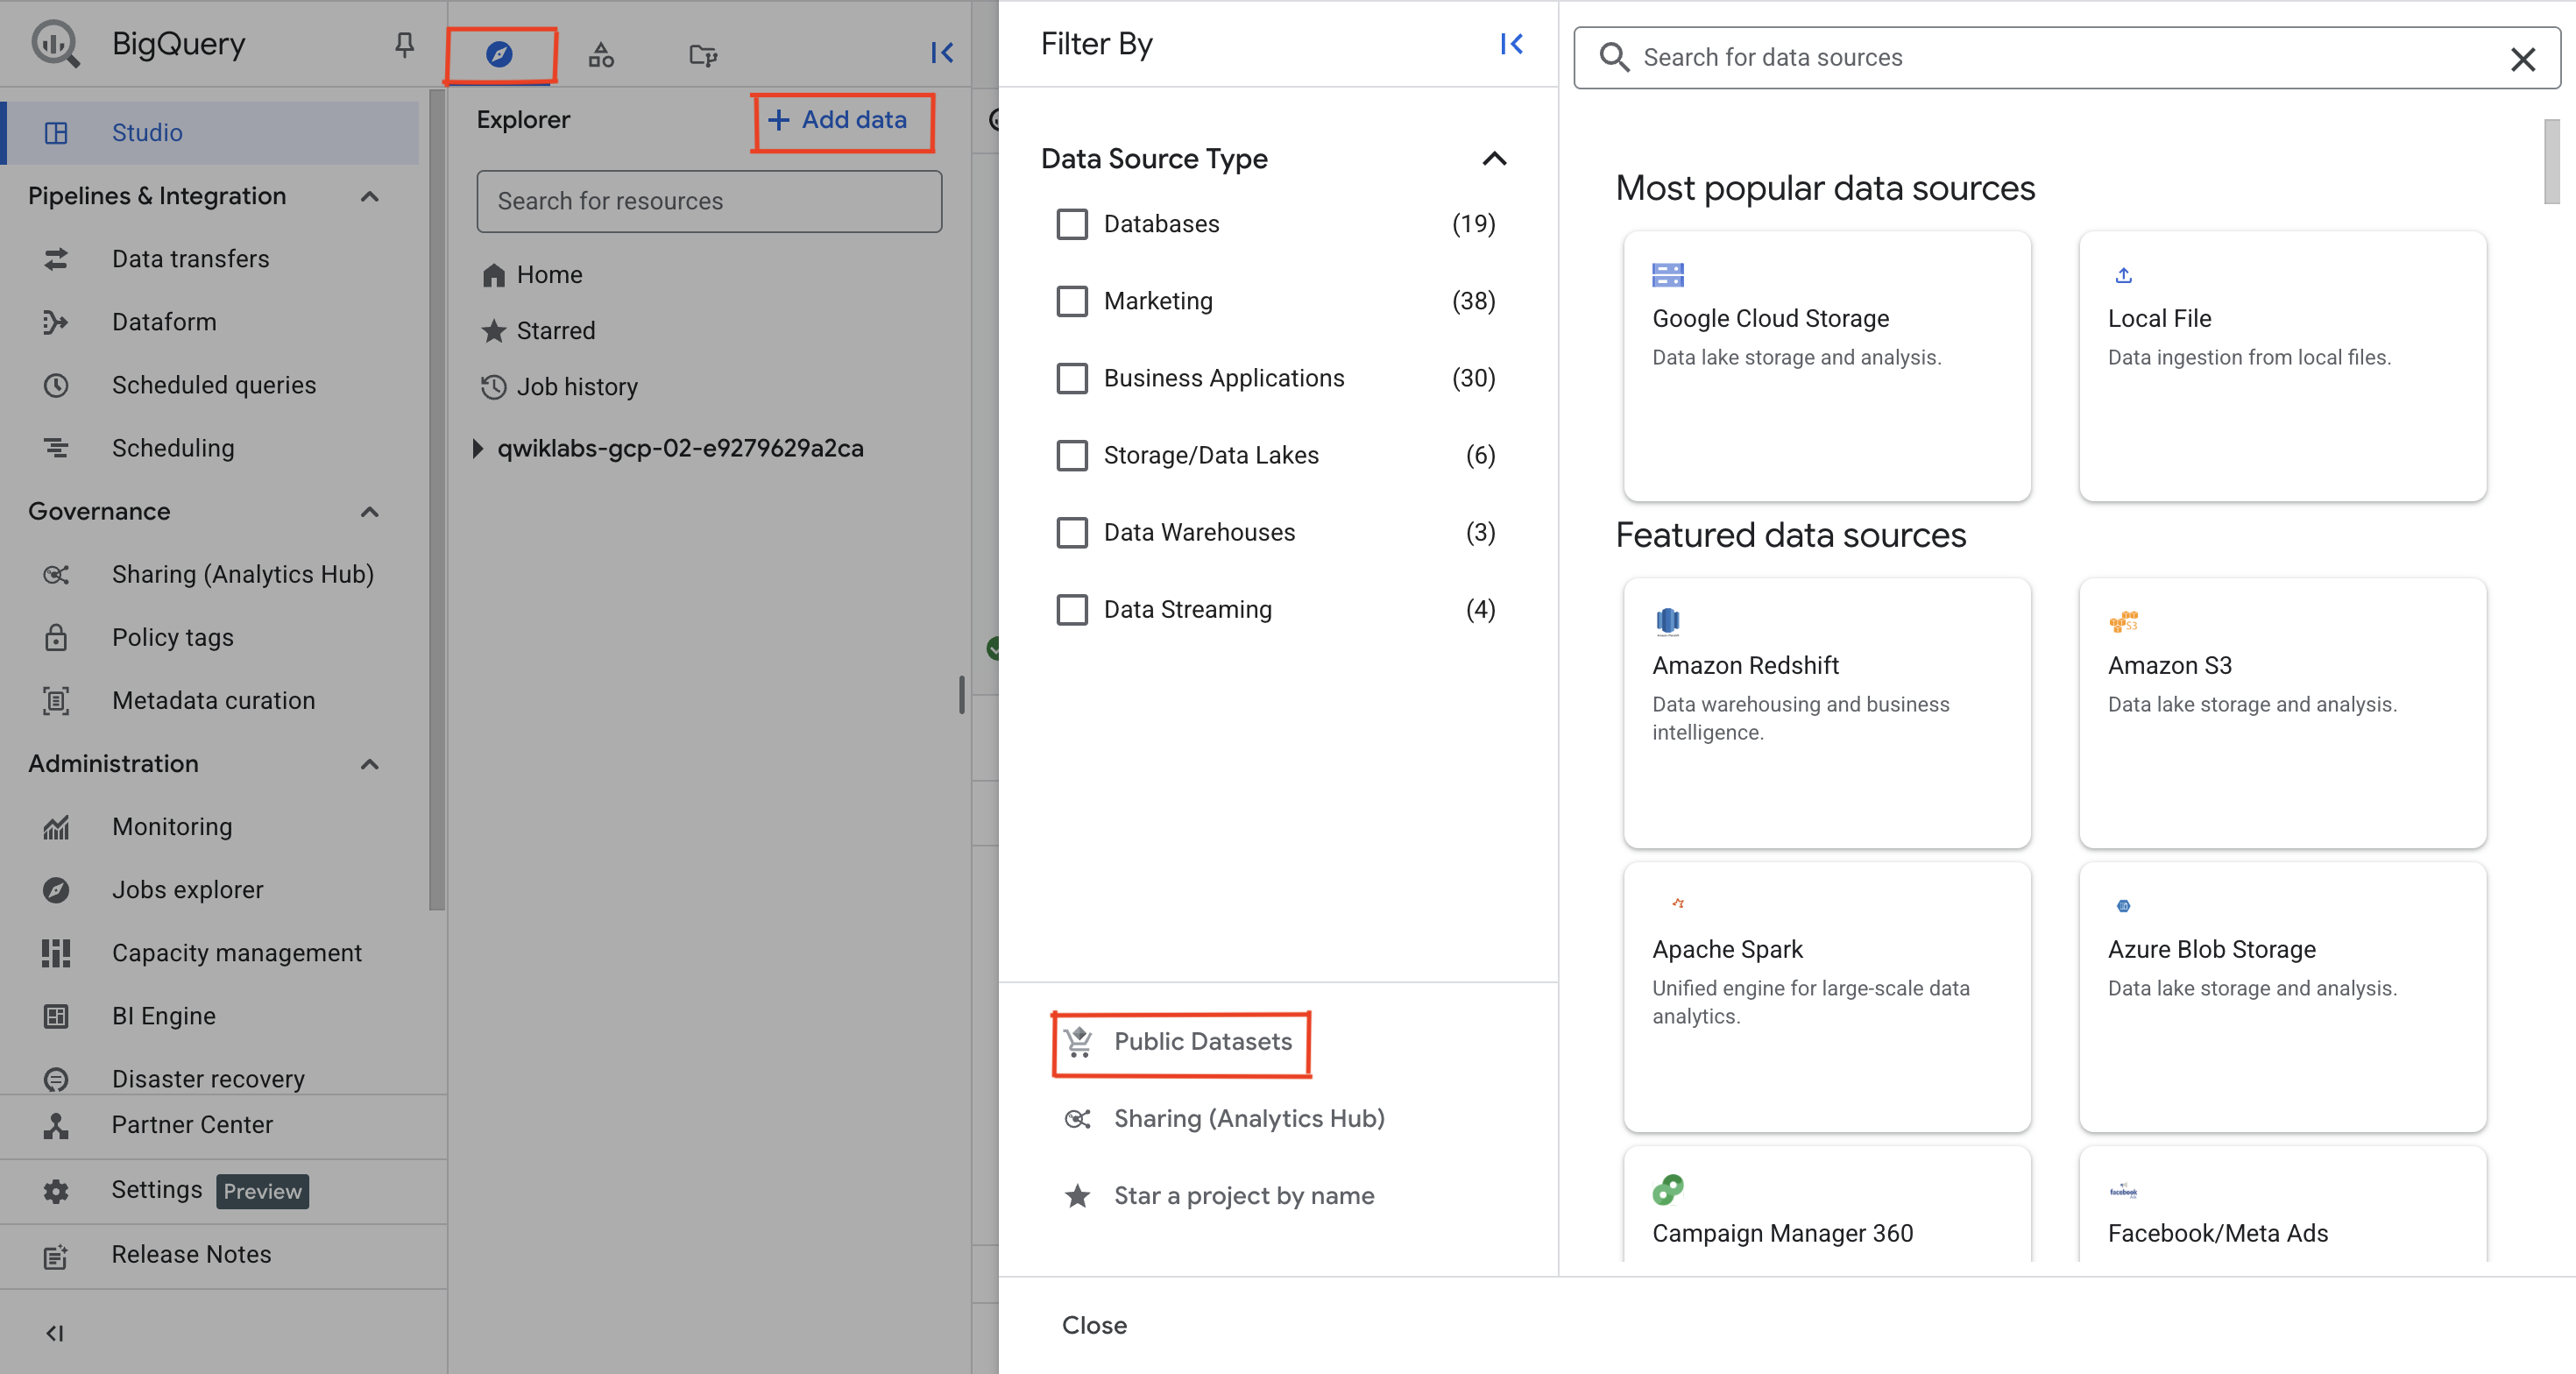
In the left menu, in Explorer, click on + Add data and select Public datasets.
Search for GSOD NOAA then select the dataset.
Click on View Dataset.
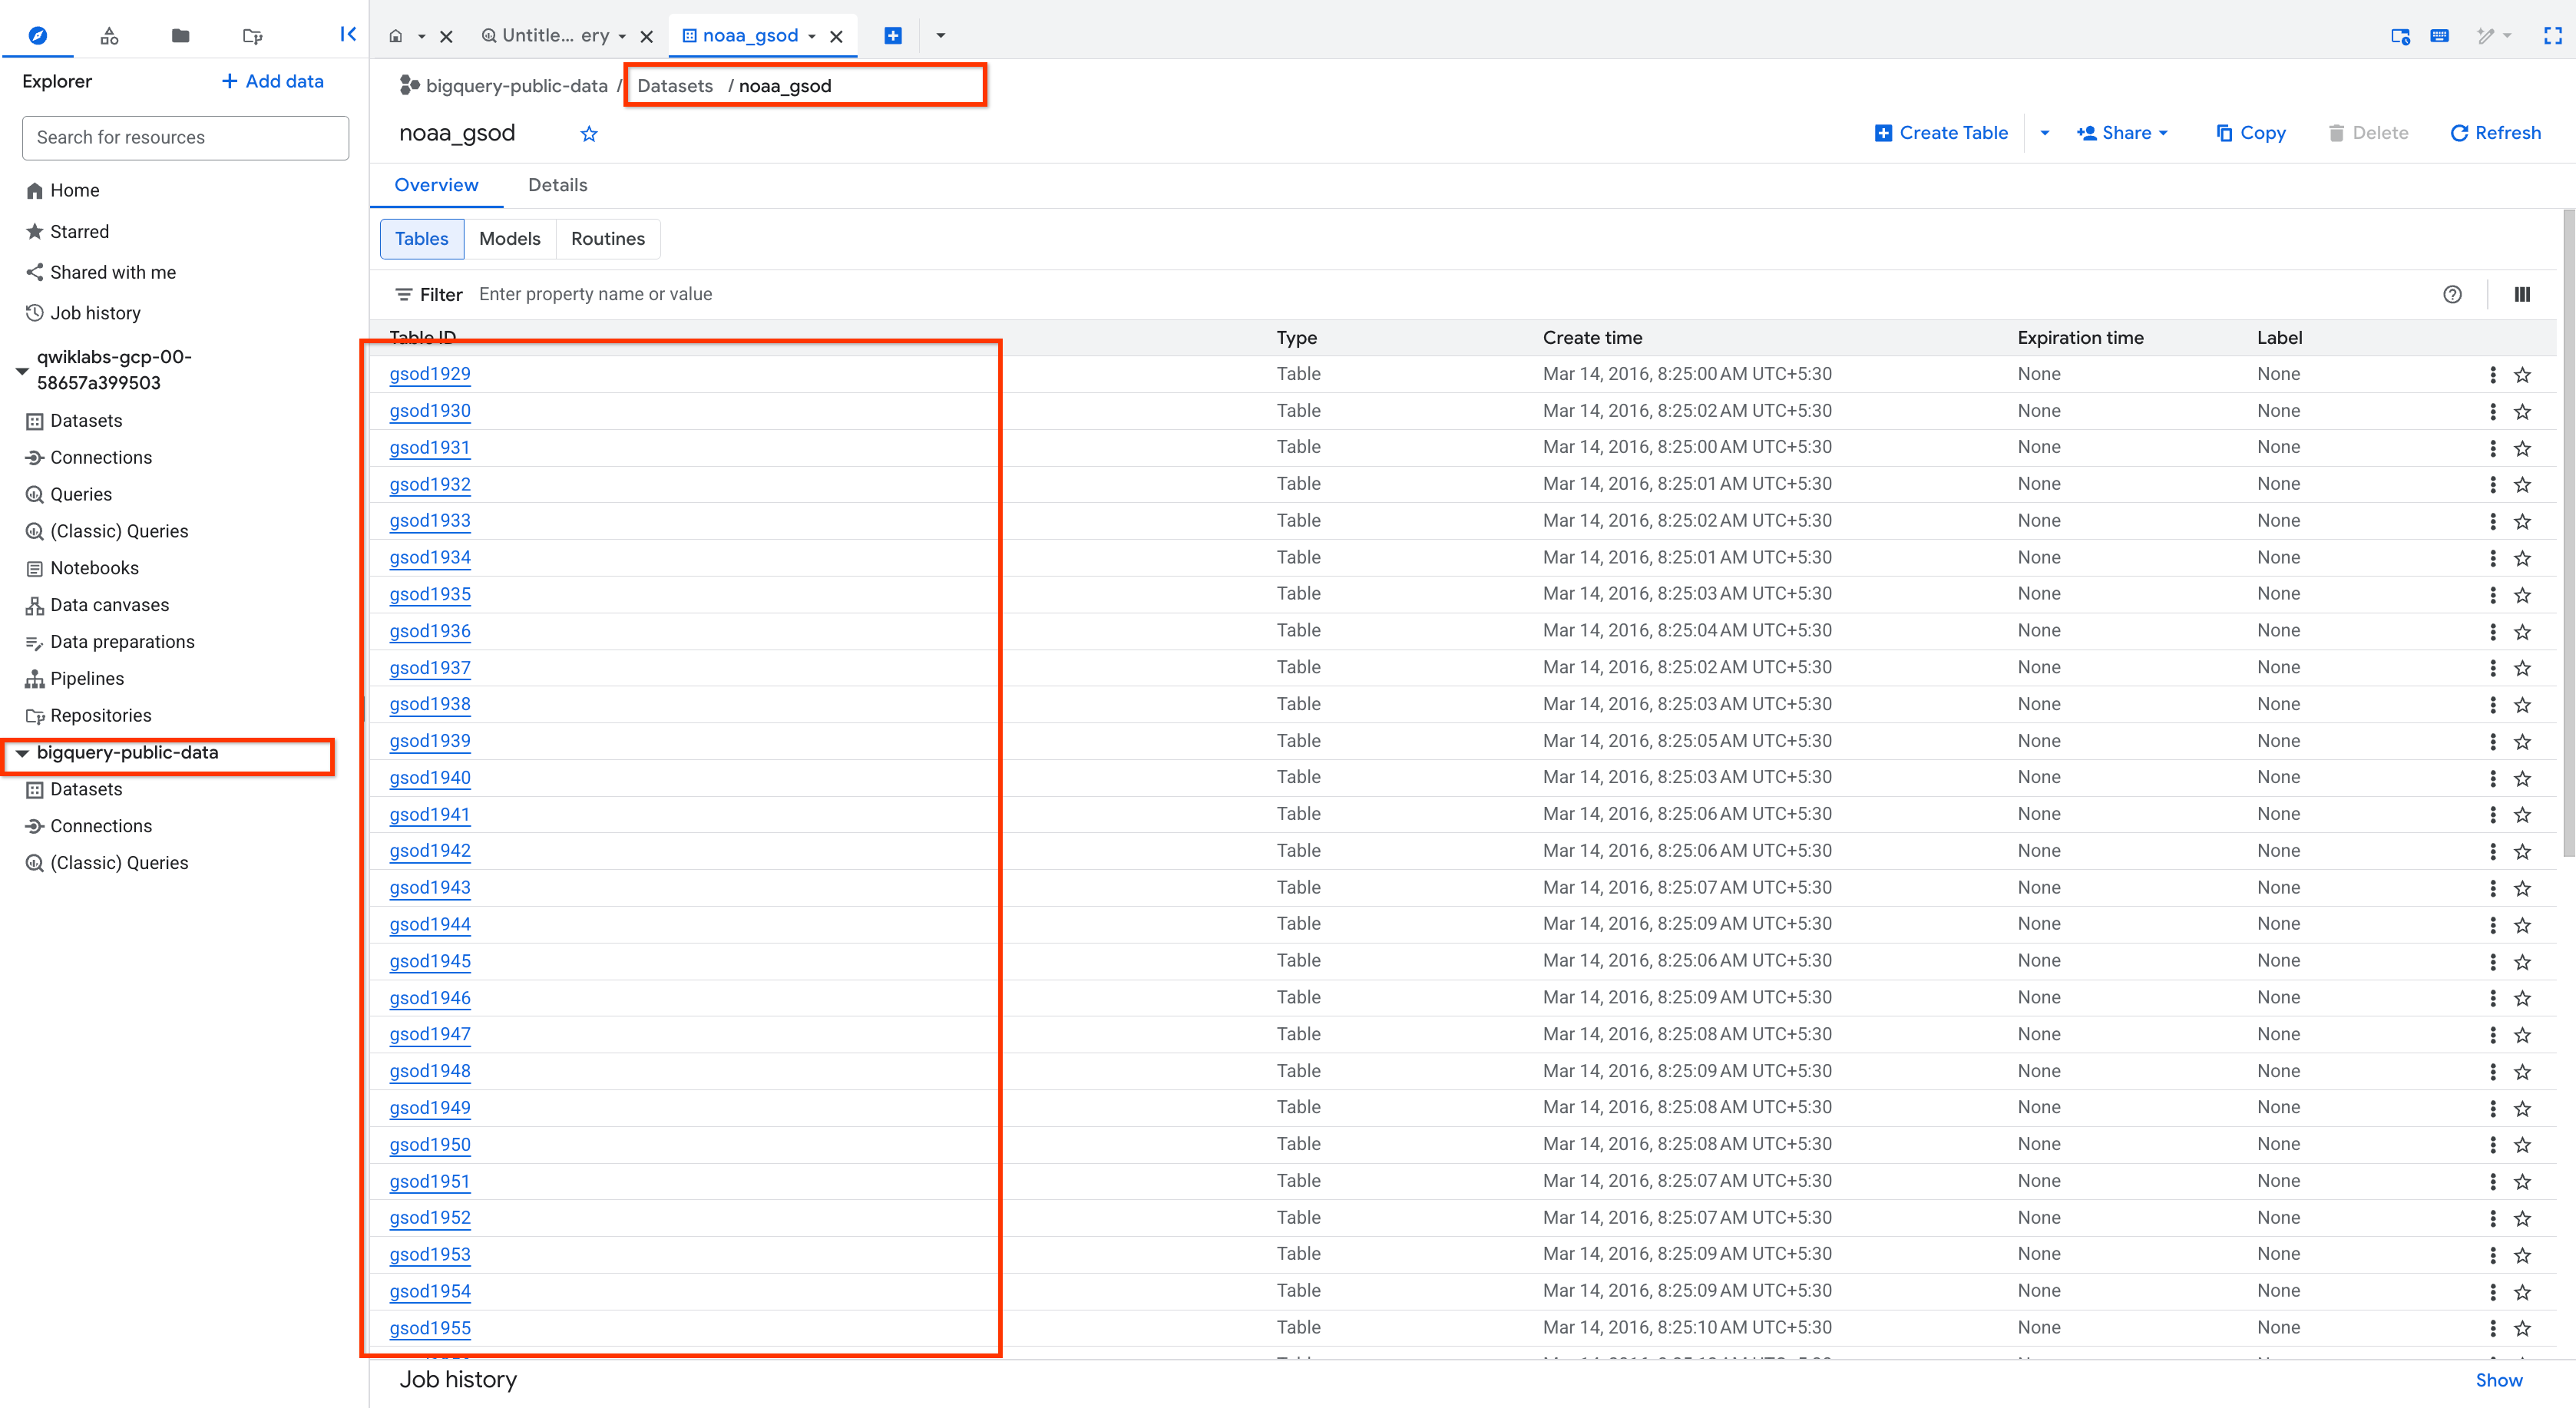
Scroll through the tables in the noaa_gsod dataset (which are manually sharded and not partitioned):
Your goal is to create a table that:
Queries on weather data from 2018 onward
Filters to only include days that have had some precipitation (rain, snow, etc.)
Only stores each partition of data for 90 days from that partition's date (rolling window)
First, copy and paste this below query to Query editor:
#standardSQL
SELECT
DATE(CAST(year AS INT64), CAST(mo AS INT64), CAST(da AS INT64)) AS date,
(SELECT ANY_VALUE(name) FROM `bigquery-public-data.noaa_gsod.stations` AS stations
WHERE stations.usaf = stn) AS station_name, -- Stations may have multiple names
prcp
FROM `bigquery-public-data.noaa_gsod.gsod*` AS weather
WHERE prcp < 99.9 -- Filter unknown values
AND length(_TABLE_SUFFIX) = 4 AND CAST(_TABLE_SUFFIX AS int64) >= 2018
AND prcp > 0 -- Filter stations/days with no precipitation
AND CAST(_TABLE_SUFFIX AS int64) >= 2018
ORDER BY date DESC -- Where has it rained/snowed recently
LIMIT 10
Notice that the table wildcard * used in the FROM clause to limit the amount of tables referred to in the TABLE_SUFFIX filter.
Notice that although a LIMIT 10 was added, this still does not reduce the total amount of data scanned (about 457.5 MB) since there are no partitions yet.
Click RUN.
Confirm the date is properly formatted and the precipitation field is showing non-zero values.
Task 5. Your turn: Create a partitioned table
Modify the previous query to create a table with the below specifications:
Table name: ecommerce.days_with_rain
Use the date field as your PARTITION BY
For OPTIONS, specify partition_expiration_days = 730
Add the table description = "weather stations with precipitation, partitioned by day"
Your query should look like this:
#standardSQL
CREATE OR REPLACE TABLE ecommerce.days_with_rain
PARTITION BY date
OPTIONS (
partition_expiration_days=60,
description="weather stations with precipitation, partitioned by day"
) AS
SELECT
DATE_ADD(DATE(CAST(year AS INT64), CAST(mo AS INT64), CAST(da AS INT64)), INTERVAL 8 YEAR) AS date,
(SELECT ANY_VALUE(name) FROM `bigquery-public-data.noaa_gsod.stations` AS stations
WHERE stations.usaf = stn) AS station_name,
prcp
FROM `bigquery-public-data.noaa_gsod.gsod2018`
WHERE prcp < 99.9
AND prcp > 0
Confirm data partition expiration is working
To confirm you are only storing data from 60 days in the past up until today, run the DATE_DIFF query to get the age of your partitions, which are set to expire after 60 days.
Below is a query which tracks the average rainfall for the NOAA weather station in Wakayama, Japan which has significant precipitation.
Add this query and run it:
#standardSQL
# avg monthly precipitation
SELECT
AVG(prcp) AS average,
station_name,
date,
CURRENT_DATE() AS today,
DATE_DIFF(CURRENT_DATE(), date, DAY) AS partition_age,
EXTRACT(MONTH FROM date) AS month
FROM ecommerce.days_with_rain
WHERE station_name = 'WAKAYAMA' #Japan
GROUP BY station_name, date, today, month, partition_age
ORDER BY date DESC; # most recent days first
Task 6. Confirm the oldest partition_age is at or below 60 days
Update the ORDER BY clause to show the oldest partitions first.
Add this query and run it:
#standardSQL
# avg monthly precipitation
SELECT
AVG(prcp) AS average,
station_name,
date,
CURRENT_DATE() AS today,
DATE_DIFF(CURRENT_DATE(), date, DAY) AS partition_age,
EXTRACT(MONTH FROM date) AS month
FROM ecommerce.days_with_rain
WHERE station_name = 'WAKAYAMA' #Japan
GROUP BY station_name, date, today, month, partition_age
ORDER BY partition_age DESC
Note: Your results will vary if you re-run the query in the future, as the weather data, and your partitions, are continuously updated.
Congratulations!
You've successfully created and queried partitioned tables in BigQuery.
End your lab
When you have completed your lab, click End Lab. Google Skills removes the resources you’ve used and cleans the account for you.
You will be given an opportunity to rate the lab experience. Select the applicable number of stars, type a comment, and then click Submit.
The number of stars indicates the following:
1 star = Very dissatisfied
2 stars = Dissatisfied
3 stars = Neutral
4 stars = Satisfied
5 stars = Very satisfied
You can close the dialog box if you don't want to provide feedback.
For feedback, suggestions, or corrections, please use the Support tab.
Copyright 2026 Google LLC All rights reserved. Google and the Google logo are trademarks of Google LLC. All other company and product names may be trademarks of the respective companies with which they are associated.
I lab creano un progetto e risorse Google Cloud per un periodo di tempo prestabilito
I lab hanno un limite di tempo e non possono essere messi in pausa. Se termini il lab, dovrai ricominciare dall'inizio.
In alto a sinistra dello schermo, fai clic su Inizia il lab per iniziare
Utilizza la navigazione privata
Copia il nome utente e la password forniti per il lab
Fai clic su Apri console in modalità privata
Accedi alla console
Accedi utilizzando le tue credenziali del lab. L'utilizzo di altre credenziali potrebbe causare errori oppure l'addebito di costi.
Accetta i termini e salta la pagina di ripristino delle risorse
Non fare clic su Termina lab a meno che tu non abbia terminato il lab o non voglia riavviarlo, perché il tuo lavoro verrà eliminato e il progetto verrà rimosso
Questi contenuti non sono al momento disponibili
Ti invieremo una notifica via email quando sarà disponibile
Bene.
Ti contatteremo via email non appena sarà disponibile
Un lab alla volta
Conferma per terminare tutti i lab esistenti e iniziare questo
Utilizza la navigazione privata per eseguire il lab
Il modo migliore per eseguire questo lab è utilizzare una finestra del browser in incognito o privata. Ciò evita eventuali conflitti tra il tuo account personale e l'account studente, che potrebbero causare addebiti aggiuntivi sul tuo account personale.
This lab focuses on how to query partitioned datasets and how to create your own dataset partitions to improve query performance, which reduces cost.
Durata:
Configurazione in 0 m
·
Accesso da 90 m
·
Completamento in 60 m