


시작하기 전에
- 실습에서는 정해진 기간 동안 Google Cloud 프로젝트와 리소스를 만듭니다.
- 실습에는 시간 제한이 있으며 일시중지 기능이 없습니다. 실습을 종료하면 처음부터 다시 시작해야 합니다.
- 화면 왼쪽 상단에서 실습 시작을 클릭하여 시작합니다.

In this series of labs, you take a demo microservices Java application built with the Spring framework and modify it to use an external database server. You adopt some of the best practices for tracing, configuration management, and integration with other services using integration patterns.
When implementing such techniques in a traditional on-premises environment, you have to build and manage these servers and service capabilities yourself.
But what do you do when you move to the cloud? Going cloud native is not only about replicating the architectures that you have to implement in your own data center, simply substituting virtual machine-based workloads for bare-metal workloads. Cloud-native applications can adopt the fully managed cloud services and platforms that require little or no manual operational overhead.
In these labs, you learn how to replace the external dependencies that you would otherwise need to maintain and operate yourself with fully managed services on Google Cloud.
Through the use of Spring Cloud, Google Cloud components, and preconfigured Spring Boot starters, you can quickly replace RDBMs like MySQL with Cloud SQL, messaging pipeline services like RabbitMQ with Pub/Sub, distributed trace stores like Zipkin with Cloud Trace, and centralized configuration server services with Cloud Runtime Configuration API.
You first deploy and test the application in Cloud Shell, starting with this lab, where you bring the application up by running the two microservices components in separate Cloud Shell console tabs.
In later labs in this series, you deploy the application components to App Engine and Kubernetes Engine and explore how to use Cloud Trace to debug and monitor your application when it is deployed to those services.
In this lab, you will learn how to perform the following tasks:
curl and the Cloud Shell web preview to test connectivity to web applications running locally in Cloud Shell.Click the Start Lab button. If you need to pay for the lab, a pop-up opens for you to select your payment method. On the left is a panel populated with the temporary credentials that you must use for this lab.
Copy the username, and then click Open Google Console. The lab spins up resources, and then opens another tab that shows the Choose an account page.
On the Choose an account page, click Use Another Account. The Sign in page opens.
Paste the username that you copied from the Connection Details panel. Then copy and paste the password.
After a few moments, the Cloud console opens in this tab.

Google Cloud Shell is a virtual machine that is loaded with development tools. It offers a persistent 5GB home directory and runs on the Google Cloud.
Google Cloud Shell provides command-line access to your Google Cloud resources.
In Cloud console, on the top right toolbar, click the Open Cloud Shell button.
Click Continue.
It takes a few moments to provision and connect to the environment. When you are connected, you are already authenticated, and the project is set to your PROJECT_ID. For example:
gcloud is the command-line tool for Google Cloud. It comes pre-installed on Cloud Shell and supports tab-completion.
Output:
Example output:
Output:
Example output:
In this task, you will clone the source repository for the demo application that is used throughout these labs.
The demo application has two parts:
guestbook-frontend) that manages the user interface presented in a web browser.guestbook-service) that processes the data and manages the messaging and database interfaces.To run, test, and use the backend locally, perform the following steps:
guestbook-service), execute the following command:This action opens a second Cloud Shell console to the same virtual machine.
guestbook-service) is still running, test the service by executing the following command in the second Cloud Shell tab:To run the frontend locally, perform the following steps:
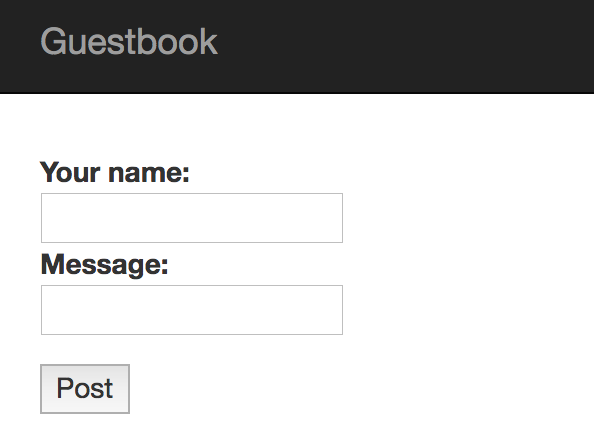
guestbook-frontend), execute the following command:The frontend web application launches on port 8080.
In this task, you will test the demo application. The demo application is a simple Java application composed of a microservices backend and a frontend consuming it. You extend this simple application in later labs to leverage various Google Cloud services. You will eventually deploy it to the cloud, using both App Engine and Google Kubernetes Engine.
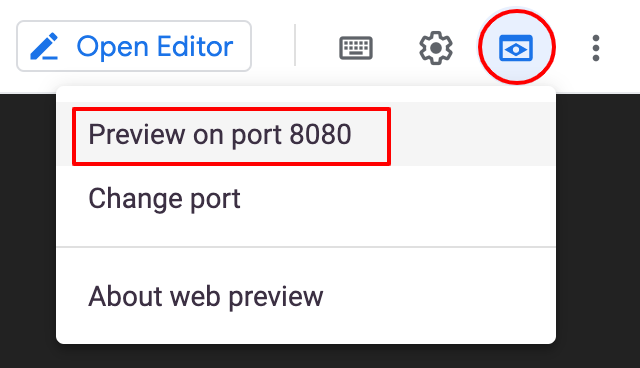
To access and use the frontend application through the web preview, perform the following steps:
 ) icon.
A new browser tab displays the connection to the frontend application.
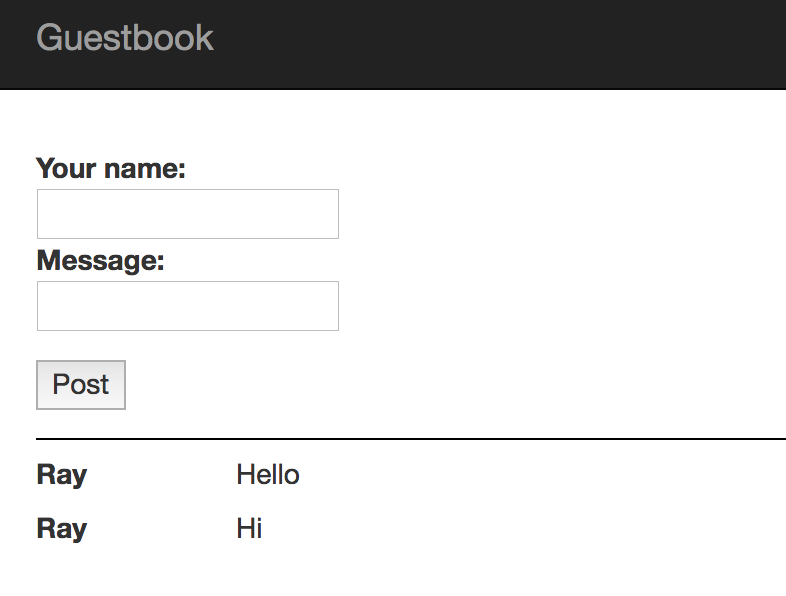
The messages are listed below the message input section.
To use Cloud Shell to test the backend service, perform the following steps.
guestbook-service API by executing the following command:jq to parse the JSON return text, execute the following command.For example, the following command prints out only the messages.
In this lab, you have configured Cloud Shell to run multi-part Java applications locally. Next, you used Maven to launch Java applications in the Cloud shell. Finally, you used curl and the Cloud Shell web preview to test connectivity to web applications running locally in Cloud Shell.
When you have completed your lab, click End Lab. Google Skills removes the resources you’ve used and cleans the account for you.
You will be given an opportunity to rate the lab experience. Select the applicable number of stars, type a comment, and then click Submit.
The number of stars indicates the following:
You can close the dialog box if you don't want to provide feedback.
For feedback, suggestions, or corrections, please use the Support tab.
Copyright 2026 Google LLC All rights reserved. Google and the Google logo are trademarks of Google LLC. All other company and product names may be trademarks of the respective companies with which they are associated.


현재 이 콘텐츠를 이용할 수 없습니다
이용할 수 있게 되면 이메일로 알려드리겠습니다.

감사합니다
이용할 수 있게 되면 이메일로 알려드리겠습니다.

한 번에 실습 1개만 가능
모든 기존 실습을 종료하고 이 실습을 시작할지 확인하세요.