


시작하기 전에
- 실습에서는 정해진 기간 동안 Google Cloud 프로젝트와 리소스를 만듭니다.
- 실습에는 시간 제한이 있으며 일시중지 기능이 없습니다. 실습을 종료하면 처음부터 다시 시작해야 합니다.
- 화면 왼쪽 상단에서 실습 시작을 클릭하여 시작합니다.
Creating and Managing Service Account
/ 50
Use the Client Libraries to Access BigQuery from a Service Account
/ 50
Creating and Managing Service Account
/ 50
Use the Client Libraries to Access BigQuery from a Service Account
/ 50
Service accounts are a special type of Google account that grant permissions to virtual machines instead of end users. Service accounts are primarily used to ensure safe, managed connections to APIs and Google Cloud services. Granting access to trusted connections and rejecting malicious ones is a must-have security feature for any Google Cloud project.
In this lab, you will learn how to:
For each lab, you get a new Google Cloud project and set of resources for a fixed time at no cost.
Sign in to Google Skills using an incognito window.
Note the lab's access time (for example, 1:15:00), and make sure you can finish within that time.
There is no pause feature. You can restart if needed, but you have to start at the beginning.
When ready, click Start lab.
Note your lab credentials (Username and Password). You will use them to sign in to the Google Cloud Console.
Click Open Google Console.
Click Use another account and copy/paste credentials for this lab into the prompts. If you use other credentials, you'll receive errors or incur charges.
Accept the terms and skip the recovery resource page.
Google Cloud Shell is a virtual machine that is loaded with development tools. It offers a persistent 5GB home directory and runs on the Google Cloud.
Google Cloud Shell provides command-line access to your Google Cloud resources.
In Cloud console, on the top right toolbar, click the Open Cloud Shell button.
Click Continue.
It takes a few moments to provision and connect to the environment. When you are connected, you are already authenticated, and the project is set to your PROJECT_ID. For example:
gcloud is the command-line tool for Google Cloud. It comes pre-installed on Cloud Shell and supports tab-completion.
Output:
Example output:
Output:
Example output:
A service account is a special Google account that belongs to your application or a virtual machine (VM) instead of an individual end user. Your application uses the service account to call the Google API of a service, so that the users aren't directly involved.
For example, a Compute Engine VM may run as a service account and that account can be given permissions to access the resources it needs. This way the service account is the identity of the service, and the service account's permissions control which resources the service can access.
A service account is identified by its email address, which is unique to the account.
When you create a new Cloud project using the Cloud Console, if the Compute Engine API is enabled for your project, a Compute Engine service account is created for you by default. It is identifiable using the email:
PROJECT_NUMBER-compute@developer.gserviceaccount.com.
If your project contains an App Engine application, the default App Engine service account is created in your project by default. It is identifiable using the email:
PROJECT_ID@appspot.gserviceaccount.com.
In addition to the user-managed service accounts, you might see some additional service accounts in your project’s IAM policy or in the Cloud Console. These service accounts are created and owned by Google. These accounts represent different Google services and each account is automatically granted IAM roles to access your Google Cloud project.
An example of a Google-managed service account is a Google API service account identifiable using the email:
PROJECT_NUMBER@cloudservices.gserviceaccount.com.
This service account is designed specifically to run internal Google processes on your behalf and is not listed in the Service Accounts section of the Cloud Console. By default, the account is automatically granted the project editor role on the project and is listed in the IAM section of the Cloud Console.
This service account is deleted only when the project is deleted. Google services rely on the account having access to your project, so you should not remove or change the service account’s role on your project.
In this task, you create and manage service accounts.
By default, you can create up to 100 user-managed service accounts in a project. If this quota does not meet your needs, you can use the Cloud console to request a quota increase.
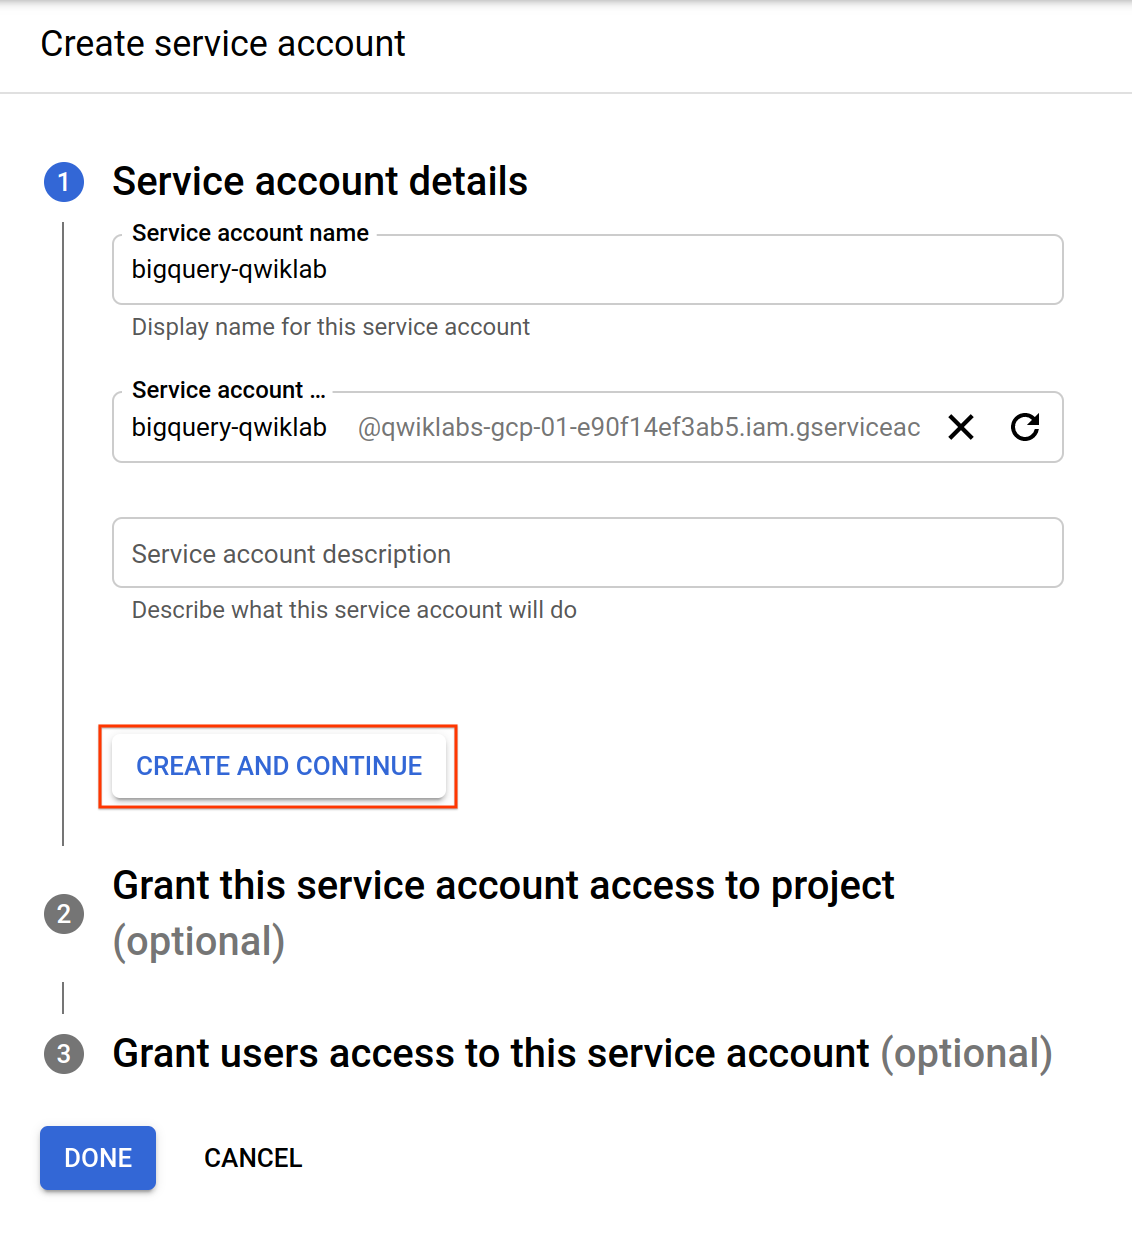
Creating a service account is similar to adding a member to your project, but the service account belongs to your applications rather than an individual end user.
The output of this command is the service account, which will look similar to the following.
Output:
When granting IAM roles, you can treat a service account either as a resource or as an identity.
Your application uses a service account as an identity to authenticate to Google Cloud services. For example, if you have a Compute Engine Virtual Machine (VM) running as a service account, you can grant the editor role to the service account (the identity) for a project (the resource).
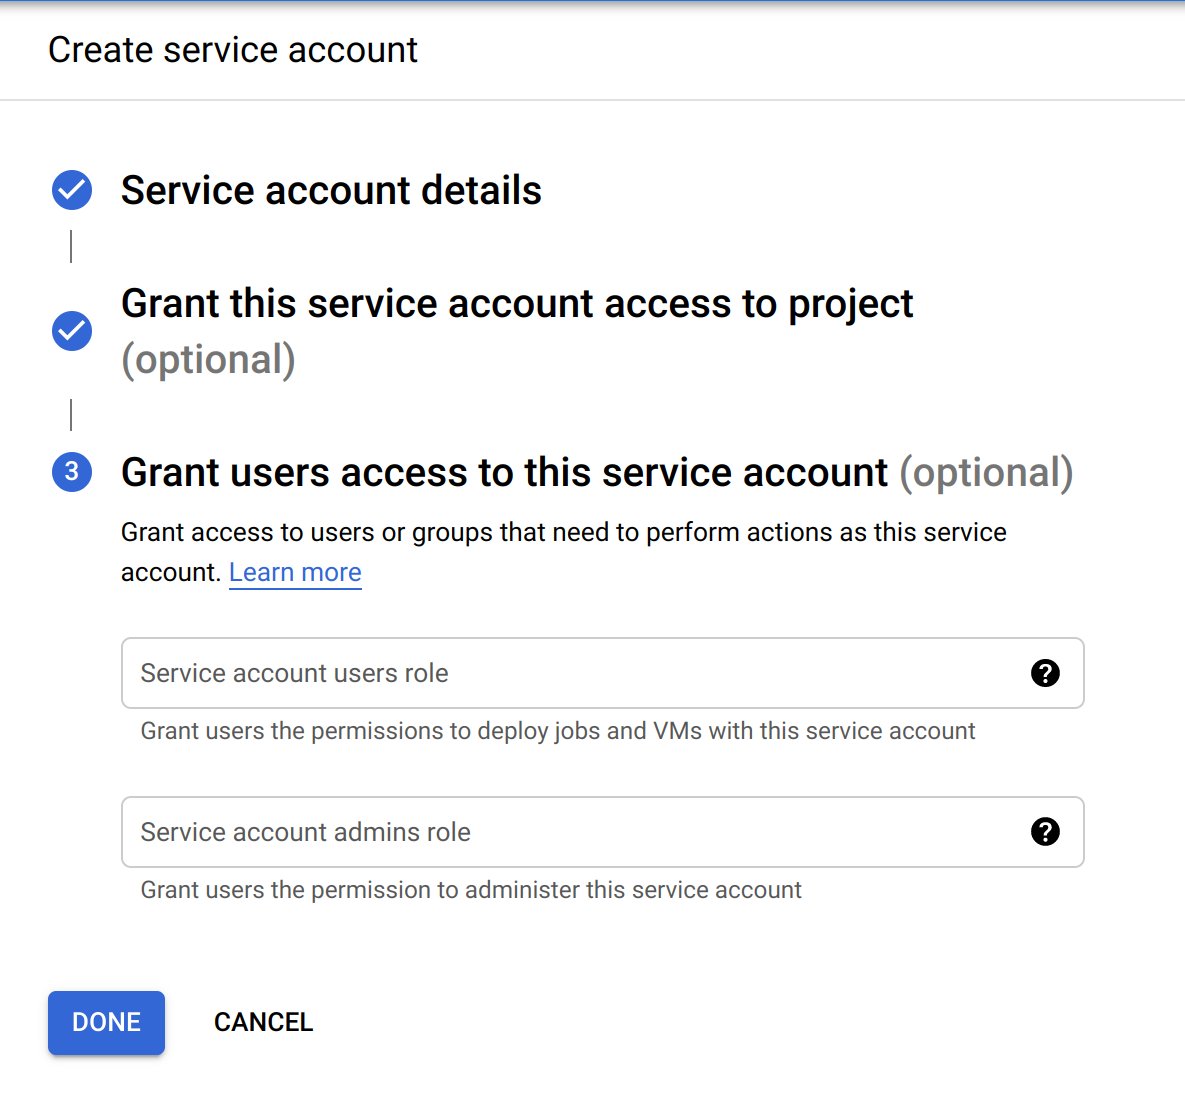
At the same time, you might also want to control who can start the VM. You can do this by granting a user (the identity) the serviceAccountUser role for the service account (the resource).
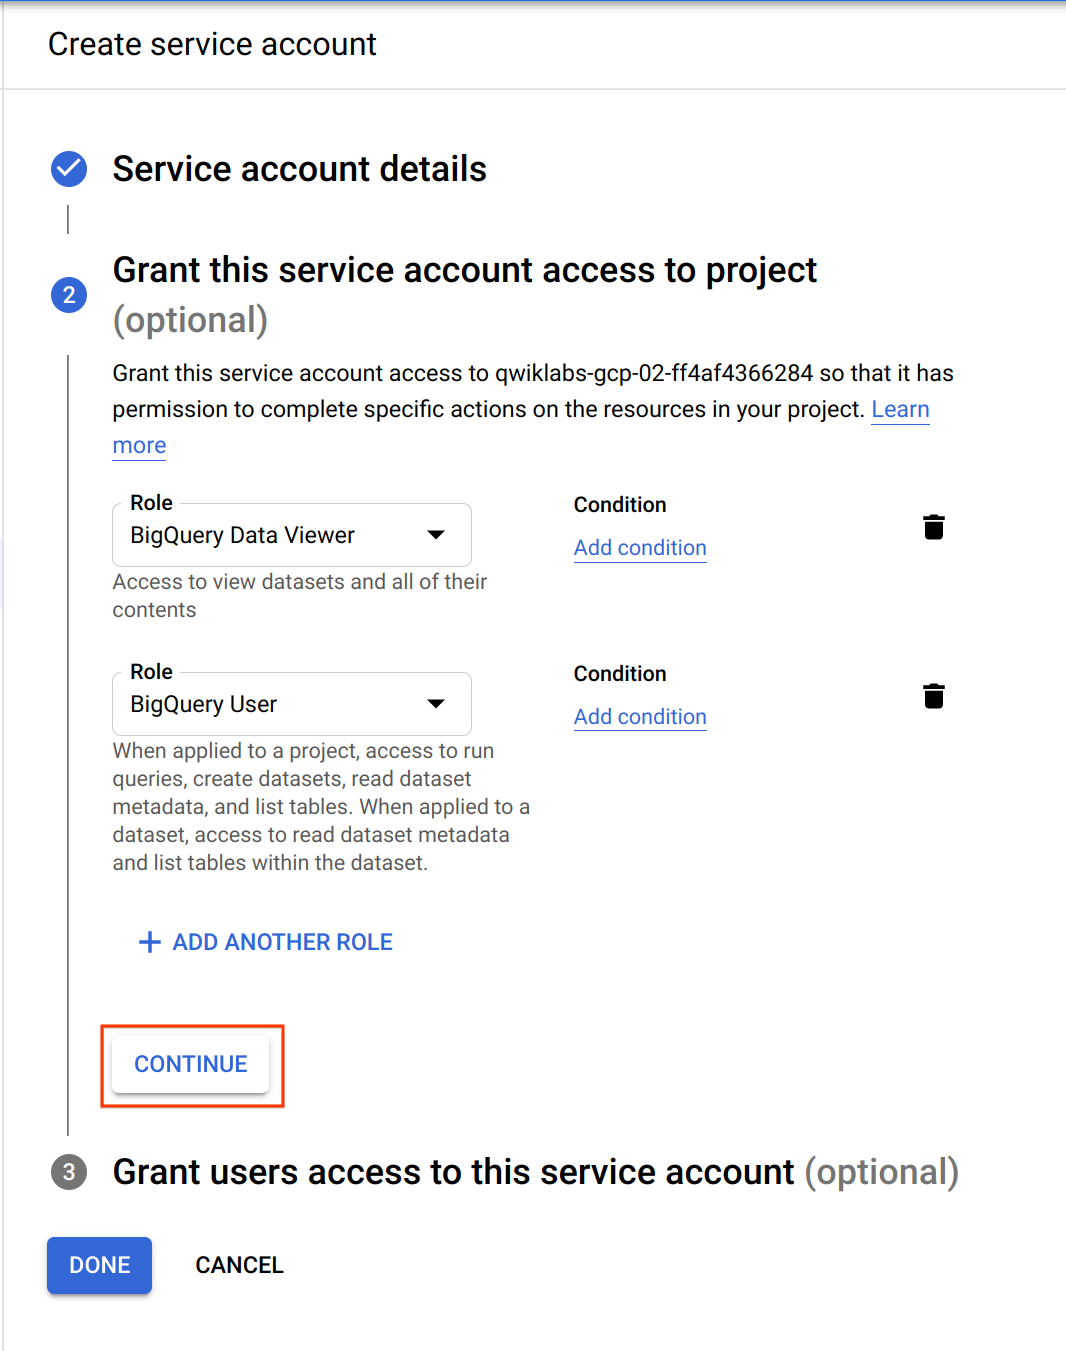
You grant roles to a service account so that the service account has permission to complete specific actions on the resources in your Google Cloud project. For example, you might grant the storage.admin role to a service account so that it has control over objects and buckets in Cloud Storage.
The output will display a list of roles the service account now has.
Output:
Click Check my progress to verify the objective.
When an identity calls a Google Cloud API, Cloud Identity and Access Management (Cloud IAM) requires that the identity has the appropriate permissions to use the resource. You can grant permissions by granting roles to a user, a group, or a service account.
There are three types of roles in Cloud IAM:
For more details, please refer to the IAM Roles reference documentation.
In this task, you query the BigQuery public datasets from an instance with the help of a service account which has the necessary roles.
You will first create a new service account using the Cloud Console.
bigquery-qwiklab.Your Cloud Console should resemble the following.
|
Configuration |
Value |
|
Name |
|
|
Region |
|
|
Zone |
|
|
Series |
|
|
Machine Type |
|
|
Boot Disk |
|
|
Service Account |
|
|
Access scopes |
|
bigquery-qwiklab service account doesn't appear in the drop-down list, try typing the name in to the Filter section.Next, you will look at the options that were added when you selected a boot disk that supports shielded VMs.
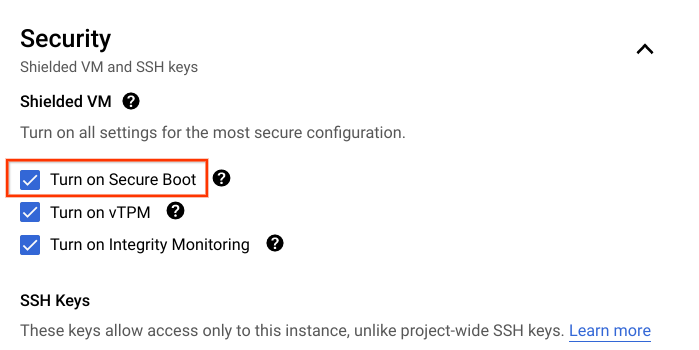
Click the Security tab. At the top of the tab, the Shielded VM options appear. If you had not selected a boot disk with shielded VM features, these options would not have appeared. Some of these options are selected by default.
Click the Turn on Secure Boot checkbox.
Compute Engine does not enable this option by default, because unsigned drivers and other low-level software might not be compatible. Even so, if possible, Google recommends enabling Secure Boot.
bigquery-instance by clicking on the SSH button. Click Connect.echo command, create query.py. You will use this file, written in Python, to run the query.query.py with:sed command has successfully changed the Project ID in the file:Example output (yours will differ):
query.py with:sed command has successfully changed the service account email in the file:Example output (yours will differ):
The application will now use the permissions that are associated with this service account.
pyarrow library and db-dtypes using this command:query.py using this command:You should be returned with a similar output as the following.
Output:
You made a request to a BigQuery public dataset with a bigquery-qwiklab service account.
Click Check my progress to verify the objective.
In this lab, you have learned how to do the following:
When you have completed your lab, click End Lab. Google Skills removes the resources you’ve used and cleans the account for you.
You will be given an opportunity to rate the lab experience. Select the applicable number of stars, type a comment, and then click Submit.
The number of stars indicates the following:
You can close the dialog box if you don't want to provide feedback.
For feedback, suggestions, or corrections, please use the Support tab.
Copyright 2026 Google LLC All rights reserved. Google and the Google logo are trademarks of Google LLC. All other company and product names may be trademarks of the respective companies with which they are associated.


현재 이 콘텐츠를 이용할 수 없습니다
이용할 수 있게 되면 이메일로 알려드리겠습니다.

감사합니다
이용할 수 있게 되면 이메일로 알려드리겠습니다.

한 번에 실습 1개만 가능
모든 기존 실습을 종료하고 이 실습을 시작할지 확인하세요.
실습을 시작하려면 이 간단한 단계를 완료하세요.