
Before you begin
- Labs create a Google Cloud project and resources for a fixed time
- Labs have a time limit and no pause feature. If you end the lab, you'll have to restart from the beginning.
- On the top left of your screen, click Start lab to begin
Deploy GKE cluster
/ 30
Modify GKE clusters
/ 35
Deploy a sample nginx workload
/ 35

在本研究室中,利用 Google Cloud 控制台建立 GKE 叢集並部署範例 Pod。
在本研究室中,瞭解如何執行下列工作:
在每個研究室中,您都能在固定時間內免付費建立新的 Google Cloud 專案,並使用一組資源。
請透過無痕式視窗登入 Qwiklabs。
請記下研究室的存取時間 (例如 1:15:00),並確保自己能在時間限制內完成作業。
研究室不提供暫停功能。如有需要,您可以重新開始,但原先的進度恕無法保留。
準備就緒後,請按一下「Start lab」。
請記下研究室憑證 (使用者名稱和密碼),這組資訊將用於登入 Google Cloud 控制台。
按一下「Open Google Console」。
按一下「Use another account」,然後複製這個研究室的憑證,並貼入提示訊息。
如果使用其他憑證,系統會顯示錯誤或向您收取費用。
接受條款,然後略過資源復原頁面。
完成初始登入步驟後,就會看到專案資訊主頁。
您將在這項工作中,使用 Google Cloud 控制台和 Cloud Shell 部署 GKE 叢集。
在 Google Cloud 控制台的「導覽選單」
點選「建立」,開始建立 GKE 叢集。
點選畫面右上方的「切換為 Standard 叢集」切換作業模式。
點選「切換為 Standard 叢集」來確認操作。
檢查控制台使用者介面和控制選項,以變更叢集名稱、叢集位置、Kubernetes 版本、節點數量和節點資源,例如預設節點集區內的機器類型。
可以在跨區域或單一可用區中建立叢集。預設為單一可用區。在區域各處部署時,節點會部署到三個不同的可用區,且部署的節點總數會增加三倍。
叢集開始佈建。
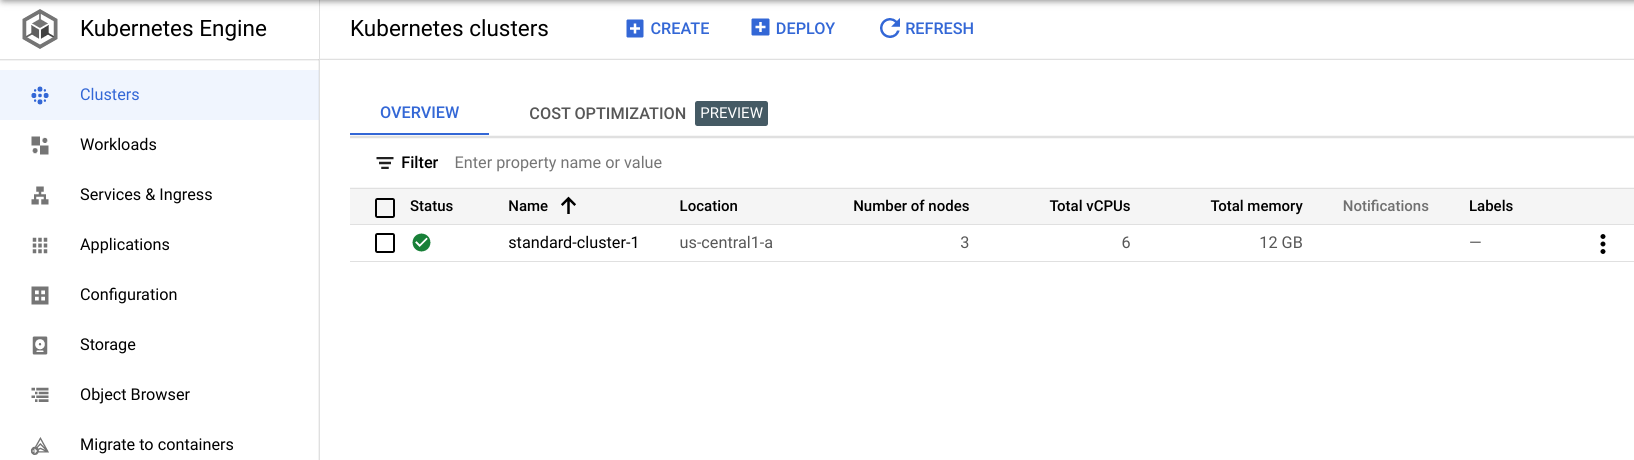
佈建完成後,「Kubernetes Engine」>「叢集」頁面會如螢幕截圖所示:
點選「Check my progress」來確認目標已達成。
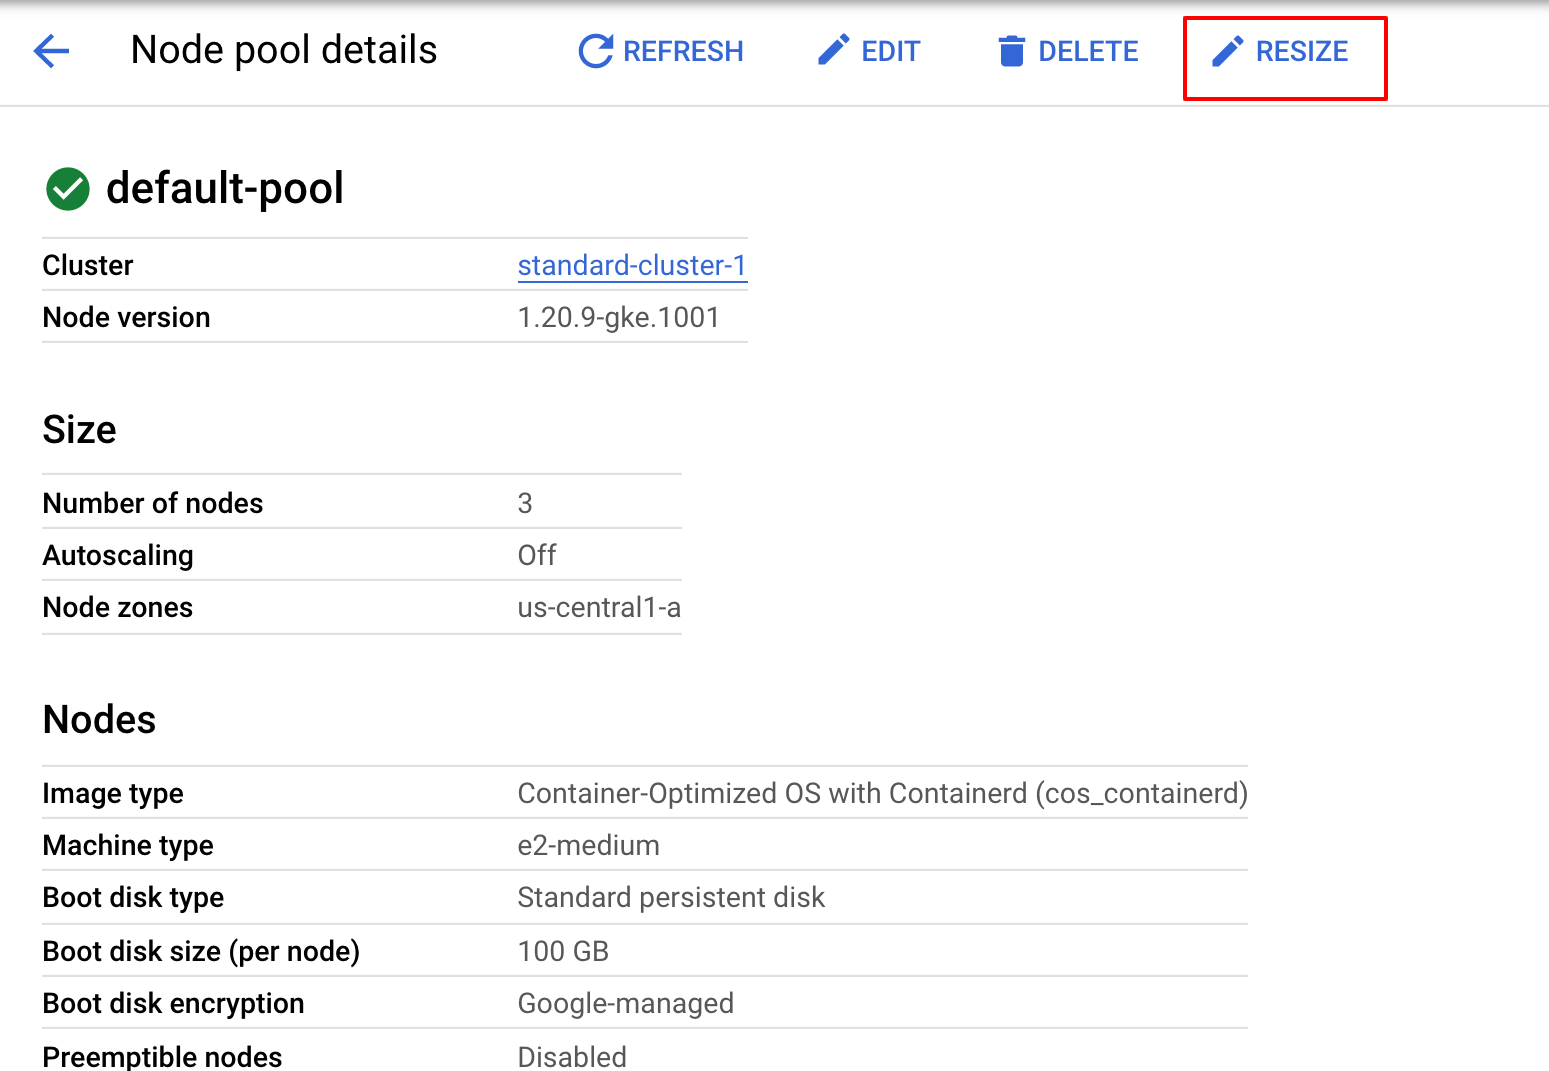
使用 Google Cloud 控制台或 Cloud Shell,可以輕鬆修改現有叢集的許多參數。在這項工作中,您會使用 Google Cloud 控制台修改 GKE 叢集的大小。
中,依序點選「Kubernetes Engine」>「叢集」>「standard-cluster-1」,然後按一下詳細資料頁面頂端的「節點」。 中,依序點選「Kubernetes Engine」>「叢集」。作業完成後,依序前往「Kubernetes Engine」>「叢集」頁面,會看到 standard-cluster-1 現在有四個節點。
點選「Check my progress」來確認目標已達成。
在這項工作中,您將使用 Google Cloud 控制台,部署執行 nginx 網路伺服器的 Pod 做為範例工作負載。
) 中,依序點選「Kubernetes Engine」>「Workloads」(工作負載)。點選「Check my progress」來確認目標已達成。
在這項工作中,您會直接在 Google Cloud 控制台中查看 GKE 工作負載的詳細資料。
中,依序點選「Kubernetes Engine」>「工作負載」。這裡會顯示工作負載總覽資訊,包括資源使用率圖表、記錄檔連結、與這項工作負載相關聯的 Pod 詳細資料等。
在 Google Cloud 控制台中,點選 nginx-1 工作負載的「詳細資料」分頁標籤。這個分頁會顯示更多工作負載的詳細資料,例如 Pod 規格、Pod 備用資源的數量與狀態,以及水平 Pod 自動配置器的詳情。
點選「修訂版本記錄」分頁標籤。這裡會顯示這項工作負載的修訂版本清單。
點選「事件」分頁標籤。此分頁會列出與這項工作負載相關聯的事件。
然後是「YAML」分頁。此分頁提供完整的 YAML 檔案,定義了這項範例工作負載的元件和完整設定。
還是在 Google Cloud 控制台的 nginx-1 工作負載「詳細資料」分頁中,點選「總覽」分頁標籤,向下捲動至「代管的 Pod」,按一下其中一個 Pod 名稱,查看該 Pod 的詳細資料頁面。
「Pod 詳細資料」頁面提供 Pod 設定、資源使用率,以及執行 Pod 的節點等資訊。
在「Pod 詳細資料」頁面中點選「事件」與「記錄檔」分頁標籤,查看事件詳細資料,以及連至 Cloud 作業套件中容器記錄檔的連結。
點選「YAML」分頁標籤,查看 Pod 設定的詳細 YAML 檔案。
如果您已完成研究室,請按一下「End Lab」(關閉研究室)。Google Cloud Skills Boost 會移除您使用的資源,並清除所用帳戶。
您可以針對研究室的使用體驗評分。請選取合適的星級評等並提供意見,然後按一下「Submit」(提交)。
星級評等代表您的滿意程度:
如果不想提供意見回饋,您可以直接關閉對話方塊。
如有任何想法、建議或指教,請透過「Support」(支援) 分頁提交。
Copyright 2026 Google LLC 保留所有權利。Google 和 Google 標誌是 Google LLC 的商標,其他公司和產品名稱則有可能是其關聯公司的商標。


This content is not currently available
We will notify you via email when it becomes available

Great!
We will contact you via email if it becomes available

One lab at a time
Confirm to end all existing labs and start this one