GSP675

總覽
使用淺顯易懂的提示詞,就能在 Google Workspace 和第三方服務中,自動執行例行工作和複雜工作流程,不必編寫程式碼。只要在 Workspace Studio 中描述目標,Gemini 即可自動調度管理必要步驟,執行端對端程序,也就是「工作流程」。這些流程會根據新資訊即時調整,執行更精密的自動化作業,例如情緒分析、內容生成,以及智慧型工作優先排序。
在本實驗室,您將使用 AI 建立工作流程,解決電子郵件過多的常見問題。您要建立自動化動作來摘要未讀電子郵件的重點,並直接將每日速覽傳送至 Chat。
課程內容
您將瞭解如何運用下列工具,自動處理 Google Workspace 中的工作:
- 使用 AI 建立工作流程。
- 透過 Workspace Studio 生成的變數,在步驟之間傳遞資訊,建構精密的工作流程。
設定和需求
點選「Start Lab」之前
請詳閱下列操作說明。實驗室活動會計時,而且無法暫停。點選「Start Lab」後就會開始計時,並顯示您可以使用 Google Workspace 資源多久。
您會在實際雲端環境完成這個 Google Workspace 實作實驗室的活動,而非模擬或示範環境。您會取得新的臨時憑證,可以在實驗室活動期間登入及存取 Google Workspace。
需求
如要完成這個研究室活動,請先確認:
- 可以使用標準的網際網路瀏覽器 (Chrome 瀏覽器為佳)。
- 預留足夠時間。請留意左側面板頂端的時間,這是完成所有步驟的預計所需時間。請做好規劃,把握時間完成實驗室。開始進行實驗室之後,就無法暫停再繼續。每次進行實驗室時,都會從步驟 1 開始。
- 您「不」需要 Google Workspace 帳戶,本實驗室會提供帳戶。
請開啟無痕視窗來執行這個實驗室。
實驗室提示您登入控制台時,務必使用實驗室提供的學員帳戶,這樣活動追蹤功能才能確認您是否完成實驗室活動。
開始進行實驗室
-
準備好時,點選左上方面板的「Start Lab」。
「實驗室詳細資料」窗格會顯示臨時憑證,您在這個實驗室登入 Gmail 時必須使用。
如果實驗室會產生費用,將出現彈出式視窗,請您選擇付款方式。
-
對「開啟 Google 雲端硬碟」按一下滑鼠右鍵,選擇「在新分頁中開啟連結」。
接著,實驗室會啟動相關資源,並開啟另一個分頁,顯示「登入」頁面。
-
顯示提示時,請同意所有條款及細則。
Google 雲端硬碟隨即開啟,您會登入學員 Google 帳戶。
開啟 Workspace Studio
-
為開啟應用程式,請在新的瀏覽器分頁中前往 Workspace Studio:https://studio.workspace.google.com。
-
查看使用者顯示圖片,確認 Workspace Studio 已設為本實驗室建立的學生帳戶。如果不是,請切換至該學生帳戶。
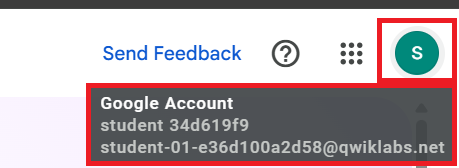
請勿關閉 Google 雲端硬碟和 Workspace Studio 的瀏覽器分頁。
工作 1:運用 AI 建立工作流程
- 在「Describe a task for Gemini」方塊中,詳細說明您要工作流程執行的作業。在本實驗室,請使用下列提示詞:
Every weekday at 8 am, send me a summary of unread emails on Google Chat.
- 按一下「Create」,Gemini 就會生成工作流程步驟。
Gemini 會在 Workspace Studio 中建立工作流程。您的要求會分成 3 項工作:
-
On a schedule (排程啟動):在特定日期和時間啟動工作流程,例如每個工作天上午 8 點。
-
Recap unread emails (摘要未讀郵件):取得 AI 生成的重要未讀郵件摘要。
-
Notify me in Chat (在 Chat 中通知我):透過 Chat 接收未讀電子郵件摘要通知。
編輯工作流程排程
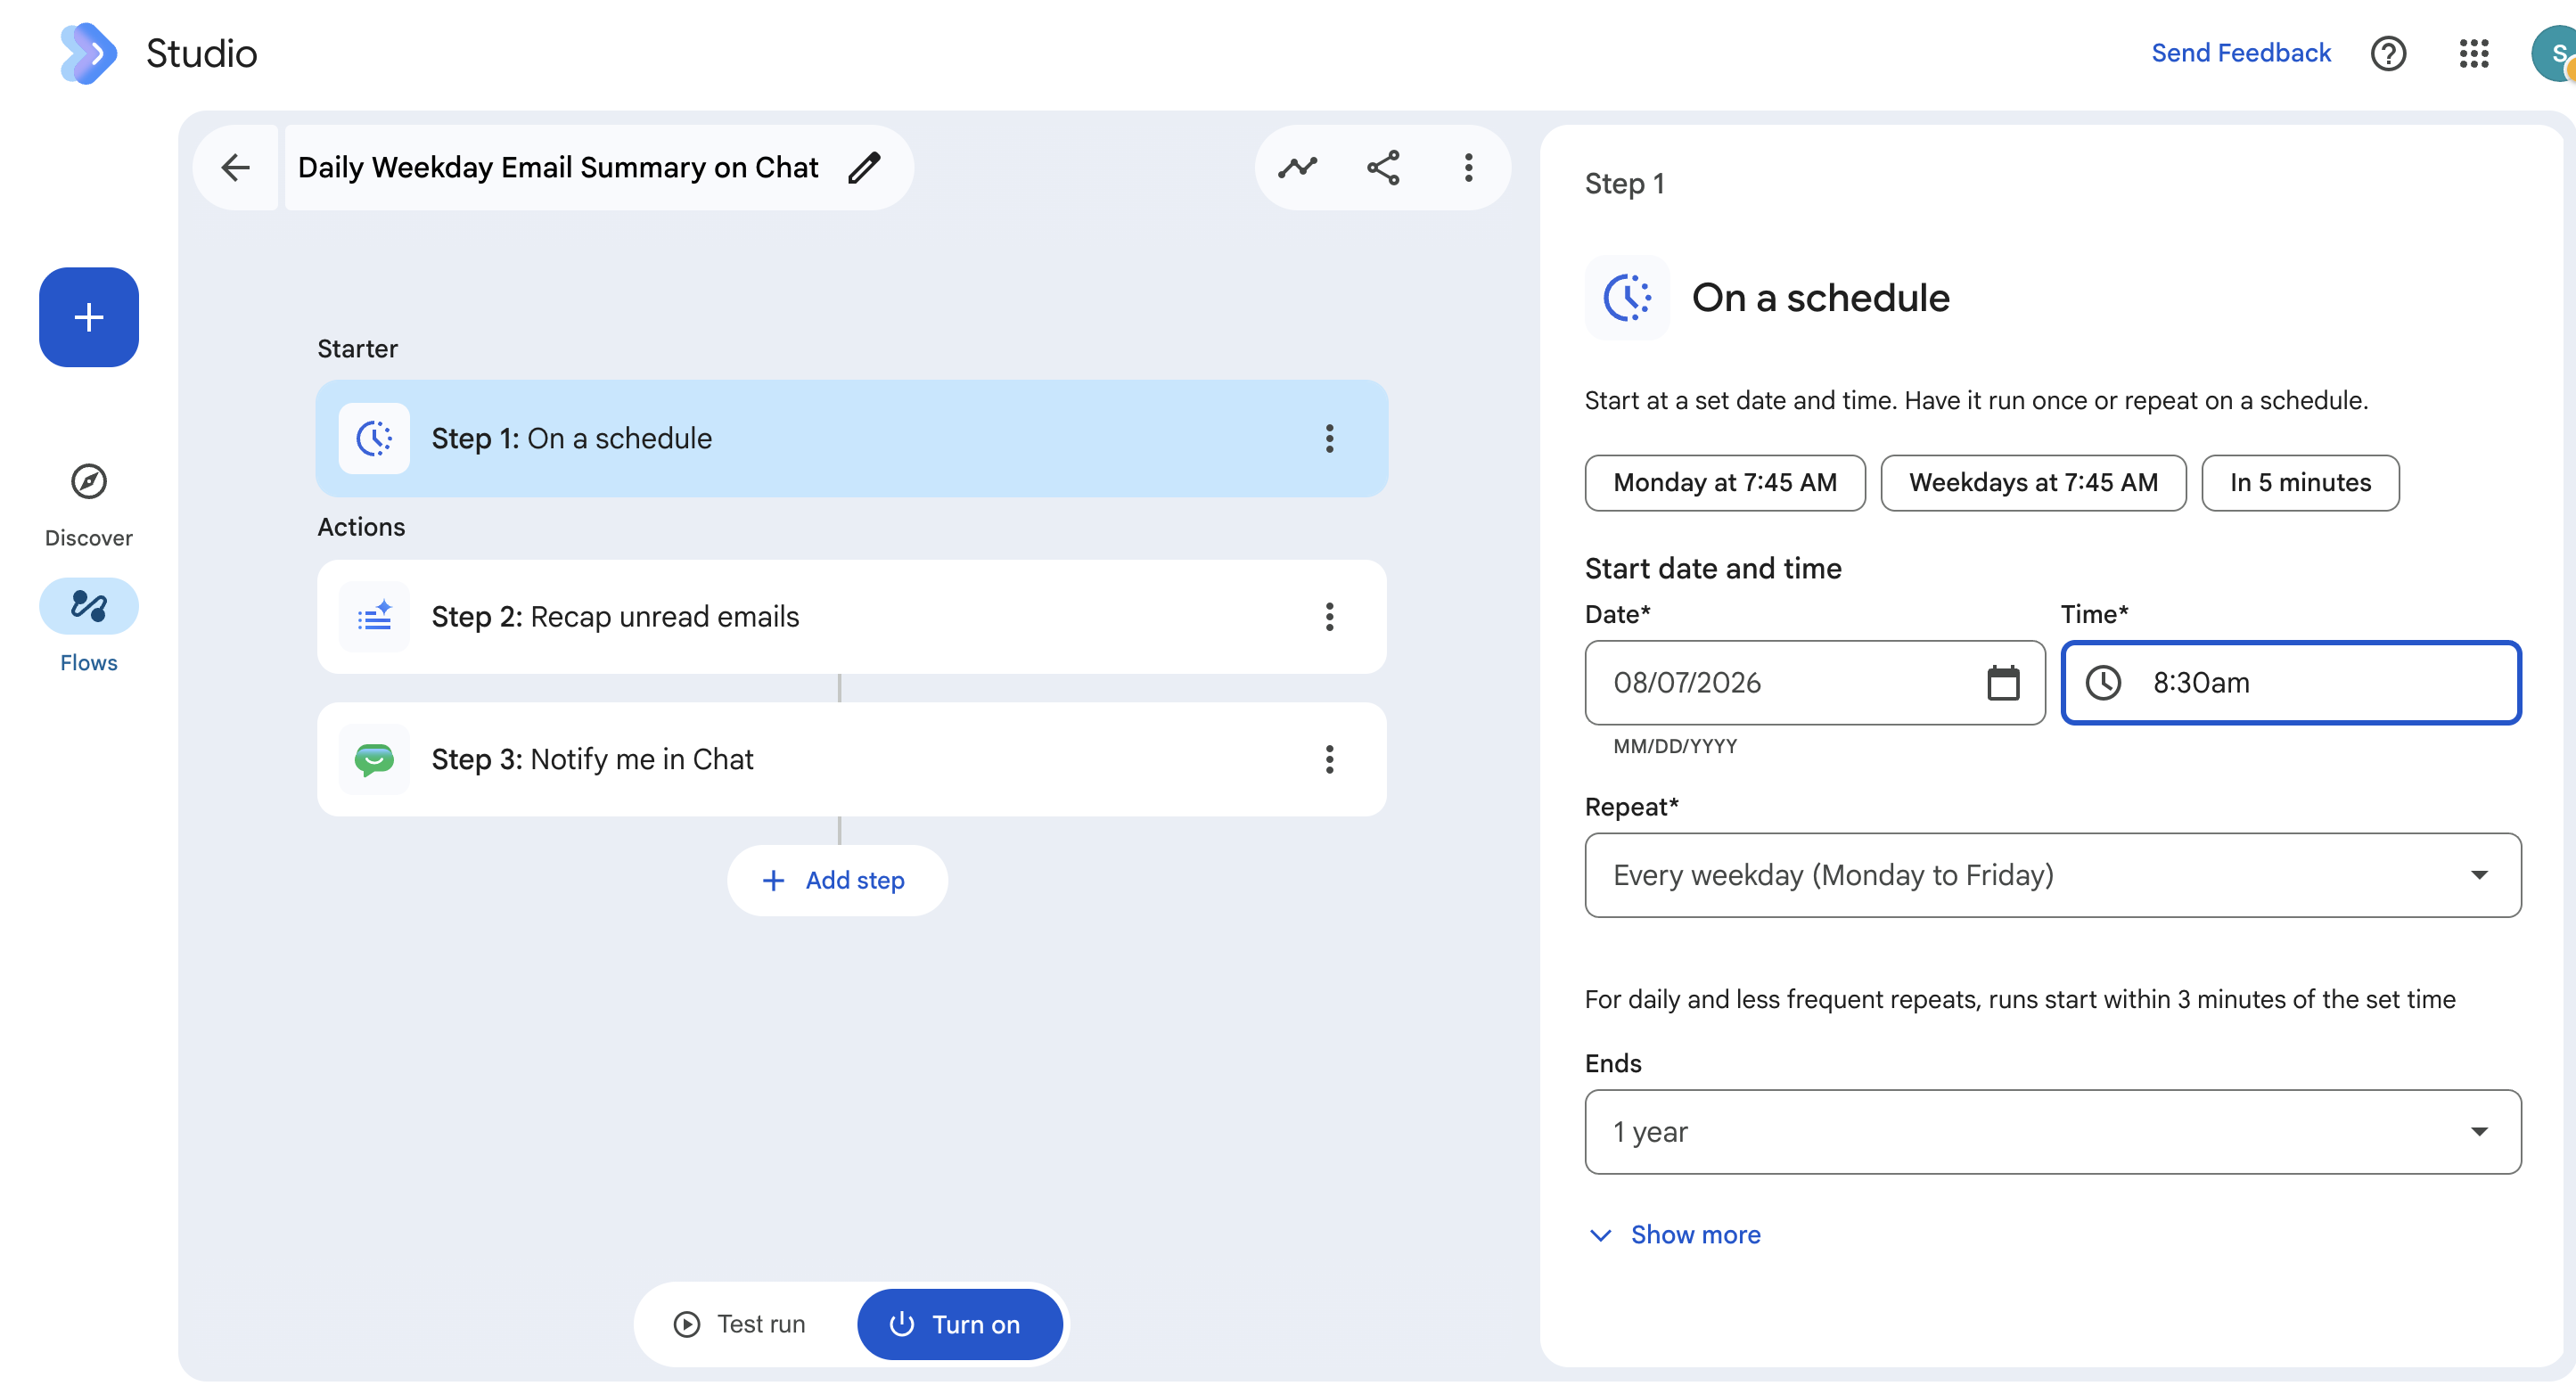
建立完成後,工作流程會顯示在編輯器中。按一下「Step 1: On a schedule」。
- 在右側設定窗格中,將「Time」的值從「8:00 am」變更為「8:30 am」。
查看摘要未讀郵件重點的提示詞
Gemini 會提供提示詞,用來整理未讀電子郵件的摘要。如要調整提示詞,可以編輯內容。
- 按一下「Step 2: Recap unread emails」。
在這個步驟中,Gemini 準備了詳細的提示詞供您調整。
將提示詞換成下列文字:
Goal: Summarize unread emails from the primary inbox, organize them into action-oriented categories, and exclude promotional and non-essential content.
Instructions:
1. Filter Emails: Identify all unread emails from yesterday. Exclude ads, promotional emails, social media notifications, newsletters, spam, automated meeting acceptances, location changes, and system notifications.
2. Identify Action Items: Create an "Urgent Action Items" category for any emails that require a direct response, decision, or task from me. Use my recent conversations and projects as context to determine importance and urgency.
3. Identify Themes: Recognize and group any high-volume, repetitive themes (e.g., code reviews, project updates) into their own distinct sections. For these themes, provide a high-level summary of the overall activity rather than a list of every single email.
4. Categorize Remaining Emails: Use a "Meeting Updates" category for all meeting invitations, rejections, and schedule changes. Use an "FYI" category for everything else that doesn't fit into the other groups.
Special Handling for Digests
* For emails that are Google Group or mailing list digests, do not summarize each individual thread. Instead, provide a single summary for the digest that identifies the top 2-3 most discussed topics.
5. Formatting:
* Preamble: Begin the entire output with the exact phrase: "Let's get caught up on your inbox", followed by two line breaks.
* Present the final summary using clear headings and a brief, conversational tone. Do not use a strict bulleted list for every single email, instead, summarize and group where it makes sense.
* Empty Categories: If a category has no emails, output the category header followed by a single line break and the phrase "You're all caught up."
* Strictness: Provide only the final summary as requested. Do not include any apologies, explanations, or conversational text outside of the specified format.
* Also format it beautifully and use all things rich text and emojis.
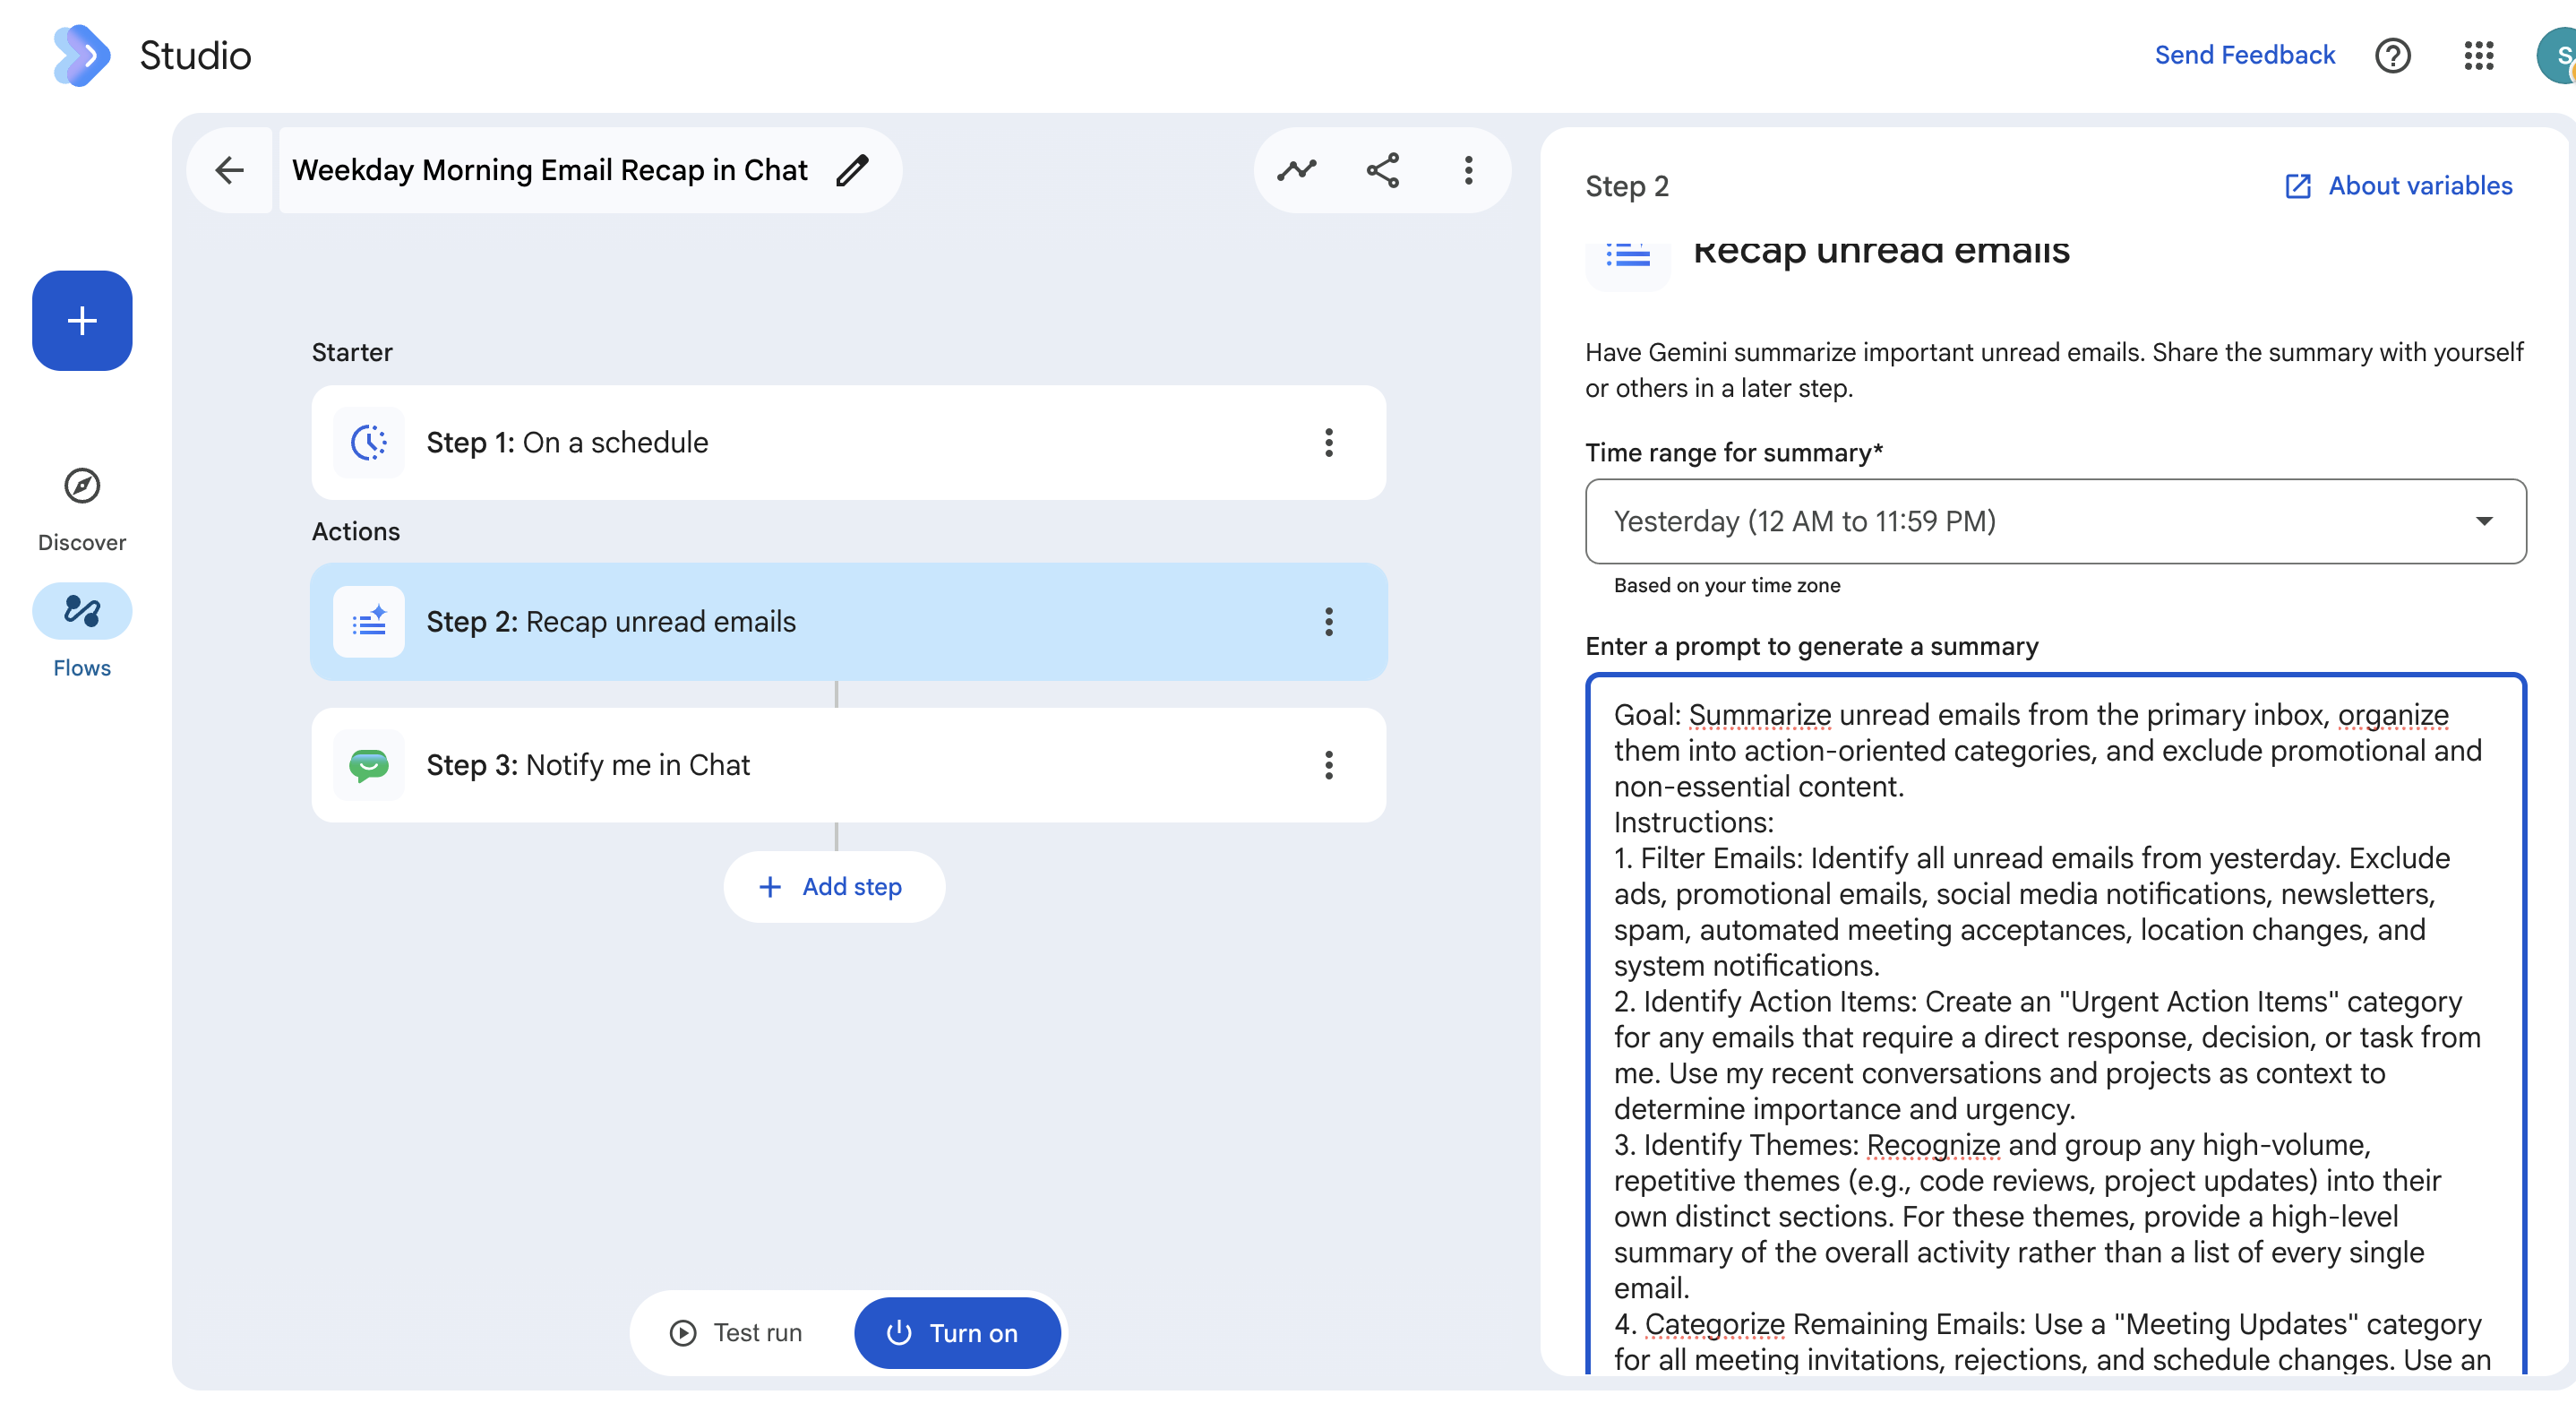
請詳閱提示詞,瞭解如何要求 Gemini 提供摘要。這則提示詞遵循下列最佳做法:
- 在開頭說明想達成的目標。
- 接著提供詳細指令。
- 指定輸出內容的格式。
使用變數傳遞資訊
解決方案的最後一部分,是每天早上透過 Chat,將未讀電子郵件摘要傳送給自己。在這個步驟,Workspace Studio 會使用變數在步驟之間傳遞資訊。
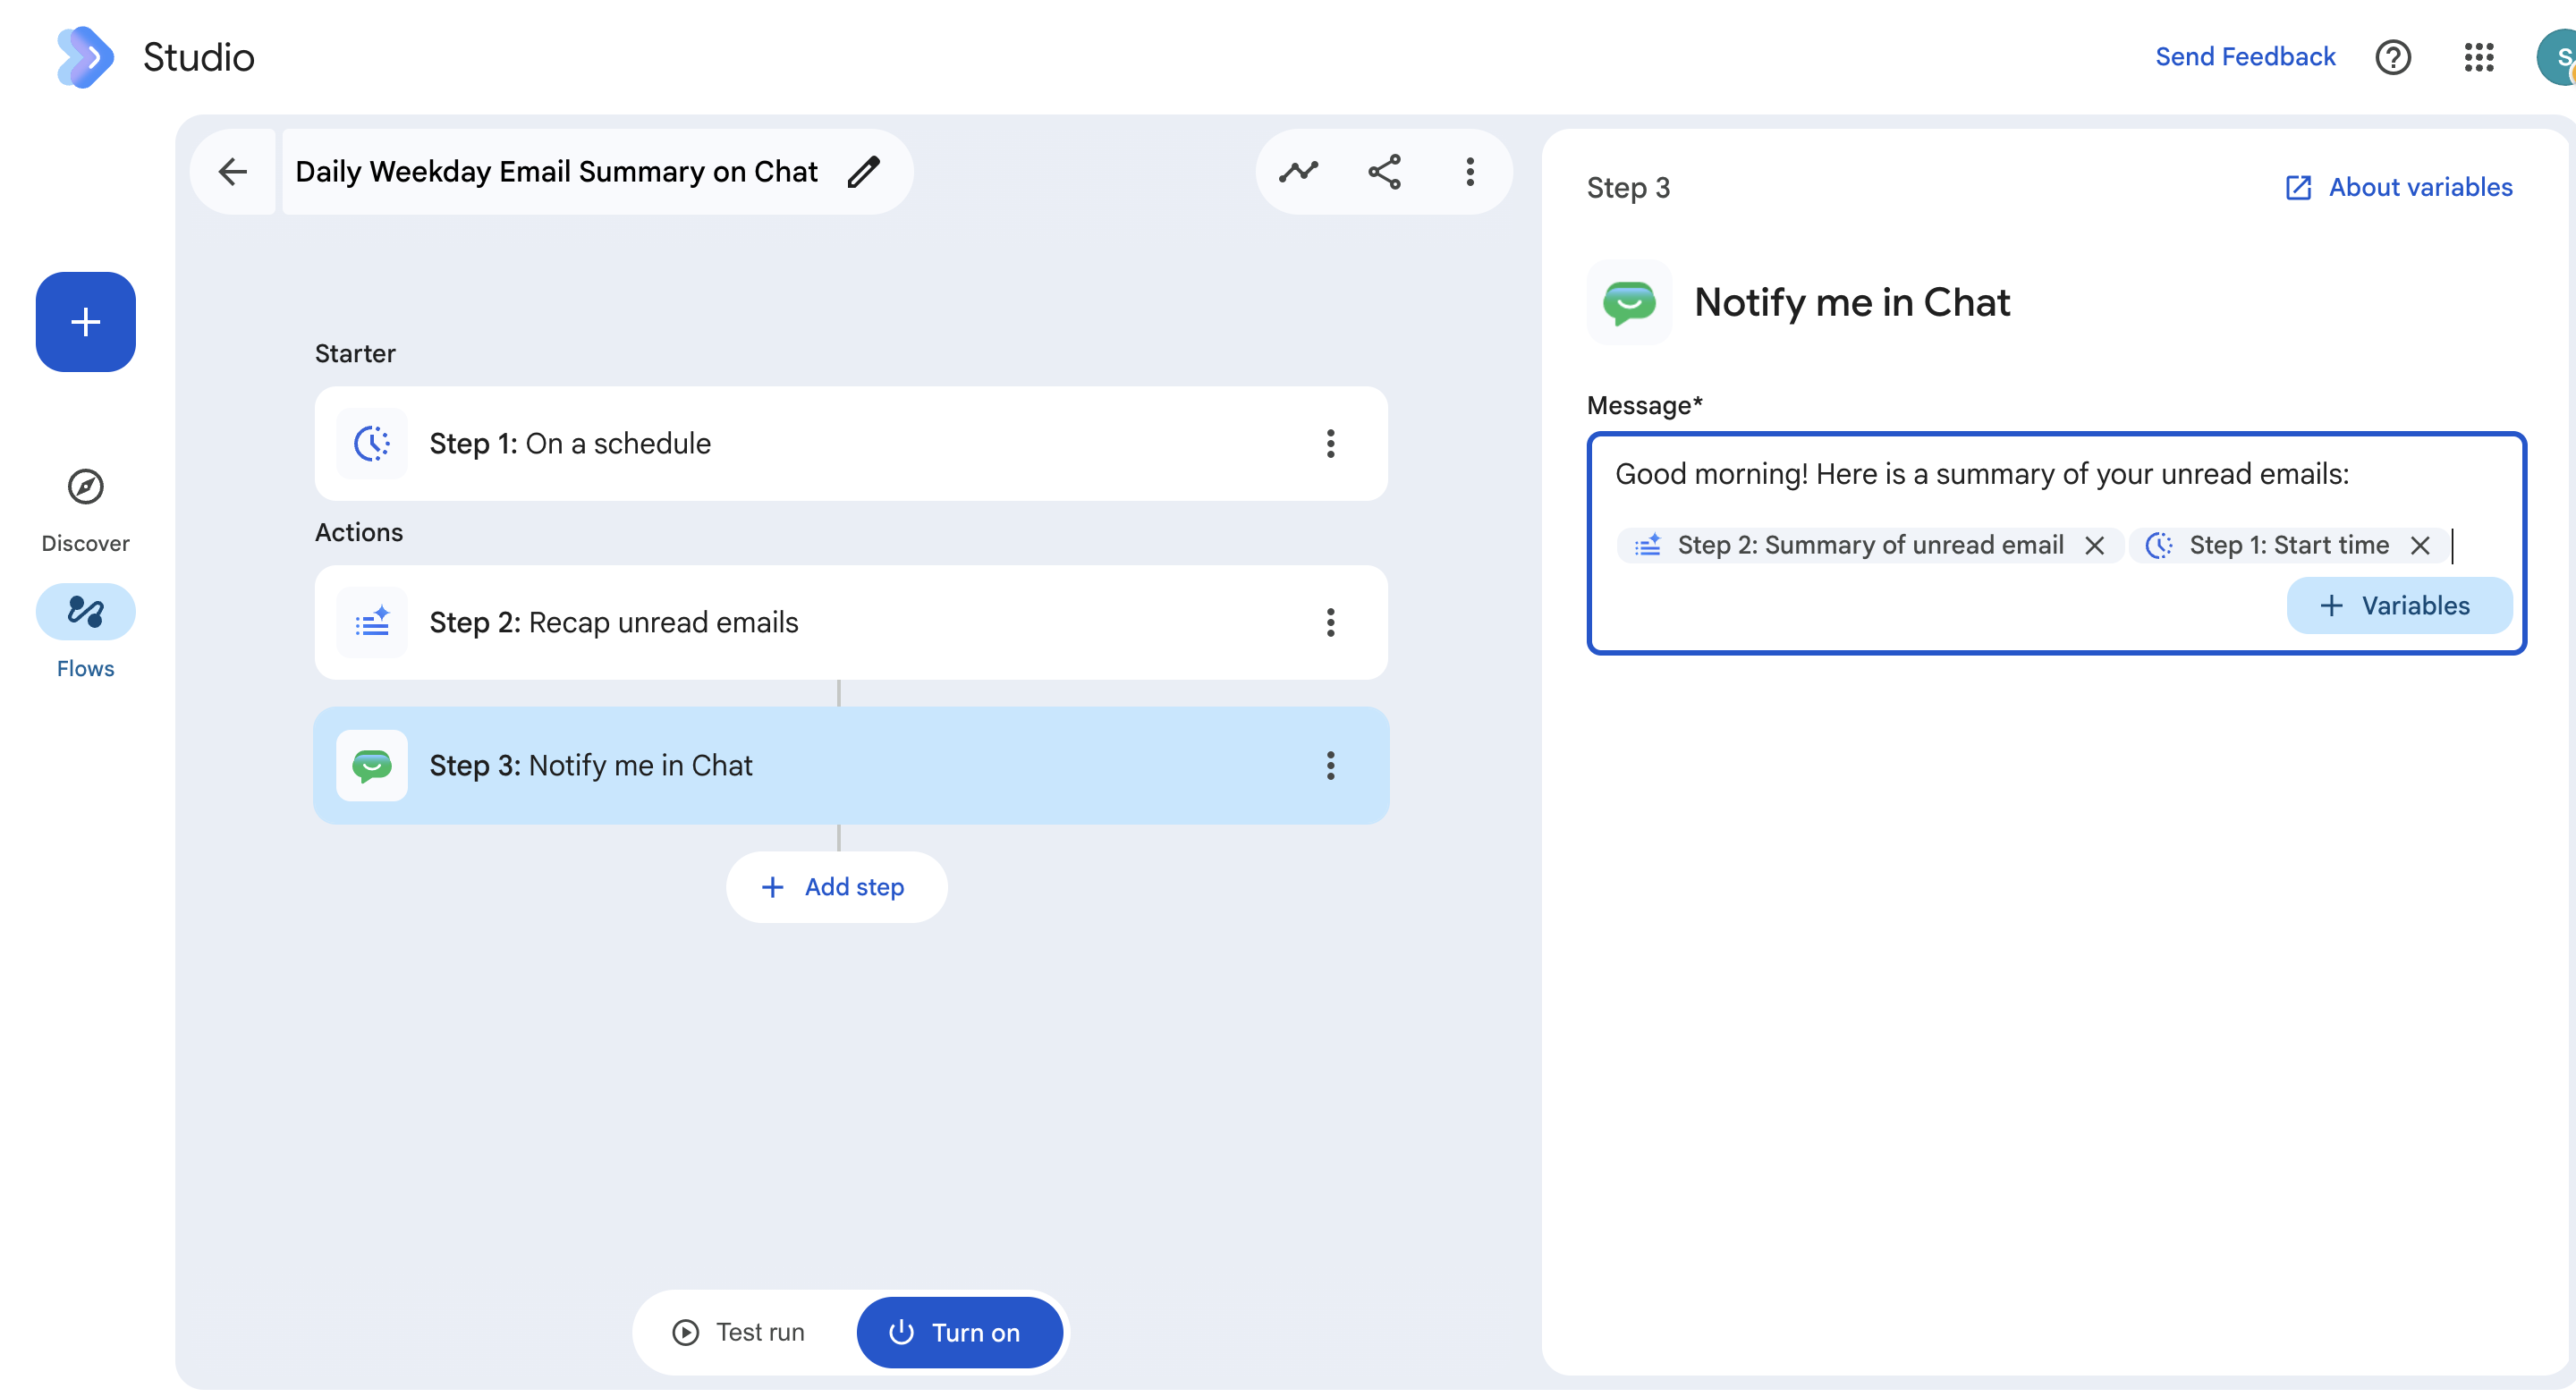
- 點選第三個步驟「Notify me in Chat」,查看設定。
- 系統會使用「Step 2: Summary of unread email」的變數,將 Gemini 生成的摘要傳遞至步驟 3,也就是您在 Chat 通知中收到的輸出內容。
- 在「Message」部分,按一下「Variables」,新增其他變數。首先,新增步驟 1 的「Start time」。接著使用下列格式,新增步驟 2 的「Summary of unread email」:
This summary ran at [Step 1: Start time]: [Step 2: Summary of unread email]
工作 2:測試工作流程
啟用工作流程前請先測試,確保流程能正常運作:
- 依序點選「Test run」和「Start」。
- 測試會立即執行工作流程,方便您驗證輸出內容。如果發現需要更新的地方,可以在測試執行結束後編輯流程。
- 若一切正常,您會收到「Run Completed」訊息。
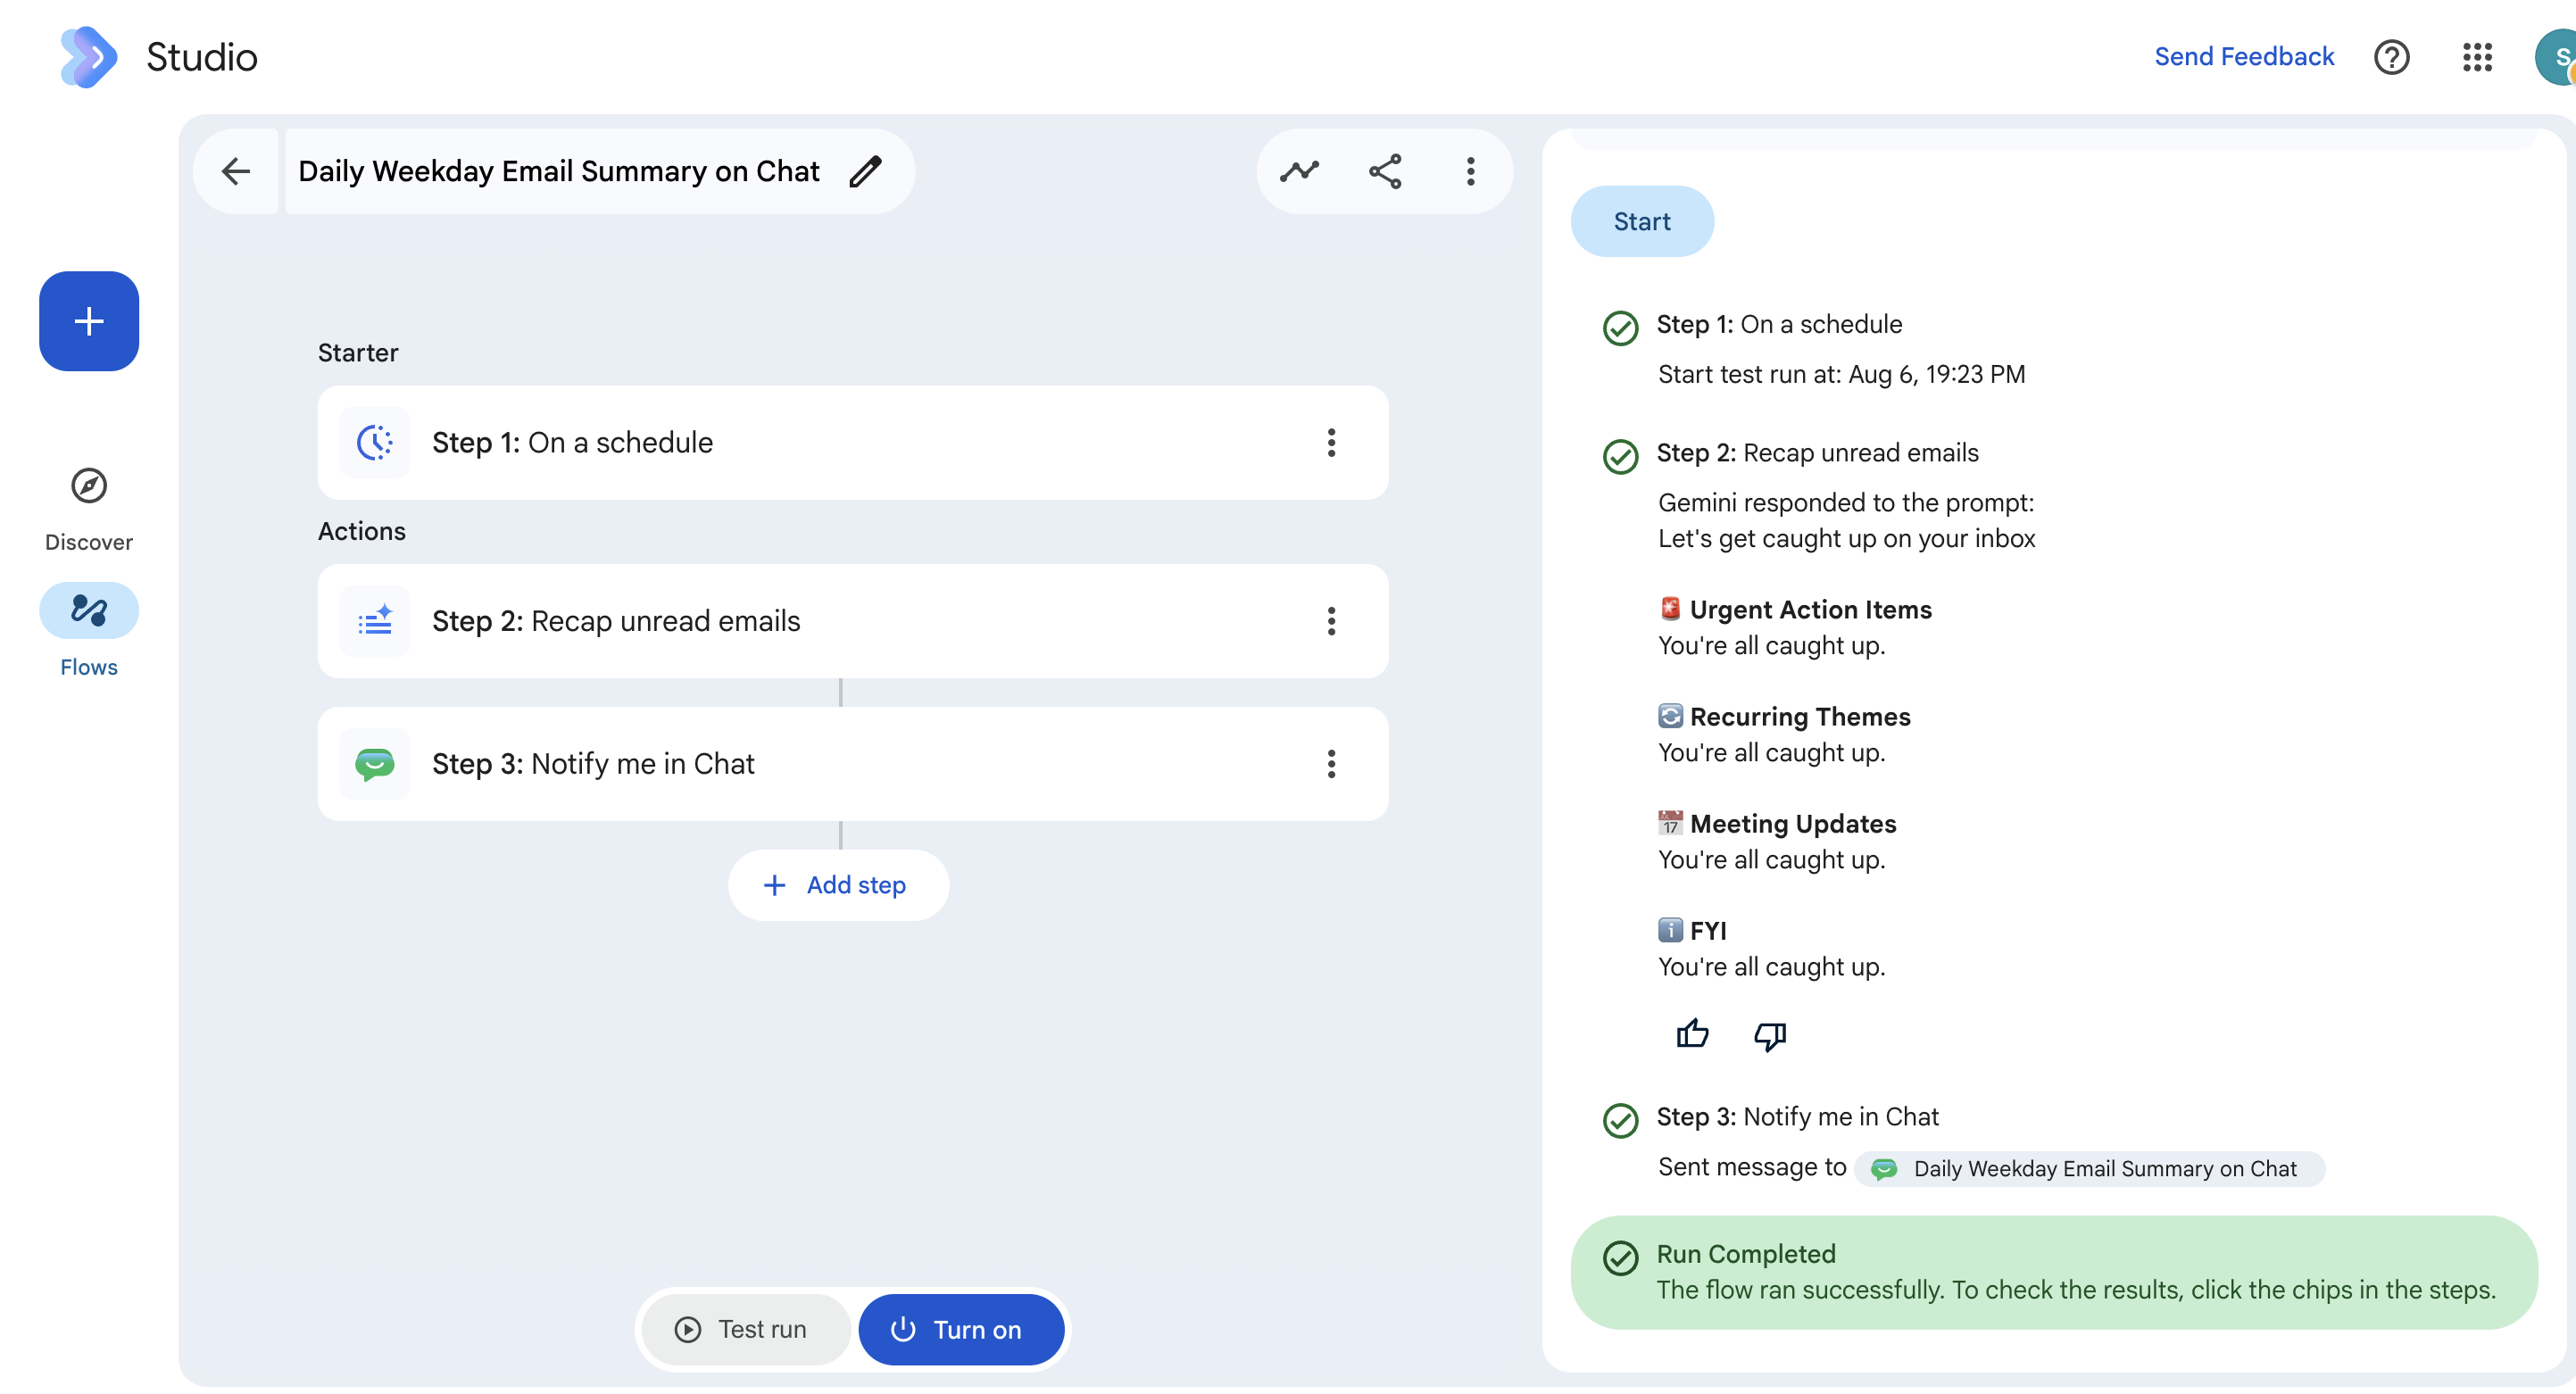
- 接著,按一下「Turn on」。現在起,這個工作流程會在每個工作天,根據您在「Step 1: On a schedule」定義的時間執行。
工作 3:更新工作流程
如果工作流程發生問題,您會在以下幾個地方收到通知:
- Gmail 收件匣中,Google Workspace Studio 圖示上會顯示紅點。
- Workspace Studio 網頁應用程式中,「Flows」分頁內會有訊息。
- Workspace Studio 網頁應用程式中,「Activity」分頁會顯示紅點。請將「排解工作流程問題」指南加入書籤,以便瞭解詳情。
更新剛才建立的工作流程,變更執行時間。
- 在 Workspace Studio 中,按一下「My flows」。
- 按一下工作流程名稱以在編輯器開啟 (Workspace Studio 會為流程命名)。
- 按一下「Step 1: On a schedule」。
- 在「Time」欄位,將工作流程執行時間變更為「7:00 am」。
- 按一下「Save changes」。
工作 4:使用範本建立工作流程
範本是預先建構的工作流程,專為常見用途設計,當中包含完成工作所需的所有步驟和提示詞。有些範本可直接使用,有些則需要您新增一些資訊才能發揮作用。
在這項工作中,您將使用範本執行下列操作:
-
在資料夾中新增項目時觸發流程:將檔案或子資料夾新增至 Google 雲端硬碟的特定資料夾時,流程就會啟動。
-
建立工作:在 Google Tasks 中建立新工作。新工作會自動加入 Google Tasks 的主要工作清單。
建立雲端硬碟資料夾
建立工作流程前,您需要在 Google 雲端硬碟中建立資料夾。請立即設定,以便稍後在工作流程中參照。
- 在 Google 雲端硬碟分頁,按一下左側雲端硬碟圖示下方的「新增」。
- 按一下「新資料夾」,然後將資料夾命名為「Workspace Studio 工作」
- 點選「建立」。
這是用來啟動工作流程的資料夾。請勿關閉這個瀏覽器視窗,之後會用到。
設定工作流程
在 Google Workspace Studio 中設定工作流程。
- 返回 Workspace Studio 瀏覽器分頁。按一下「Discover」,然後捲動瀏覽可用的範本。
- 按一下「Auto-create tasks when files are added to a folder」範本。
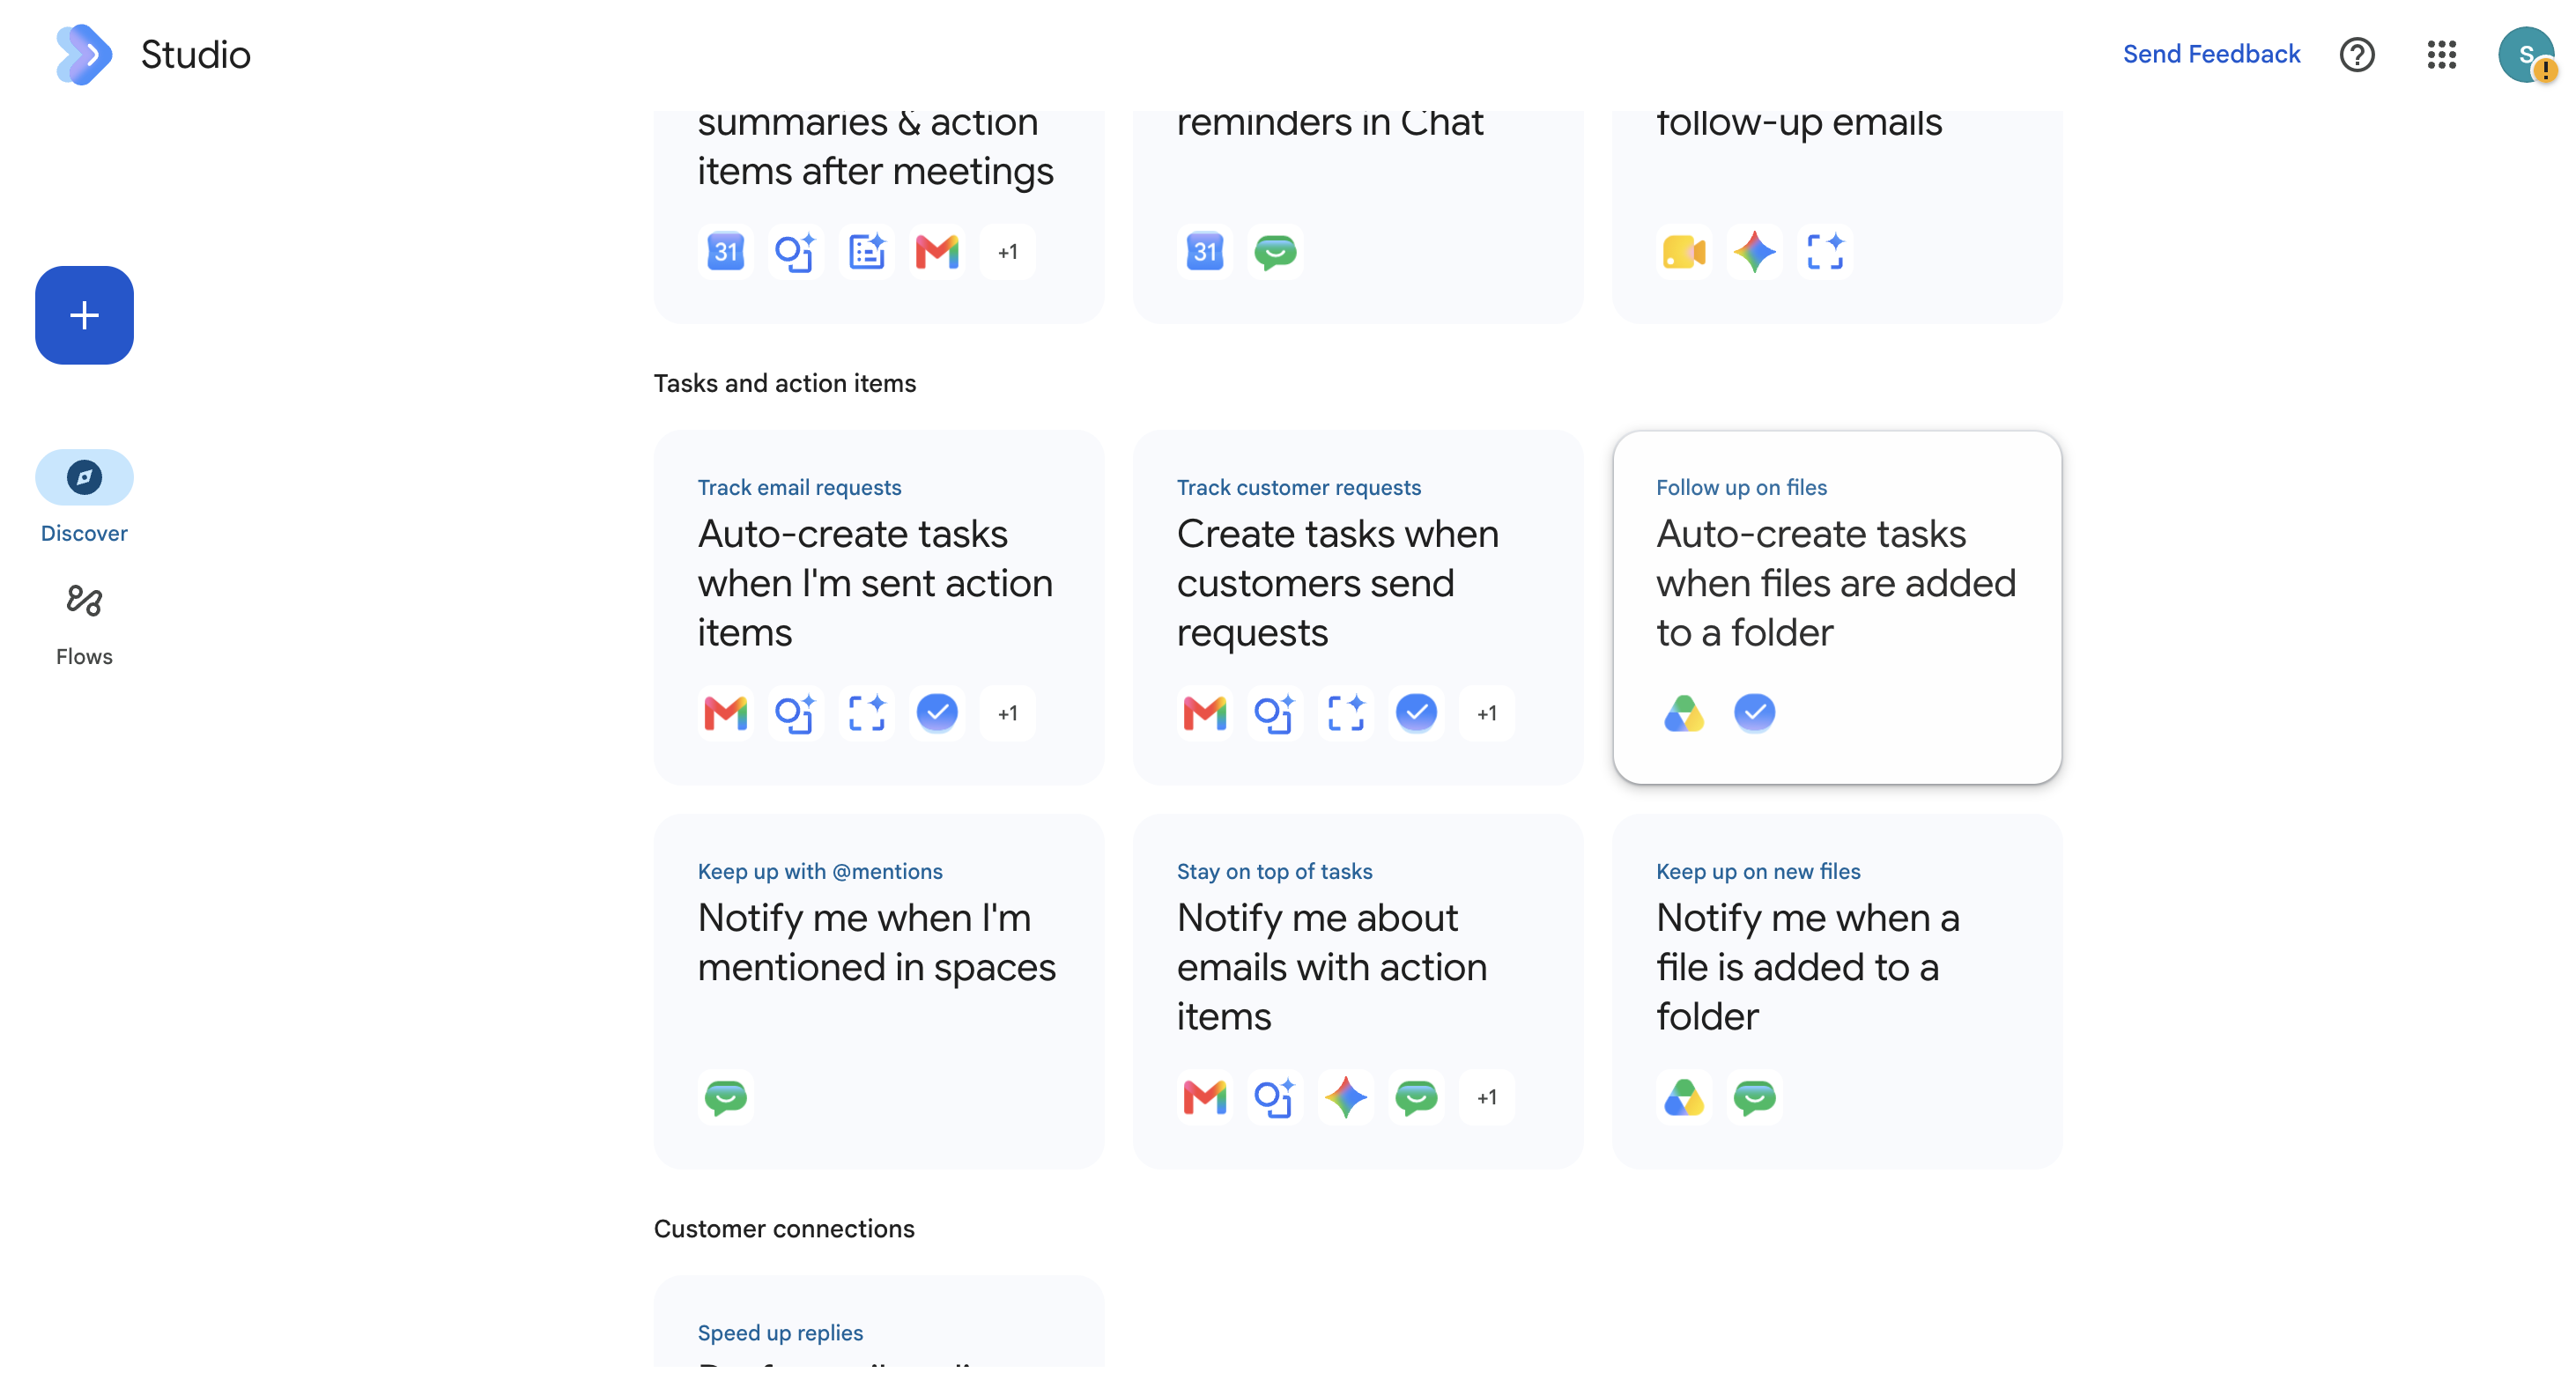
工作流程隨即會顯示在編輯器中。
- 按一下「Step 1: When an item is added to a folder」。
- 在編輯器右側,按一下「Folder」欄位中的「Drive」。
- 在「雲端硬碟資料夾挑選器」中,依序點選「所有位置」>「我的雲端硬碟」旁的箭頭圖示 (>),然後選取「Workspace Studio 工作」。
- 按一下「Step 2: Create a task」,查看步驟設定。
- 按一下編輯器底部的「Turn on」。
將檔案新增至雲端硬碟資料夾
- 返回 Google 雲端硬碟,在「Workspace Studio 工作」資料夾中,依序點選「新增」和「Google 文件」。
- 系統會開啟新的 Google 文件。依序點選「檔案」和「重新命名」。
- 將檔案重新命名為「測試工作」。
- 按下 Enter 鍵。
- 在同一個瀏覽器視窗中,輸入下列網址:
tasks.google.com
Google Tasks 會隨即開啟。
- 確認您看到標題為「Review new file added to Drive」的新工作。
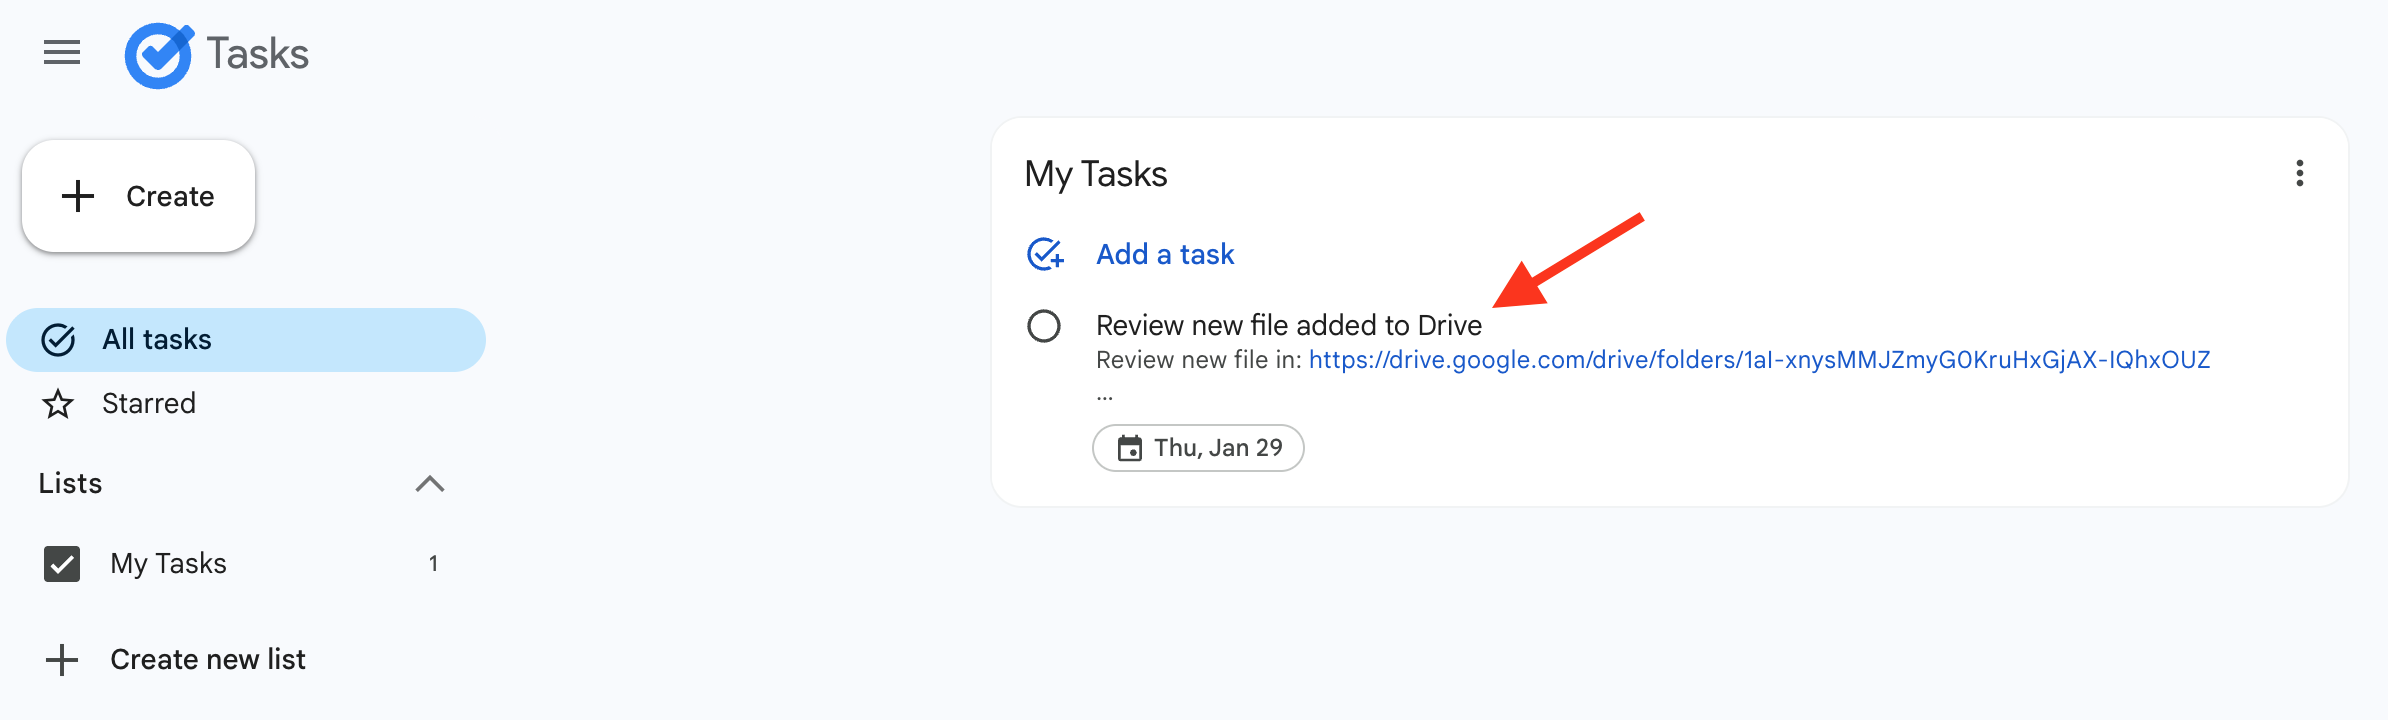
流程已成功為您新增工作:查看資料夾中的新項目。
點選「Check my progress」確認目標已達成。
使用範本建立工作流程
恭喜!
現在,您可以使用 Google Workspace Studio,使用自然語言和範本建立流程,自動執行工作。
Google Cloud 教育訓練與認證
協助您瞭解如何充分運用 Google Cloud 的技術。我們的課程會介紹專業技能和最佳做法,讓您可以快速掌握要領並持續進修。我們提供從基本到進階等級的訓練課程,並有隨選、線上和虛擬課程等選項,方便您抽空參加。認證可協助您驗證及證明自己在 Google Cloud 技術方面的技能和專業知識。
使用手冊上次更新日期:2026 年 8 月 6 日
實驗室上次測試日期:2026 年 8 月 6 日
Copyright 2026 Google LLC 保留所有權利。Google 和 Google 標誌是 Google LLC 的商標,其他公司和產品名稱則有可能是其關聯公司的商標。