Modify an ADK Agent to use MCP

Check my progress

/ 100

This lab may incorporate AI tools to support your learning.

GML016

注意:為確保體驗一致且效能優異,本實驗室可能會針對部分模型要求提供快取回應。 Google Cloud 自學實驗室

總覽

大型語言模型 (LLM) 功能強大,但有兩大限制:習得的知識會停留在完成訓練時的狀態,而且缺乏與外界互動的能力,因此無法存取即時資料,或執行預約會議、更新客戶記錄等操作。

在這種情況下,Model Context Protocol (MCP) 便能派上用場!MCP 是一項開放標準,主要用來化解 LLM 的限制。

為什麼要使用 MCP?

有了 MCP,LLM 就能透過安全的標準化「語言」,與外部資料、應用程式和服務溝通。這項技術就像一座橋梁,讓 AI 代理突破靜態知識的限制,能以動態方式擷取最新資訊並採取行動,進而提高準確度、實用性和自動化程度。

本實驗室將逐步說明如何安裝 Agent Development Kit (ADK)、修改現有 ADK 代理,以便使用 MCP,以及部署更新後的代理,透過指令列介面啟動互動式工作階段。

查看 Gemini Enterprise Agent Ready (GEAR) 計畫的其他內容。

目標

本實驗室將帶您瞭解如何執行下列工作:

  • 安裝 Agent Development Kit (ADK),並為專案建立虛擬環境。
  • 測試 currency-agent 系統 (即「修改前」的狀態)。
  • 修改代理,以便使用 MCP 伺服器。
  • 重新啟動 MCP 伺服器和代理,讓變更生效。
  • 驗證對 MCP 伺服器所做的變更 (即「修改後」的狀態)。

設定和需求

  • 實驗室活動會計時且無法暫停,點選「Start」就會開始計時。
  • 內建的 IDE 已預先設定 gcloud SDK。
  • 使用終端機執行指令,然後點選「Check my progress」,確認工作已完成。

設定環境並安裝相關依附元件

  1. 在終端機執行下列指令,從 Cloud Storage bucket 複製本實驗室要使用的程式碼檔案:

    gcloud storage cp -r gs://{{{project_0.project_id| YOUR_GCP_PROJECT_ID}}}-bucket/currency-agent .
  2. 執行下列指令來設定環境,並在 currency-agent 目錄建立 .env 檔案:

    cd currency-agent cp /home/student/keys.json . uv venv --python 3.12 source .venv/bin/activate uv sync touch .env echo "GOOGLE_CLOUD_PROJECT={{{ project_0.project_id }}}" >> .env echo "GOOGLE_CLOUD_LOCATION=global" >> .env echo "GOOGLE_GENAI_USE_ENTERPRISE=True" >> .env echo "MODEL={{{project_0.startup_script.gemini_flash_model_id | gemini_flash_model_id}}}" >> .env

工作 1:安裝 Agent Development Kit (ADK)

  1. 在新的終端機 (依序選取選單列的「Terminal」>「New Terminal」),執行下列指令來啟動 MCP 伺服器:

    cd currency-agent uv run mcp-server/server.py
  2. 在新的終端機 (依序選取選單列的「Terminal」>「New Terminal」),執行下列指令來啟動 A2A 伺服器 (伺服器會在通訊埠 10000 啟動):

    cd currency-agent uv run uvicorn currency_agent.agent:a2a_app --host localhost --port 10000

工作 2:執行基準代理 (「修改前」)

  1. 最初的終端機執行個體,執行下列指令來啟動現有的 Currency Agent:

    adk run currency_agent 注意:如果在啟動代理時發生逾時錯誤 (例如 asyncio.exceptions.CancelledError),請前往 MCP 伺服器 (工作 1 的步驟 1) 和 A2A 伺服器 (工作 1 的步驟 2) 各自的終端機分頁,確認這些伺服器都正常執行。
  2. 等到終端機顯示 [user]: 提示後,輸入下列內容與代理互動:

    What's the exchange rate between USD and EUR?

代理應該會提供美元和歐元的即時匯率。

  1. 試試其他提示詞:

    What's the exchange rate between USD and CNY?

代理應該會提供美元和人民幣的即時匯率。

  1. 輸入下列提示詞,與代理互動:

    What's the price of Bitcoin?

從回覆內容可以看出,代理只能分享法定貨幣的相關資訊,無法提供任何加密貨幣的最新資料。

工作 3:修改代理

在這項工作,您將修改 Currency Agent,讓這個代理能夠使用 Model Context Protocol (MCP) 伺服器。這就像透過公開的 Coinbase API 呼叫獨立的「貨幣伺服器」,取得代理原本無法存取的匯率資訊。

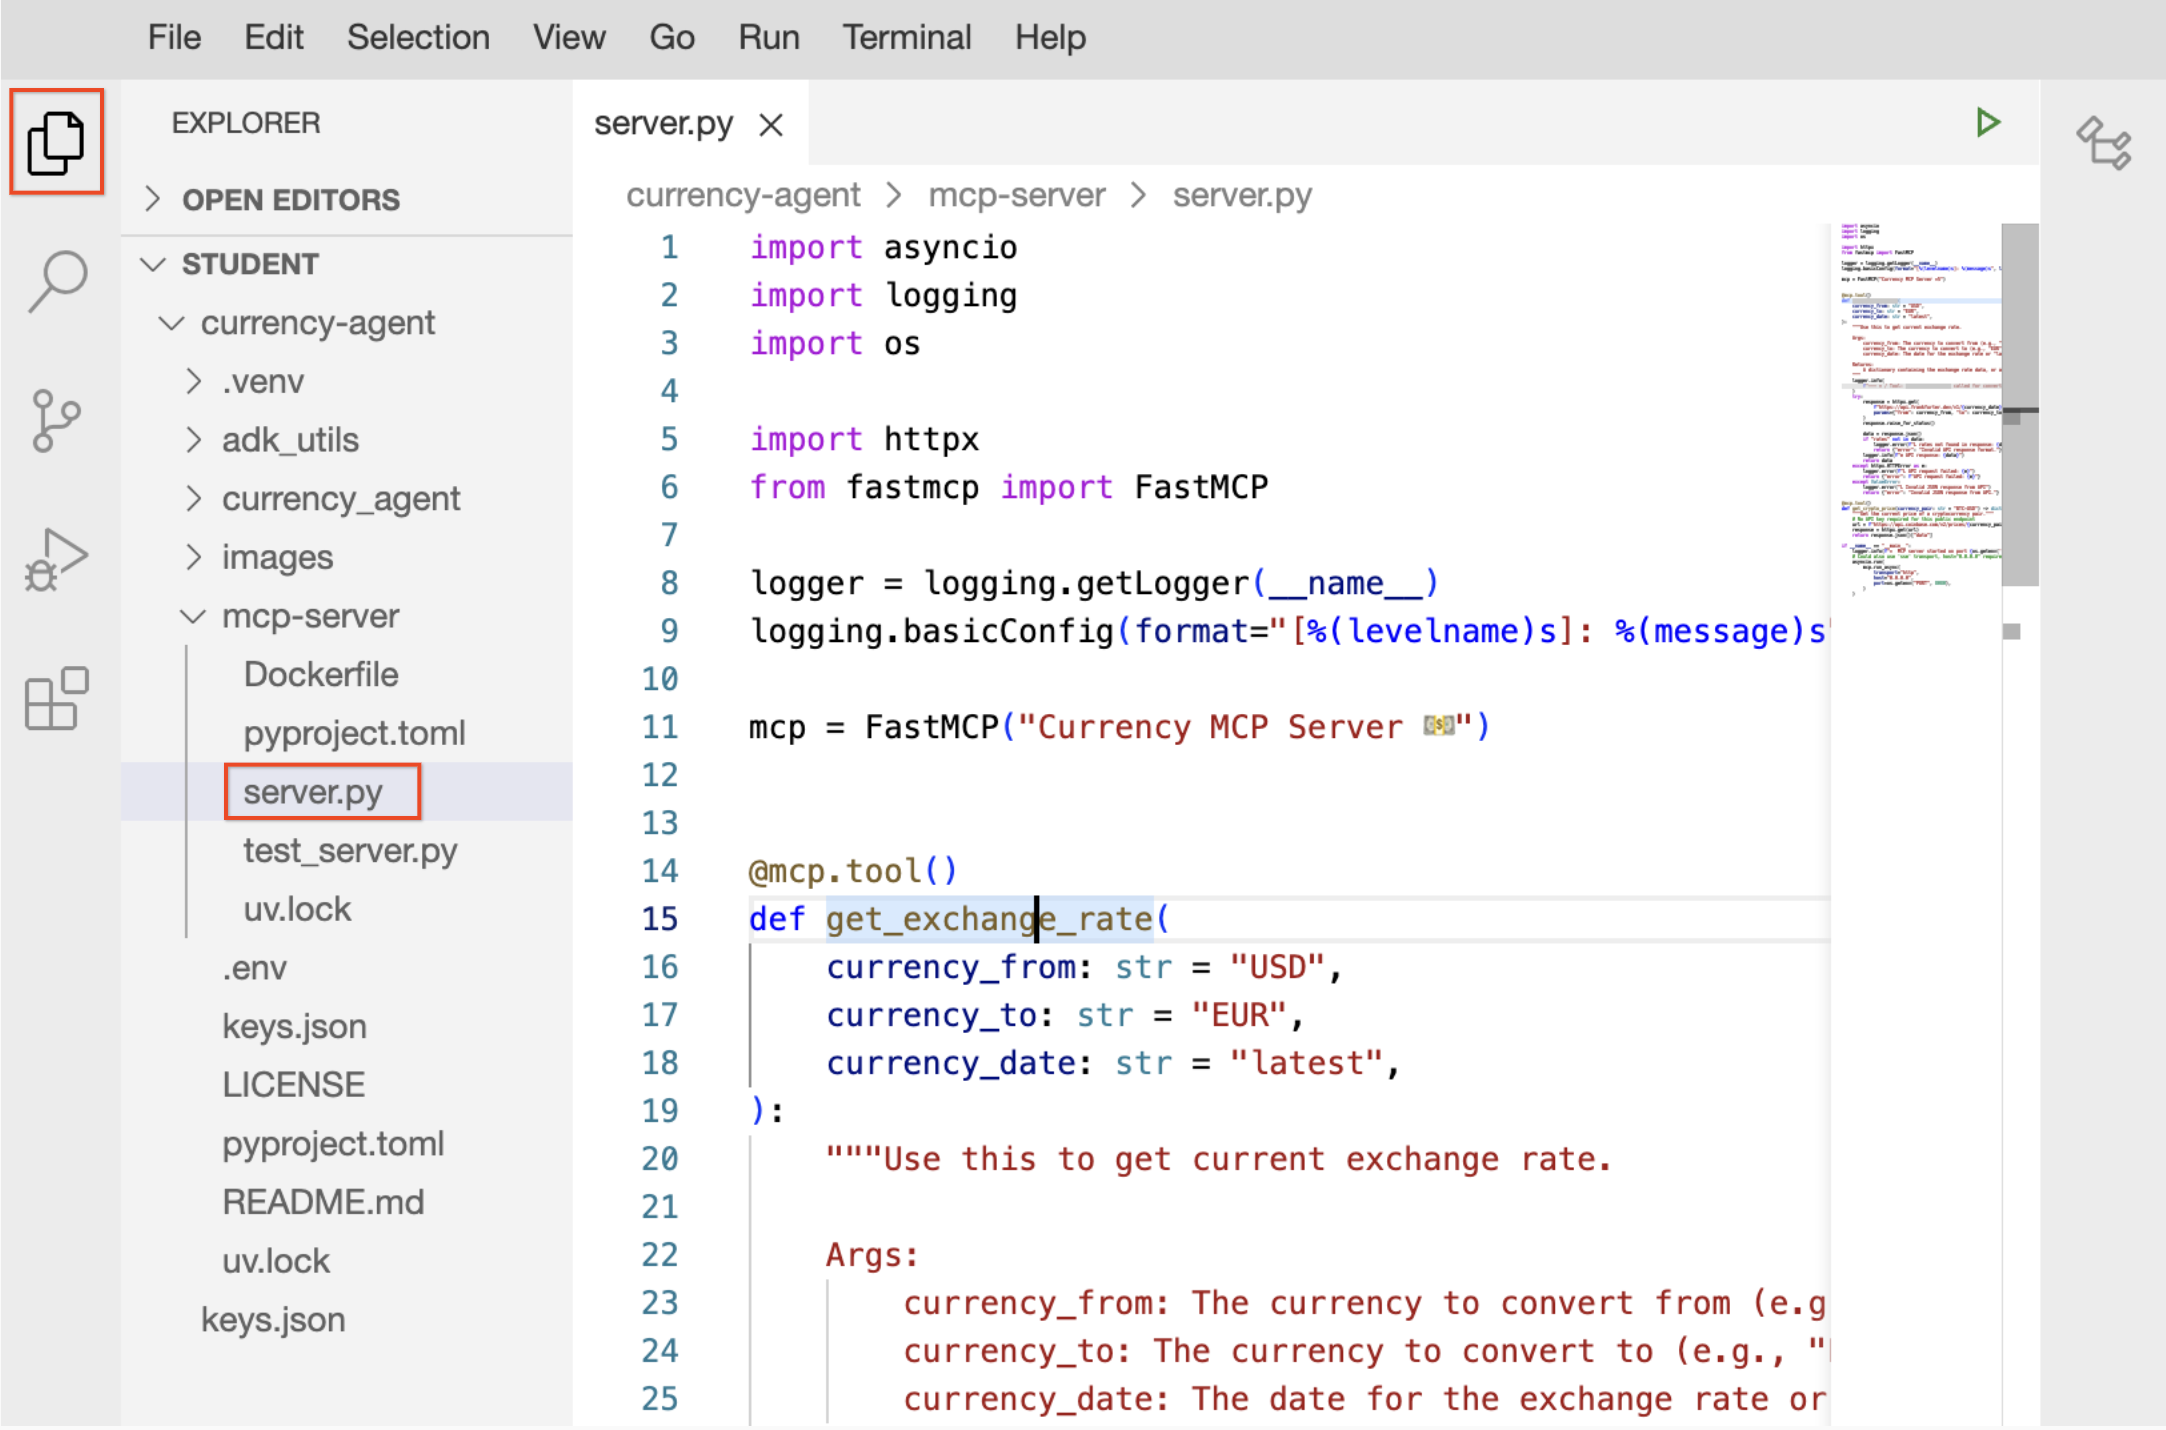
  1. 點選左側窗格的「檔案總管」圖示,然後前往「currency-agent/mcp-server」專案資料夾。
「檔案總管」圖示
  1. 在「檔案總管」開啟 mcp-server 目錄內的 server.py 檔案,然後在第 53 行插入下列程式碼,並儲存變更:

    @mcp.tool() def get_crypto_price(currency_pair: str = "BTC-USD") -> dict: """Get the current price of a cryptocurrency pair.""" # No API key required for this public endpoint url = f"https://api.coinbase.com/v2/prices/{currency_pair}/spot" response = httpx.get(url) return response.json()["data"]

工作 4:重新啟動 MCP 和 A2A 伺服器

  1. 切換至 MCP 伺服器仍在執行的終端機執行個體。

  2. 按下 CTRL+C 鍵,停止伺服器。

  3. 在同一個終端機執行下列指令,重新啟動 MCP 伺服器:

    uv run mcp-server/server.py
  4. 切換至 A2A 伺服器仍在執行的終端機執行個體。

  5. 按下 CTRL+C 鍵,停止伺服器。

  6. 在同一個終端機執行下列指令,重新啟動代理:

    uv run uvicorn currency_agent.agent:a2a_app --host localhost --port 10000

工作 5:執行並測試更新後的代理 (「修改後」)

  1. 切換至先前執行 currency_agent 的終端機執行個體。

  2. 輸入 exit,結束原本的工作階段。

  3. 輸入下列指令,重新執行並測試代理:

    adk run --save_session currency_agent 注意:您可以忽略與 Python 版本依附元件相關的任何警告。
  4. 送出下列提示詞,與代理互動:

    Use the get_crypto_price tool to get me the current price of Bitcoin.

代理已可透過 MCP 存取 get_crypto_price 工具,因此現在不只能提供法定貨幣的資訊,還能回答其他貨幣的問題!

注意:如果出現 429 配額錯誤,請稍候一分鐘再重新提出要求。
  1. 先輸入 exit,再依系統提示輸入工作階段 ID 1,確保活動追蹤作業順利完成。

點選「Check my progress」,確認目標已達成。

修改 ADK 代理,以便使用 MCP。

恭喜!

您已成功部署 ADK 代理,並完成修改,讓代理能夠使用 Model Context Protocol (MCP) 伺服器。

使用手冊上次更新日期:2026 年 5 月 22 日

實驗室上次測試日期:2026 年 5 月 22 日

Copyright 2026 Google LLC 保留所有權利。Google 和 Google 標誌是 Google LLC 的商標,其他公司和產品名稱則有可能是其關聯公司的商標。

Before you begin

  1. Labs create a Google Cloud project and resources for a fixed time
  2. Labs have a time limit and no pause feature. If you end the lab, you'll have to restart from the beginning.
  3. On the top left of your screen, click Start lab to begin

Use private browsing

  1. Copy the provided Username and Password for the lab
  2. Click Open console in private mode

Sign in to the Console

  1. Sign in using your lab credentials. Using other credentials might cause errors or incur charges.
  2. Accept the terms, and skip the recovery resource page
  3. Don't click End lab unless you've finished the lab or want to restart it, as it will clear your work and remove the project

This content is not currently available

We will notify you via email when it becomes available

Great!

We will contact you via email if it becomes available

One lab at a time

Confirm to end all existing labs and start this one

Use private browsing to run the lab

Using an Incognito or private browser window is the best way to run this lab. This prevents any conflicts between your personal account and the Student account, which may cause extra charges incurred to your personal account.