

Before you begin
- Labs create a Google Cloud project and resources for a fixed time
- Labs have a time limit and no pause feature. If you end the lab, you'll have to restart from the beginning.
- On the top left of your screen, click Start lab to begin

Create a Git Repository
/ 25
Launch the site at TCP port 8080
/ 25
Create the Cloud Build trigger
/ 25
Test the pipeline
/ 25
Create a Git Repository
/ 25
Launch the site at TCP port 8080
/ 25
Create the Cloud Build trigger
/ 25
Test the pipeline
/ 25

In this lab you create a pipeline for deploying websites based on Hugo, a static website builder. You store the website content in a Git repository, deploy the website with Firebase, then use Cloud Build to create a pipeline to automatically deploy new content that is committed to the repository.
In this lab you perform the following:
You may find it helpful to have some hands-on experience with the services you will be using. Here are some other labs you may find helpful:
Static site builders like Hugo have become popular because of their ability to produce websites that do not require web servers. With static web platforms there are no server operating systems or software to maintain. There are, however, various operational considerations. For example, you may want to version control your postings, host your web site on a content delivery network ("CDN") and provision an SSL certificate.
You can address these needs by using a Continuous Integration / Continuous Deployment pipeline on Google Cloud. A deployment pipeline enables developers to rapidly innovate by automating the entire deployment process. In this lab, you will learn to build a pipeline demonstrating this automation.
Read these instructions. Labs are timed and you cannot pause them. The timer, which starts when you click Start Lab, shows how long Google Cloud resources are made available to you.
This hands-on lab lets you do the lab activities in a real cloud environment, not in a simulation or demo environment. It does so by giving you new, temporary credentials you use to sign in and access Google Cloud for the duration of the lab.
To complete this lab, you need:
Click the Start Lab button. If you need to pay for the lab, a dialog opens for you to select your payment method. On the right is the Lab setup and access panel with the following:
Note that the lab timer is located near the top of the page, showing the remaining time.
Click Open Google Cloud console (or right-click and select Open Link in Incognito Window if you are running the Chrome browser).
The lab spins up resources, and then opens another tab that shows the Sign in page.
Tip: Arrange the tabs in separate windows, side-by-side.
If necessary, copy the Username below and paste it into the Sign in dialog.
You can also find the Username in the Lab setup and access panel.
Click Next.
Copy the Password below and paste it into the Welcome dialog.
You can also find the Password in the Lab setup and access panel.
Click Next.
Click through the subsequent pages:
After a few moments, the Google Cloud console opens in this tab.

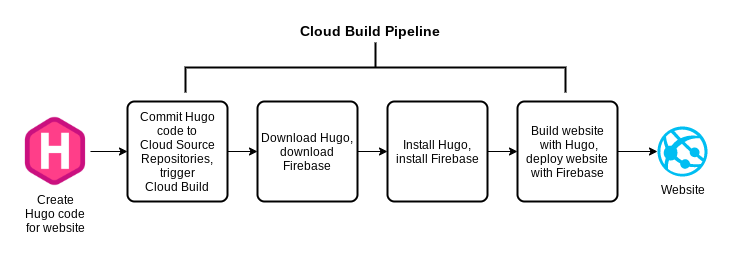
Here's a diagram of what you are going to build:
The goal is to be able to commit code and have it trigger the pipeline, which in turn deploys the website. Your journey is in two parts. First, you build the website locally and manually deploy it to Firebase. Second, you automate the process by building a pipeline with Cloud Build.
First build the website manually on a Linux instance to learn the end-to-end process. You also use the Linux instance to perform some of the one-time tasks needed to get Firebase up and running.
 ) select Compute Engine > VM Instances. Notice the instance that has been built for you.
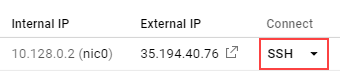
At the end of the line you should see an External IP address and an SSH button as shown in the figure below. If these are obscured by an information panel, close that panel so you can see the entire line.
Now install Hugo in the Linux instance to locally test the website before you deploy it with Firebase. This lab provides a shell script to make this easier.
installhugo.sh:Your output should be similar to the sample output below:
Output:
Note the use of the curl command to download Hugo and the tar command to unpack the Hugo archive. You will see similar commands later in this lab when you create the pipeline.
When complete, you receive a message saying that Hugo has been installed into the /tmp directory as shown below.
You are now ready to build the website infrastructure.
Clone the pre-created Git repository to the Linux instance.
Cloning a repository creates a mirror of it in the shell. This allows you to implement the web site while in the shell, and then later commit your changes to the file system. Later in this lab, you will set up a pipeline that responds to these commits to the repository.
git on the Linux VM and set your project ID, project number, and region. Save them as PROJECT_ID, PROJECT_NUMBER, and REGION variables:Enter the following commands in the Linux instance shell:
warning: You appear to have cloned an empty repository. is expected because the repository is newly initialized and does not contain any commits yet.
Click Check my progress to verify the objective.
Now you are ready to create the site structure.
Normally the hugo command creates the directory. The --force option will create the site in the repository directory, which already exists. This allows you to keep the Git-related information in the directory that you just cloned.
When complete, you see messages that the site has been created.
When complete, you see messages indicating that the theme has been cloned.
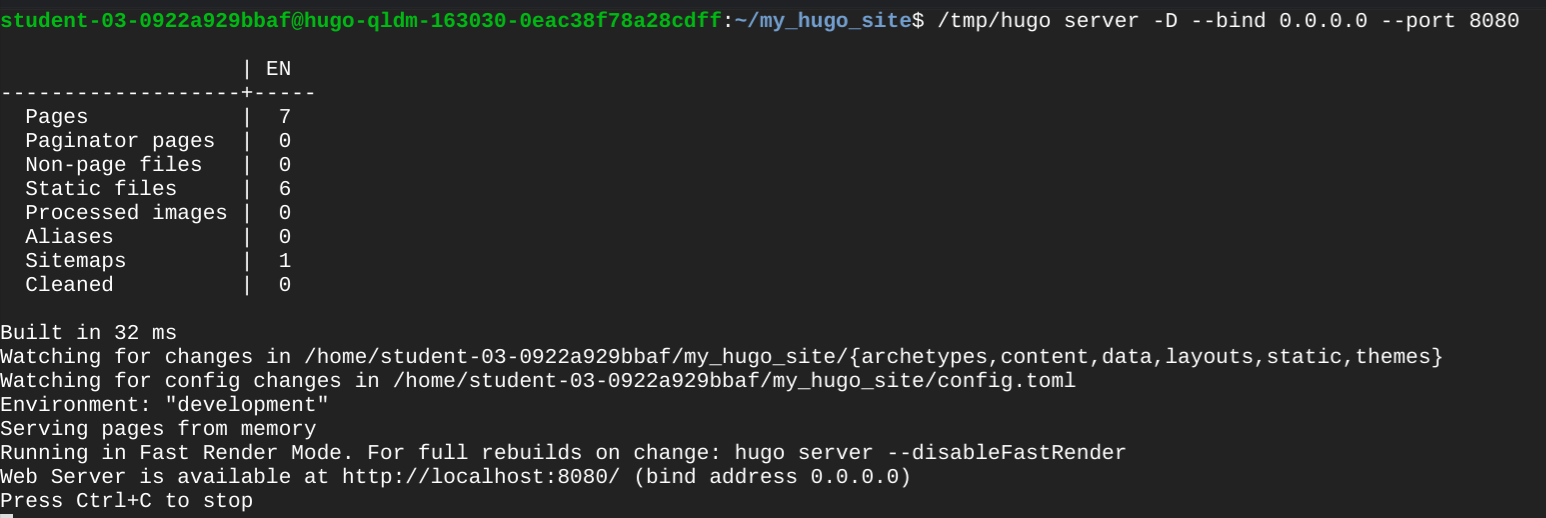
Hugo builds the site and serves it for access on TCP port 8080. The server runs until it is stopped by pressing CTRL+C.
[EXTERNAL IP] with the external IP address of your hugo-dev-vm instance.You can find the external IP address in the Google Cloud Console under Compute Engine > VM Instances in the External IP column. Alternatively, run the following command in your terminal to retrieve it:
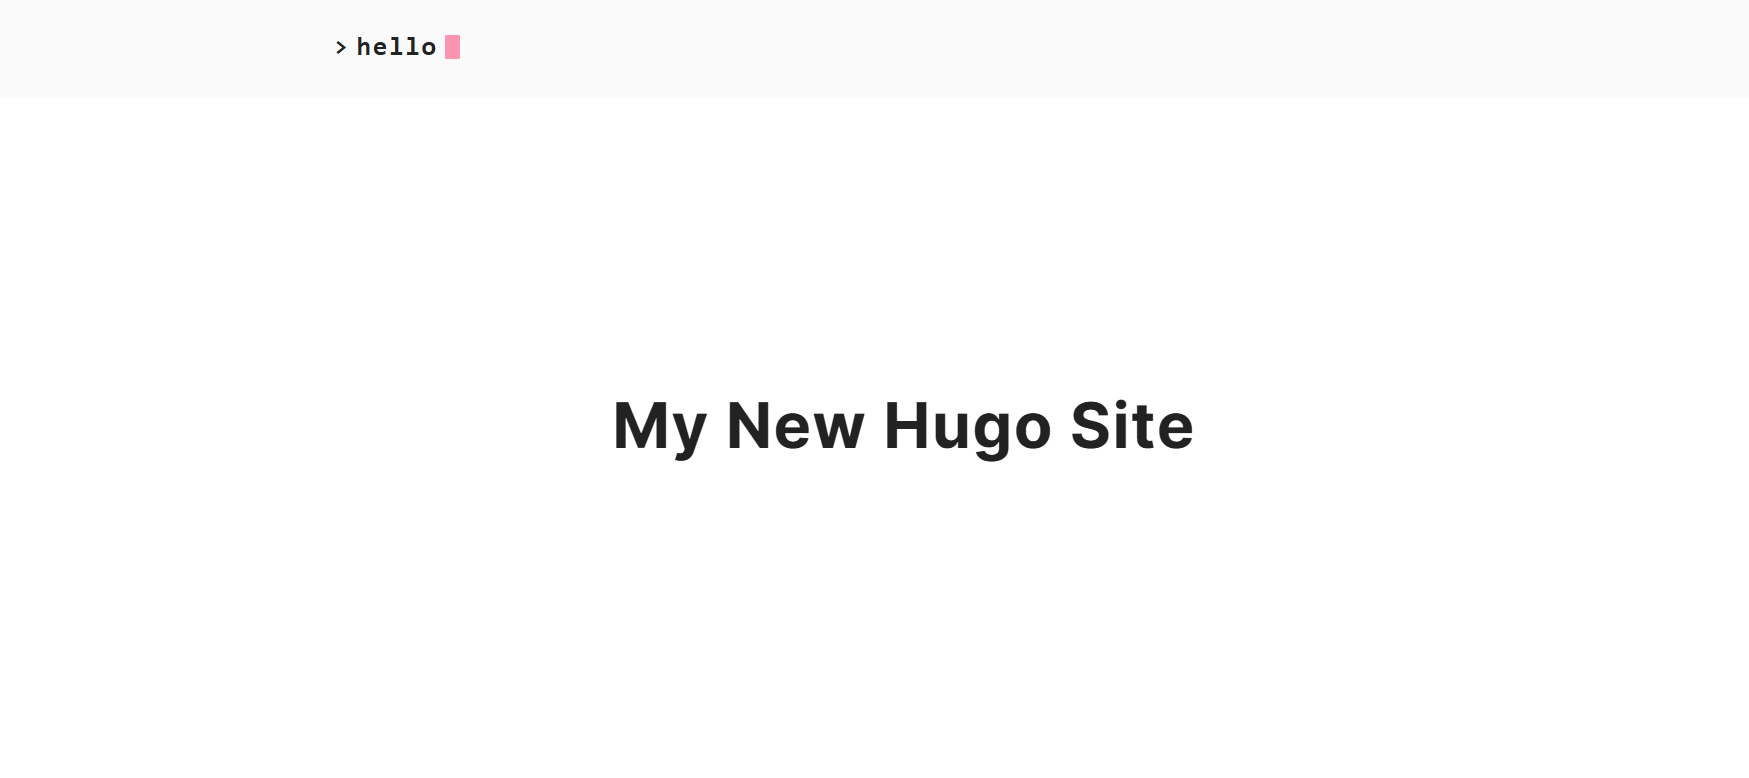
Browse to:
The web site should look like this.
Click Check my progress to verify the objective.
When asked for a project option, select Use an existing project, then use the arrow keys, spacebar, and the ENTER key to select the Project ID,
For the public directory, select the default value public.
For configuring as a single page application, type N and press ENTER.
For setting up automatic builds and deploys with GitHub/external Git, type N and press ENTER.
For installing agent skills for Firebase, select N.
If asked to overwrite any existing files, select Y.
If you receive a generic welcome message, wait a few minutes for the CDN to initialize and refresh the browser window. Record this hosting URL for later use.
You have now performed the entire deployment locally. Next, you automate the process from end to end using Cloud Build.
Before proceeding, verify that your session's environment variables are still defined. If you restarted your terminal session or got disconnected, run the following commands in the Linux instance shell to re-define them:
Cloud Build uses a file named cloudbuild.yaml in the root directory of the repository to perform the build. The file is in YAML format. Spacing and indentation are important, so it has already been placed on the Linux instance for you.
cp command:cloudbuild.yaml file looks like.Some lines in the output have wrapped because of their length.
Output:
cloudbuild.yaml file:curl to download the Hugo and Firebase tools.tar and wget commands are nearly identical to those used earlier in the installhugo.sh script.The goal of building the pipeline is to be able to trigger builds when changes are made to the repository. You start by performing an initial commit to the repository to validate your ability to make future changes.
.gitignore file to exclude certain directories from the repository:You have now committed (uploaded) the initial version of the website to Google Cloud.
Now you create a Cloud Build Webhook trigger that responds to code pushes from the Gitea Git repository.
Click Check my progress to verify the objective.
The Cloud Build service account must have permissions to use Firebase to deploy the website.
| Cloud Build | Role | Description |
|---|---|---|
| [PROJECT_NUMBER]@cloudbuild.gserviceaccount.com | roles/firebasehosting.admin | Full read/write access to Hosting resources |
Now that you have created the pipeline, make a change to the site then commit it to see if the change propagates.
You can use the nano text editor to open and edit the file:
Locate the line that contains title and change it to:
Press CTRL+O, ENTER to save, and CTRL+X to exit the nano editor.
Alternatively, you can run the following sed command in the shell to automatically update the title:
You can also go to the Firebase console and examine the project to find the domain name.
Click Check my progress to verify the objective.
You have learned how Cloud Build can orchestrate a pipeline to quickly deploy Hugo websites to Firebase, which provides a CDN and SSL certificate. Cloud Build allows you to tailor the process to your needs. The short deployment times allow you to innovate quickly and test your website revisions with little effort. Consult the Cloud Build and Firebase documentation for more information.
...helps you make the most of Google Cloud technologies. Our classes include technical skills and best practices to help you get up to speed quickly and continue your learning journey. We offer fundamental to advanced level training, with on-demand, live, and virtual options to suit your busy schedule. Certifications help you validate and prove your skill and expertise in Google Cloud technologies.
Manual Last Updated June 18, 2026
Lab Last Tested June 18, 2026
Copyright 2026 Google LLC. All rights reserved. Google and the Google logo are trademarks of Google LLC. All other company and product names may be trademarks of the respective companies with which they are associated.



This content is not currently available
We will notify you via email when it becomes available

Great!
We will contact you via email if it becomes available


One lab at a time
Confirm to end all existing labs and start this one