

시작하기 전에
- 실습에서는 정해진 기간 동안 Google Cloud 프로젝트와 리소스를 만듭니다.
- 실습에는 시간 제한이 있으며 일시중지 기능이 없습니다. 실습을 종료하면 처음부터 다시 시작해야 합니다.
- 화면 왼쪽 상단에서 실습 시작을 클릭하여 시작합니다.

Python is a high-level, general-purpose programming language. Its design philosophy emphasizes code readability with the use of significant indentation. Python is dynamically typed and garbage-collected. It supports multiple programming paradigms, including structured, object-oriented and functional programming.
You will learn about the Python print() function in this lab. The print() function prints the specified message to the screen, or other standard output device. The message can be a string, or any other object, the object will be converted into a string before written to the screen.
Please go through these directions. The Labs have a time limit and cannot be paused. The timer begins when you click the Start Lab button, shows how long Google Cloud resources will be made available to you.
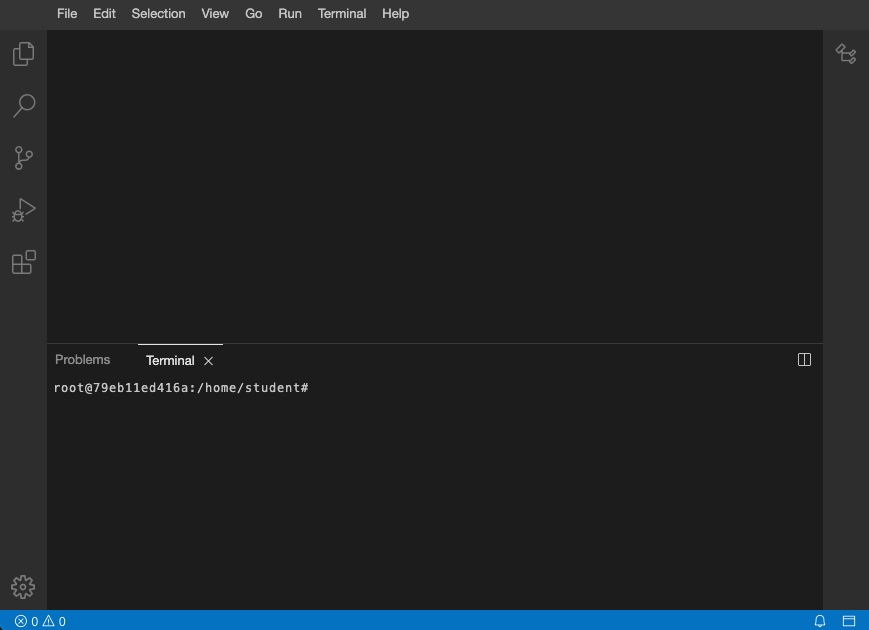
After you click the Start Lab button, you will see an editor and terminal, where you will be performing further steps in the lab. It should looks like this:
You are going to finish a series of tasks related to Python programming.
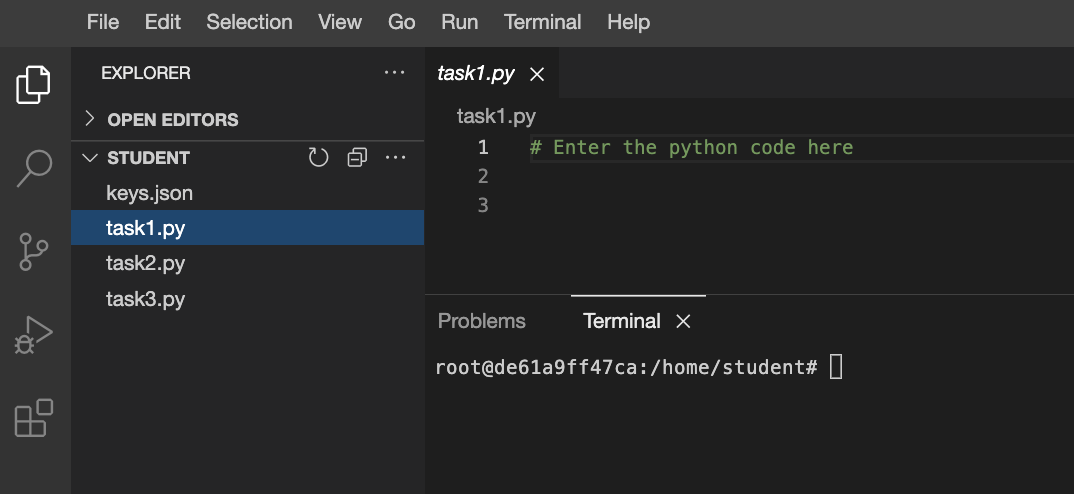
task as shown below. You will need to use these files to complete the tasks in the lab.To complete this lab, you need:
You need to use Python programming to produce the text as an output.
Click the files icon to access the pre-created file.
Open the pre-created task1.py file, by clicking on the file name.
Write the Python command to put My first Python program on the terminal screen.
Note: The three dots (...) indicate where to add the code.
Convert the following Bash command into its equivalent Python code.
Click the files icon to access the pre-created file.
Open the pre-created task2.py file, by clicking on the file name.
Write the Python code to put the output on the terminal screen.
Execute the file by entering the following command in the terminal.
You need to use Python programming to produce the text as an output into the multiple times.
Click the files icon to access the pre-created file.
Open the pre-created task3.py file, by clicking on the file name.
Write the Python code to put This is fun! on the terminal screen 5 times.
Note: The three dots (...) indicate where to add the code.
You have successfully completed the tasks related to Python Programming.


현재 이 콘텐츠를 이용할 수 없습니다
이용할 수 있게 되면 이메일로 알려드리겠습니다.

감사합니다
이용할 수 있게 되면 이메일로 알려드리겠습니다.

한 번에 실습 1개만 가능
모든 기존 실습을 종료하고 이 실습을 시작할지 확인하세요.