
Before you begin
- Labs create a Google Cloud project and resources for a fixed time
- Labs have a time limit and no pause feature. If you end the lab, you'll have to restart from the beginning.
- On the top left of your screen, click Start lab to begin
Create a connection to Cloud Storage
/ 40
Create and load the Iceberg table in Cloud Storage with BigQuery
/ 30
Query the Iceberg table from BigQuery
/ 30

Query Iceberg tables in Cloud Storage with BigQuery In this lab, you'll explore how BigQuery's Lakehouse tables can query data in open-source formats directly within Cloud Storage. You'll learn how to create a Lakehouse table that points to an existing Iceberg table, enabling you to analyze data without moving or duplicating it. This powerful feature allows you to maintain a single source of truth in an open format while leveraging BigQuery's high-performance analytics engine. This hands-on experience is a cornerstone of a modern data lakehouse, where you can unify your data regardless of its format or location.
You'll start by creating a connection that allows BigQuery to securely access data in Cloud Storage. Then, you'll define a Lakehouse table over a sample Iceberg table that contains raw web log data. Iceberg is an open table format designed for huge analytic datasets, and it's often used with processing engines like Apache Spark.
Finally you will run a query that seamlessly joins the Iceberg data in Cloud Storage with a native BigQuery table containing customer information. By mastering these technique, Cymbal E-commerce can answer critical business questions that span different data sources. For example: "Which products are most frequently viewed by our highest-value customers right before they make a purchase?"
Read these instructions. Labs are timed and you cannot pause them. The timer, which starts when you click Start Lab, shows how long Google Cloud resources will be made available to you.
This hands-on lab lets you do the lab activities yourself in a real cloud environment, not in a simulation or demo environment. It does so by giving you new, temporary credentials that you use to sign in and access Google Cloud for the duration of the lab.
To complete this lab, you need:
Since this is a temporary account, which will last only as long as this lab:
 ) at the top-left.
In the Google Cloud console, enter BigLake API in the top search bar.
Click on the result for BigLake API under Marketplace.
If the API is not already enabled, click Enable to enable the API.
From the navigation menu select IAM & Admin and from the flyout submenu select IAM.
Find your entry which will be similar to student-xx-xxxxxxxxxxxx@qwiklabs.net
Verify you have the role BigQuery Connection Admin and BigQuery Connection User
In this task, you create a new connection to Cloud Storage for BigQuery to use for reading the data in a CSV file in Cloud Storage as an external table.
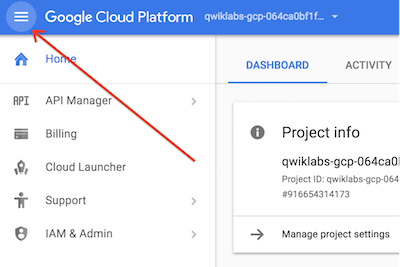
In the Google Cloud console, in the Navigation menu (
On the top left pane, click Explorer and click + Add data.
For Data Source Type select Storage/Data Lakes.
For Most popular data sources click the card for Google Cloud Storage.
In the resulting selection of cards for Access external data in place click on External or Lakehouse Table.
In the Create table screen use the following values:
| Property | Value | ||||||||||||||||
| Create table from | Google Cloud Storage | ||||||||||||||||
| Select file from GCS bucket or use a URI pattern | |||||||||||||||||
| File format | CSV | ||||||||||||||||
| Source Data Partitioning | Leave un-checked | ||||||||||||||||
| Project | |||||||||||||||||
| Dataset | Click Dataset, from Loaded datasets select cymbal_lake |
||||||||||||||||
| Table | |||||||||||||||||
| Table type | External table | ||||||||||||||||
| Create a Lakehouse table using a Cloud resource connection | Check the box for this item | ||||||||||||||||
| |||||||||||||||||
| Schema, Auto detect | Check the box for this item | ||||||||||||||||
To verify the objective, click Check my progress.
In this task you ingest the data from the external table you just created and load it into Iceberg format in a Cloud Storage bucket.
In the Google Cloud console, in the Navigation menu (
If not already open click Classic Explorer and expand your project. It will be similar to qwiklabs-gcp-xx-xxxxxxxxxxxx.
Expand the entry for cymbal_lake.
Click the 3 vertical dots to the right of the entry for web_log. Select Query from the popup menu.
Close the reference panel by clicking the X in the top right corner.
Replace the SQL query with the following code:
Click the Run button. After processing you will get an error message. Don't close it as you need the BigQuery service account ID from it to set the proper permission. The error message will be like this example:
Copy the user ID from the error message. It will be in this format bqcx-xxxxxxxxxxxx-xxxx@gcp-sa-bigquery-condel.iam.gserviceaccount.com
In the Google Cloud console, in the Navigation menu (
Click the 3 vertical dots at the right end of the row with your bucket gcs-bucket-
In the box Access control click the link to Switch to uniform
In the popup select Uniform. Click Save.
Click + Add principal
In New principal paste in the user ID you copied from the BigQuery error message.
Click Select a role *
In the Filter enter Storage Object User and select Storage Object User from the resulting list, click Save and then click Update.
Return to BigQuery and rerun the create table query by repeating Task 2 step 6.
To verify the objective, click Check my progress.
You will now work with BigQuery to access the data in the Iceberg table you just created in Cloud Storage.
In the Google Cloud console, in the Navigation menu (
If not already open expand the entry in Classic Explorer for your project. It will appear like qwiklabs-gcp-xx-xxxxxxxxxxxx.
Expand the entry for cymbal_lake.
Click the 3 vertical dots to the right of the entry for iceberg_web_log. Select Query from the popup menu.
Close the reference panel by clicking the X in the top right corner.
Replace the SQL query with the following code:
Click the Run button. The returned data is from your Iceberg table in Cloud Storage!
Replace the SQL query with the following code:
Click the Run button. The returned data is from your Iceberg table in Cloud Storage joined to customer data in a native BigQuery table!
To verify the objective, click Check my progress.
You configured an external table in BigQuery to access data from a CSV file in Cloud Storage. You then created an Iceberg table in Cloud Storage and populated it with data from the CSV file by using BigQuery. Finally, you ran a query combining data in the Iceberg table with data in a native BigQuery table. While this was a simple example, it demonstrates the power and flexibility that Cymbal's BigQuery and Lakehouse provides to turn data into a powerful business tool.


This content is not currently available
We will notify you via email when it becomes available

Great!
We will contact you via email if it becomes available

One lab at a time
Confirm to end all existing labs and start this one