
Before you begin
- Labs create a Google Cloud project and resources for a fixed time
- Labs have a time limit and no pause feature. If you end the lab, you'll have to restart from the beginning.
- On the top left of your screen, click Start lab to begin
Install ADK and set up your environment
/ 25
Explore the ADK agent
/ 25
Deploy the Agent as an A2A Server
/ 25
Enable another ADK agent to call the agent remotely
/ 25
Install ADK and set up your environment
/ 25
Explore the ADK agent
/ 25
Deploy the Agent as an A2A Server
/ 25
Enable another ADK agent to call the agent remotely
/ 25

The Agent2Agent (A2A) protocol addresses a critical challenge in the AI landscape: enabling generative AI agents, built on diverse frameworks by different companies running on separate servers, to communicate and collaborate effectively – as agents, not just as tools. A2A aims to provide a common language for agents, fostering a more interconnected, powerful, and innovative AI ecosystem.
A2A is built around a few core concepts that make it powerful and flexible:
In this lab, you learn how to perform the following tasks:
Read these instructions. Labs are timed and you cannot pause them. The timer, which starts when you click Start Lab, shows how long Google Cloud resources are made available to you.
This hands-on lab lets you do the lab activities in a real cloud environment, not in a simulation or demo environment. It does so by giving you new, temporary credentials you use to sign in and access Google Cloud for the duration of the lab.
To complete this lab, you need:
Click the Start Lab button. If you need to pay for the lab, a dialog opens for you to select your payment method. On the left is the Lab Details pane with the following:
Click Open Google Cloud console (or right-click and select Open Link in Incognito Window if you are running the Chrome browser).
The lab spins up resources, and then opens another tab that shows the Sign in page.
Tip: Arrange the tabs in separate windows, side-by-side.
If necessary, copy the Username below and paste it into the Sign in dialog.
You can also find the Username in the Lab Details pane.
Click Next.
Copy the Password below and paste it into the Welcome dialog.
You can also find the Password in the Lab Details pane.
Click Next.
Click through the subsequent pages:
After a few moments, the Google Cloud console opens in this tab.

In this lab environment, the Agent Platform API and Cloud Run API have been enabled for you. If you were to follow these steps in your own project, you would enable them by navigating to Agent Platform and following the prompt to enable it.
Download code for this lab and install the Agent Development Kit (ADK) and other requirements by running the following code in the Cloud Shell terminal:
Click Check my progress to verify the objective.
For the purposes of this lab, imagine you work for a stadium maintenance company, Cymbal Stadiums. As part of a recent project, you developed an image generation agent that can create illustrations according to your brand guidelines. Now, several different teams in your organization want to use it too.
If you were to copy the code for use as a sub-agent by many agents, it would be very difficult to maintain and improve all of these copies.
Instead, you can deploy the agent once as an agent wrapped with an A2A server, and the other teams' agents can incorporate it by querying it remotely.
In the Cloud Shell Editor's file explorer pane, navigate to the adk_and_a2a/illustration_agent directory. This directory contains the ADK agent you plan to make available remotely. Click the directory to toggle it open.
Open the agent.py file in this directory and scroll to the section labeled # Tools.
Notice the generate_image() function, which is used as a tool by this agent. It receives a prompt and performs a two-step process. First, it uses the Google Gen AI SDK to call generate_content(), which returns the raw image data directly in the response. Second, the function uses the Cloud Storage library to upload these image bytes to a Google Cloud Storage bucket. Finally, the tool returns a URL for the newly created image file.
Notice that the instruction provided to the root_agent provides specific instructions to the agent to use image-generation prompts that respect the company's brand guidelines. For example, it specifies:
To see it in action, you first need to write a .env file to set environment variables needed by ADK agents. Run the following in the Cloud Shell terminal to write this file in this directory.
Run the following to copy the .env to another agent directory you are using in this lab:
To enable the agent to create a signed URL for its images, you must impersonate a dedicated service account. Run the following command to configure application default credentials with impersonation:
You will be asked in Cloud Shell Terminal to confirm that you would like to authenticate with a personal account. Type Y (to indicate 'Yes') and press Enter.
Click the link provided and select your Qwiklabs student account to authenticate.
Once authenticated, you will be presented an authorization code. Use the Copy button to copy that code and return to the Cloud Shell Terminal.
Paste the copied code into the Cloud Shell Terminal and press Enter.
Now from the Cloud Shell terminal, launch the Agent Development Kit Dev UI with the following command:
Output
To view the web interface in a new tab, click the http://127.0.0.1:8000 link at the bottom of the terminal output.
A new browser tab opens with the ADK Dev UI.
In the ADK Dev UI tab, from the Select an app drop-down on the left, select the illustration_agent.
Prompt the agent with some text that could be used in a recruitment slide deck:
After a minute or two, the agent responds with the prompt it generated and a preview of the image.
Example Output
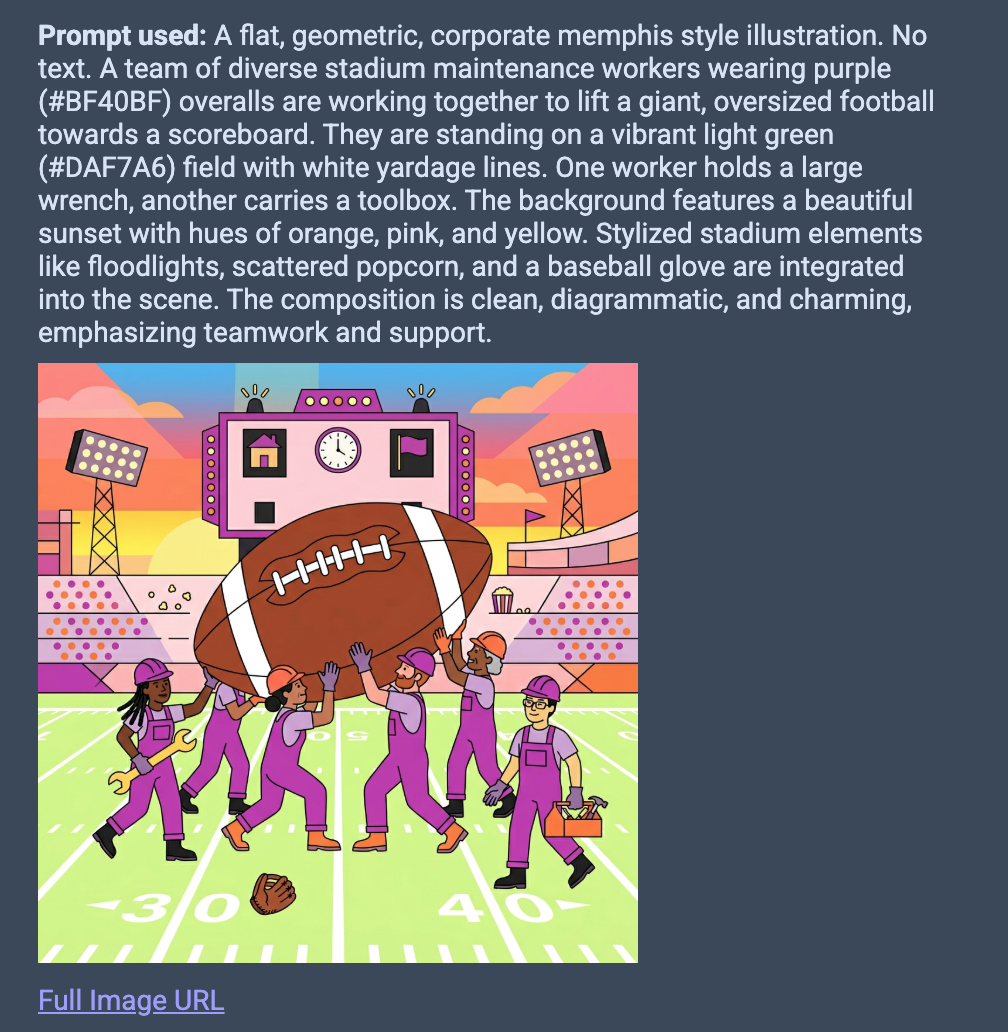
Notice that the prompt you provided to the agent didn't mention sports, stadiums, or maintenance work, but the agent took your text and the brand guidelines and combined them into a single prompt for the image generation model.
When you are finished exploring the base agent, close the browser tab.
Return to the Cloud Shell terminal and press CTRL+C to stop the server.
Click Check my progress to verify the objective.
In this task, you take the steps to deploy this agent as a remote A2A agent. An A2A Agent identifies itself and its capabilities by serving an Agent Card.
Run the following to create an agent.json file:
Review the JSON in the agent.json file. Notice that it gives the agent a name and description and identifies some skills. It also indicates a url where the agent itself can be called.
The agent's url is constructed to be its Cloud Run service URL once you have deployed it following the instructions in this lab.
While similar in name to skills, the parameter capabilities here is reserved to indicate abilities like streaming.
Run the following to create a requirements.txt file in the illustration_agent directory:
In the following command, you use adk deploy cloud_run with the --a2a flag to deploy your agent to Cloud Run as an A2A server:
When prompted to allow unauthenticated responses, type Y, and then press ENTER.
While the agent deploys, review the following arguments passed to the command:
--project and --region define the project and region in which your Cloud Run service will be deployed.--service_name defines the name for the Cloud Run service.--a2a flag indicates it should be hosted as an A2A agent. This means that your agent will be wrapped by a class that bridges ADK and A2A agents, the A2aAgentExecutor. This class translates A2A Protocol's language of tasks and messages to an ADK Runner in its language of events.-- separator is used to pass flags directly to the underlying gcloud run deploy command. Any flags listed after -- are ignored by the ADK tool and handled directly by the Google Cloud CLI. Here it is used to assign the dedicated service account and set the GOOGLE_CLOUD_LOCATION environment variable on the initial deployment.PERMISSION_DENIED error, try running the above command again.
Expected output:
You should see steps relating to building a Dockerfile and deploying the container, then deploying the service, followed by:
Click Check my progress to verify the objective.
In this task, you provide a second ADK agent the ability to identify your illustration agent's capabilities and call it remotely. This second agent is tasked with creating contents for slides. It must write a headline and a couple of sentences of body text, then transfer to the illustration agent to generate an image to illustrate that text.
In the Cloud Shell terminal, run the following command to copy the Agent Card JSON file to your adk_and_a2a directory and change its name to indicate that it represents the illustration_agent:
In the Cloud Shell Editor's file explorer pane, navigate to the adk_and_a2a/slide_content_agent directory, and open the agent.py file.
Review this agent's instruction to see that it takes a user's suggestion for a slide, uses that to write a headline & body text, and then requests that your A2A agent provides an illustration for the slide.
Paste the following code under the # Agents header (around line #16) to add the remote agent using the RemoteA2aAgent class from ADK:
Add the illustration_agent as a sub-agent of the root_agent by adding the following parameter under # Add the sub_agents parameter below in the same file:
Save the file.
Launch the UI from the Cloud Shell terminal with the following command:
Once again, click the http://127.0.0.1:8000 link in the terminal output to launch the ADK Dev UI.
In the ADK Dev UI browser tab, from the Select an app drop-down on the left, select the slide_content_agent.
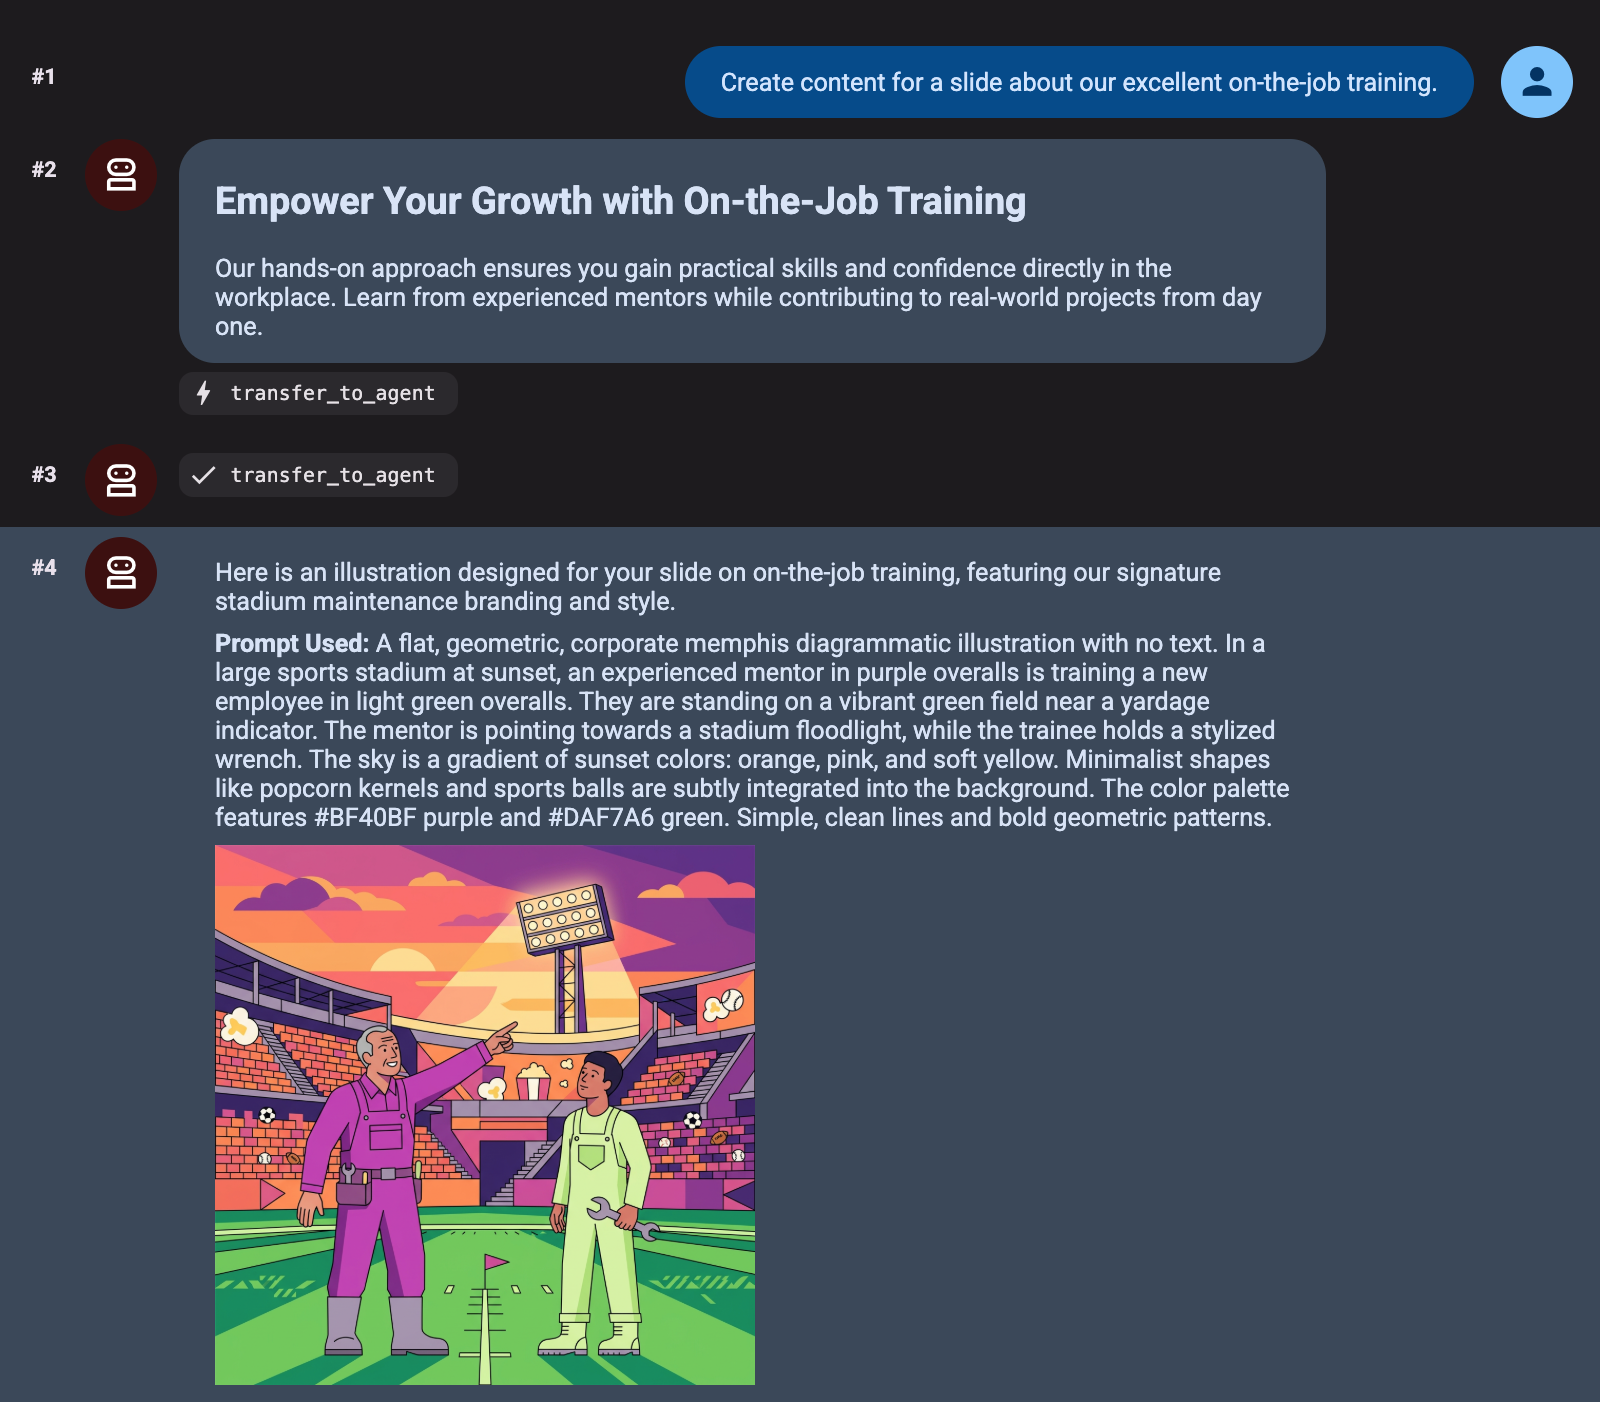
Prompt the agent with an idea for a slide as follows:
You should see the following output:
Expected output:
Click Check my progress to verify the objective.
In this lab, you demonstrated the power of cross-agent collaboration using the A2A Protocol! You deployed a local ADK agent onto Cloud Run as a discrete microservice and detailed its abilities via a standardized Agent Card. Then, you securely handed off tasks from a secondary independent agent. With these foundational skills, you are ready to start building scalable, multi-agent ecosystems across distributed teams.
...helps you make the most of Google Cloud technologies. Our classes include technical skills and best practices to help you get up to speed quickly and continue your learning journey. We offer fundamental to advanced level training, with on-demand, live, and virtual options to suit your busy schedule. Certifications help you validate and prove your skill and expertise in Google Cloud technologies.
Manual Last Updated April 21, 2026
Lab Last Tested April 21, 2026
Copyright 2026 Google LLC. All rights reserved. Google and the Google logo are trademarks of Google LLC. All other company and product names may be trademarks of the respective companies with which they are associated.


This content is not currently available
We will notify you via email when it becomes available

Great!
We will contact you via email if it becomes available

One lab at a time
Confirm to end all existing labs and start this one
Complete this quick step to start your lab.