A pipeline that accepts command-line parameters is vastly more useful than one with those parameters hard-coded. However, running it requires creating a development environment. An even better option for pipelines that are expected to be rerun by a variety of different users or in a variety of different contexts would be to use a Dataflow template.
There are many Dataflow templates that have already been created as part of Google Cloud Platform, which you can explore in the Get started with Google documentation. But none of them perform the same function as the pipeline in this lab. Instead, in this part of the lab, you convert the pipeline into a newer custom Dataflow Flex Template (as opposed to a custom traditional template).
Converting a pipeline into a custom Dataflow Flex Template requires the use of an Uber JAR to package up your code and the dependencies, a Dockerfile to describe what code to build, Cloud Build to build the underlying container that will be executed at runtime to create the actual job, and a metadata file to describe the job parameters.
Prerequisites
Basic familiarity with Java.
What you learn
In this lab, you:
Convert a custom pipeline into a custom Dataflow Flex Template.
Run a Dataflow Flex Template.
Setup and requirements
For each lab, you get a new Google Cloud project and set of resources for a fixed time at no cost.
Sign in to Qwiklabs using an incognito window.
Note the lab's access time (for example, 1:15:00), and make sure you can finish within that time.
There is no pause feature. You can restart if needed, but you have to start at the beginning.
When ready, click Start lab.
Note your lab credentials (Username and Password). You will use them to sign in to the Google Cloud Console.
Click Open Google Console.
Click Use another account and copy/paste credentials for this lab into the prompts.
If you use other credentials, you'll receive errors or incur charges.
Accept the terms and skip the recovery resource page.
Activate Google Cloud Shell
Google Cloud Shell is a virtual machine that is loaded with development tools. It offers a persistent 5GB home directory and runs on the Google Cloud.
Google Cloud Shell provides command-line access to your Google Cloud resources.
In Cloud console, on the top right toolbar, click the Open Cloud Shell button.
Click Continue.
It takes a few moments to provision and connect to the environment. When you are connected, you are already authenticated, and the project is set to your PROJECT_ID. For example:
gcloud is the command-line tool for Google Cloud. It comes pre-installed on Cloud Shell and supports tab-completion.
You can list the active account name with this command:
[core]
project = qwiklabs-gcp-44776a13dea667a6
Note:
Full documentation of gcloud is available in the
gcloud CLI overview guide
.
Check project permissions
Before you begin your work on Google Cloud, you need to ensure that your project has the correct permissions within Identity and Access Management (IAM).
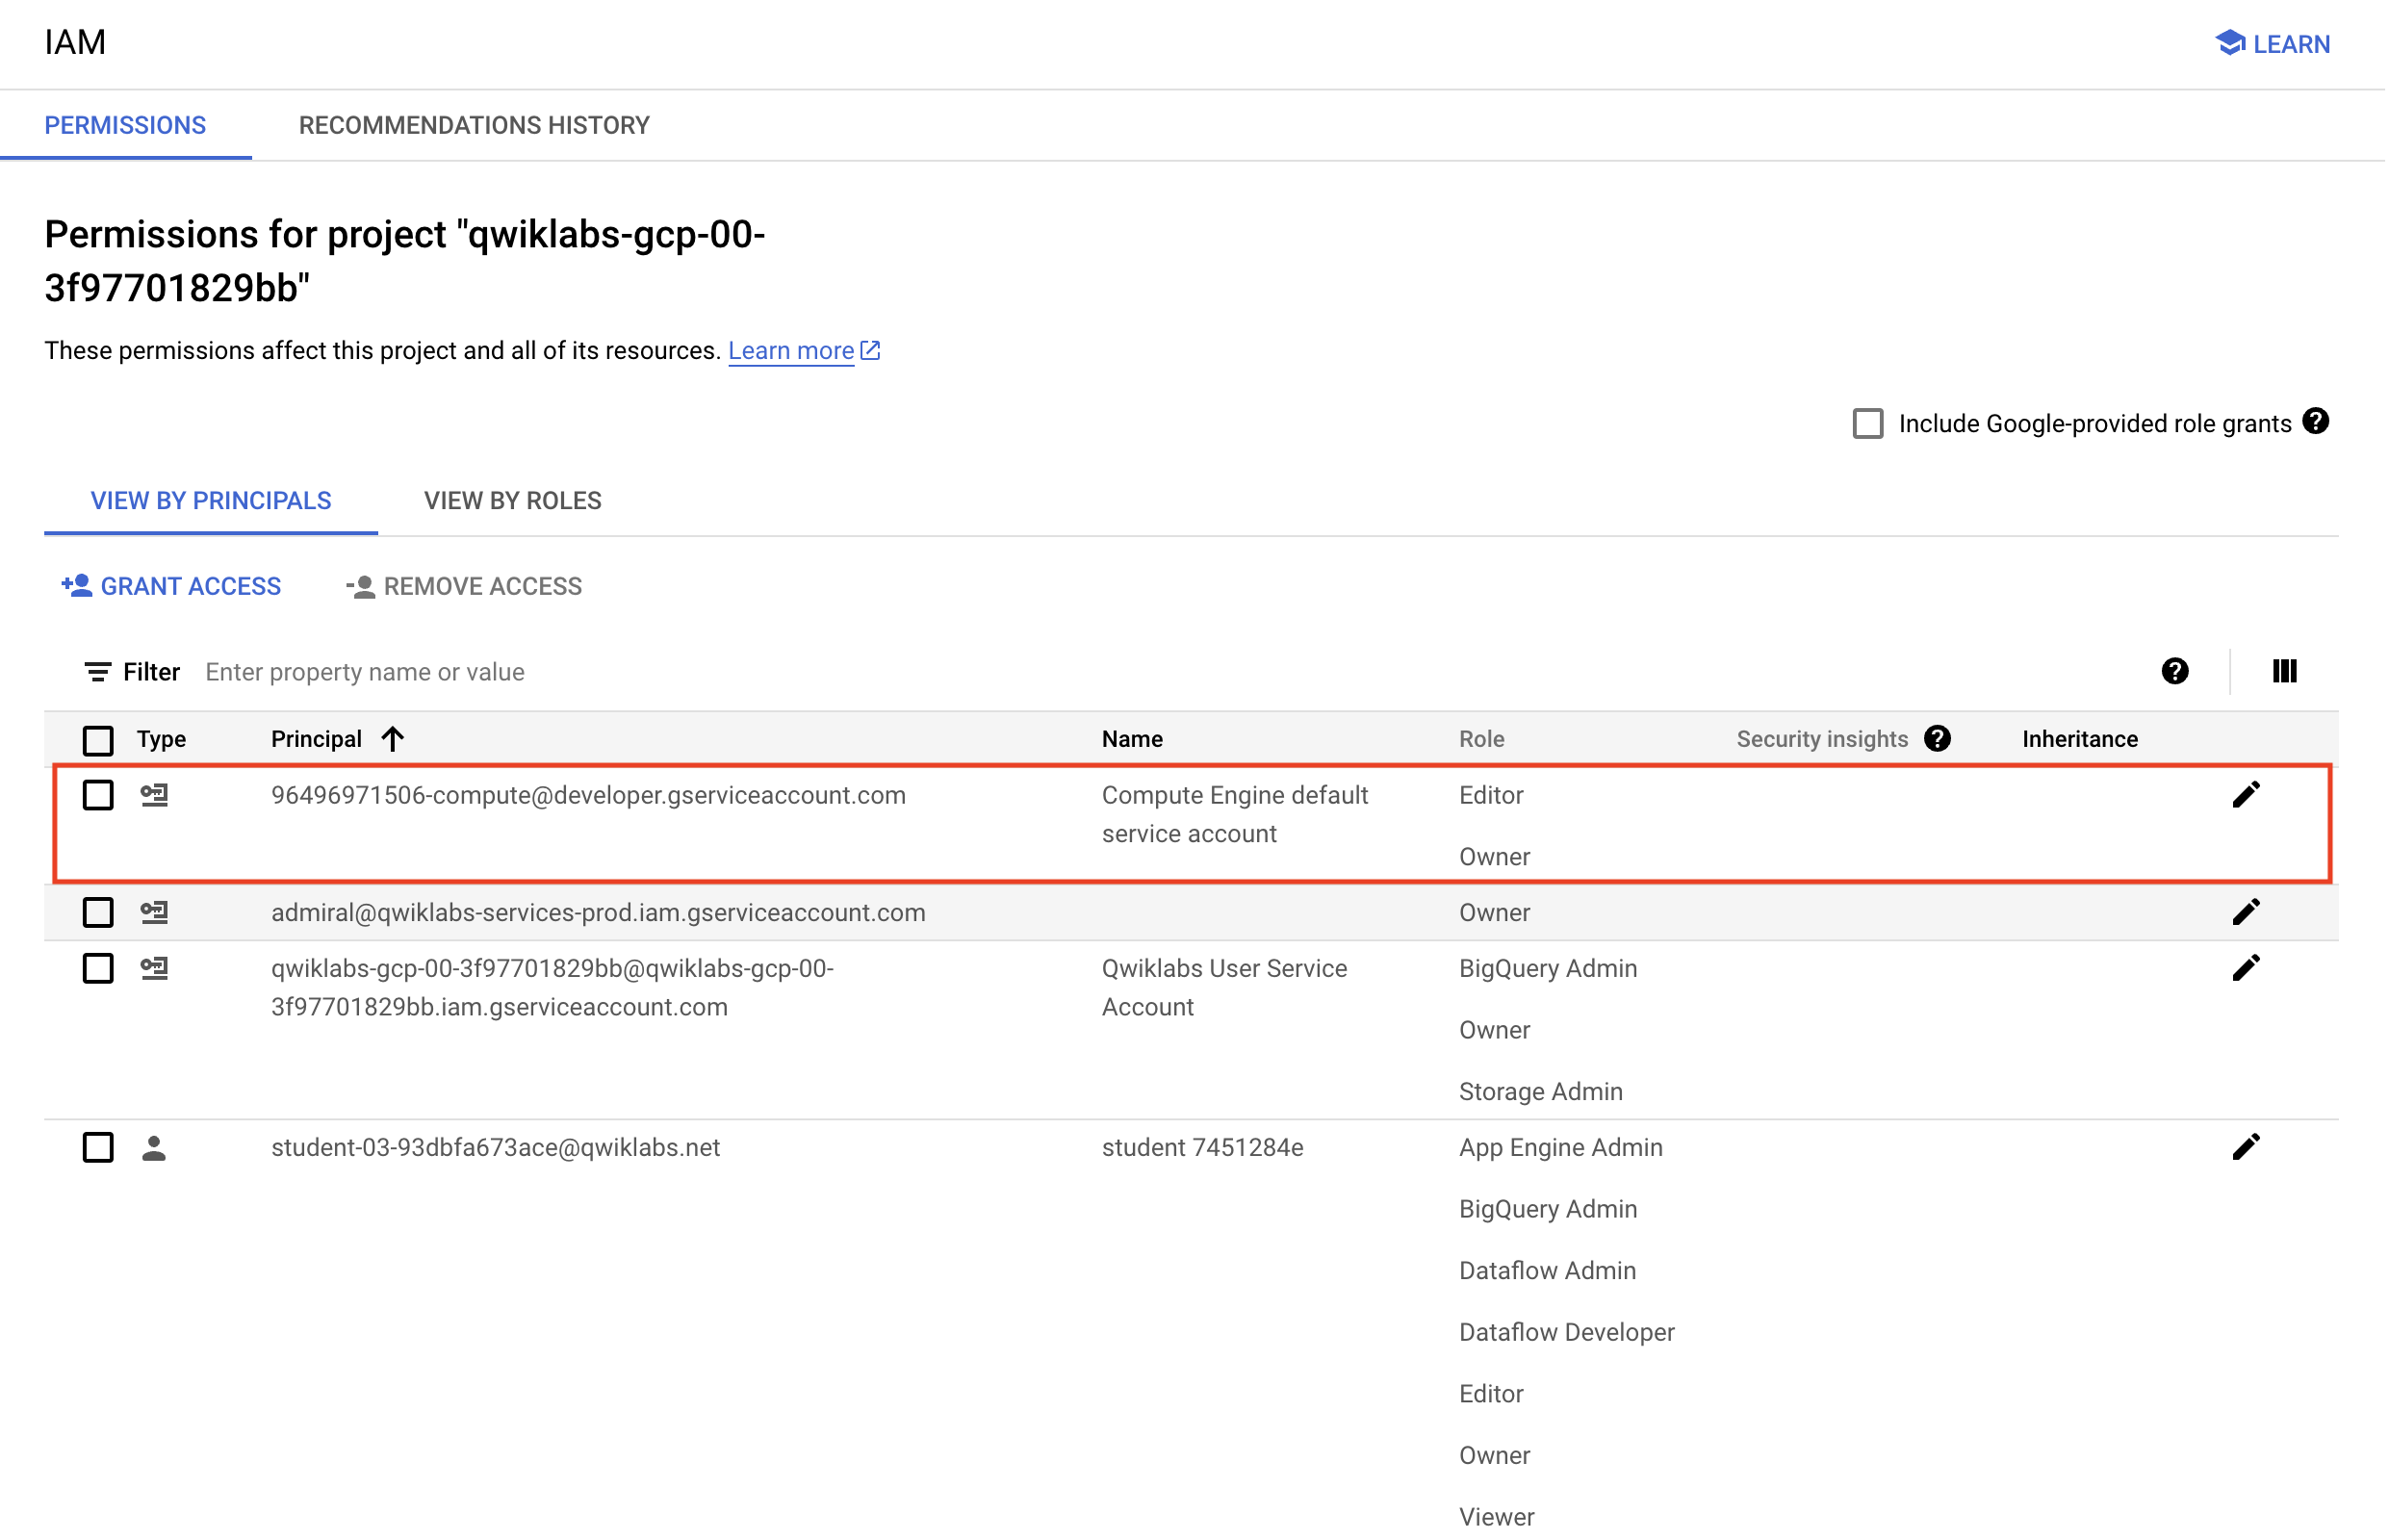
In the Google Cloud console, on the Navigation menu (), select IAM & Admin > IAM.
Confirm that the default compute Service Account {project-number}-compute@developer.gserviceaccount.com is present and has the editor role assigned. The account prefix is the project number, which you can find on Navigation menu > Cloud Overview > Dashboard.
Note: If the account is not present in IAM or does not have the editor role, follow the steps below to assign the required role.
In the Google Cloud console, on the Navigation menu, click Cloud Overview > Dashboard.
Copy the project number (e.g. 729328892908).
On the Navigation menu, select IAM & Admin > IAM.
At the top of the roles table, below View by Principals, click Grant Access.
Replace {project-number} with your project number.
For Role, select Project (or Basic) > Editor.
Click Save.
Setting up your IDE
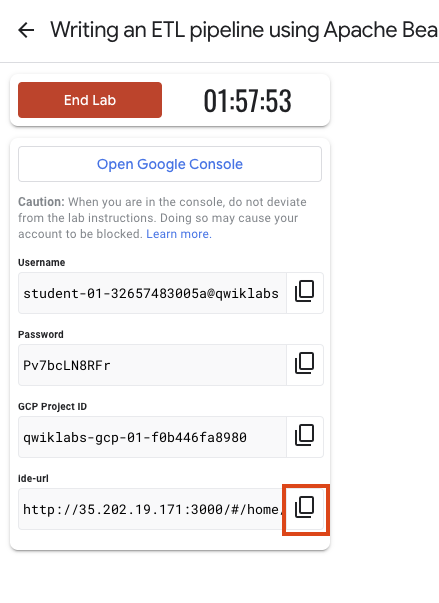
For the purposes of this lab, you will mainly be using a Theia Web IDE hosted on Google Compute Engine. It has the lab repo pre-cloned. There is java langauge server support, as well as a terminal for programmatic access to Google Cloud APIs via the gcloud command line tool, similar to Cloud Shell.
To access your Theia IDE, copy and paste the link shown in Google Cloud Skills Boost to a new tab.
Note: You may need to wait 3-5 minutes for the environment to be fully provisioned, even after the url appears. Until then you will see an error in the browser.
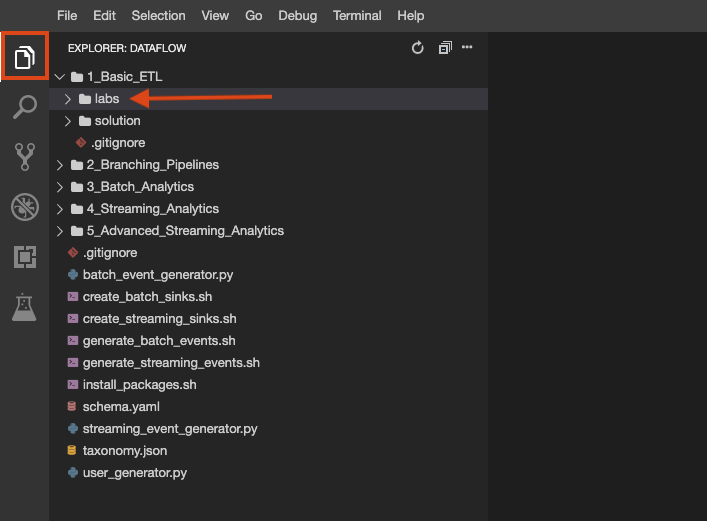
The lab repo has been cloned to your environment. Each lab is divided into a labs folder with code to be completed by you, and a solution folder with a fully workable example to reference if you get stuck.
Click on the File Explorer button to look:
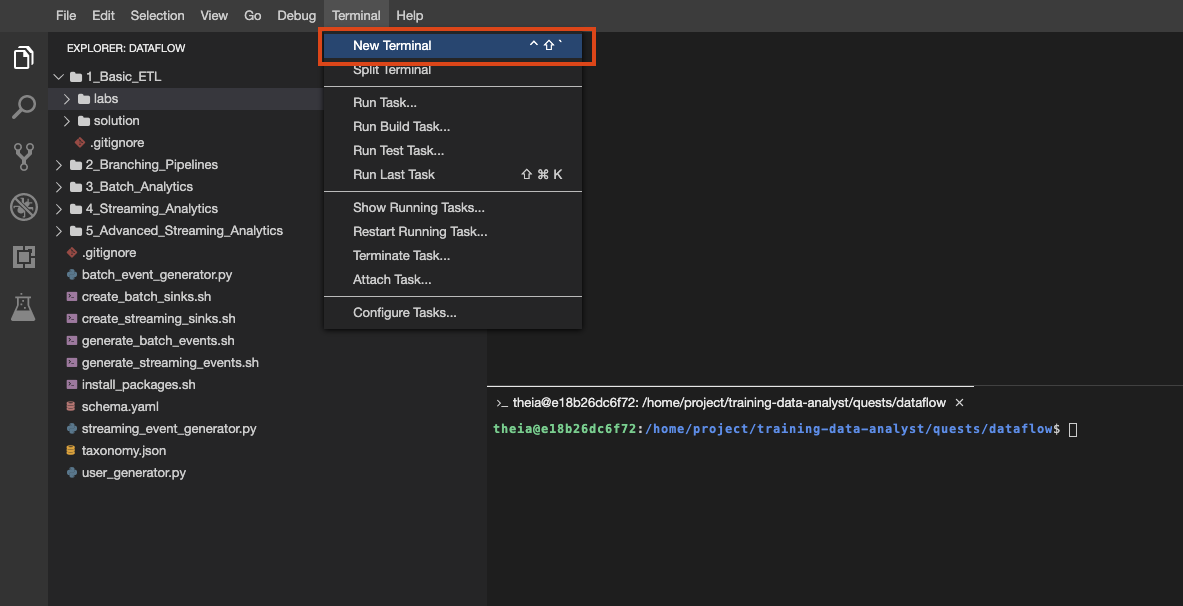
You can also create multiple terminals in this environment, just as you would with cloud shell:
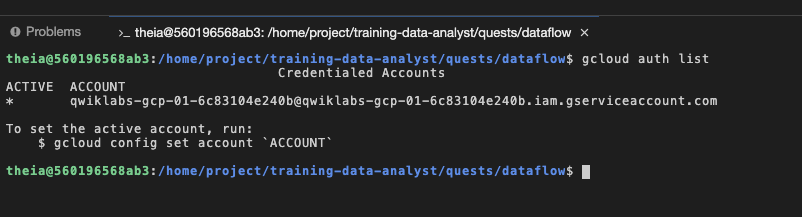
You can see with by running gcloud auth list on the terminal that you're logged in as a provided service account, which has the exact same permissions are your lab user account:
If at any point your environment stops working, you can try resetting the VM hosting your IDE from the GCE console like this:
Task 1. Set up your pipeline
For this lab, we will leverage the existing pipeline code from the Branching Pipelines lab (solutions folder).
Open the appropriate lab
Create a new terminal in your IDE environment, if you haven't already, and copy and paste the following command:
# Change directory into the lab
cd 2_Branching_Pipelines/labs
# Download dependencies
mvn clean dependency:resolve
export BASE_DIR=$(pwd)
Set up the data environment:
# Create GCS buckets and BQ dataset
cd $BASE_DIR/../..
source create_batch_sinks.sh
# Generate event dataflow
source generate_batch_events.sh
# Change to the directory containing the practice version of the code
cd $BASE_DIR
Click Check my progress to verify the objective.
Set up the data environment
Update your pipeline code
Update the MyPipeline.java in your IDE by using the solution file, which can be found in 2_Branching_Pipelines/solution/src/main/java/com/mypackage/pipeline:
Now you can build an Uber JAR file using this command:
cd $BASE_DIR
mvn clean package
Note the size. This Uber JAR file has all the dependencies embedded in it.
You can run this file as a standalone application with no external dependencies on other libraries:
ls -lh target/*.jar
In the same directory as your pom.xml file, create a file named Dockerfile with the following text. Be sure to set FLEX_TEMPLATE_JAVA_MAIN_CLASS to your full class name and YOUR_JAR_HERE to the Uber JAR that you've created.
FROM gcr.io/dataflow-templates-base/java11-template-launcher-base:latest
# Define the Java command options required by Dataflow Flex Templates.
ENV FLEX_TEMPLATE_JAVA_MAIN_CLASS="YOUR-CLASS-HERE"
ENV FLEX_TEMPLATE_JAVA_CLASSPATH="/template/pipeline.jar"
# Make sure to package as an uber-jar including all dependencies.
COPY target/YOUR-JAR-HERE.jar ${FLEX_TEMPLATE_JAVA_CLASSPATH}
You will then use Cloud Build to offload the building of this container for you, rather than building it locally. First, turn the caching on to speed up future builds:
gcloud config set builds/use_kaniko True
Then execute the actual build. This will tar up the entire directory including the Dockerfile with instructions on what to actually build, upload it to the service, build a container, and push that container to Artifact Registry in your project for future use.
You can also monitor the build status from the Cloud Build UI. You can also see that the resulting container has been uploaded to Artifact Registry.
Click Check my progress to verify the objective.
Create a custom Dataflow Flex Template container image
Task 3. Create and stage the Flex Template
To run a template, you need to create a template spec file in a Cloud Storage containing all of the necessary information to run the job, such as the SDK information and metadata.
To complete this task, create a metadata.json file in the following format that accounts for all of the input parameters your pipeline expects.
Refer to the solution if you need. This does require you to write your own parameter regex checking. While not best practice, ".*" will match on any input.
{
"name": "Your pipeline name",
"description": "Your pipeline description",
"parameters": [
{
"name": "inputSubscription",
"label": "Pub/Sub input subscription.",
"helpText": "Pub/Sub subscription to read from.",
"regexes": [
"[-_.a-zA-Z0-9]+"
]
},
{
"name": "outputTable",
"label": "BigQuery output table",
"helpText": "BigQuery table spec to write to, in the form 'project:dataset.table'.",
"is_optional": true,
"regexes": [
"[^:]+:[^.]+[.].+"
]
}
]
}
Then build and stage the actual template:
export TEMPLATE_PATH="gs://${PROJECT_ID}/templates/mytemplate.json"
# Will build and upload the template to GCS
gcloud dataflow flex-template build $TEMPLATE_PATH \
--image "$TEMPLATE_IMAGE" \
--sdk-language "JAVA" \
--metadata-file "metadata.json"
Verify that the file has been uploaded to the template location in Cloud Storage.
Click Check my progress to verify the objective.
Create and stage the Flex Template
Task 4. Execute the template from the UI
To complete this task, follow the instructions below:
Go to the Dataflow page in the Google Cloud console.
Click Create job from template.
Enter a valid job name in the Job name field.
Select Custom template from the Dataflow template drop-down menu.
Enter the Cloud Storage path to your template file in the template Cloud Storage path field.
Input the appropriate items under Required parameters.
Click Run job.
Note: You don't need to specify a staging bucket; DataFlow will create a private one in your project using your project number, similar to gs://dataflow-staging--/staging.
Examine the Compute Engine console and you will see a temporary launcher VM that is created to execute your container and initiate your pipeline with the provided parameters.
Task 5. Execute the template using gcloud
One of the benefits of using Dataflow templates is the ability to execute them from a wider variety of contexts, other than a development environment. To demonstrate this, use gcloud to execute a Dataflow template from the command line.
To complete this task, execute the following command in your terminal, modifying the parameters as appropriate:
Click Check my progress to verify the objective.
Execute the template from the UI and using gcloud
End your lab
When you have completed your lab, click End Lab. Google Cloud Skills Boost removes the resources you’ve used and cleans the account for you.
You will be given an opportunity to rate the lab experience. Select the applicable number of stars, type a comment, and then click Submit.
The number of stars indicates the following:
1 star = Very dissatisfied
2 stars = Dissatisfied
3 stars = Neutral
4 stars = Satisfied
5 stars = Very satisfied
You can close the dialog box if you don't want to provide feedback.
For feedback, suggestions, or corrections, please use the Support tab.
Copyright 2022 Google LLC All rights reserved. Google and the Google logo are trademarks of Google LLC. All other company and product names may be trademarks of the respective companies with which they are associated.
Les ateliers créent un projet Google Cloud et des ressources pour une durée déterminée.
Les ateliers doivent être effectués dans le délai imparti et ne peuvent pas être mis en pause. Si vous quittez l'atelier, vous devrez le recommencer depuis le début.
En haut à gauche de l'écran, cliquez sur Démarrer l'atelier pour commencer.
Utilisez la navigation privée
Copiez le nom d'utilisateur et le mot de passe fournis pour l'atelier
Cliquez sur Ouvrir la console en navigation privée
Connectez-vous à la console
Connectez-vous à l'aide des identifiants qui vous ont été attribués pour l'atelier. L'utilisation d'autres identifiants peut entraîner des erreurs ou des frais.
Acceptez les conditions d'utilisation et ignorez la page concernant les ressources de récupération des données.
Ne cliquez pas sur Terminer l'atelier, à moins que vous n'ayez terminé l'atelier ou que vous ne vouliez le recommencer, car cela effacera votre travail et supprimera le projet.
Ce contenu n'est pas disponible pour le moment
Nous vous préviendrons par e-mail lorsqu'il sera disponible
Parfait !
Nous vous contacterons par e-mail s'il devient disponible
Un atelier à la fois
Confirmez pour mettre fin à tous les ateliers existants et démarrer celui-ci
Utilisez la navigation privée pour effectuer l'atelier
Ouvrez une fenêtre de navigateur en mode navigation privée pour effectuer cet atelier. Vous éviterez ainsi les conflits entre votre compte personnel et le compte temporaire de participant, qui pourraient entraîner des frais supplémentaires facturés sur votre compte personnel.
In this lab you (i)convert a custom pipeline into a Dataflow Flex Template, ii) and run a Dataflow Flex Template.
Durée :
1 min de configuration
·
Accessible pendant 120 min
·
Terminé après 120 min


 ), select IAM & Admin > IAM.