Instructions et exigences de configuration de l'atelier
Protégez votre compte et votre progression. Utilisez toujours une fenêtre de navigation privée et les identifiants de l'atelier pour exécuter cet atelier.
Product Discovery- Monitoring and Managing Recommendations AI and Commerce Search
Ce contenu n'est pas encore optimisé pour les appareils mobiles.
Pour une expérience optimale, veuillez accéder à notre site sur un ordinateur de bureau en utilisant un lien envoyé par e-mail.
Overview
The Cloud commerce service and the commerce API enables customers to build end-to-end personalized recommendation systems without requiring a high level of expertise in machine learning, recommendation system, or Google Cloud.
In this lab, you will explore the monitoring and management features available for the Commerce service and examine some common issues and errors associated with importing and updating catalog and event data. The performance of the Recommendations AI and Product Search services is dependent on having an error free stream of user events so it is important to monitor these services and create alerts that trigger when there are issues with your Commerce catalog and user event data.
This lab uses a subset of the Google Merchant Center dataset for product catalog and user event data.
Objectives
In this lab, you will learn how to complete the following tasks:
Review the commerce dashboard and explore the monitoring metrics.
Create and configure alerts for Commerce services.
Review data ingestion and Cloud Logging logs for Commerce.
Update product data in the catalog using the Commerce API.
Setup and requirements
Lab setup
For each lab, you get a new Google Cloud project and set of resources for a fixed time at no cost.
Sign in to Google Skills using an incognito window.
Note the lab's access time (for example, 1:15:00), and make sure you can finish within that time.
There is no pause feature. You can restart if needed, but you have to start at the beginning.
When ready, click Start lab.
Note your lab credentials (Username and Password). You will use them to sign in to the Google Cloud Console.
Click Open Google Console.
Click Use another account and copy/paste credentials for this lab into the prompts.
If you use other credentials, you'll receive errors or incur charges.
Accept the terms and skip the recovery resource page.
Start Cloud Shell
While in Google Cloud you can operate Google Cloud remotely from your own machine. This lab uses both the Google Cloud Console and the Cloud Shell, a command line environment running in Google Cloud.
From the Cloud Console, click Activate Cloud Shell.
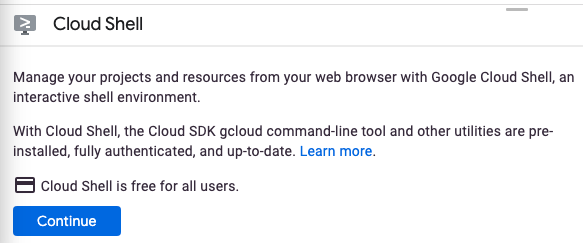
Note: If you've never started Cloud Shell before, you are presented with an intermediate screen describing what it is. If that's the case, click Continue and you won't ever see it again.
Here's what that one-time screen looks like:
It should only take a few moments to provision and connect to Cloud Shell.
Cloud Shell provides you with terminal access to a virtual machine hosted in the cloud. The virtual machine includes all the development tools that you'll need. It offers a persistent 5GB home directory and runs in Google Cloud, greatly enhancing network performance and authentication. Much, if not all, of your work in this lab can be done through the Cloud Console and Cloud Shell using only a browser.
Once connected to Cloud Shell, you should see that you are already authenticated and that the project is already set to your project ID.
Run the following command in Cloud Shell to confirm that you are authenticated:
gcloud auth list
Output:
Credentialed Accounts
ACTIVE: *
ACCOUNT: {{{user_0.username| Lab User Name}}}
To set the active account, run:
gcloud config set account {{{user_0.username| Lab User Name}}}
Note: The gcloud command-line tool is the powerful and unified command-line tool in Google Cloud. It comes preinstalled in Cloud Shell. Among its features, gcloud offers tab completion in the shell. For more information, refer to the gcloud CLI overview guide.
Run the following command to confirm that you are using the correct project for this lab:
If the correct project is not listed, you can set it with this command:
gcloud config set project {{{project_0.project_id| Project ID}}}
Output:
Updated property [core/project].
Task 1. Enable the Commerce API
Before you can begin using the Commerce Recommendations AI or Commerce Search APIs, you must enable the Commerce API.
On the Navigation menu (), click VIEW ALL PRODUCTS. In the Artificial Intelligence section, click Search for commerce.
Click Turn On API.
Click Continue and accept the data terms by clicking Accept.
Click Get Started.
Task 2. Import product catalog and user event data
Import Commerce products schema data from BigQuery
In this task, import product data into the catalog from a BigQuery table that uses the Retail products schema.
In the GCP Console, on the Navigation menu (), click VIEW ALL PRODUCTS. In the Artificial Intelligence section, click Search for commerce > Data to open the Commerce Data management page.
Make sure the Catalog tab is selected and click Import.
Configure the import parameters as follows to import the product catalog:
For Import type, select Product Catalog
For Source of data, select BigQuery
For Import Branch, select Branch 0
For Big Query table, click Browse.
Select the radio button for products Dataset: retail table.
Click Select.
Note: If you click the table name you will open the Data Catalog page and will need to return to the Commerce products import page.
Click Import.
Note:
If you get an exception 'A service account email is required to schedule auto-import', You can use the username as service account email.
You need to wait for a pop-up message to appear with a message similar to the following:
Successfully scheduled import operation import-products-6583047802807380211. It may take up to 5 minutes to see your new long running operation in the Integration Activity panel.
When the import task is scheduled you will also see the details of a gcloud scheduler command displayed that you can use to schedule a regular data import task.
Click X to close the popup that appeared to tell you that the import operation was successfully scheduled.
Click Cancel to close the import page and return to the Commerce Data page to check the status of your catalog data import task.
In the Search for commerce navigation menu, click Data and then click Activity Status to monitor the progress of the import task.
The import task will take a minute or two for the status of the import task in the Product catalog import activity status section to change to Succeeded. A total of 1268 items will have been imported.
Import user event data from Cloud Storage
In this task, import user event data from a BigQuery table.
In the GCP Console, on the Navigation menu (), click VIEW ALL PRODUCTS. In the Artificial Intelligence section, click Search for commerce > Data to open the Commerce Data management page.
Make sure the Event tab is selected and click Import.
Configure the import parameters as follows to import the product catalog:
For Import type, select User Events
For Source of data, select Google Cloud Storage
For Google Cloud Storage location, click the Browse button.
Navigate to the storage bucket called and select the file recent_retail_events.json.
Click the Filename to make sure it is selected.
Click Select.
Click Import.
You need to wait for a pop-up message to appear with a message similar to the following:
Successfully scheduled import operation import-products-6583047802807380211. It may take up to 5 minutes to see your new long running operation in the Integration Activity panel
When the import task is scheduled you will also see the details of a gcloud scheduler command displayed that you can use to schedule a regular event import task.
Wait for the import task to be scheduled with the gcloud scheduler command displayed.
Click X to close the popup that appeared to tell you that the import operation was successfully scheduled.
Click Cancel to close the import page and return to the Commerce Data page to check the status of your event data import task.
In the Commerce navigation menu, click Data and then click Activity Status to monitor the progress of the import task.
The import task will take a minute or two for the status of the import task in the User events import activity status section to change to Succeeded. Approximately 32,000 items will have been imported and 5 items will have failed.
Task 3. Review the Commerce dashboard and explore the monitoring metrics
In this task, you will explore the features in the Commerce Dashboard and the information provided.
In the GCP Console, on the Navigation menu (), click VIEW ALL PRODUCTS. In the Artificial Intelligence section, click Search for commerce > Dashboard to open the Commerce dashboard.
The Dashboard contains high-level status information and quick links for the following:
Catalog: Summary information about the total number of products in and out of stock in your catalogs.
There are 746 products in stock and 1,268 products in total in your default catalog branch.
Serving configs: Quick links for evaluating or deploying active serving configs.
This allows you to quickly tune, test, or learn how to deploy serving configs.
Event: Summary information about event data over the past 90 days.
There are ~32,000 events, with just under 2% of events showing as unjoined where the event could not be linked to a product in the catalog.
Task 4. Create and configure alerts for Commerce services
In this task, you will configure an alert that fires when user events uploads are interrupted. This indicates that there is a major problem with the source of your user events, your retail site for example, that should be investigated.
Create a Commerce alerting policy
You will now create a service-managed alerting policy using the Commerce console.
In the GCP Console, on the Navigation menu (), click VIEW ALL PRODUCTS. In the Artificial Intelligence section, click Search for commerce > Monitoring to open the Commerce Monitoring page.
Click Recommended Alerts.
Enable User events record reduction.
Click Get Code > Command Line.
This will display the gcloud command line and REST API syntax that you can use to create an alert that will fire if no Commerce events have been uploaded for a period of 10 minutes. Note that this command does not include a notification channel, that will need to be specified if you want to use a command like this.
gcloud alpha monitoring policies create --policy='
{
"displayName": "User events record reduction",
"documentation": {
"content": "No user events have been recorded for 10 minutes.",
"mimeType": "text/markdown"
},
"conditions": [
{
"displayName": "user event record reduction",
"conditionAbsent": {
"filter": "metric.type=\"serviceruntime.googleapis.com/api/request_count\" resource.type=\"consumed_api\" resource.label.\"service\"=\"retail.googleapis.com\" resource.label.\"method\"=monitoring.regex.full_match(\"(google.cloud.retail.v2.UserEventService.CollectUserEvent|google.cloud.retail.v2.UserEventService.WriteUserEvent)\")",
"duration": "600s",
"trigger": {
"count": 1
},
"aggregations": [
{
"alignmentPeriod": "60s",
"crossSeriesReducer": "REDUCE_SUM",
"perSeriesAligner": "ALIGN_SUM"
}
]
}
}
],
"combiner": "OR",
"enabled": true,
"userLabels": {
"retail": "event_record_reduction",
"version": "1"
},
"notificationChannels": []
}'
Click Close. You will use the console to set up the alert in the following steps.
In User events record reduction, click Notification Channels.
Click Manage Notification Channels.
This will open a new browser tab with the Cloud Monitoring Notification Channels page open.
Next to Emails, click Add New.
Enter your email and name details in the Create Email Channel dialog.
Click Save.
Close the Cloud Monitoring Notification Channels browser tab. This will return you to the Retail alert configuration tab.
Click the refresh icon next to Manage Notification Channels.
This will close the Manage Notifications Channels pop-up.
In User events record reduction, click Notification Channels again.
Select the Email notification channel for the email alert channel you have just created.
Click OK.
Click Submit.
Explore the alerting policy using the Cloud Operations Monitoring console
You will explore the information and controls available to you for Commerce alerting policies in the Cloud Operations Monitoring console by opening the service-managed policy for user events record reduction that you created in the previous task.
In the GCP Console, on the Navigation menu (), click VIEW ALL PRODUCTS. In the Observability section, click Monitoring > Overview to open the Cloud Operations Monitoring overview page.
Click Alerting.
Under policies, click User events record reduction to open your newly created Commerce alert.
The overview chart will show you the most recent alerting history. You can change the chart from the default time range covering the last hour up to the last six weeks.
The incidents sections allows you to view current active alerts or to select Show Closed Incidents to list all recent alerts, even those that have been responded to and closed.
Hover your mouse over the Edit button.
The button is greyed out and the mouse-over text indicates that you cannot edit a service-managed alerting policy.
Note that you can enable and disable the event on these page but you cannot change the alert parameters or change the notification channel.
On the Monitoring menu, click Settings.
Click Notification channels.
Note that you can manage your notification channels here, adding or removing alerting paths as required. Any additional notification channels created here will be available for Commerce service-managed policies you create in the Commerce console.
Task 5. Update product data in the catalog using the Commerce API
You will now use curl to make calls to the Commerce API to retrieve and update product catalog data.
Create an IAM service account to authenticate requests
Create an environment variable to store the Project ID:
Create an IAM service account for controlled access to the Commerce API:
export SA_NAME="retail-service-account"
gcloud iam service-accounts create $SA_NAME --display-name $SA_NAME
Note: If you have created this service account in a previous lab this command will fail with an error stating that the account already exists. You can ignore that error and continue.
Bind the service account to the Retail Editor IAM role:
gcloud projects add-iam-policy-binding ${PROJECT_ID} \
--member="serviceAccount:$SA_NAME@${PROJECT_ID}.iam.gserviceaccount.com" \
--role="roles/retail.editor"
If this succeeds then the updated project IAM policy, including this new binding, is displayed.
Allow the lab user account to use impersonation with the new service account
Creating a role binding on the service account for the lab user with the Service Account Token Creator role allows the lab user to use service account impersonation to safely generate limited duration authentication tokens for the service account. These tokens can then be used to interactively test access to APIs and services.
Create a role binding on the Commerce API service account for your user account to permit impersonation:
export USER_ACCOUNT=$(gcloud config list --format 'value(core.account)')
gcloud iam service-accounts add-iam-policy-binding $SA_NAME@$PROJECT_ID.iam.gserviceaccount.com --member "user:$USER_ACCOUNT" --role roles/iam.serviceAccountTokenCreator
Generate a temporary access token for the Commerce API:
This command may fail as it can take up to 10 minutes for the Service Account Token Creator role to propagate. Retry this command after 1 minute if it fails, and retry until it succeeds. You will also see a warning informing you that the command is using impersonation. This is expected.
Get product data from the catalog using the Commerce API
You will use the product URL in the catalog to retrieve the product data.
Store sample user event JSON data in an environment variable:
This is the REST API URL for the product in the Commerce API. This URL is used to manage the product in the catalog. Note that the URL includes bash environment variable substitutions for the Project ID and the Product_ID.
Retrieve the product data from the Catalog using the REST API using curl:
curl -H "Authorization: Bearer ${ACCESS_TOKEN}" \
-H 'Content-Type: application/json' -X GET $PRODUCT_URL
The response returned will look like the following block of JSON.
Note that the product title is Android Iconic Sock.
Define a JSON payload with an updated title.
PRODUCT_DATA="
{
'title':'Android Iconic Sock',
'categories':['Apparel']
}"
echo ${PRODUCT_DATA}
This update payload makes a minor change to the product title.
Update the catalog item using the REST API using curl to make a PATCH request:
curl -H "Authorization: Bearer ${ACCESS_TOKEN}" \
-H 'Content-Type: application/json charset=utf-8' \
-X PATCH -d "${PRODUCT_DATA}" $PRODUCT_URL
This will return the updated product JSON in the response showing the updated product title.
Les ateliers créent un projet Google Cloud et des ressources pour une durée déterminée.
Les ateliers doivent être effectués dans le délai imparti et ne peuvent pas être mis en pause. Si vous quittez l'atelier, vous devrez le recommencer depuis le début.
En haut à gauche de l'écran, cliquez sur Démarrer l'atelier pour commencer.
Utilisez la navigation privée
Copiez le nom d'utilisateur et le mot de passe fournis pour l'atelier
Cliquez sur Ouvrir la console en navigation privée
Connectez-vous à la console
Connectez-vous à l'aide des identifiants qui vous ont été attribués pour l'atelier. L'utilisation d'autres identifiants peut entraîner des erreurs ou des frais.
Acceptez les conditions d'utilisation et ignorez la page concernant les ressources de récupération des données.
Ne cliquez pas sur Terminer l'atelier, à moins que vous n'ayez terminé l'atelier ou que vous ne vouliez le recommencer, car cela effacera votre travail et supprimera le projet.
Ce contenu n'est pas disponible pour le moment
Nous vous préviendrons par e-mail lorsqu'il sera disponible
Parfait !
Nous vous contacterons par e-mail s'il devient disponible
Un atelier à la fois
Confirmez pour mettre fin à tous les ateliers existants et démarrer celui-ci
Utilisez la navigation privée pour effectuer l'atelier
Le meilleur moyen d'exécuter cet atelier consiste à utiliser une fenêtre de navigation privée. Vous éviterez ainsi les conflits entre votre compte personnel et le compte temporaire de participant, qui pourraient entraîner des frais supplémentaires facturés sur votre compte personnel.
Product Discovery- Monitoring and Managing Recommendations AI and Commerce Search
Durée :
2 min de configuration
·
Accessible pendant 90 min
·
Terminé après 60 min


 ), click VIEW ALL PRODUCTS. In the Artificial Intelligence section, click Search for commerce.


