Vertex AI is now Gemini Enterprise Agent Platform! We are currently updating our content to reflect this change. Please bear with us if you encounter naming inconsistencies during this transition.
Aplique suas habilidades no console do Google Cloud
Este laboratório pode incorporar ferramentas de IA para ajudar no seu aprendizado.
Overview
The Cloud Retail service and the Retail API enable customers to build end-to-end personalized recommendation systems without requiring a high level of expertise in machine learning, recommendation system, or Google Cloud.
In this lab, you will configure Retail Recommendations AI prediction models and serving configs, generate user product recommendations using the Retail Recommendations AI console and API, and upload user event data that includes Recommendations AI attribution tokens to improve Recommendations AI prediction model performance.
This lab uses the Retail product catalog and event data you imported in a previous lab. This catalog data was created using Google Merchant Center data.
Objectives
In this lab, you will learn how to complete the following tasks:
Configure a Retail Recommendations AI model.
Create a Retail Serving Config for Recommendations AI.
Perform test predictions using the Retail Recommendations AI console.
Explore the Retail Recommendations AI API from the command line.
Use Attribution tokens to improve Recommendations AI models.
Setup and requirements
Lab setup
For each lab, you get a new Google Cloud project and set of resources for a fixed time at no cost.
Sign in to Google Skills using an incognito window.
Note the lab's access time (for example, 1:15:00), and make sure you can finish within that time.
There is no pause feature. You can restart if needed, but you have to start at the beginning.
When ready, click Start lab.
Note your lab credentials (Username and Password). You will use them to sign in to the Google Cloud Console.
Click Open Google Console.
Click Use another account and copy/paste credentials for this lab into the prompts.
If you use other credentials, you'll receive errors or incur charges.
Accept the terms and skip the recovery resource page.
Start Cloud Shell
While in Google Cloud you can operate Google Cloud remotely from your own machine. This lab uses both the Google Cloud Console and the Cloud Shell, a command line environment running in Google Cloud.
From the Cloud Console, click Activate Cloud Shell.
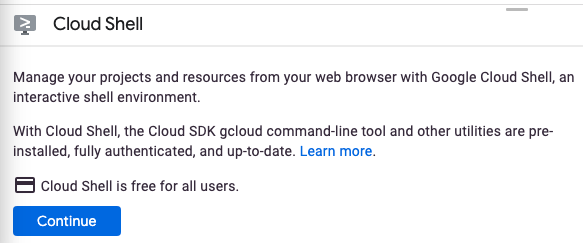
Note: If you've never started Cloud Shell before, you are presented with an intermediate screen describing what it is. If that's the case, click Continue and you won't ever see it again.
Here's what that one-time screen looks like:
It should only take a few moments to provision and connect to Cloud Shell.
Cloud Shell provides you with terminal access to a virtual machine hosted in the cloud. The virtual machine includes all the development tools that you'll need. It offers a persistent 5GB home directory and runs in Google Cloud, greatly enhancing network performance and authentication. Much, if not all, of your work in this lab can be done through the Cloud Console and Cloud Shell using only a browser.
Once connected to Cloud Shell, you should see that you are already authenticated and that the project is already set to your project ID.
Run the following command in Cloud Shell to confirm that you are authenticated:
gcloud auth list
Output:
Credentialed Accounts
ACTIVE: *
ACCOUNT: {{{user_0.username| Lab User Name}}}
To set the active account, run:
gcloud config set account {{{user_0.username| Lab User Name}}}
Note: The gcloud command-line tool is the powerful and unified command-line tool in Google Cloud. It comes preinstalled in Cloud Shell. Among its features, gcloud offers tab completion in the shell. For more information, refer to the gcloud CLI overview guide.
Run the following command to confirm that you are using the correct project for this lab:
If the correct project is not listed, you can set it with this command:
gcloud config set project {{{project_0.project_id| Project ID}}}
Output:
Updated property [core/project].
Task 1. Enable the Retail API
Before you can begin using the Retail Recommendations AI or Retail Search APIs, you must enable the Retail
API.
On the Google Cloud console title bar, in the Search field, type Search for commerce, click Search, and then click Search for commerce.
Click Turn On API.
Click Continue and accept the data terms by clicking Accept.
Click Continue.
Click on Turn On to turn on the Retail Search.
Click Get Started.
Task 2. Import product catalog and user event data
In this task, you will import product catalog data from BigQuery and user event data from Cloud Storage.
Import Retail products schema data from BigQuery
In this task, import product data into the catalog from a BigQuery table that uses the Retail products schema.
In the Search for commerce console, select Data from the left-hand side menu to open the Retail Data management page.
Make sure the Catalog tab is selected and click Import.
Configure the import parameters as follows to import the product catalog:
For Import type, select Product Catalog
For Source of data, select BigQuery
For Import Branch, select Branch 0
For Big Query table, click Browse.
Enter products in the search box and click Search.
Select the radio button for products Dataset: retail table.
Click Select.
Note: If you click the table name you will open the Data Catalog page and will need to return to the Retail products import page.
Click Import.
You need to wait for a pop-up message to appear with a message similar to the following:
Successfully scheduled import operation import-products-6583047802807380211. It may take up to 5 minutes to see your new long running operation in the Integration Activity panel.
When the import task is scheduled you will also see the details of a gcloud scheduler command displayed that you can use to schedule a regular data import task.
Click X to close the popup that appeared to tell you that the import operation was successfully scheduled.
Click Cancel to close the import page and return to the Retail Data page to check the status of your catalog data import task.
In the Search for commerce navigation menu, click Data and then click Activity status to monitor the progress of the import task.
The import task will take a minute or two for the status of the import task in the Product catalog import activity section to change to Succeeded. A total of 1268 items will have been imported.
Import user event data from Cloud Storage
In this task, import user event data from a BigQuery table.
In the Search for commerce console, select Data from the left-hand side menu to open the Retail Data management page.
Make sure the Events tab is selected and click Import.
Configure the import parameters as follows to import the product catalog:
For Import type, select User Events
For Source of data, select Google Cloud Storage
For Google Cloud Storage location, click the Browse button.
Navigate to the storage bucket called and select the file recent_retail_events.json.
Click the Filename to make sure it is selected.
Click Select.
Click Import.
You need to wait for a pop-up message to appear with a message similar to the following:
Successfully scheduled import operation import-products-6583047802807380211. It may take up to 5 minutes to see your new long running operation in the Integration Activity panel
When the import task is scheduled you will also see the details of a gcloud scheduler command displayed that you can use to schedule a regular event import task.
Click X to close the popup that appeared to tell you that the import operation was successfully scheduled.
Click Cancel to close the import page and return to the Retail Data page to check the status of your event data import task.
In the Search for commerce navigation menu, click Data and then click Activity status to monitor the progress of the import task.
The import task will take a minute or two for the status of the import task in the User events section to change to Succeeded. Approximately 32,000 items will have been imported and 5 items will have failed.
Task 3. Configure a Retail Recommendations AI model
In this task, you will configure a new Retail Recommendations AI model. Training a model can take a number of days so you will not be able to interact with the model that you configure during the lab session but you can explore how to work with models using the default recently_viewed model that is created automatically for you when the initial batch of event data was imported.
In the Search for commerce navigation menu, click Models.
Click Create model.
For Model name, enter Others you may like.
For Model type, select Others you may like.
For Business Objective, select Click-through rate (CTR).
Note that in the Data Requirements met? section that you have meet the criteria for this model:
At least 7 days of Detail page view events in the last 90 days AND at least 10 occurrences per catalog item on average (with a 90 days window) of Detail page view events OR at least 60 days of Detail page view events in the last 90 days.
At least 100 unique catalog items for the Detail page view event in the last 90 days.
At least 10,000 Detail page view events in the last 90 days.
Click Cancel.
Note: Do not click the Create button.
The model training process takes a number of days to complete and will not be ready while this lab is running. You should proceed to the next step where you will work with a default model that is already prepared.
Task 4. Create a Recommendations AI Serving Config and test the recommendations
You will now create a Serving Config using the default recently_viewed Recommendations AI model. Serving configurations are invoked by your site when surfacing recommendations or search results. The Retail API references the serving configuration's associated model or controls at serving time to determine the recommendations or search results to generate.
In the Search for commerce navigation menu, click Serving configs.
Click Create Serving Config.
In the Select product stage, select the Recommendation product type.
For Serving config name, type Test Recommendation.
The Serving config ID field is automatically filled for you with a default value, test-recommendation. If you change this default you will need to adjust variables in later steps yourself.
Click Continue.
In the Include Model stage, select the Items you recently viewed model.
Click Continue
In the Preferences stage, leave the Price reranking and Result diversification options at their defaults.
Click Create.
Click the Test Recommendation serving config that you have just created.
Click Evaluate tab to open the Recommendations AI evaluation console.
For Visitor ID enter GA1.3.1260529204.1622654859.
Click Prediction Preview.
You will see a list of product links, and images for those products, that this visitor has recently viewed along with. This is a trivial model that does not provide any real insights but it is used here to demonstrate how to use the console for interactive testing of the results produced by a Recommendations AI serving config.
Task 5. Explore the Retail API from the command line
You will now use curl and other command line utilities to make calls to the Retail Recommendations AI API to explore how to make requests, get recommendations and then filter and refine the results.
Note: If you have already created the IAM service account you will see an error when you try to recreate the account in the next step. You can ignore the error but complete the rest of the steps as you need to generate the authentication token.
Create an IAM service account to authenticate requests
Create an environment variable to store the Project ID:
Allow the lab user account to use impersonation with the new service account
Creating a role binding on the service account for the lab user with the Service Account Token Creator role allows the lab user to use service account impersonation to safely generate limited duration authentication tokens for the service account. These tokens can then be used to interactively test access to APIs and services.
Create a role binding on the Retail API service account for your user account to permit impersonation:
export USER_ACCOUNT=$(gcloud config list --format 'value(core.account)')
gcloud iam service-accounts add-iam-policy-binding $SA_NAME@$PROJECT_ID.iam.gserviceaccount.com --member "user:$USER_ACCOUNT" --role roles/iam.serviceAccountTokenCreator
Generate a temporary access token for the Retail API:
export ACCESS_TOKEN=$(gcloud auth print-access-token --impersonate-service-account $SA_NAME@$PROJECT_ID.iam.gserviceaccount.com )
Note: This command may fail as it can take up to 10 minutes for the Service Account Token Creator role to propagate. Retry this command after 1 minute if it fails, and retry until it succeeds. You will also see a warning informing you that the command is using impersonation. This is expected.
Generate predictions using the Recommendations AI API
When calling the Retail Recommendations AI API to make predictions you need to include some metadata as JSON payload data. The visitorID identifies the user ID that the recommendations are to be generated for. The request should be accompanied by some user_event detail similar to the example you've seen earlier but can include a lot more data some of which is shown here. Some optional parameters for the Retail Recommendations AI API can also be included. The filter parameter can be used to identify tags that can refine the recommendations, for example to filter the results for a specific promotion. The validateOnly parameter instructs the API to perform a dry run test. The experiment_group parameter can be used to identify groups for A/B testing.
The SERVING_CONFIG_ID environment variable is used to construct the REST API URL specific Retail Recommendations AI serving config, and therefore the model, that should be used to generate the recommendations.
Store parameters in environment variables:
# Recommendations AI API parameters
export VISITOR_ID="GA1.3.1260529204.1622654859"
export SERVING_CONFIG="test-recommendation"
# User Event Data
export USER_ID="USER01"
export PRODUCT_ID="GGOEGDHB163199"
export EVENT_TYPE="detail-page-view"
export IP_ADDRESS="192.168.1.1"
export USER_AGENT="Mozilla"
# Recommendations AI API optional parameters
export FILTER_STRING=""
export VALIDATE_ONLY="false"
export EXPERIMENT_GROUP="Group-a"
Store the Retail Recommendations AI prediction payload JSON data in an environment variable:
This payload data will be sent to the Recommendations AI API to generate a set of recommendations. The environment variables you defined in the previous step are substituted for the parameter values in the resulting DATA environment variable.
Store the Recommendations AI API URL for predictions in an environment variable:
This constructs the REST API URL for generating a Recommendations AI API recommendation using the appropriate serving config ID. Note that the URL again has the access token appended as an inline parameter called access_token.
Call the API storing the results in a variable for reuse:
This will generate a list of Product IDs that correspond to recommendations produced by the recommendation model configured for the serving config ID you provided using the visitor ID, event data, and other parameters to refine the recommendation.
Upload a user event including a Retail Recommendation AI attribution token.
Each Retail Recommendations AI prediction includes an attribution token. You should include this token in user events that result from the recommendation in order to improve the quality of the Retail Recommendations AI model. You will learn how attribution tokens are used by Retail Recommendations AI to improve the performance of recommendation models later in the course.
Parse the Retail Recommendations AI prediction response using JQ to retrieve the attributionToken:
Store sample user event JSON data for a detail-page-view user event for the recommended product including the attribution token that associates this event with the prediction:
Congratulations, you've successfully created Retail Recommendations AI models and worked with recommendations using the Retail API.
End your lab
When you have completed your lab, click End Lab. Google Skills removes the resources you’ve used and cleans the account for you.
You will be given an opportunity to rate the lab experience. Select the applicable number of stars, type a comment, and then click Submit.
The number of stars indicates the following:
1 star = Very dissatisfied
2 stars = Dissatisfied
3 stars = Neutral
4 stars = Satisfied
5 stars = Very satisfied
You can close the dialog box if you don't want to provide feedback.
For feedback, suggestions, or corrections, please use the Support tab.
Copyright 2026 Google LLC All rights reserved. Google and the Google logo are trademarks of Google LLC. All other company and product names may be trademarks of the respective companies with which they are associated.
Antes de começar
Os laboratórios criam um projeto e recursos do Google Cloud por um período fixo
Os laboratórios têm um limite de tempo e não têm o recurso de pausa. Se você encerrar o laboratório, vai precisar recomeçar do início.
No canto superior esquerdo da tela, clique em Começar o laboratório
Usar a navegação anônima
Copie o nome de usuário e a senha fornecidos para o laboratório
Clique em Abrir console no modo anônimo
Fazer login no console
Faça login usando suas credenciais do laboratório. Usar outras credenciais pode causar erros ou gerar cobranças.
Aceite os termos e pule a página de recursos de recuperação
Não clique em Terminar o laboratório a menos que você tenha concluído ou queira recomeçar, porque isso vai apagar seu trabalho e remover o projeto
Este conteúdo não está disponível no momento
Você vai receber uma notificação por e-mail quando ele estiver disponível
Ótimo!
Vamos entrar em contato por e-mail se ele ficar disponível
Um laboratório por vez
Confirme para encerrar todos os laboratórios atuais e iniciar este
Use a navegação anônima para executar o laboratório
A melhor maneira de executar este laboratório é usando uma janela de navegação anônima
ou privada. Isso evita conflitos entre sua conta pessoal
e a conta de estudante, o que poderia causar cobranças extras
na sua conta pessoal.
Product Discovery - Implementing and Using Recommendations AI models
Duração:
Configuração: 2 minutos
·
Tempo de acesso: 90 minutos
·
Tempo para conclusão: 60 minutos