Vertex AI is now Gemini Enterprise Agent Platform! We are currently updating our content to reflect this change. Please bear with us if you encounter naming inconsistencies during this transition.
Ihre Kompetenzen in der Google Cloud Console anwenden
Prüfpunkte
Create the VM instance
Fortschritt prüfen
/ 30
Create a Cloud Storage bucket and Enable Private Google Access
Fortschritt prüfen
/ 40
Configure a Cloud NAT gateway
Fortschritt prüfen
/ 30
Create the VM instance
Fortschritt prüfen
/ 30
Create a Cloud Storage bucket and Enable Private Google Access
Fortschritt prüfen
/ 40
Configure a Cloud NAT gateway
Fortschritt prüfen
/ 30
Dieses Lab kann KI-Tools enthalten, die den Lernprozess unterstützen.
As a Network Engineer or Solutions Architect, you may come across situations where you need an extra layer of security and/or privacy on your network architecture. For example, you may need certain resources to initiate connections to external networks or even the public internet, but you don't want any unauthorized connection to reach your private resources.
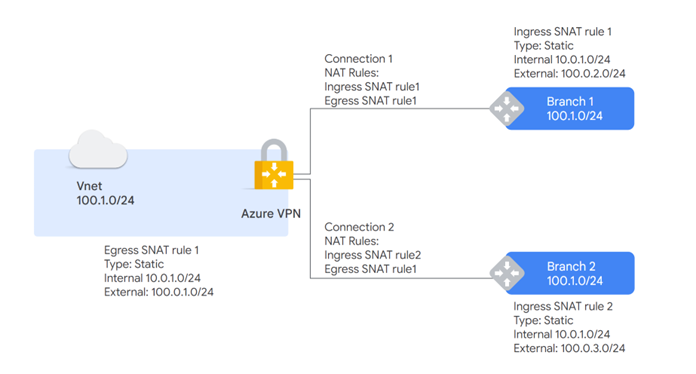
In Microsoft Azure, you would use Azure Private Endpoint to enhance security and privacy. Azure Private Endpoint is a network interface that connects your Azure resources privately to a service that is powered by Azure Private Link. This interface provides private communication between your virtual network and Azure services without using a public IP address or internet exposure.
This privacy is achieved using Azure Network Address Translation (NAT) Gateway. Azure NAT Gateway is a highly available, managed network gateway that provides outbound connectivity from your virtual network to the internet or other networks. It allows you to share a single public IP address for outbound internet access for your Virtual Machines (VM).
By using these Azure features, you can enforce control over the traffic in your network, keep your connections private, and interact with your VMs without exposing them to the public internet.
With this in mind, there are some questions you may be considering as you work in Google Cloud:
How can you keep connections private in Google Cloud?
How can you connect to, and interact with, your VMs without exposing them to the public internet?
How can you enforce granular control over the traffic in your network?
Now you will explore how you can provide security on your network architecture in Google Cloud.
Overview
In this lab, you implement Private Google Access and Cloud NAT for a VM instance that doesn't have an external IP address. Then, you verify access to public IP addresses of Google APIs and services and other connections to the internet.
VM instances without external IP addresses are isolated from external networks. Using Cloud NAT, these instances can access the internet for updates and patches, and in some cases, for bootstrapping. As a managed service, Cloud NAT provides high availability without user management and intervention.
Objectives
In this lab, you learn how to perform the following tasks:
Configure a VM instance that doesn't have an external IP address
Connect to a VM instance using an Identity-Aware Proxy (IAP) tunnel
Enable Private Google Access on a subnet
Configure a Cloud NAT gateway
Verify access to public IP addresses of Google APIs and services and other connections to the internet
For each lab, you get a new Google Cloud project and set of resources for a fixed time at no cost.
Sign in to Google Skills using an incognito window.
Note the lab's access time (for example, 1:15:00), and make sure you can finish within that time.
There is no pause feature. You can restart if needed, but you have to start at the beginning.
When ready, click Start lab.
Note your lab credentials (Username and Password). You will use them to sign in to the Google Cloud Console.
Click Open Google Console.
Click Use another account and copy/paste credentials for this lab into the prompts.
If you use other credentials, you'll receive errors or incur charges.
Accept the terms and skip the recovery resource page.
Task 1. Create the VM instance
Create a VPC network with some firewall rules and a VM instance that has no external IP address, and connect to the instance using an IAP tunnel.
Create a VPC network and firewall rules
First, create a VPC network for the VM instance and a firewall rule to allow SSH access.
In the Cloud console, in the Navigation menu (), click VPC network > VPC networks.
Click Create VPC Network.
For Name, type privatenet.
For Subnet creation mode, click Custom.
In New Subnet specify the following, and leave the remaining settings as their defaults:
Property
Value (type value or select option as specified)
Name
privatenet-us
Region
IPv4 address range
10.130.0.0/20
Note: Don't enable Private Google access yet!
Click Done.
Click Create and wait for the network to be created.
In the left pane, click Firewall.
Click Create Firewall Rule.
Specify the following, and leave the remaining settings as their defaults:
Property
Value (type value or select option as specified)
Name
privatenet-allow-ssh
Network
privatenet
Targets
All instances in the network
Source filter
IPv4 ranges
Source IPv4 ranges
35.235.240.0/20
Protocols and ports
Specified protocols and ports
For tcp, click the checkbox and specify port 22.
Click Create.
Note: In order to connect to your private instance using SSH, you need to open an appropriate port on the firewall. IAP connections come from a specific set of IP addresses (35.235.240.0/20). Therefore, you can limit the rule to this CIDR range.
Create the VM instance with no public IP address
In the Cloud console, in the Navigation menu (), click Compute Engine > VM instances.
Click Create Instance.
On the Machine configuration page, specify the following, and leave the remaining settings as their defaults:
Property
Value (type value or select option as specified)
Name
vm-internal
Region
Zone
Series
E2
Machine type
e2-medium (2vCPU, 4 GB memory)
Click OS and storage.
If the Image shown is not Debian GNU/Linux 12 (bookworm), click Change and select Debian GNU/Linux 12 (bookworm), and then click Select.
Click Networking.
In Network interfaces, edit the network interface by specifying the following:
Property
Value (type value or select option as specified)
Network
privatenet
Subnetwork
privatenet-us
External IPv4 address
None
Note: The default setting for a VM instance is to have an ephemeral external IP address. This behavior can be changed with a policy constraint at the organization or project level. To learn more about controlling external IP addresses on VM instances, refer to the
external IP address documentation.
Click Done.
Click Create, and wait for the VM instance to be created.
On the VM instances page, verify that the External IP of vm-internal is None.
Click Check my progress to verify the objective.
Create the VM instance
SSH to vm-internal to test the IAP tunnel
In the Cloud console, click Activate Cloud Shell ().
If prompted, click Continue.
To connect to vm-internal, run the following command:
When prompted for the same passphrase, press ENTER.
To test the external connectivity of vm-internal, run the following command:
ping -c 2 www.google.com
This should not work because vm-internal has no external IP address!
Wait for the ping command to complete.
To return to your Cloud Shell instance, run the following command:
exit
Note: When instances do not have external IP addresses, they can only be reached by other instances on the network via a managed VPN gateway or via a Cloud IAP tunnel. Cloud IAP enables context-aware access to VMs via SSH and RDP without bastion hosts. To learn more about this, see the blog post Cloud IAP enables context-aware access to VMs via SSH and RDP without bastion hosts.
Task 2. Enable Private Google Access
VM instances that have no external IP addresses can use Private Google Access to reach external IP addresses of Google APIs and services. By default, Private Google Access is disabled on a VPC network.
Create a Cloud Storage bucket
Create a Cloud Storage bucket to test access to Google APIs and services.
In the Cloud console, in the Navigation menu (), click Cloud Storage > Buckets.
Click Create.
Specify the following, and leave the remaining settings as their defaults:
Property
Value (type value or select option as specified)
Name
Enter a globally unique name
Location type
Multi-region
Click Create. If prompted to enable public access prevention, ensure it is checked and click Confirm.
Note the name of your storage bucket.
Store the name of your bucket in an environment variable:
export MY_BUCKET=[enter your bucket name here]
Verify it with echo:
echo $MY_BUCKET
Copy an image file into your bucket
Copy an image from a public Cloud Storage bucket to your own bucket.
Store the name of your bucket in an environment variable:
export MY_BUCKET=[enter your bucket name here]
Verify it with echo:
echo $MY_BUCKET
Try to copy the image to vm-internal, run the following command:
gcloud storage cp gs://$MY_BUCKET/*.svg .
This should not work: vm-internal can only send traffic within the VPC network because Private Google Access is disabled (by default).
Press Ctrl+Z to stop the request.
Enable Private Google Access
Private Google Access is enabled at the subnet level. When it is enabled, instances in the subnet that only have private IP addresses can send traffic to Google APIs and services through the default route (0.0.0.0/0) with a next hop to the default internet gateway.
In the Cloud console, in the Navigation menu (), click VPC network > VPC networks.
Click privatenet to open the network.
Click Subnets, and then click privatenet-us.
Click Edit.
For Private Google access, select On.
Click Save.
Click Check my progress to verify the objective.
Create a Cloud Storage bucket and Enable Private Google Access
Note: Enabling Private Google Access is as simple as selecting On within the subnet!
Run the following command, in Cloud Shell for vm-internal, to try to copy the image to vm-internal.
gcloud storage cp gs://$MY_BUCKET/*.svg .
This should work because vm-internal's subnet has Private Google Access enabled!
To return to your Cloud Shell instance, run the following command:
exit
Note: To view the eligible APIs and services that you can use with Private Google Access, see supported services in the
Private access options for services Guide.
Task 3. Configure a Cloud NAT gateway
Although vm-internal can now access certain Google APIs and services without an external IP address, the instance cannot access the internet for updates and patches. Configure a Cloud NAT gateway, which allows vm-internal to reach the internet.
Try to update the VM instances
In Cloud Shell, to try to re-synchronize the package index, run the following:
sudo apt-get update
The output should finish like this (example output):
...
Reading package lists... Done
This should work because Cloud Shell has an external IP address!
To connect to vm-internal, run the following command:
To try to re-synchronize the package index of vm-internal, run the following command:
sudo apt-get update
This should only work for Google Cloud packages because vm-internal only has access to Google APIs and services!
Press Ctrl+C to stop the request.
Configure a Cloud NAT gateway
Cloud NAT is a regional resource. You can configure it to allow traffic from all ranges of all subnets in a region, from specific subnets in the region only, or from specific primary and secondary CIDR ranges only.
On the Google Cloud console title bar, type Network services in the Search field, then click Network services in the search results.
On the Network service page, click Pin next to Network services.
Click Cloud NAT.
Click Get started to configure a NAT gateway.
Specify the following:
Property
Value (type value or select option as specified)
Gateway name
nat-config
Network
privatenet
Region
For Cloud Router, select Create new router.
For Name, type nat-router
Click Create.
Note: The NAT mapping section allows you to choose the subnets to map to the NAT gateway. You can also manually assign static IP addresses that should be used when performing NAT. Do not change the NAT mapping configuration in this lab.
Click Create.
Wait for the gateway's status to change to Running.
Click Check my progress to verify the objective.
Configure a Cloud NAT gateway
Verify the Cloud NAT gateway
It may take up to 3 minutes for the NAT configuration to propagate to the VM, so wait at least a minute before trying to access the internet again.
In Cloud Shell for vm-internal, to try to re-synchronize the package index of vm-internal, run the following command:
sudo apt-get update
The output should finish like this (example output):
...
Reading package lists... Done
This should work because vm-internal is using the NAT gateway!
To return to your Cloud Shell instance, run the following command:
exit
Note: The Cloud NAT gateway implements outbound NAT, but not inbound NAT. In other words, hosts outside of your VPC network can only respond to connections initiated by your instances; they cannot initiate their own, new connections to your instances via NAT.
Task 4. Configure and view logs with Cloud NAT Logging
Cloud NAT logging allows you to log NAT connections and errors. When Cloud NAT logging is enabled, one log entry can be generated for each of the following scenarios:
When a network connection using NAT is created.
When a packet is dropped because no port was available for NAT.
You can opt to log both kinds of events, or just one or the other. Created logs are sent to Cloud Logging.
Enabling logging
If logging is enabled, all collected logs are sent to Cloud Logging by default. You can filter these so that only certain logs are sent.
You can also specify these values when you create a NAT gateway or by editing one after it has been created. The following directions show how to enable logging for an existing NAT gateway.
In the Google Cloud console, in the Navigation menu (), click Network services > Cloud NAT.
Click on the nat-config gateway and then click Edit.
Click the Advanced configurations dropdown to open that section.
For Logging, select Translation and errors and then click Save.
NAT logging in Cloud Logging
Now that you have set up Cloud NAT logging for the nat-config gateway, let's find out where we can view our logs.
Click on nat-config to expose its details. Then click the link to Logs Explorer.
This will open a new tab with Logs Explorer.
You will see that there aren't any logs yet—that's because we just enabled this feature for the gateway.
Note: Keep this tab open and return to your other Google Cloud console tab.
Generating logs
As a reminder, Cloud NAT logs are generated for the following sequences:
When a network connection using NAT is created.
When a packet is dropped because no port was available for NAT.
Let's connect the host to the internal VM again to see if any logs are generated.
In Cloud Shell for vm-internal, to try to re-synchronize the package index of vm-internal, run the following command:
Try to re-synchronize the package index of vm-internal by running the following:
sudo apt-get update
The output should look like this (example output):
...
Reading package lists... Done
To return to your Cloud Shell instance, run the following command:
exit
Let's see if opening up this connection revealed anything new in our logs.
Viewing Logs
Return to your Observability Logging tab and in the navigation menu, click Logs Explorer.
You should see two new logs that were generated after connecting to the internal VM.
Note: You may need to wait for a few minutes. If you are still unable to see the logs, repeat step 1 to step 4, from the Generating logs section, and then refresh the logging page.
As we see, the logs give us details on the VPC network we connected to and the connection method we used. Feel free to expand different labels and details.
Task 5. Review
You created vm-internal, an instance with no external IP address, and connected to it securely using an IAP tunnel. Then you enabled Private Google Access, configured a NAT gateway, and verified that vm-internal can access Google APIs and services and other public IP addresses.
VM instances without external IP addresses are isolated from external networks. Using Cloud NAT, these instances can access the internet for updates and patches, and in some cases, for bootstrapping. As a managed service, Cloud NAT provides high availability without user management and intervention.
IAP uses your existing project roles and permissions when you connect to VM instances. By default, instance owners are the only users that have the IAP Secured Tunnel User role.
Private Google Access and Google Cloud NAT are two Google Cloud features that provide network connectivity solutions, while their equivalents in Microsoft Azure are Private Link and Azure NAT Gateway.
Here is a recap of the similarities and differences between these services:
Similarities
Both platforms enable private access to cloud resources over private IP addresses, allowing customers to access services privately, without going through the public internet.
Both cloud platforms improve security by limiting exposure to the public internet and enabling tighter access controls.
Both Azure Private Link and Private Google Access use a similar architecture, where the customer's virtual network is connected to the cloud service provider's network via a private connection.
Both platforms provide Network Address Translation (NAT) services in the cloud, allowing customers to share a limited number of public IP addresses among multiple resources.
Differences
Google Cloud NAT is a feature that provides outbound NAT services for instances without public IP addresses, while Azure NAT Gateway is an Azure feature that provides outbound NAT services for virtual networks.
Google Cloud NAT supports one-to-many NAT and many-to-one NAT configurations, while Azure NAT Gateway only supports one-to-many NAT.
Google Cloud NAT uses a single NAT IP address for all instances using the service, while Azure NAT Gateway allows customers to specify a pool of public IP addresses for NAT.
Private Google Access allows customers to access Google services privately from within a VPC network, while Private Link is an Azure feature that enables access to Azure services privately.
Private Google Access allows customers to access Google services using private IP addresses, while Private Link enables customers to access Azure services using Azure Private Endpoints, which are virtual network interfaces for the service.
End your lab
When you have completed your lab, click End Lab. Google Skills removes the resources you’ve used and cleans the account for you.
You will be given an opportunity to rate the lab experience. Select the applicable number of stars, type a comment, and then click Submit.
The number of stars indicates the following:
1 star = Very dissatisfied
2 stars = Dissatisfied
3 stars = Neutral
4 stars = Satisfied
5 stars = Very satisfied
You can close the dialog box if you don't want to provide feedback.
For feedback, suggestions, or corrections, please use the Support tab.
Copyright 2026 Google LLC All rights reserved. Google and the Google logo are trademarks of Google LLC. All other company and product names may be trademarks of the respective companies with which they are associated.
Vorbereitung
Labs erstellen ein Google Cloud-Projekt und Ressourcen für einen bestimmten Zeitraum
Labs haben ein Zeitlimit und keine Pausenfunktion. Wenn Sie das Lab beenden, müssen Sie von vorne beginnen.
Klicken Sie links oben auf dem Bildschirm auf Lab starten, um zu beginnen
Privates Surfen verwenden
Kopieren Sie den bereitgestellten Nutzernamen und das Passwort für das Lab
Klicken Sie im privaten Modus auf Konsole öffnen
In der Konsole anmelden
Melden Sie sich mit Ihren Lab-Anmeldedaten an. Wenn Sie andere Anmeldedaten verwenden, kann dies zu Fehlern führen oder es fallen Kosten an.
Akzeptieren Sie die Nutzungsbedingungen und überspringen Sie die Seite zur Wiederherstellung der Ressourcen
Klicken Sie erst auf Lab beenden, wenn Sie das Lab abgeschlossen haben oder es neu starten möchten. Andernfalls werden Ihre bisherige Arbeit und das Projekt gelöscht.
Diese Inhalte sind derzeit nicht verfügbar
Bei Verfügbarkeit des Labs benachrichtigen wir Sie per E-Mail
Sehr gut!
Bei Verfügbarkeit kontaktieren wir Sie per E-Mail
Es ist immer nur ein Lab möglich
Bestätigen Sie, dass Sie alle vorhandenen Labs beenden und dieses Lab starten möchten
Privates Surfen für das Lab verwenden
Am besten führen Sie dieses Lab in einem Inkognito- oder privaten Browserfenster aus. So vermeiden Sie Konflikte zwischen Ihrem privaten Konto und dem Teilnehmerkonto, die zusätzliche Kosten für Ihr privates Konto verursachen könnten.
In this lab, you configure Private Google Access and Cloud NAT for a VM instance that doesn't have an external IP address. Then, you verify access to public IP addresses of Google APIs and services and other connections to the internet.
 ), click VPC network > VPC networks.
 ).
).


