


Before you begin
- Labs create a Google Cloud project and resources for a fixed time
- Labs have a time limit and no pause feature. If you end the lab, you'll have to restart from the beginning.
- On the top left of your screen, click Start lab to begin
Add Cloud Data Fusion API Service Agent role to service account
/ 25
Setup Cloud Storage bucket
/ 25
Deploy and execute the pipeline
/ 50

In this lab you will learn how to build a reusable pipeline that reads data from Cloud Storage, performs data quality checks, and writes to Cloud Storage.
For each lab, you get a new Google Cloud project and set of resources for a fixed time at no cost.
Sign in to Google Skills using an incognito window.
Note the lab's access time (for example, 02:00:00), and make sure you can finish within that time.
There is no pause feature. You can restart if needed, but you have to start at the beginning.
When ready, click Start lab.
Note your lab credentials (Username and Password). You will use them to sign in to the Google Cloud console.
Click Open Google console.
Click Use another account and copy/paste credentials for this lab into the prompts.
If you use other credentials, you'll receive errors or incur charges.
Accept the terms and skip the recovery resource page.
Since this is a temporary account, which will last only as long as this lab:
 ) at the top-left.
Cloud Shell is a virtual machine that contains development tools. It offers a persistent 5-GB home directory and runs on Google Cloud. Cloud Shell provides command-line access to your Google Cloud resources. gcloud is the command-line tool for Google Cloud. It comes pre-installed on Cloud Shell and supports tab completion.
Click the Activate Cloud Shell button (
Click Continue.
It takes a few moments to provision and connect to the environment. When you are connected, you are also authenticated, and the project is set to your PROJECT_ID.
(Output)
(Example output)
(Output)
(Example output)
Before you begin working on Google Cloud, you must ensure that your project has the correct permissions within Identity and Access Management (IAM).
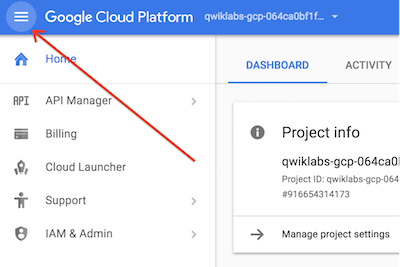
In the Google Cloud console, on the Navigation menu (
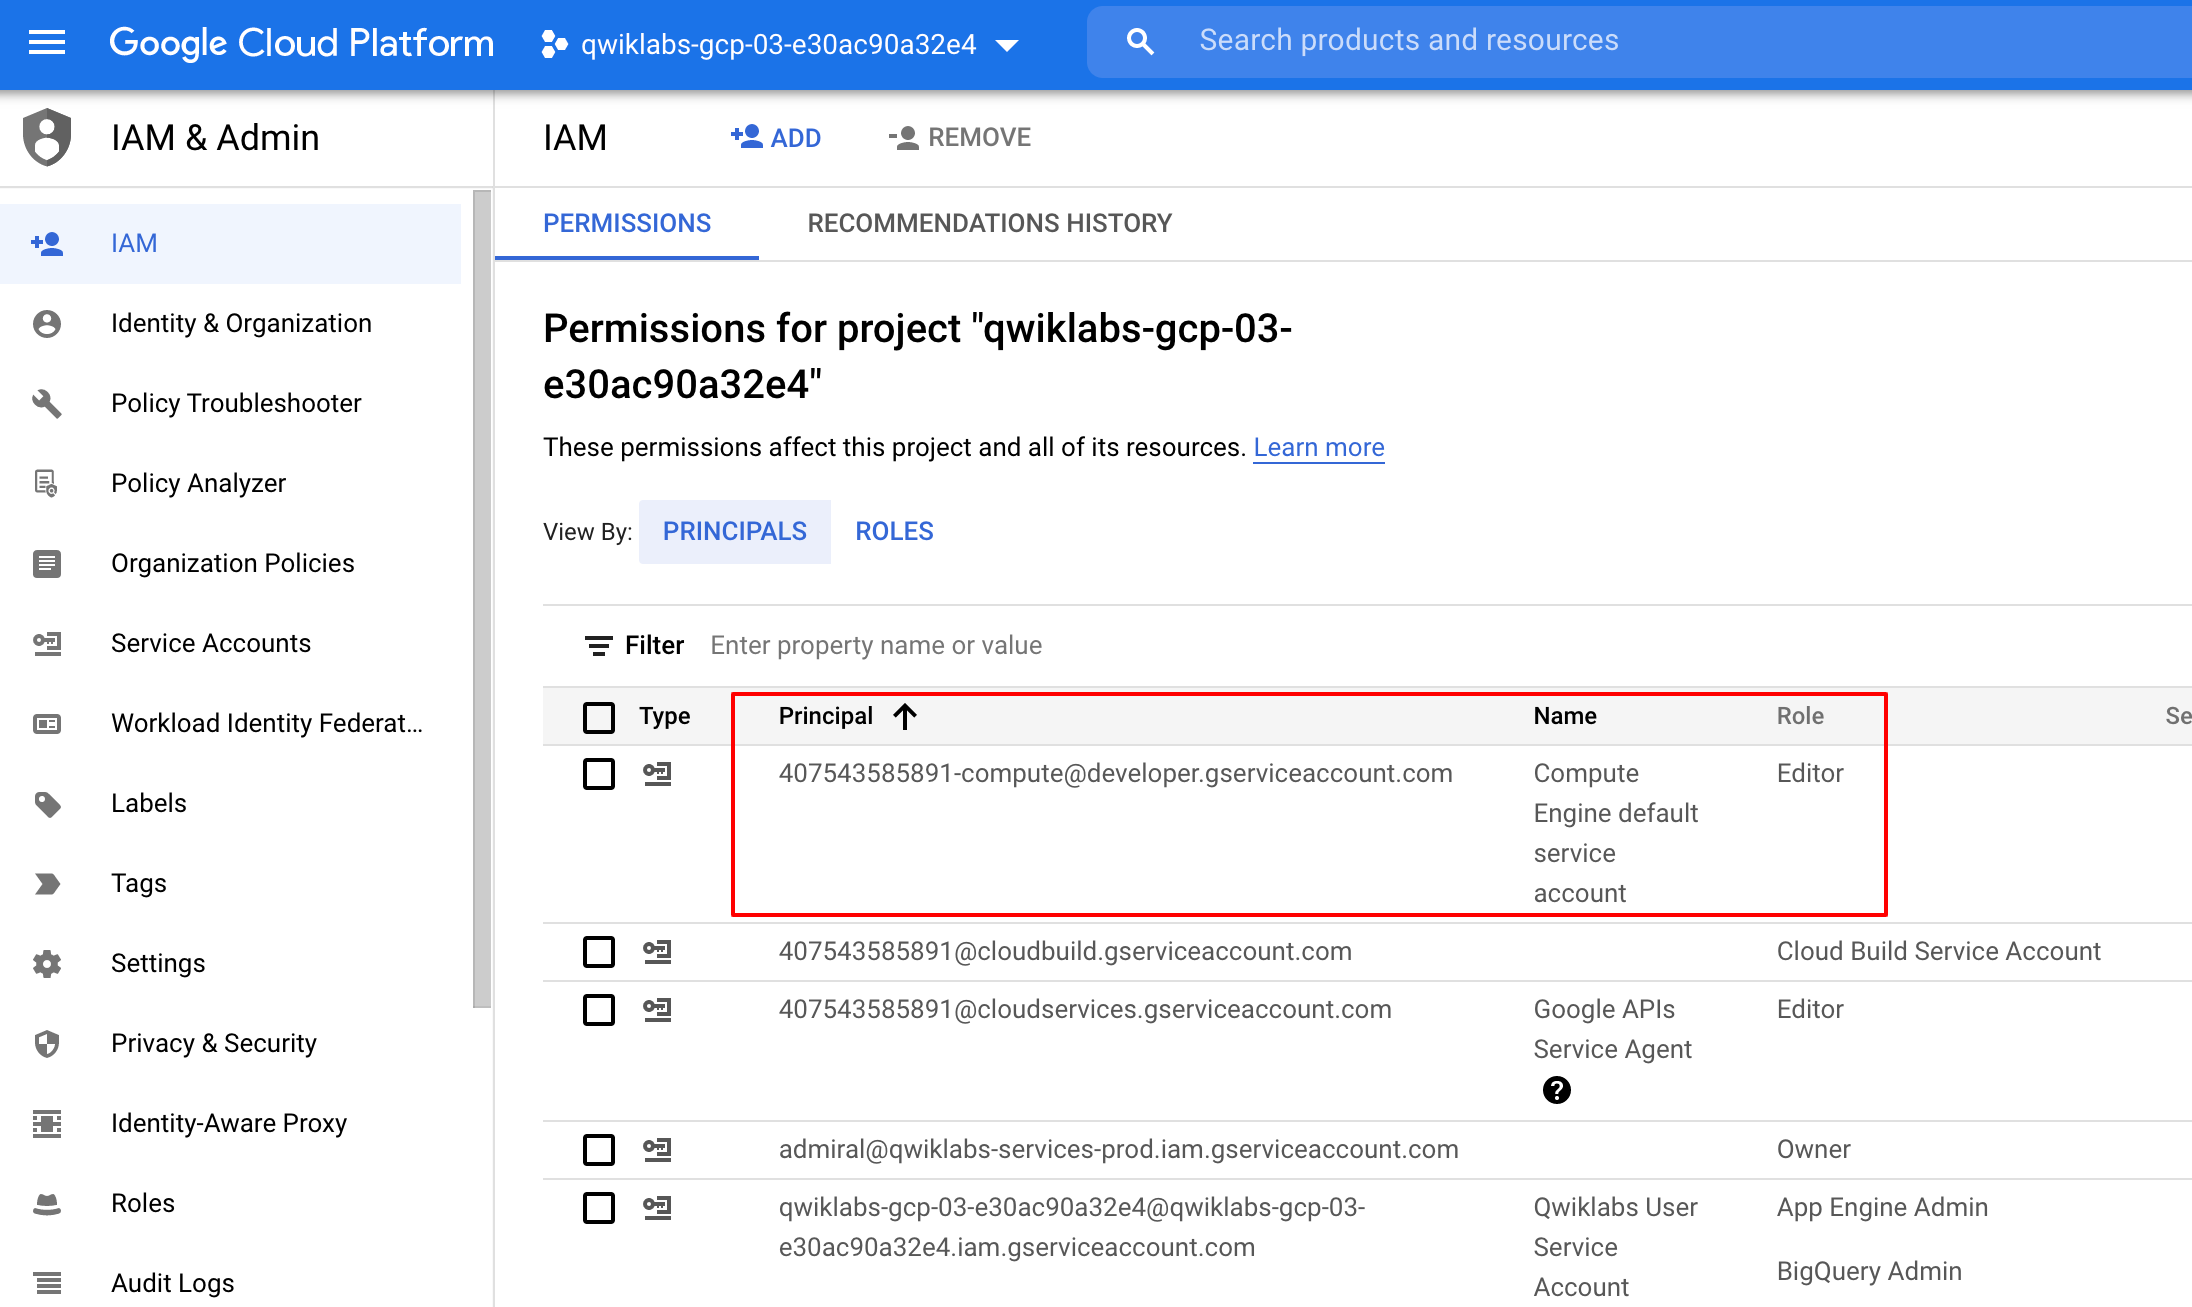
Confirm that the default compute Service Account {project-number}-compute@developer.gserviceaccount.com is present and has the editor role assigned. The account prefix is the project number, which you can find on Navigation menu > Cloud overview.
If the account is not present in IAM or does not have the editor role, follow the steps below to assign the required role.
In the Google Cloud console, on the Navigation menu, click Cloud overview.
From the Project info card, copy the Project number.
On the Navigation menu, click IAM & Admin > IAM.
At the top of the IAM page, click Add.
For New principals, type:
Replace {project-number} with your project number.
For Select a role, select Basic (or Project) > Editor.
Click Save.
Next, you will grant permissions to the service account associated with the instance, using the following steps.
From the Google Cloud console, navigate to the IAM & Admin > IAM.
Confirm that the Compute Engine Default Service Account {project-number}-compute@developer.gserviceaccount.com is present, copy the Service Account to your clipboard.
On the IAM Permissions page, click +Grant Access.
In the New principals field paste the service account.
Click into the Select a role field and start typing Cloud Data Fusion API Service Agent, then select it.
Click ADD ANOTHER ROLE.
Add the Dataproc Administrator role.
Click Save.
Click Check my progress to verify the objective.
In the console, on the Navigation menu, click IAM & admin > IAM.
Select the Include Google-provided role grants checkbox.
Scroll down the list to find the Google-managed Cloud Data Fusion service account that looks like service-{project-number}@gcp-sa-datafusion.iam.gserviceaccount.com and then copy the service account name to your clipboard.
Next, navigate to the IAM & admin > Service Accounts.
Click on the default compute engine account that looks like {project-number}-compute@developer.gserviceaccount.com, and select the Principals with access tab on the top navigation.
Click on the Grant Access button.
In the New Principals field, paste the service account you copied earlier.
In the Role dropdown menu, select Service Account User.
Click Save.
Next, you will create a Cloud Storage bucket in your project to be used later to store results when your pipeline runs.
In Cloud Shell, execute the following commands to create a new bucket:
The created bucket has the same name as your Project ID.
Click Check my progress to verify the objective.
Click the Argument setter action plugin and click Deploy.
In the Deploy window that opens, click Finish.
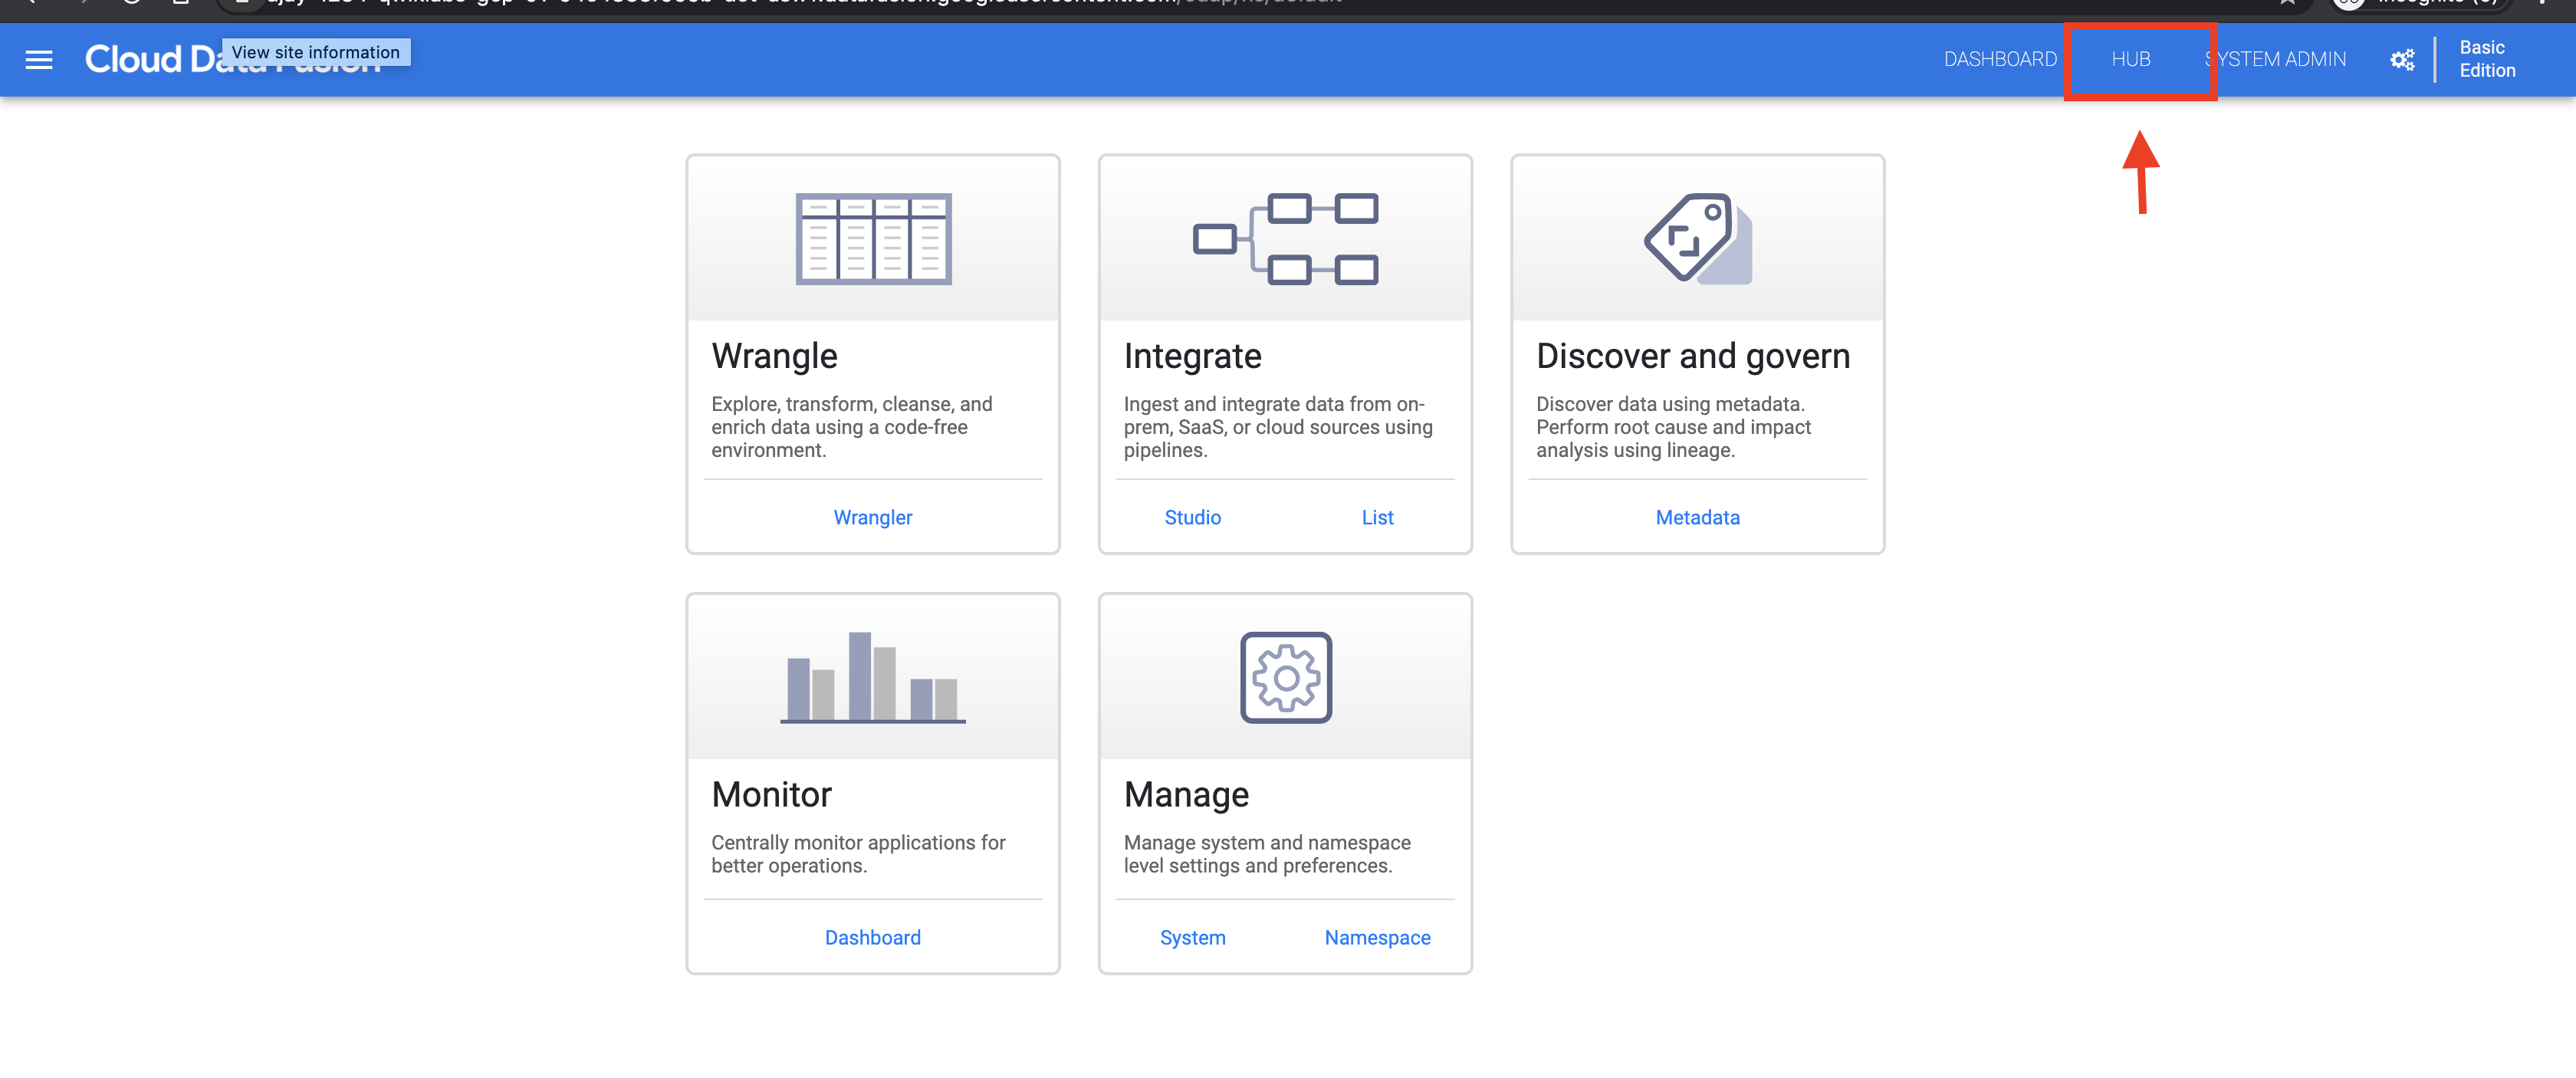
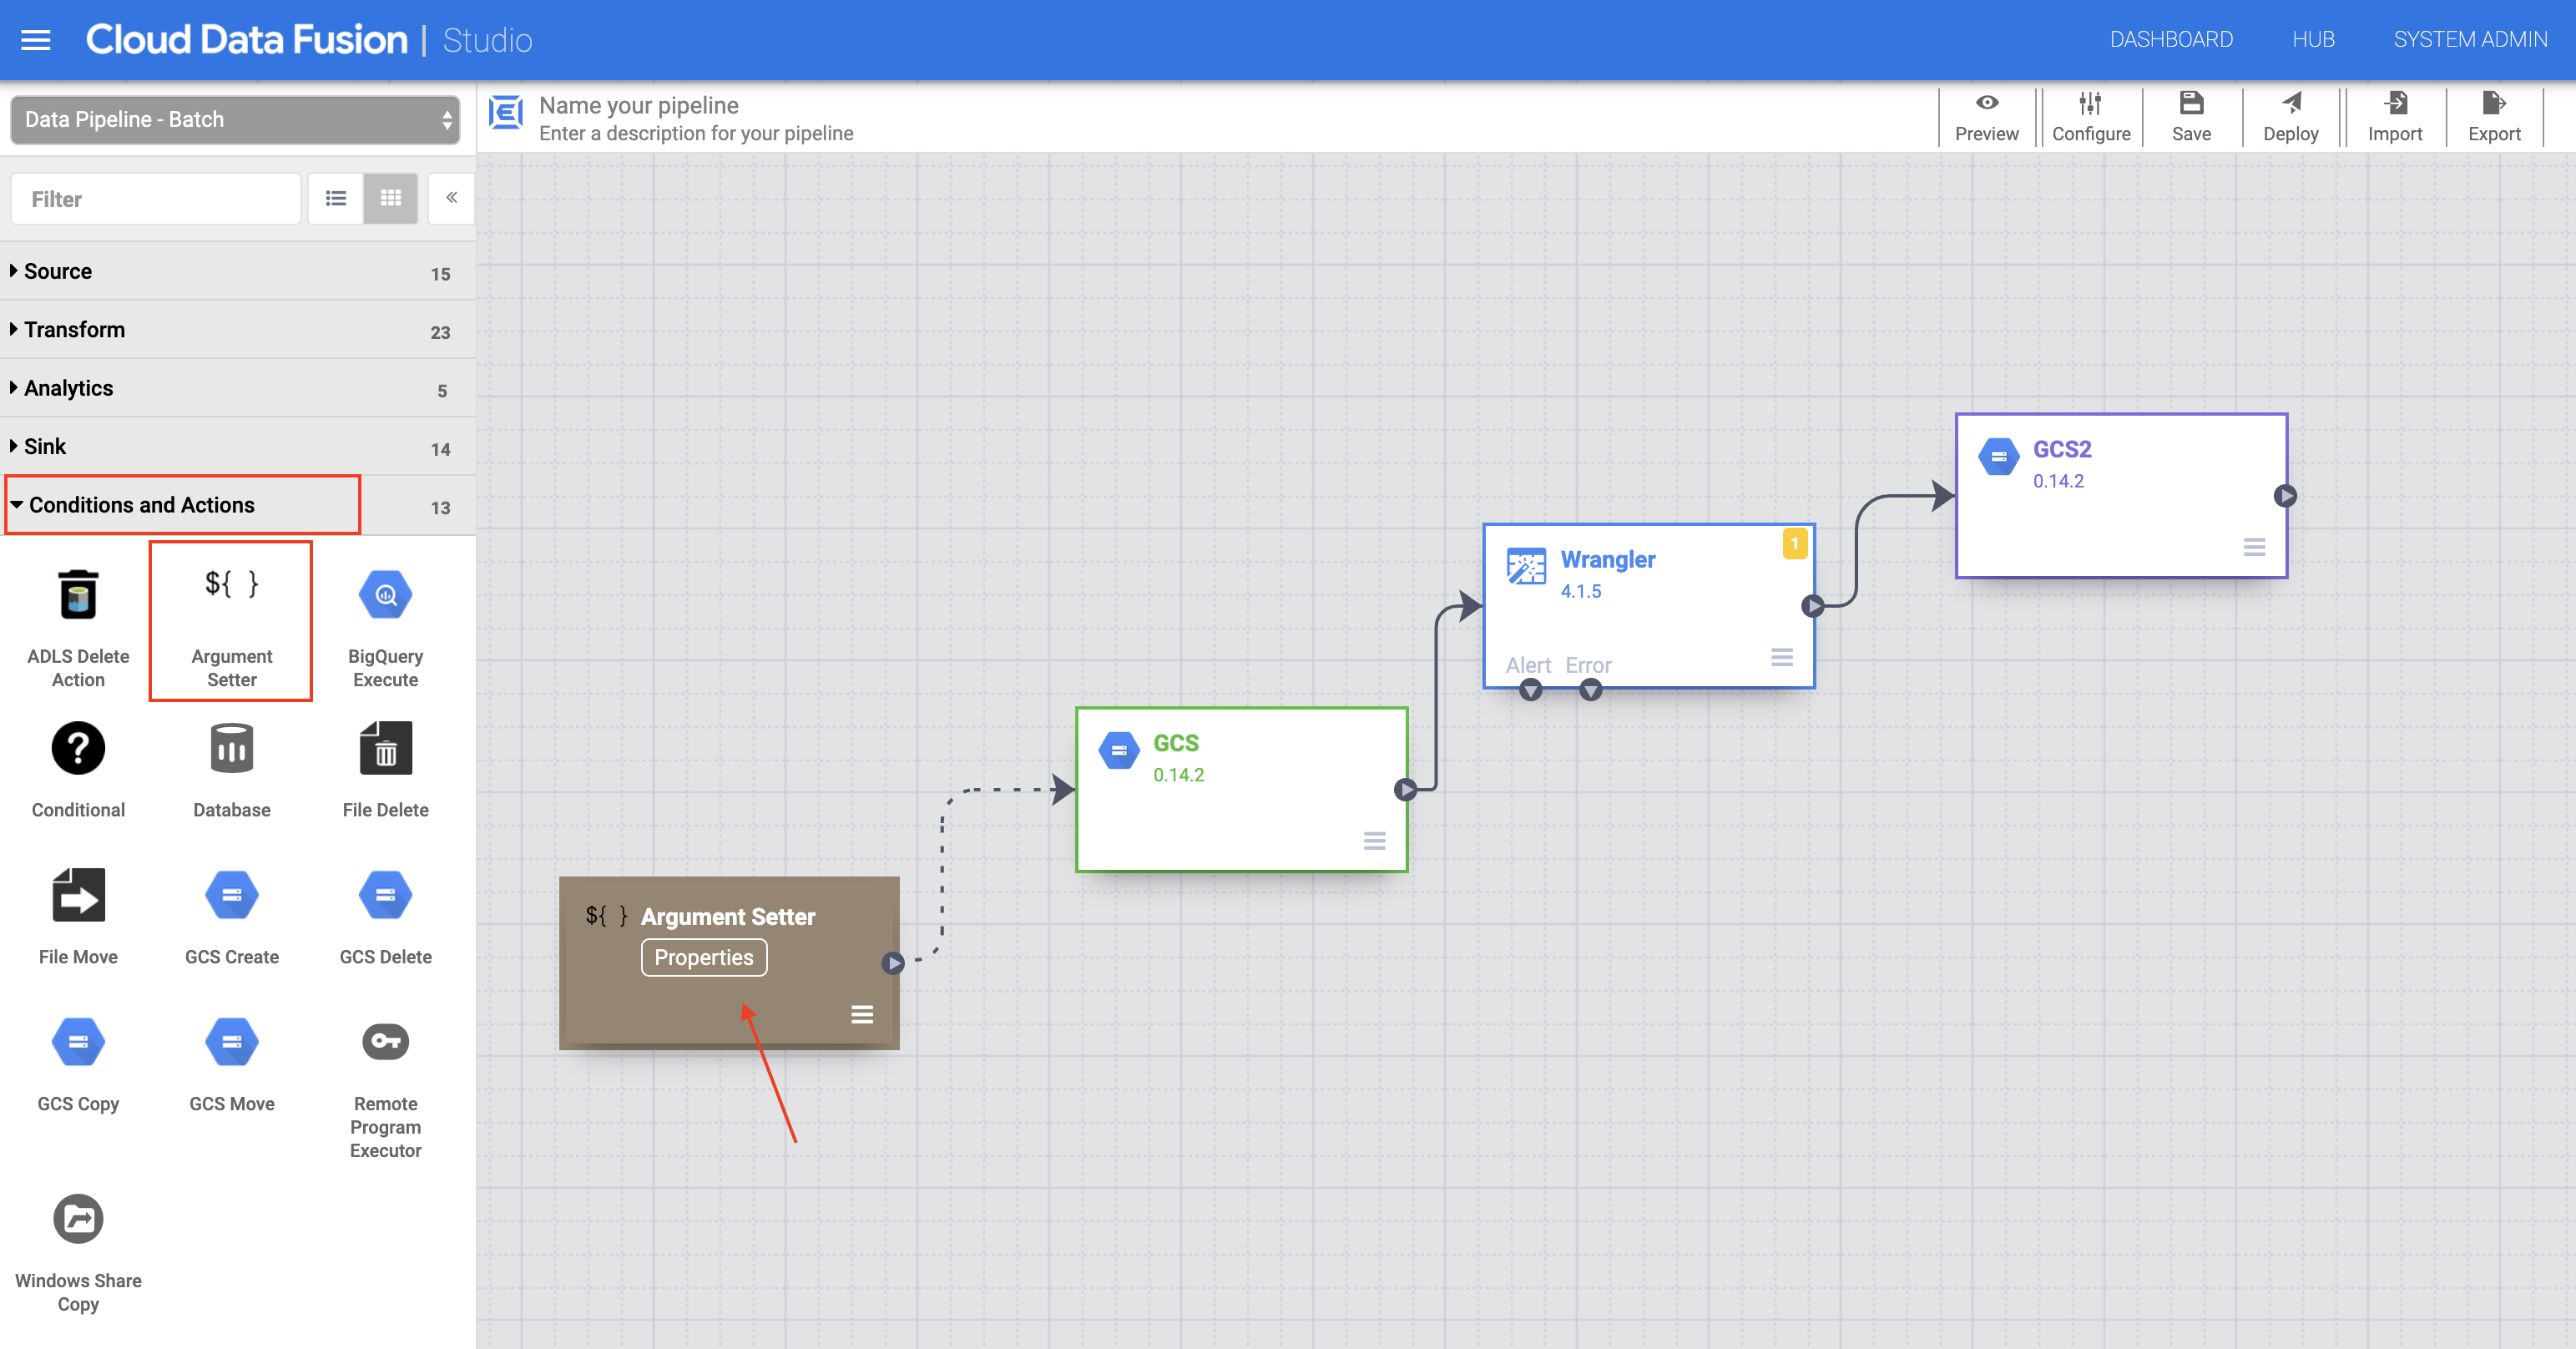
Click Create a pipeline. The Pipeline Studio page opens.
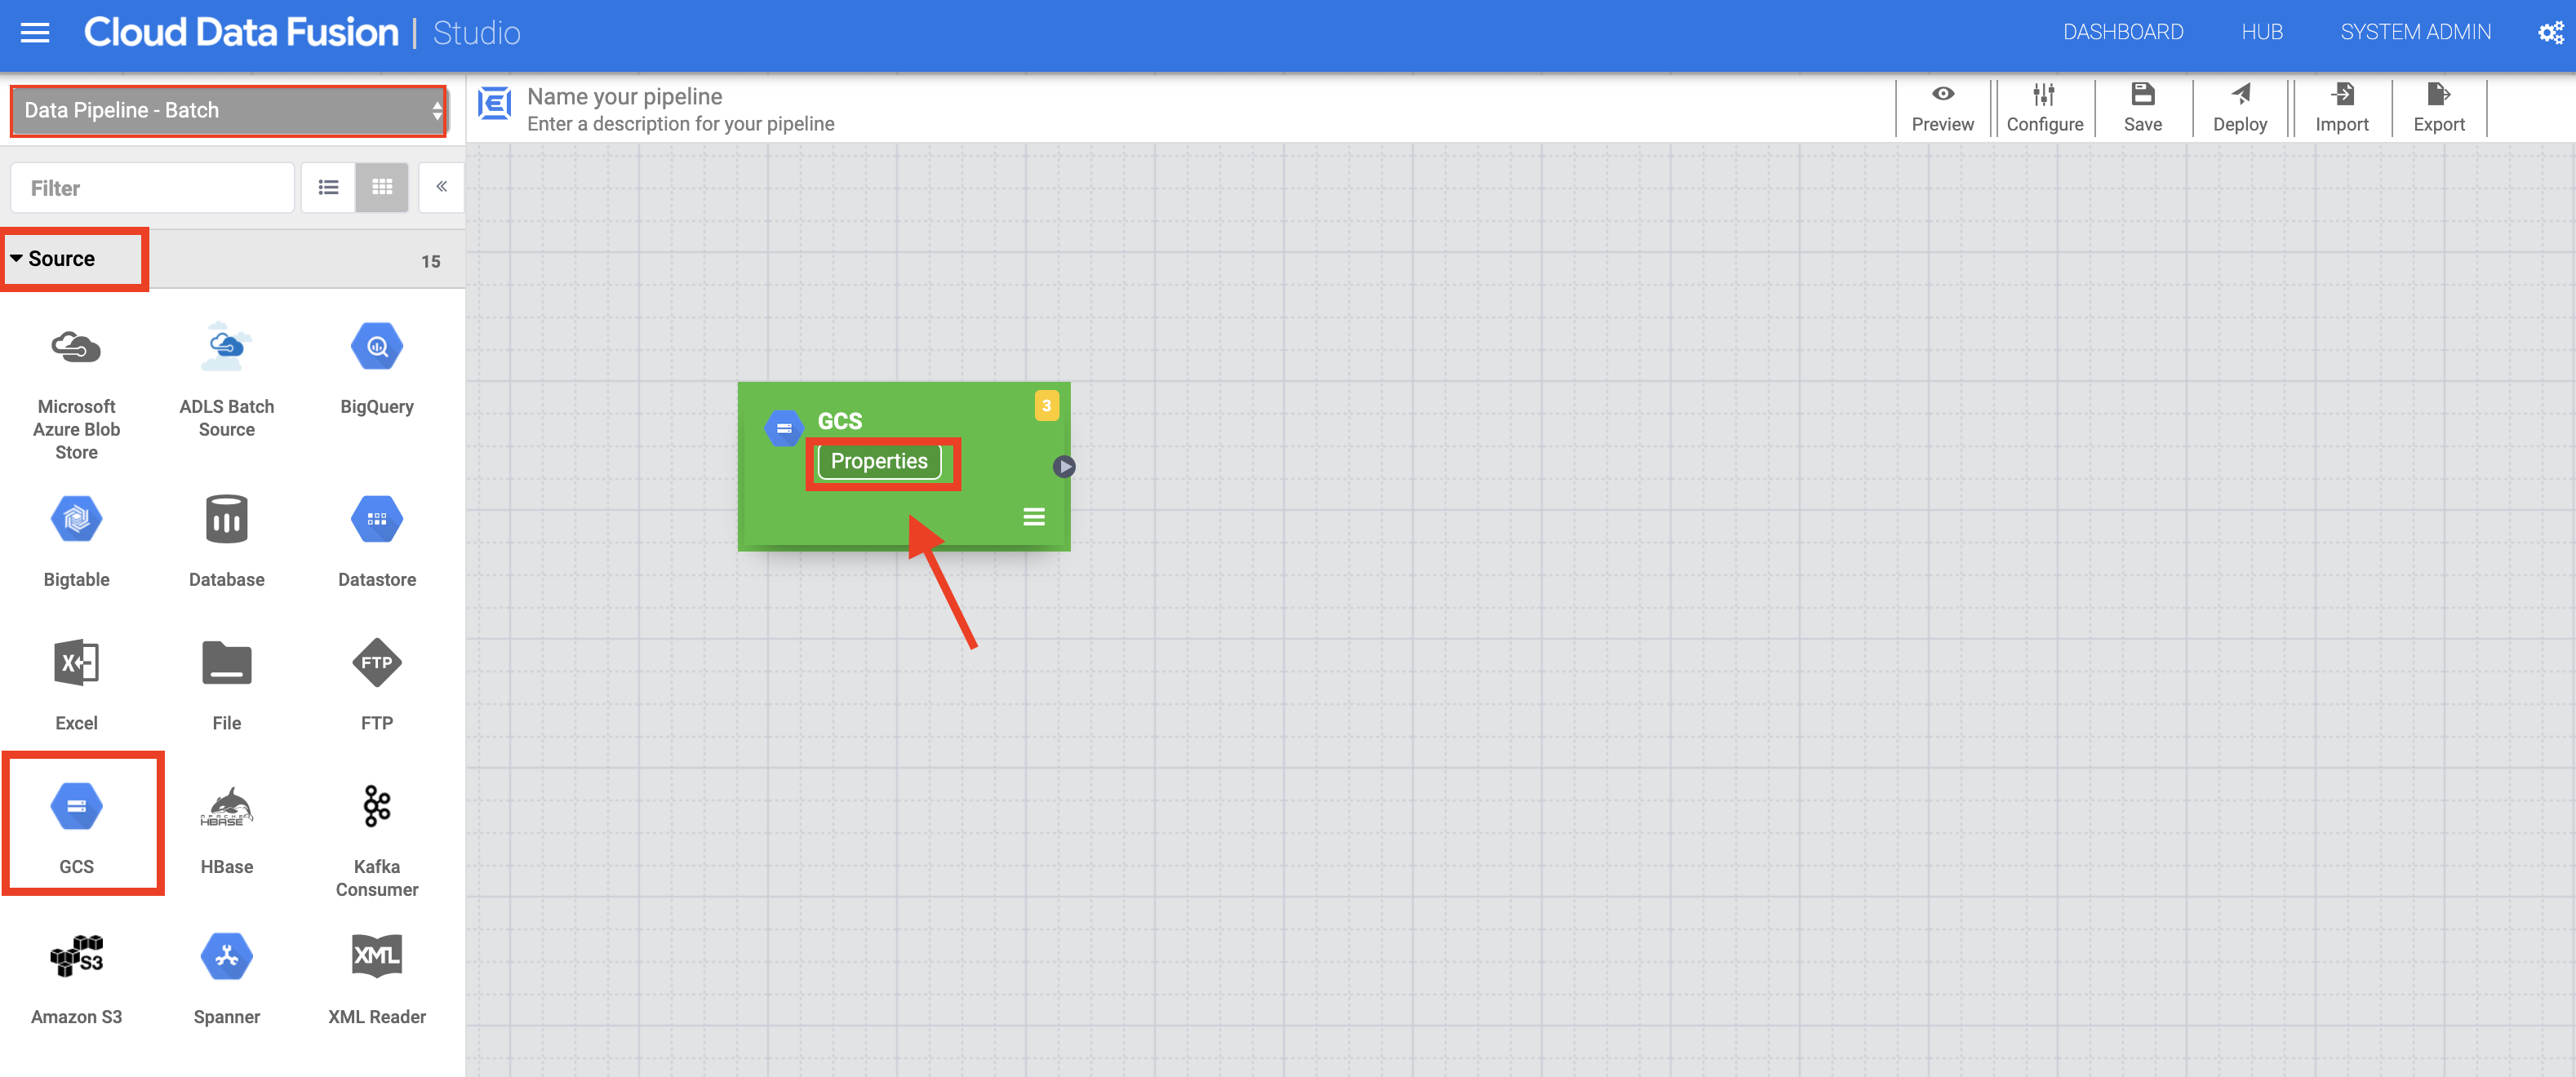
In the left panel of the Pipeline Studio page, using the Source drop-down menu, select Google Cloud Storage.
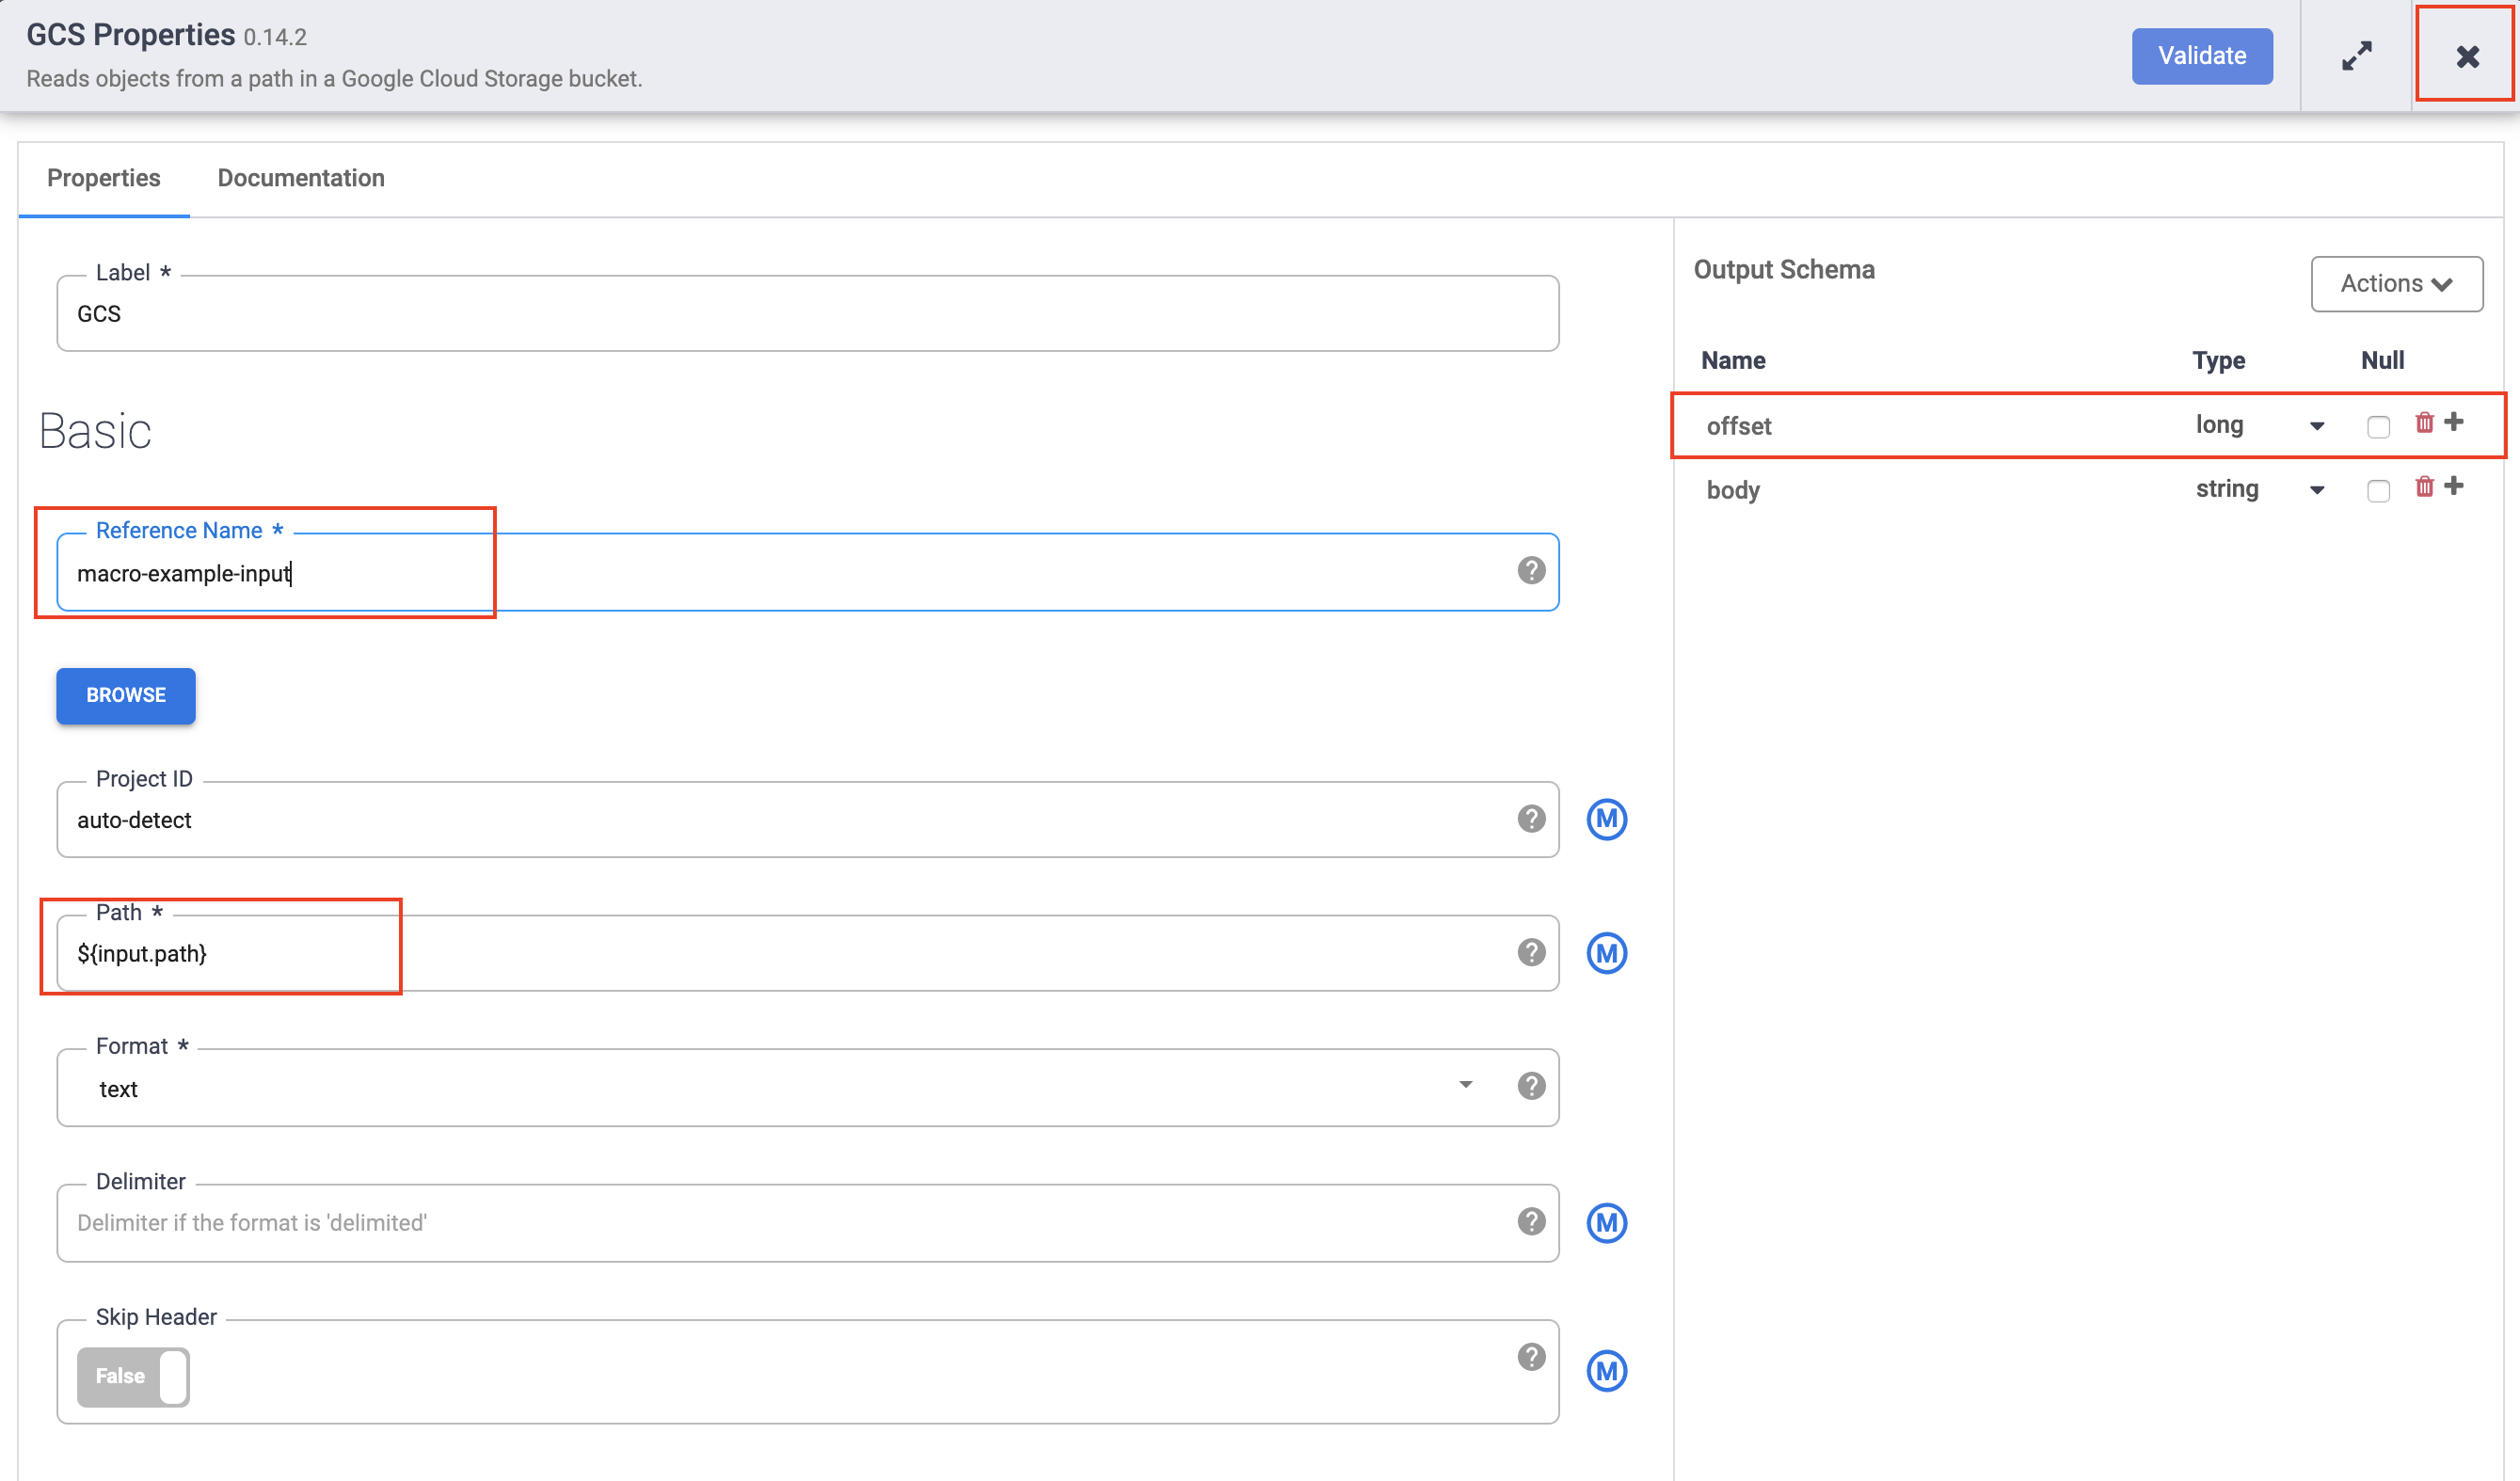
Hover over the Cloud Storage node and click the Properties button that appears.
In the Reference name field, type GCS1.
In the Path field, type ${input.path}. This macro controls what the Cloud Storage input path will be in the different pipeline runs.
In the Format field, select text.
In the right Output Schema panel, remove the offset field from the output schema by clicking the trash icon in the offset field row.
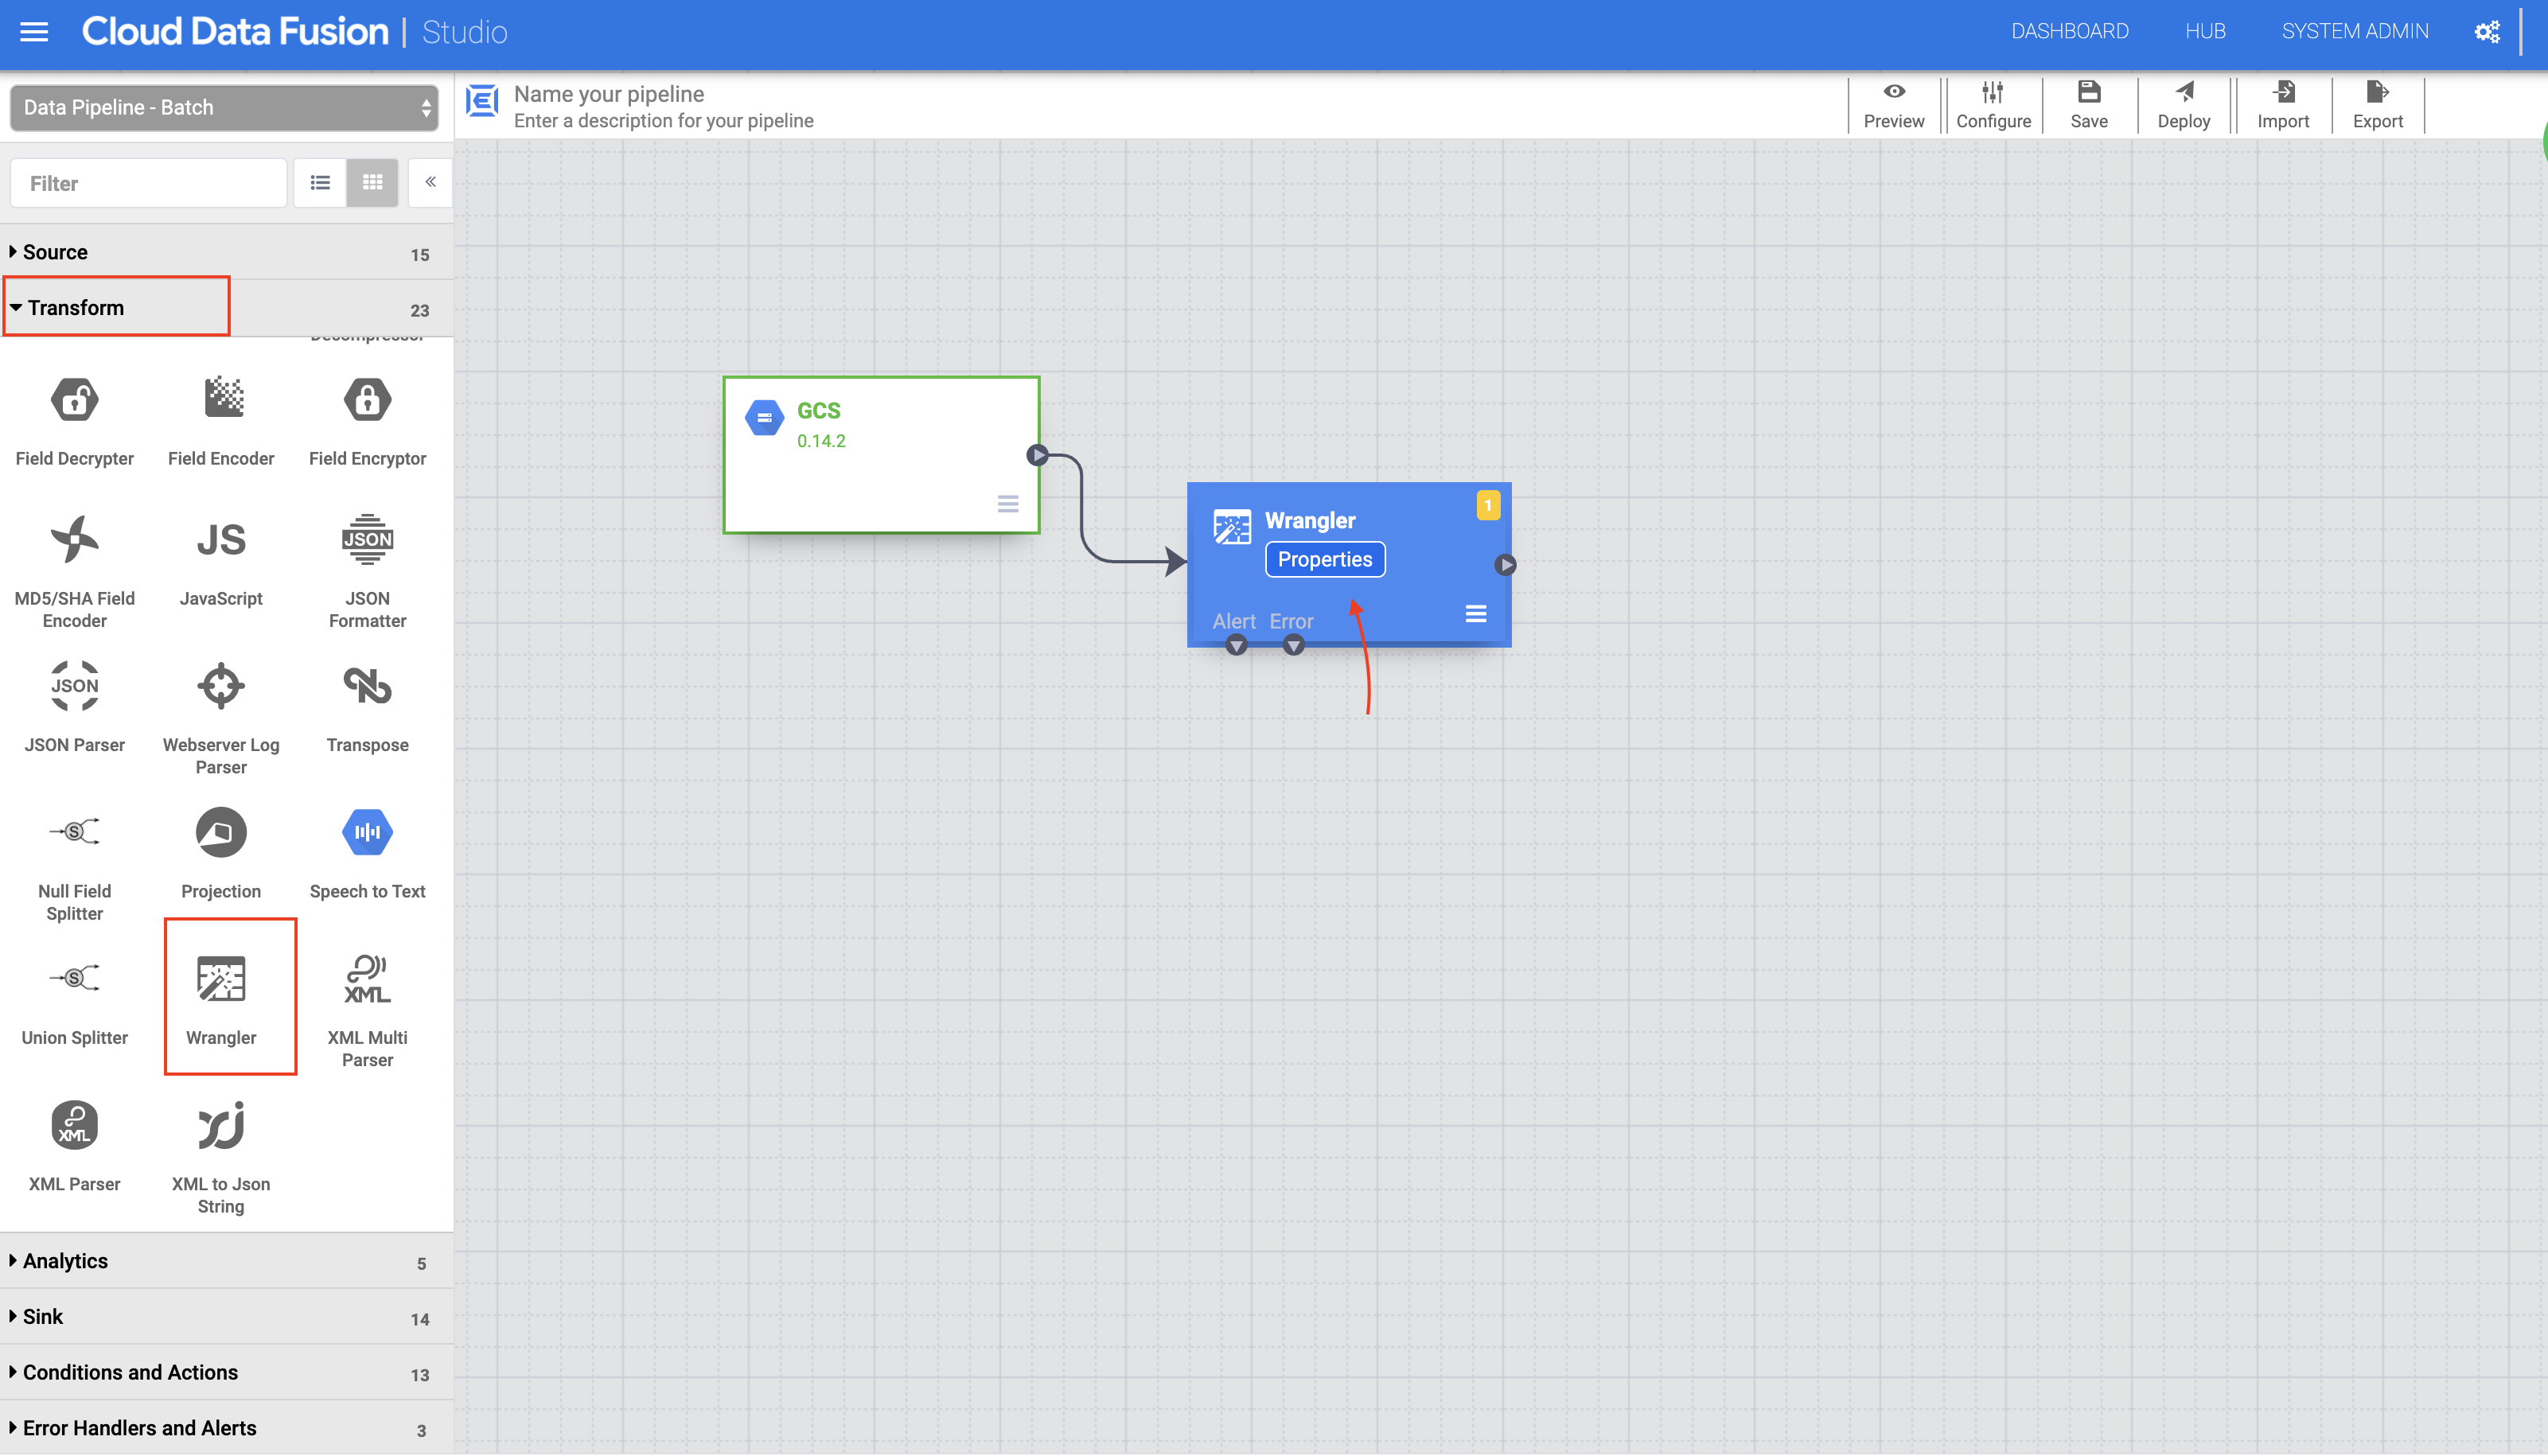
In the left panel of the Pipeline Studio page, using the Transform drop-down menu, select Wrangler.
In the Pipeline Studio canvas, drag an arrow from the Cloud Storage node to the Wrangler node.
Hover over the Wrangler node and click the Properties button that appears.
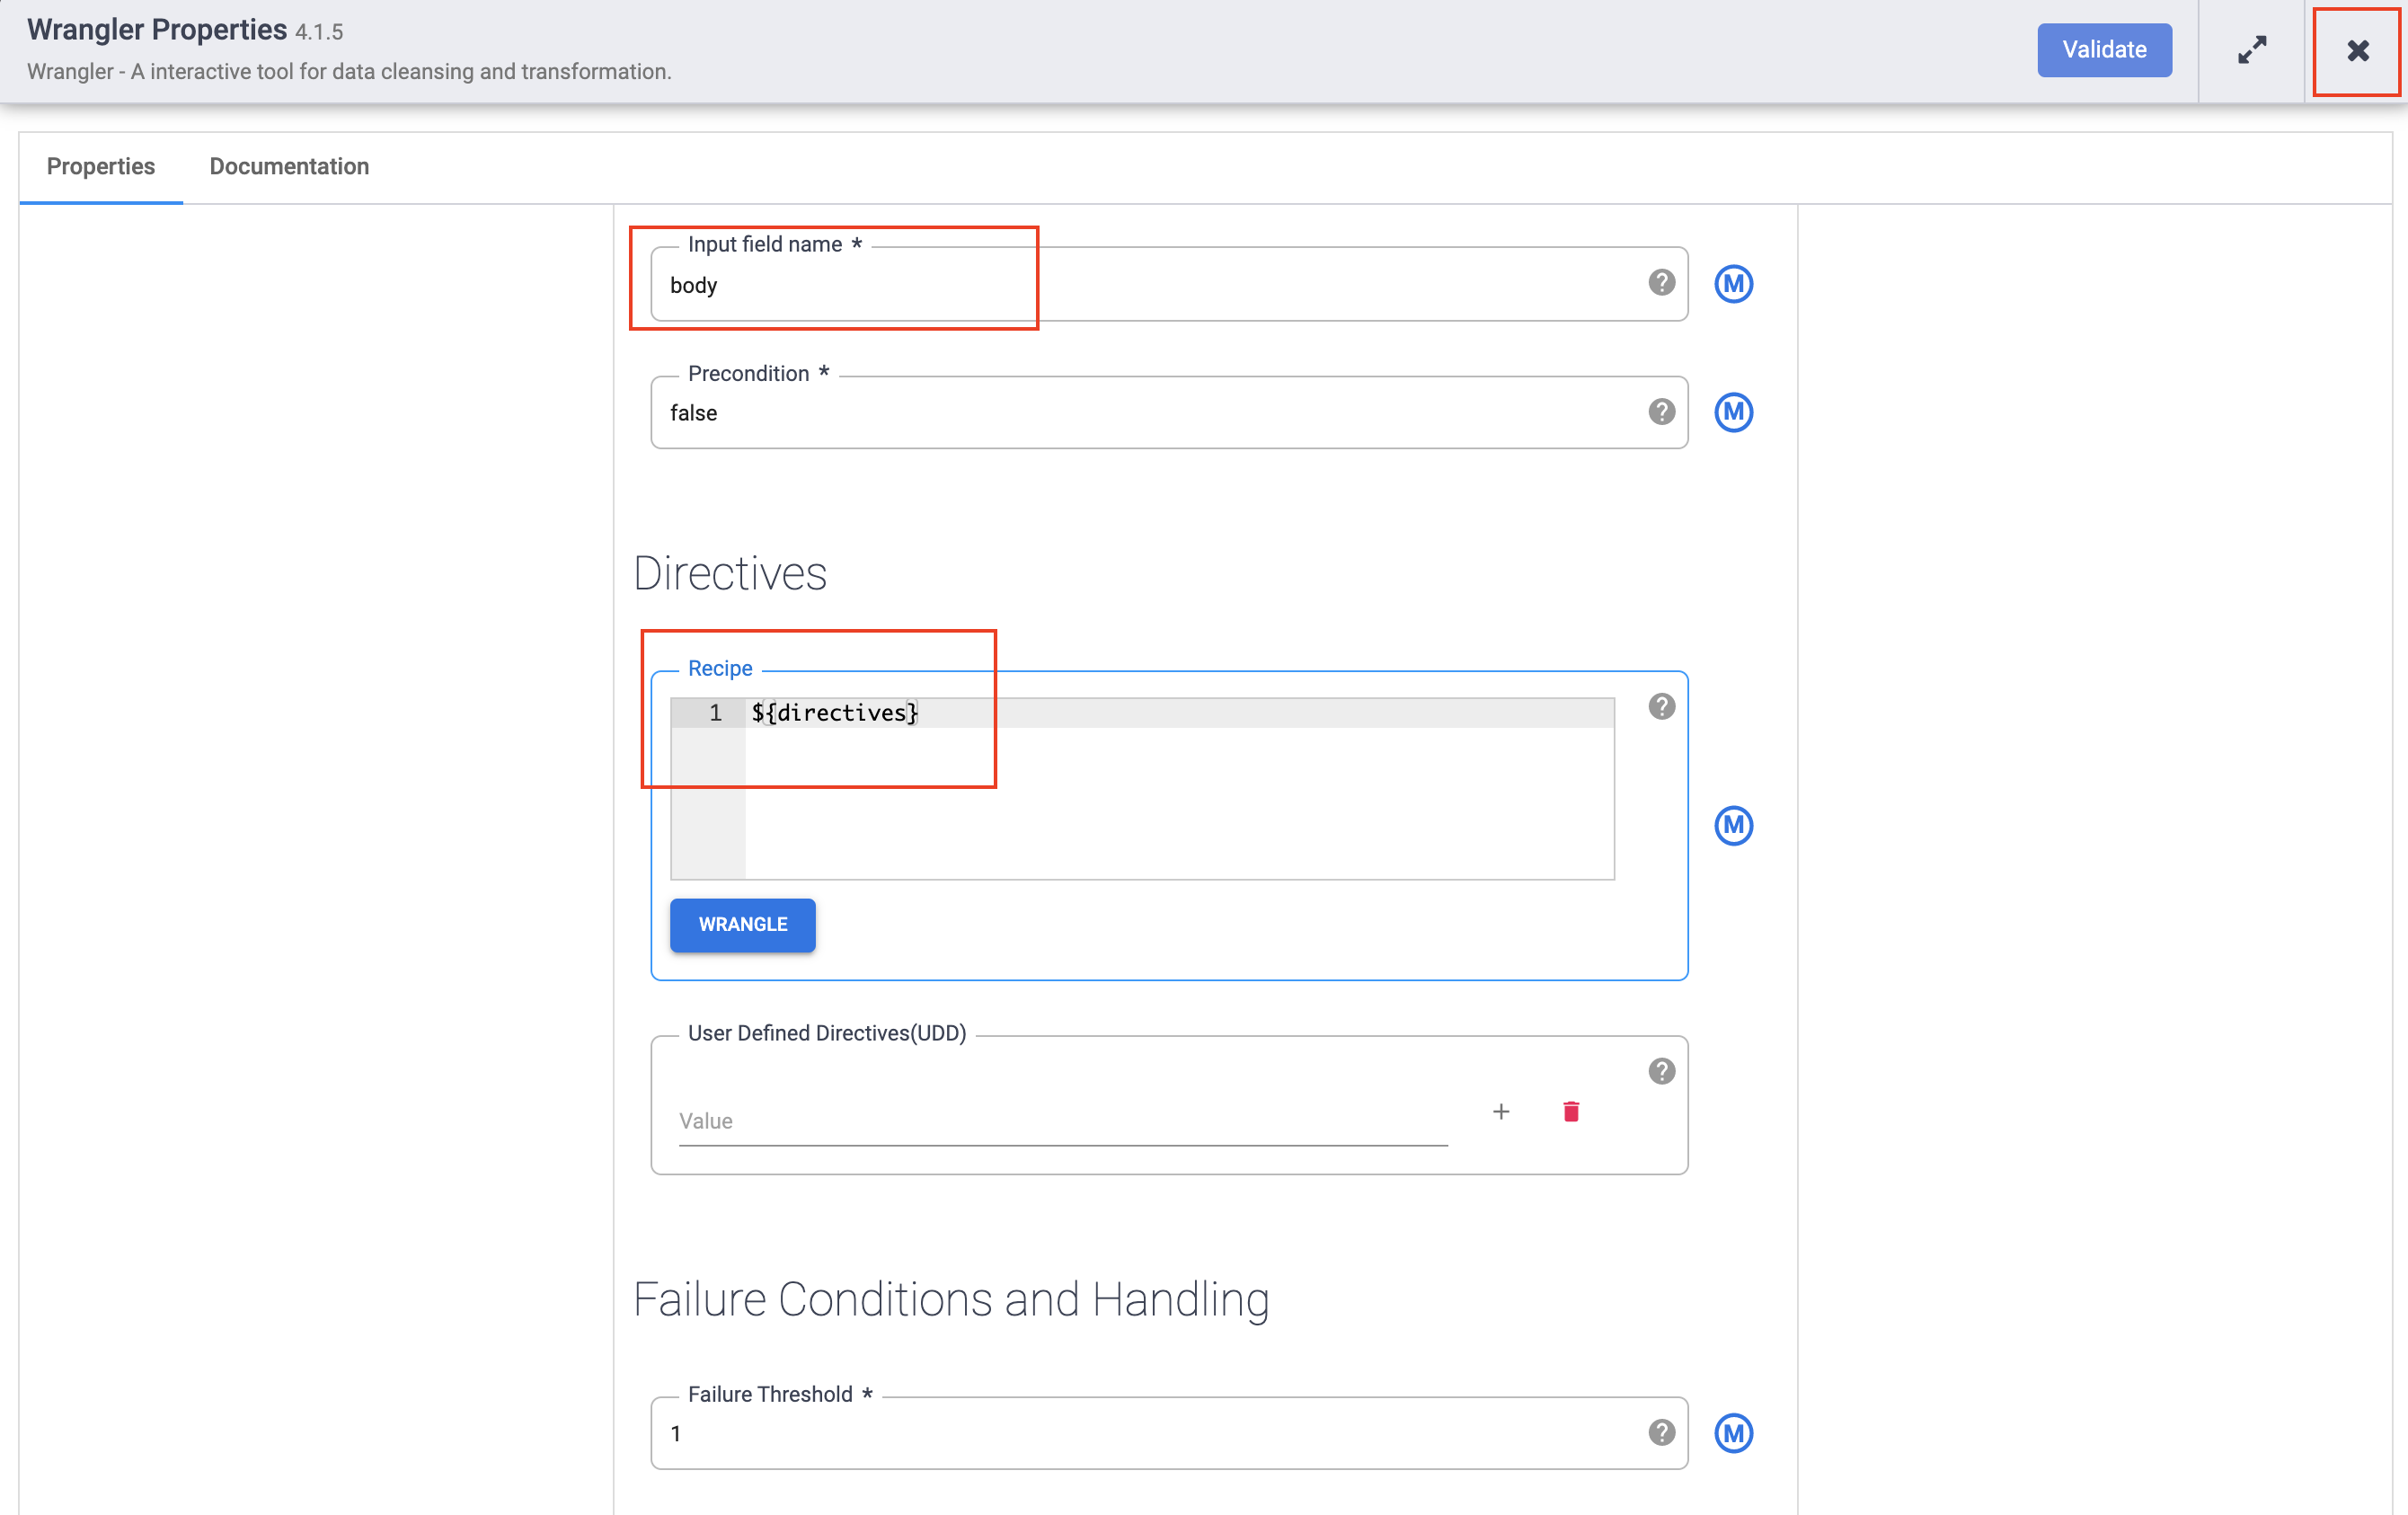
In the Input field name, type body.
In the Recipe field, type ${directives}. This macro controls what the transform logic will be in the different pipeline runs.
In the left panel of the Pipeline Studio page, using the Sink drop-down menu, select Cloud Storage.
On the Pipeline Studio canvas, drag an arrow from the Wrangler node to the Cloud Storage node you just added.
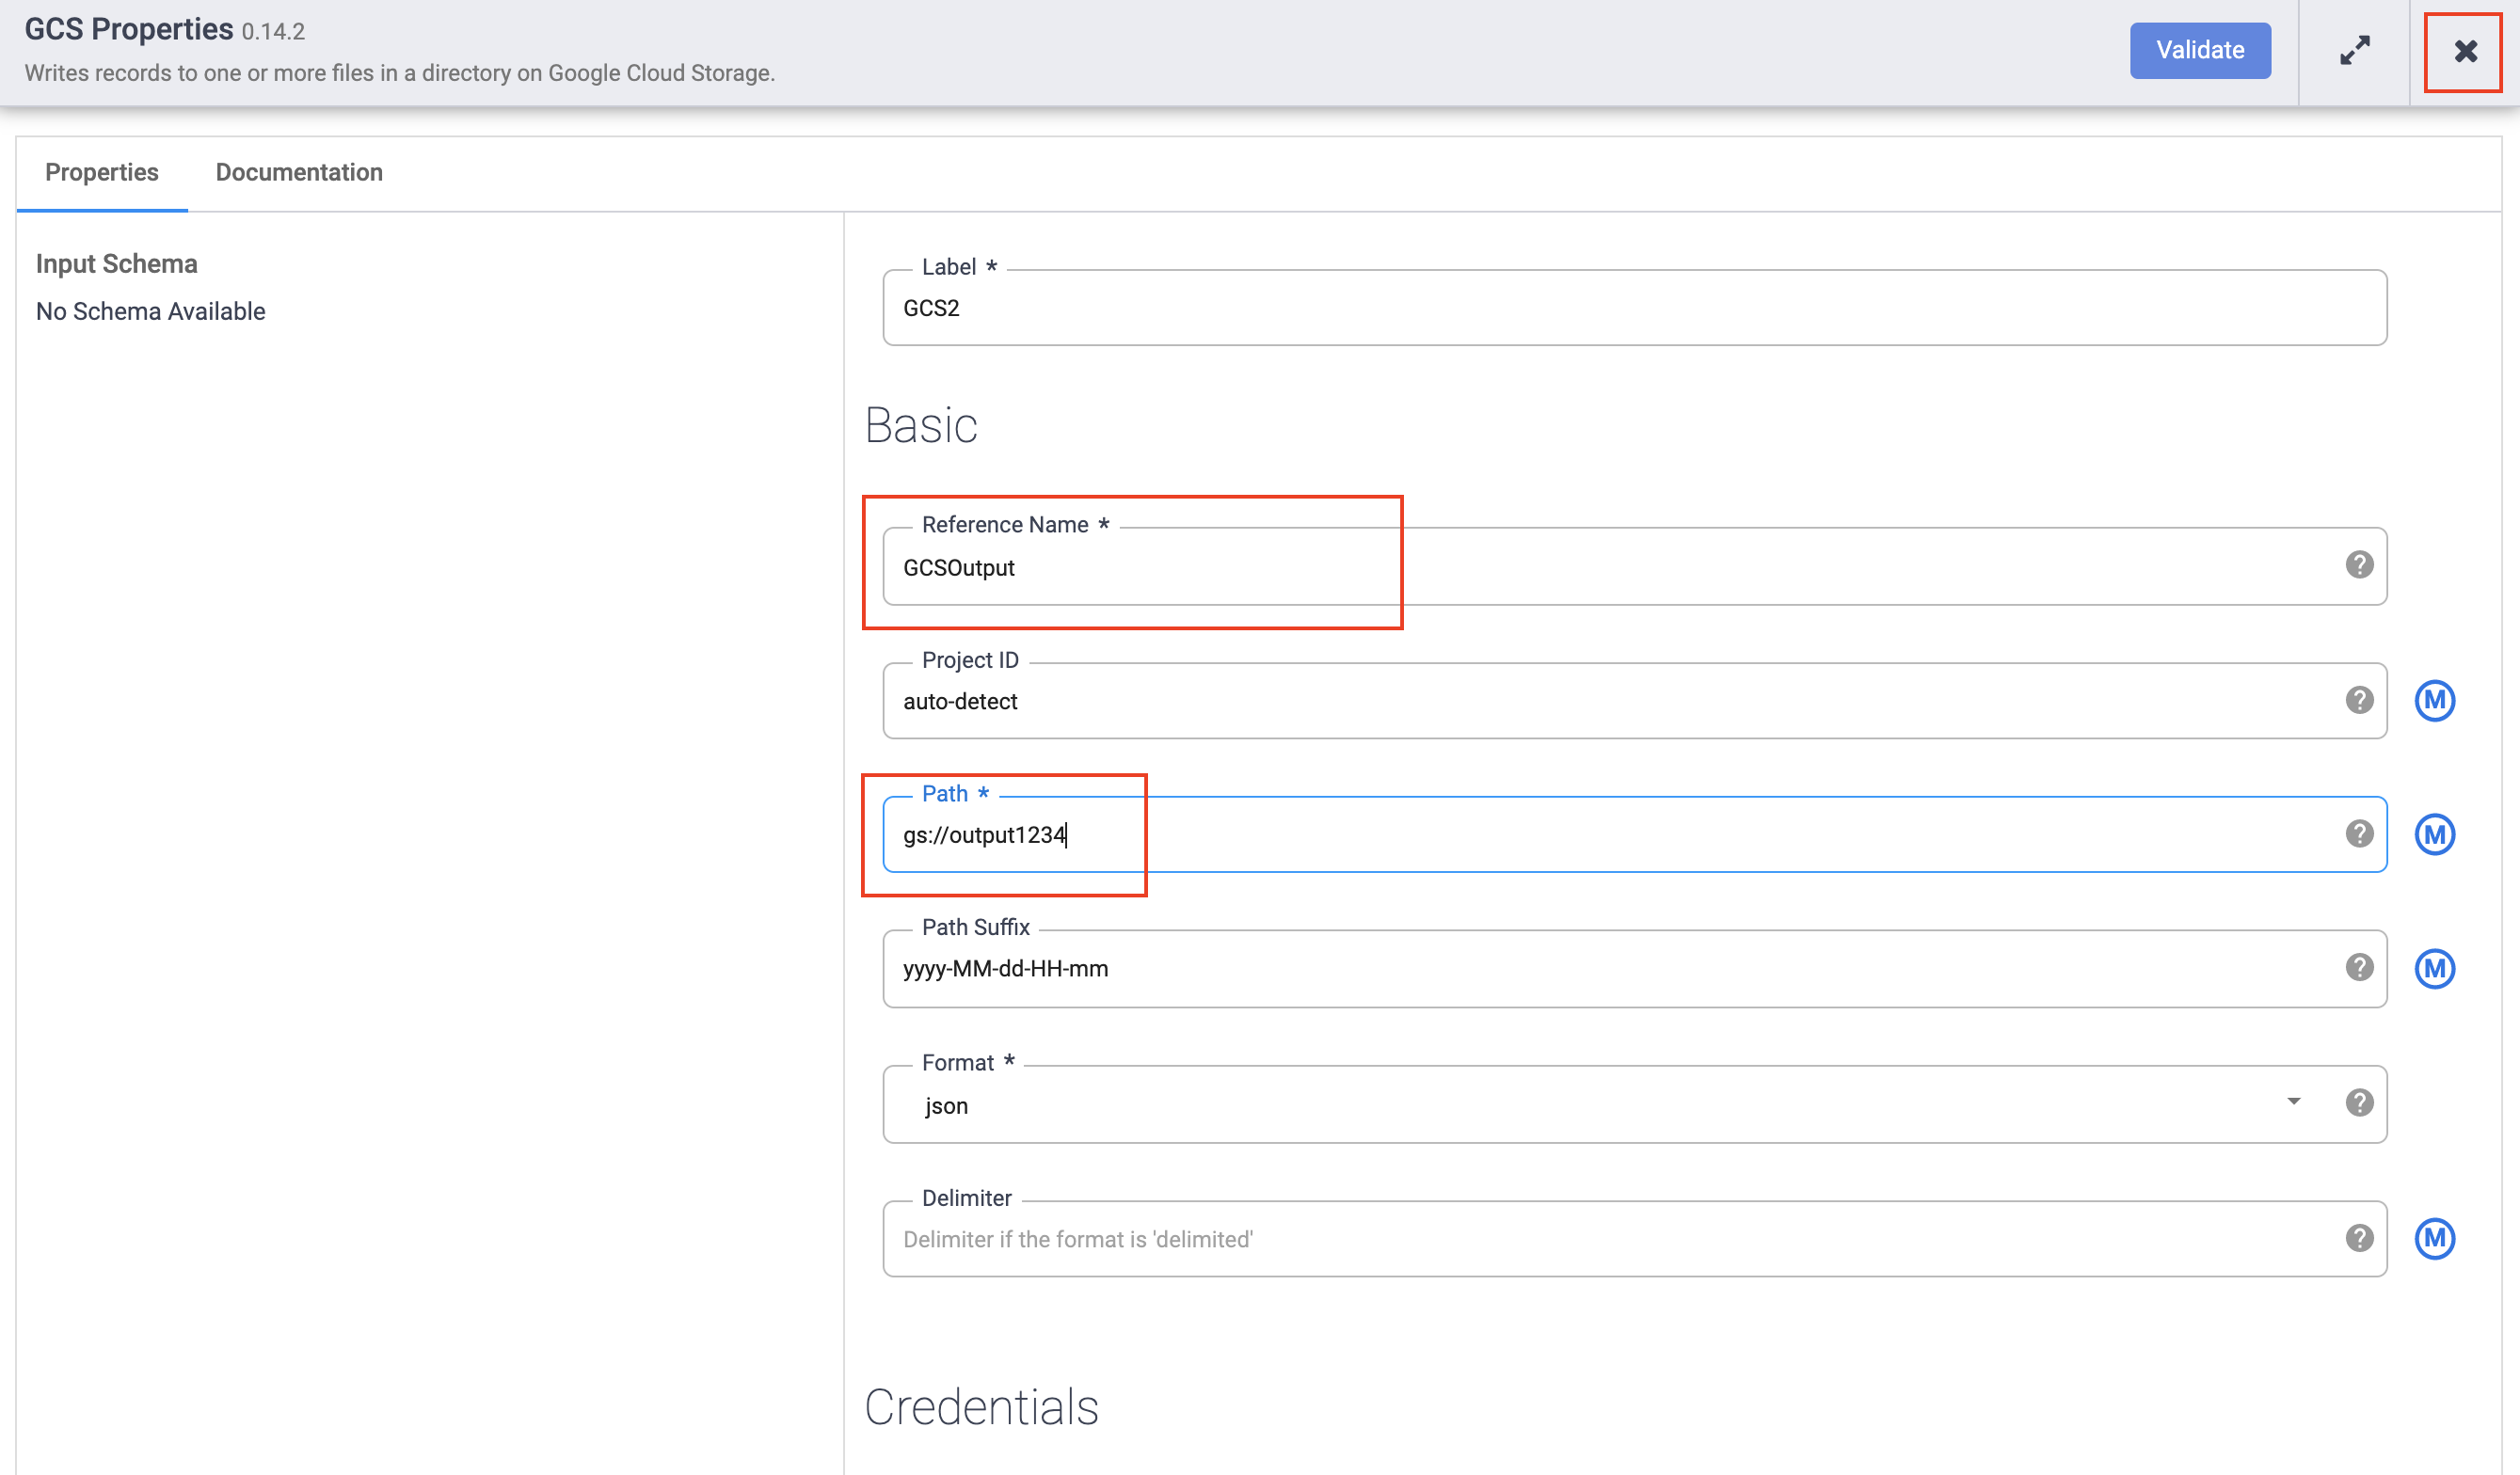
Hover over the Cloud Storage sink node and click the Properties button that appears.
In the Reference name field, type GCS2.
In the Path field, type the path of your Cloud Storage bucket you created earlier.
In the Format field, select json.
Click the X button to exit the Properties menu.
In the left panel of the Pipeline Studio page, using the Conditions and Actions drop-down menu, select the Argument Setter plugin.
In the Pipeline Studio canvas, drag an arrow from the Argument Setter node to the Cloud Storage source node.
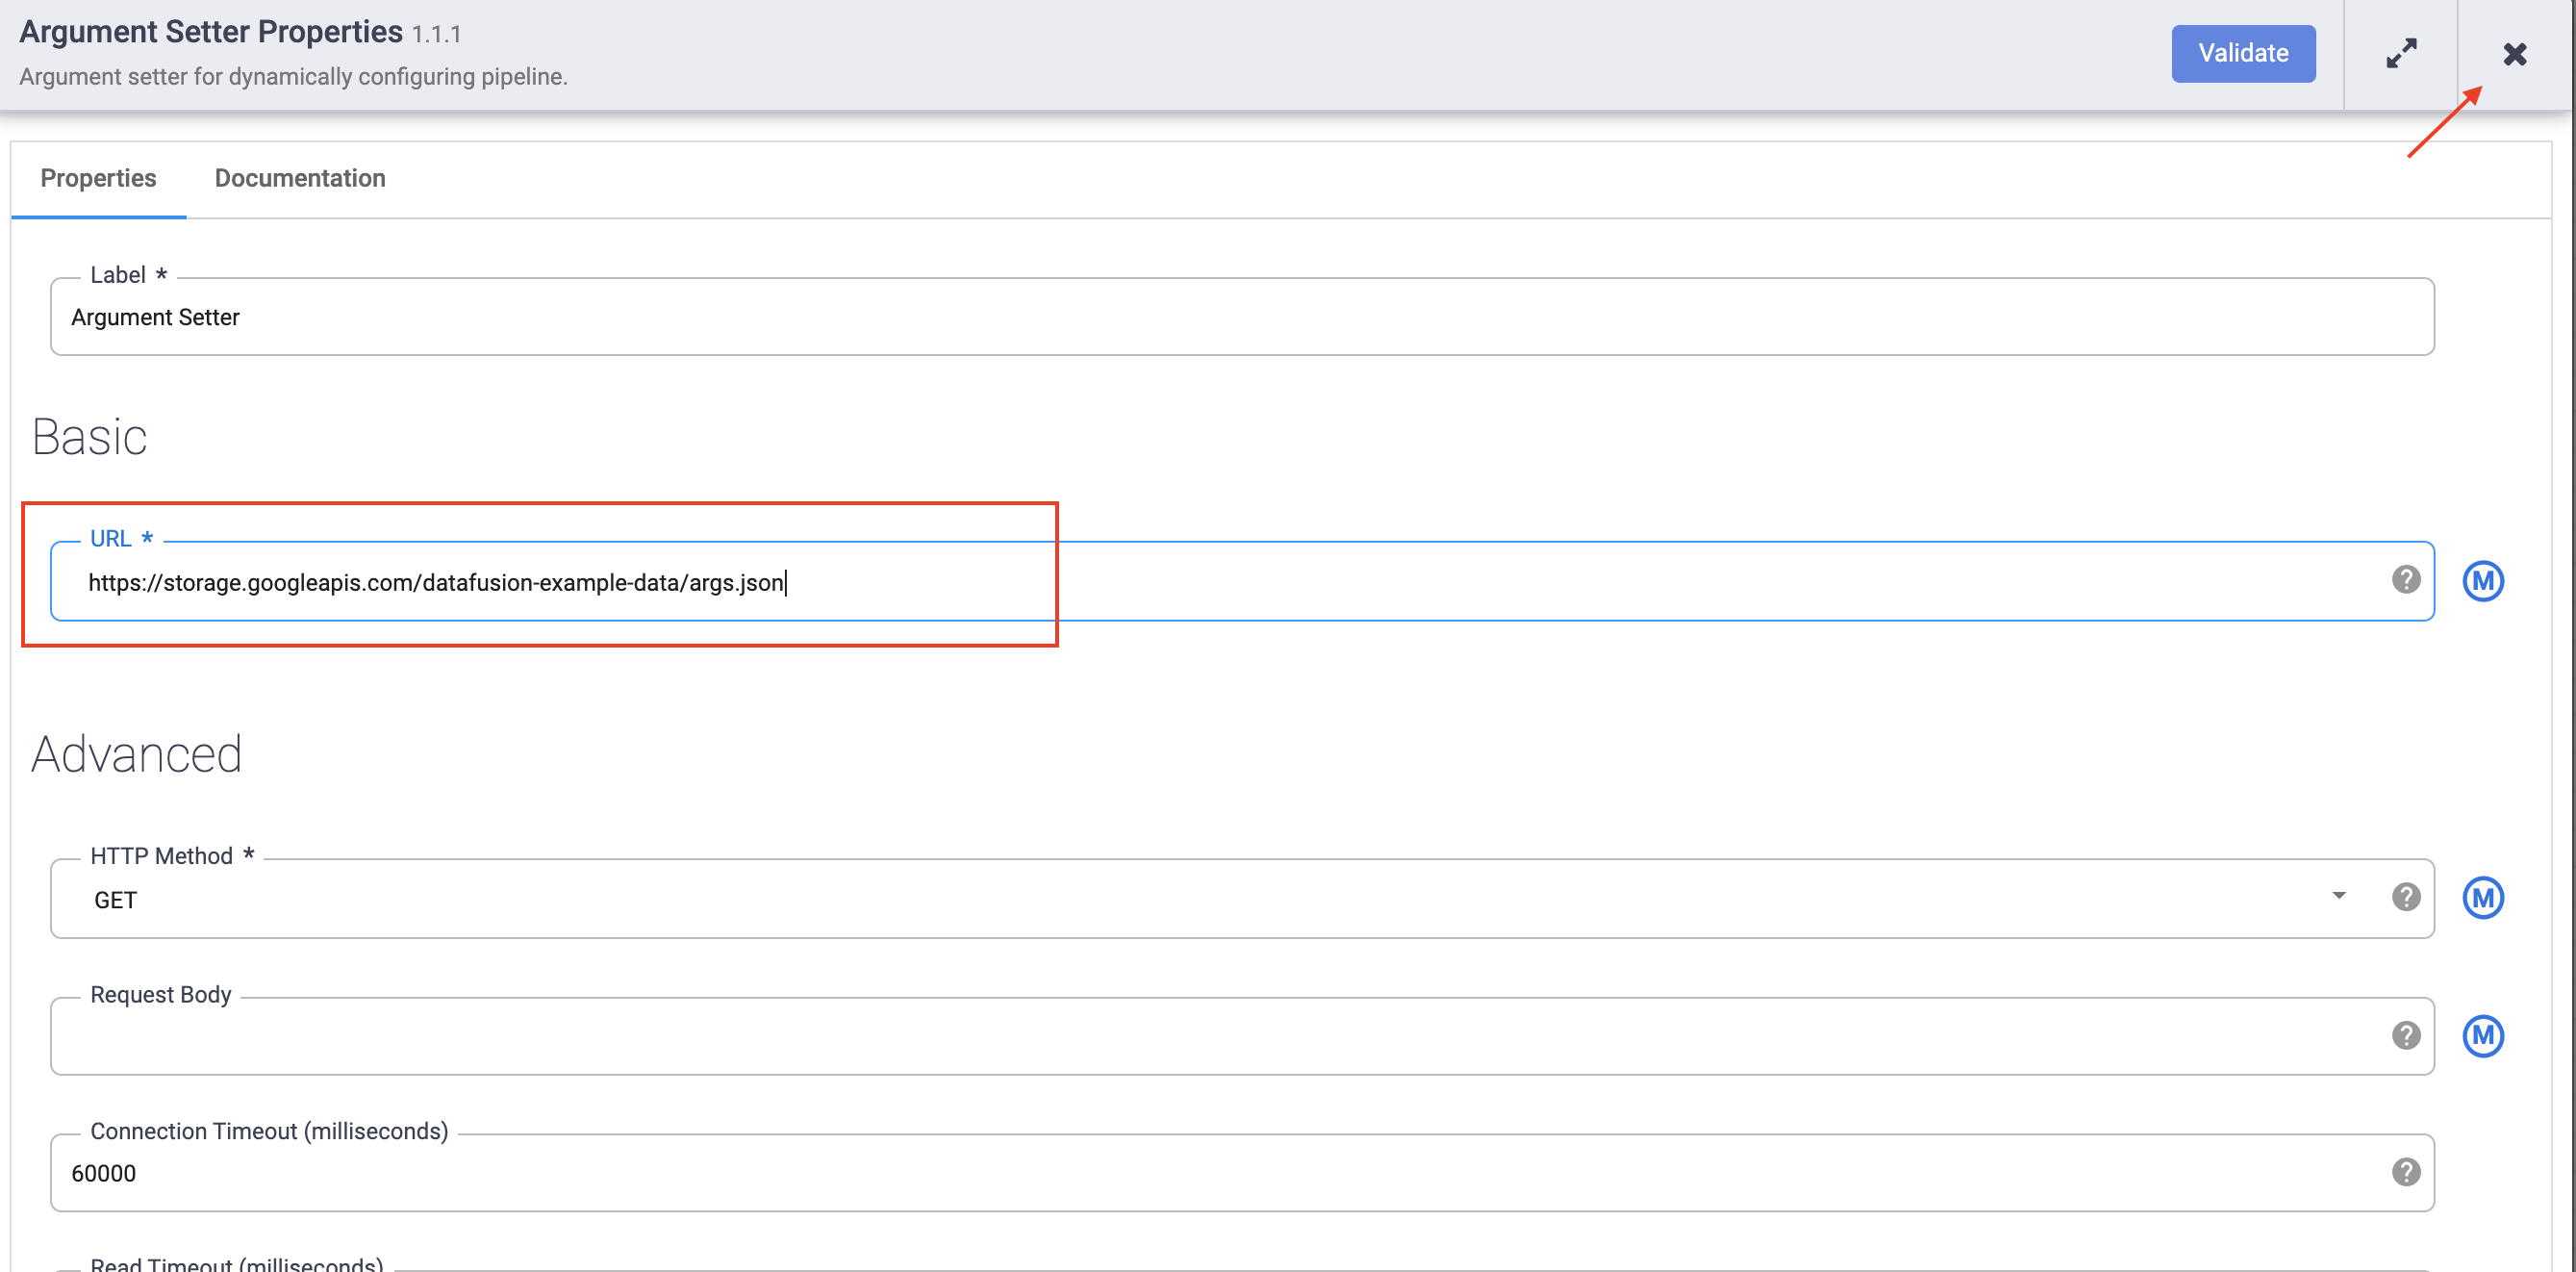
Hover over the Argument Setter node and click the Properties button that appears.
In the URL field, add the following:
The URL corresponds to a publicly accessible object in Cloud Storage that contains the following content:
The first of the two arguments is the value for input.path. The path gs://reusable-pipeline-tutorial/user-emails.txt is a publicly accessible object in Cloud Storage that contains the following test data:
The second argument is the value for directives. The value send-to-error !dq:isEmail(body) configures Wrangler to filter out any lines that are not a valid email address. For example, craig@invalid@example.com is filtered out.
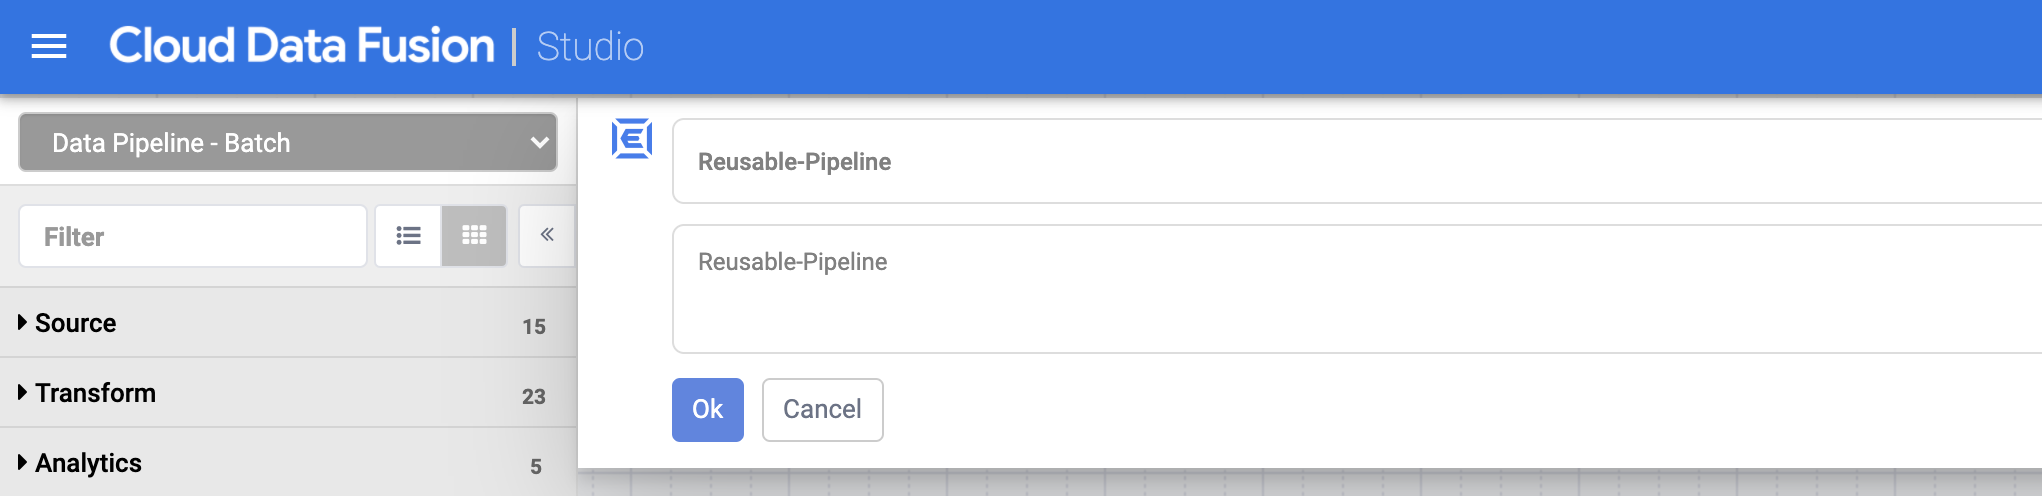
Reusable-Pipeline), and then click Save.Click Deploy on the top right of the Pipeline Studio page. This will deploy your pipeline.
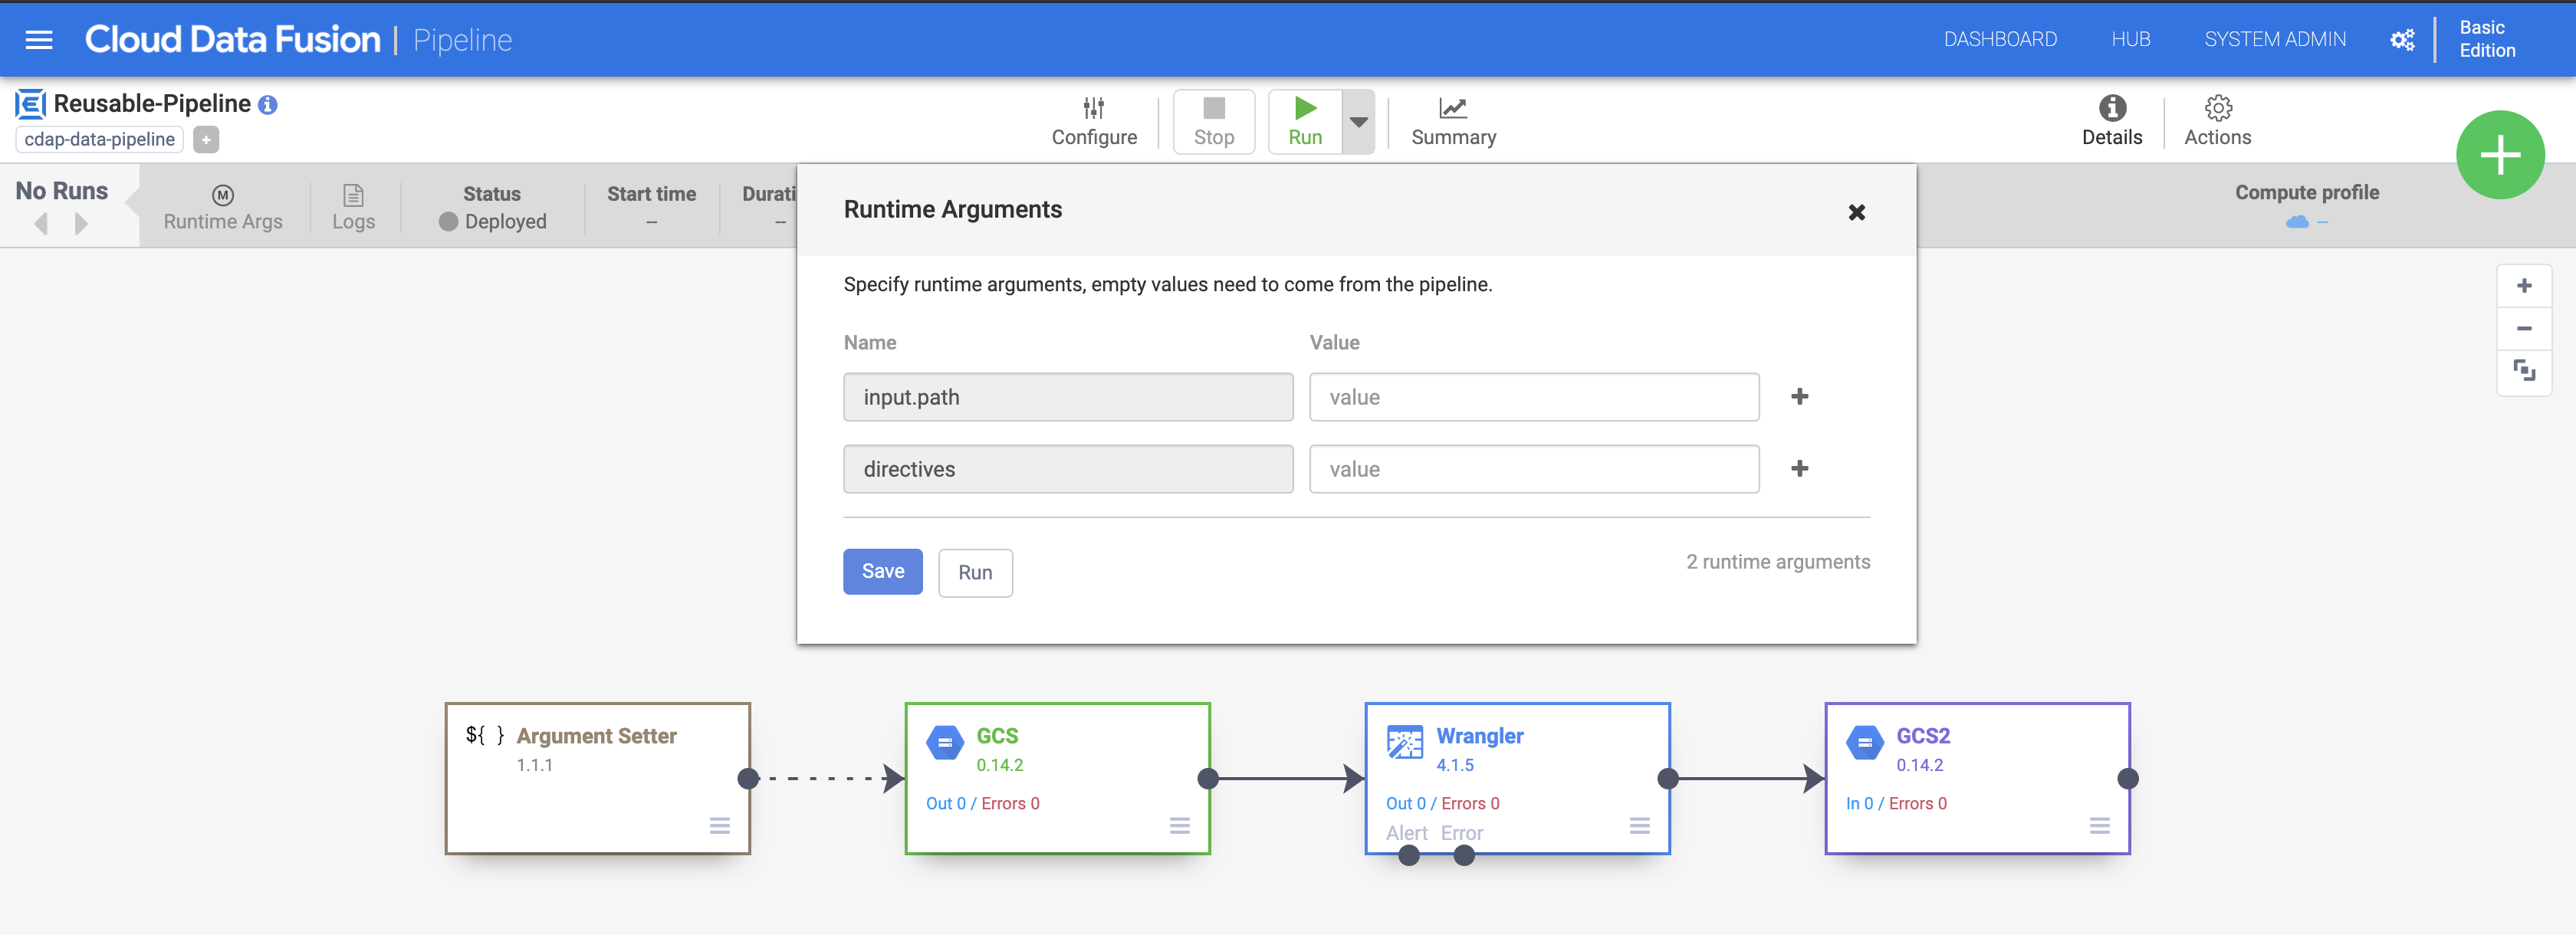
Once deployed, click the drop-down menu on the Run button. Notice the boxes for the input.path and directives arguments. This notifies Cloud Data Fusion that the pipeline will set values for these required arguments during runtime provided through the Argument Setter plugin. Click Run.
Wait for the pipeline run to complete and the status to change to Succeeded.
Click Check my progress to verify the objective.
In this lab, you have learned how to use the Argument Setter plugin to create a reusable pipeline, which can take in different input arguments with every run.
Continue with Redacting Confidential Data within your Pipelines in Cloud Data Fusion.
Manual Last Updated June 14, 2025
Lab Last Tested June 14, 2025
Copyright 2026 Google LLC All rights reserved. Google and the Google logo are trademarks of Google LLC. All other company and product names may be trademarks of the respective companies with which they are associated.


This content is not currently available
We will notify you via email when it becomes available

Great!
We will contact you via email if it becomes available

One lab at a time
Confirm to end all existing labs and start this one