Lab ini mungkin menggabungkan alat AI untuk mendukung pembelajaran Anda.
Overview
BigQuery supports many types of SQL statements including data definition language (DDL), data manipulation language (DML), user-defined functions (UDFs), and stored procedures.
The objective of this lab is to provide Oracle professionals with the necessary knowledge and skills to begin working with SQL in BigQuery. Upon completion of this lab, Oracle professionals will have a deeper understanding of how to use SQL in BigQuery to create, update, and work with data structures in BigQuery.
In this lab, you create tables and views using DDL statements, update tables using DML statements, join data using SQL, and define custom user-defined functions (UDFs) and stored procedures.
Join data and define common table expressions (CTEs) using SQL SELECT statements.
Define custom UDFs and stored procedures.
Setup and requirements
For each lab, you get a new Google Cloud project and set of resources for a fixed time at no cost.
Sign in to Google Skills using an incognito window.
Note the lab's access time (for example, 1:15:00), and make sure you can finish within that time.
There is no pause feature. You can restart if needed, but you have to start at the beginning.
When ready, click Start lab.
Note your lab credentials (Username and Password). You will use them to sign in to the Google Cloud Console.
Click Open Google Console.
Click Use another account and copy/paste credentials for this lab into the prompts.
If you use other credentials, you'll receive errors or incur charges.
Accept the terms and skip the recovery resource page.
How to start your lab and sign in to the Google Cloud console
Click the Start Lab button. If you need to pay for the lab, a dialog opens for you to select your payment method.
On the right is the Lab setup and access panel with the following:
The Open Google Cloud console button
The temporary credentials (username and password) that you must use for this lab
Other information, if needed, to step through this lab
Note that the lab timer is located near the top of the page, showing the remaining time.
Click Open Google Cloud console (or right-click and select Open Link in Incognito Window if you are running the Chrome browser).
The lab spins up resources, and then opens another tab that shows the Sign in page.
Tip: Arrange the tabs in separate windows, side-by-side.
Note: If you see the Choose an account dialog, click Use Another Account.
If necessary, copy the Username below and paste it into the Sign in dialog.
{{{user_0.username | "Username"}}}
You can also find the Username in the Lab setup and access panel.
Click Next.
Copy the Password below and paste it into the Welcome dialog.
{{{user_0.password | "Password"}}}
You can also find the Password in the Lab setup and access panel.
Click Next.
Important: You must use the credentials the lab provides you. Do not use your Google Cloud account credentials.
Note: Using your own Google Cloud account for this lab may incur extra charges.
Click through the subsequent pages:
Accept the terms and conditions.
Do not add recovery options or two-factor authentication (because this is a temporary account).
Do not sign up for free trials.
After a few moments, the Google Cloud console opens in this tab.
Note: To access Google Cloud products and services, click the Navigation menu or type the service or product name in the Search field.
Task 1. Create BigQuery dataset and tables using DDL statements
In BigQuery, you can use data definition language (DDL) to create datasets and tables. You can also use the SQL statement LOAD DATA to load data from one or more files into a new or existing table.
In this task, you use DDL to create a dataset and tables in BigQuery, and then load data into the new tables using the LOAD DATA statement.
In the Google Cloud console, in the Navigation menu (), click BigQuery.
The Welcome to BigQuery in the Cloud Console message box opens. This message box provides a link to the quickstart guide and the release notes.
Click Done.
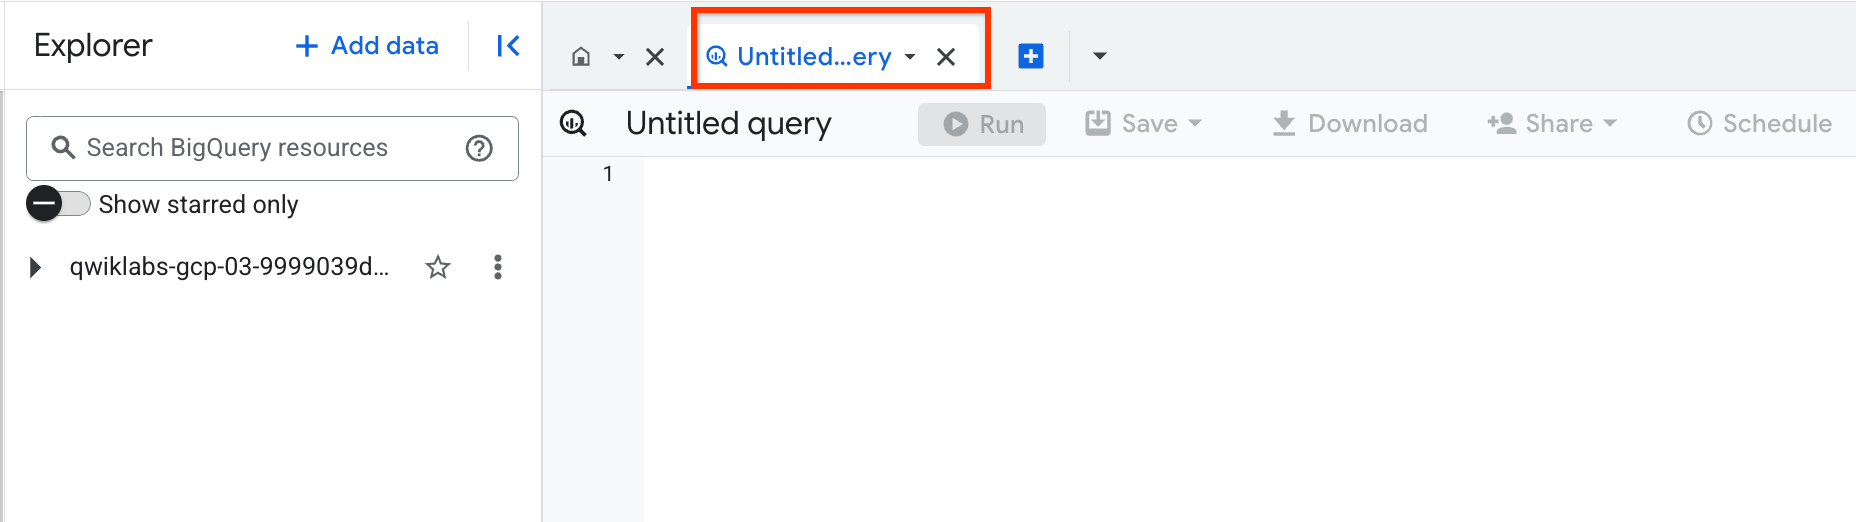
In the Studio , click the Editor icon to open the SQL code editor.
In the query editor, copy and paste the following query, and click Run:
CREATE SCHEMA IF NOT EXISTS
animals_dataset OPTIONS(
location="us");
This query creates a new BigQuery dataset named animals_dataset. Note that the DDL statement uses the term SCHEMA to refer to a logical collection of tables, views, and other resources, which in BigQuery is known as a dataset.
In the query editor, run the following queries to create two new tables:
CREATE TABLE animals_dataset.owners(
OwnerID INT64 NOT NULL,
Name STRING);
CREATE TABLE animals_dataset.pets(
PetID INT64 NOT NULL,
OwnerID INT64 NOT NULL,
Type STRING,
Name STRING,
Weight FLOAT64);
These queries create two tables called owners and pets in the BigQuery dataset you previously created named animals_dataset.
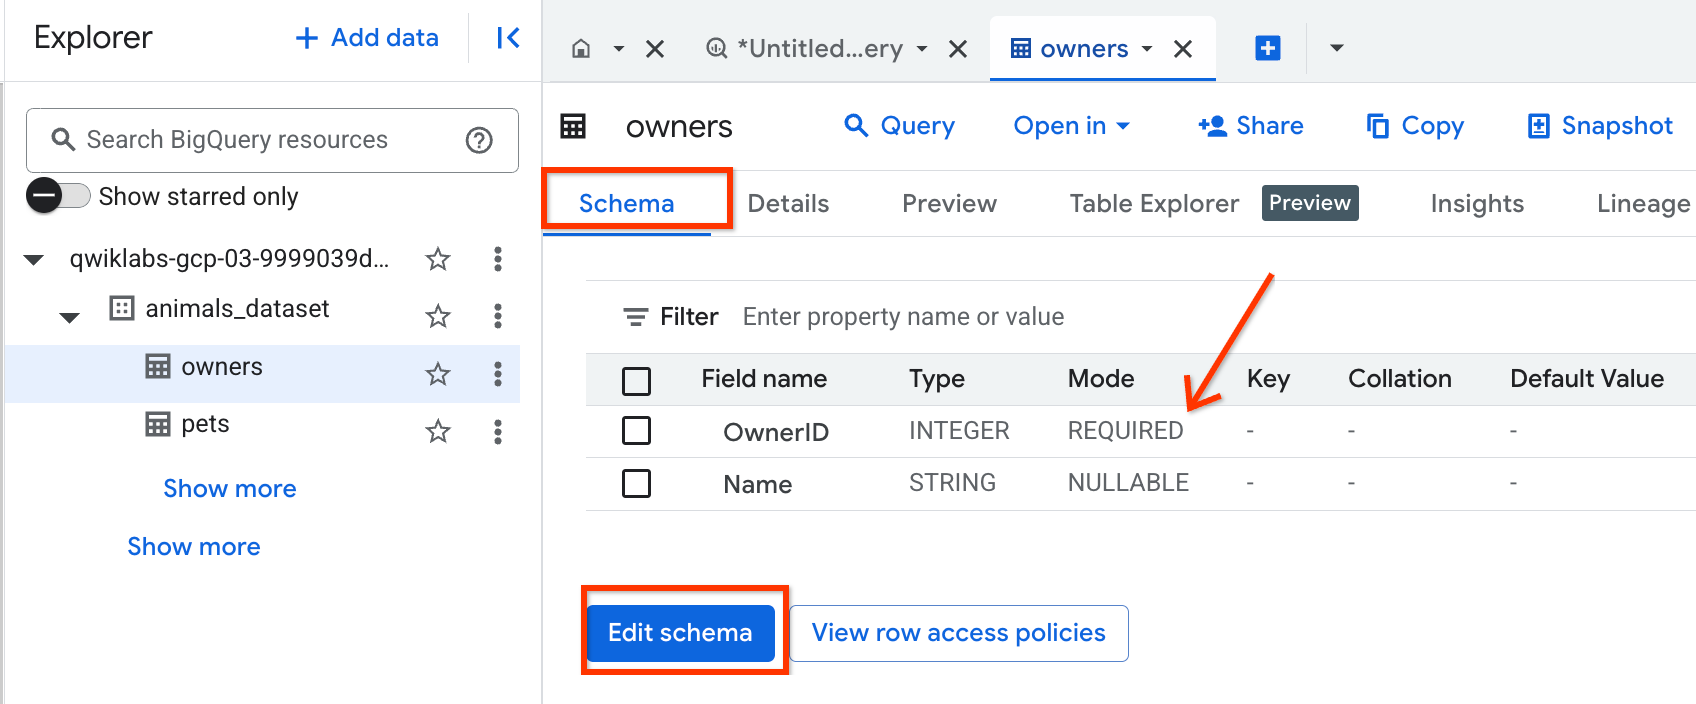
Before moving to the next step, update the field mode from REQUIRED to NULLABLE in the table schema to avoid errors in step 5.
In the Explorer panel, select the table name, choose SCHEMA tab, click EDIT SCHEMA, then update the field mode from REQUIRED to NULLABLE and click Save. Please repeat this step for all the fields with mode "REQUIRED" in both tables.
In the query editor, run the following queries:
LOAD DATA INTO animals_dataset.owners
FROM FILES (
skip_leading_rows=1,
format = 'CSV',
field_delimiter = ',',
uris = ['gs://tcd_repo/data/environmental/animals/owners.csv']);
LOAD DATA INTO animals_dataset.pets
FROM FILES (
skip_leading_rows=1,
format = 'CSV',
field_delimiter = ',',
uris = ['gs://tcd_repo/data/environmental/animals/pets.csv']);
These queries load data into the owners and pets tables from CSV files in Cloud Storage.
The Results pane displays a message that the LOAD statement ran successfully.
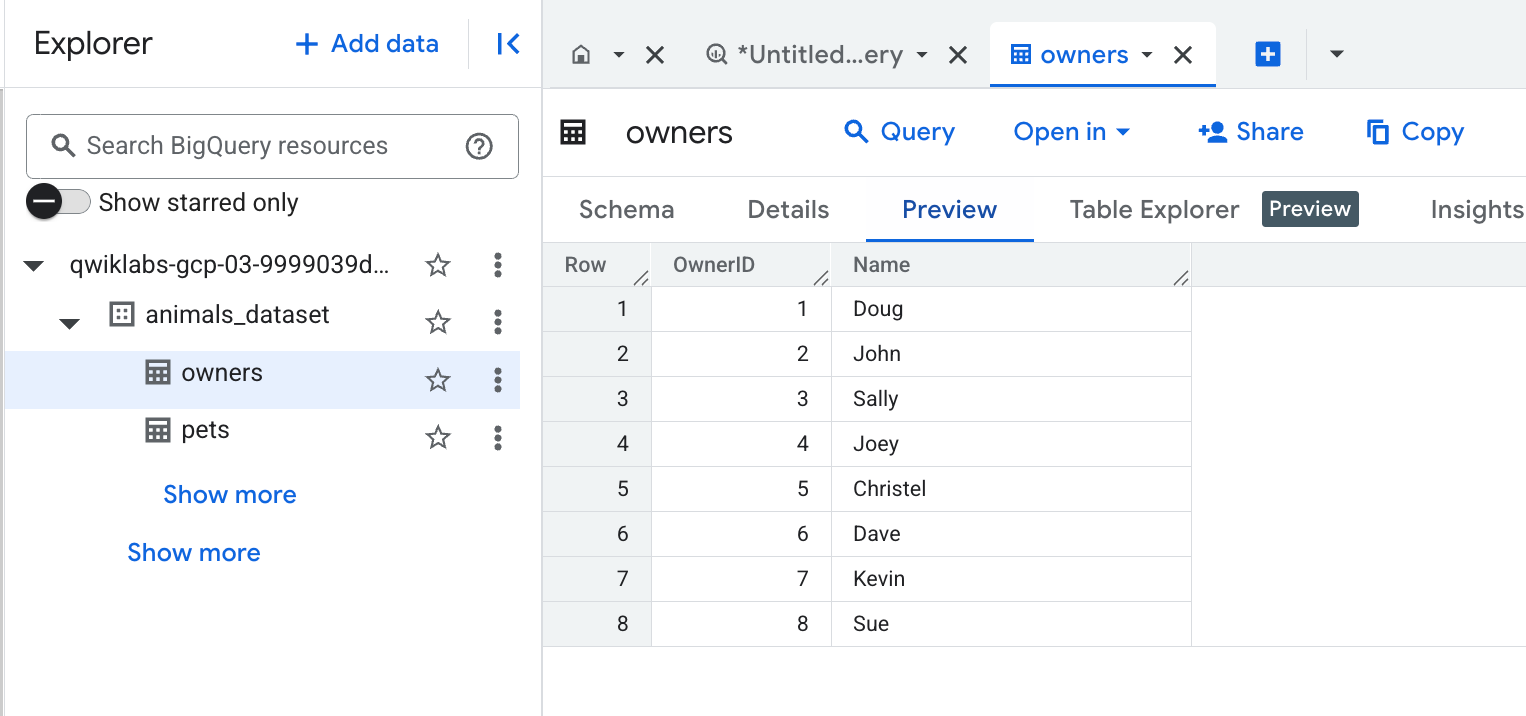
Expand the Explorer pane (left side panel) which lists the dataset and table, and then click on the table name owners.
Click on the Details and Preview tabs to see more information about the table and a preview of the data.
You can click Refresh (top right) to refresh the data in the Preview tab.
Repeat steps 6-7 to see more information about the table named pets and a preview of the data.
Click Check my progress to verify the objective.
Create BigQuery dataset and tables
Task 2. Update BigQuery table data using DML statements
In BigQuery, you can use DML to update the data in an existing table, including adding, modifying, and deleting data from your BigQuery tables.
After each insert query, the Results pane displays that one record has been added to the pets table.
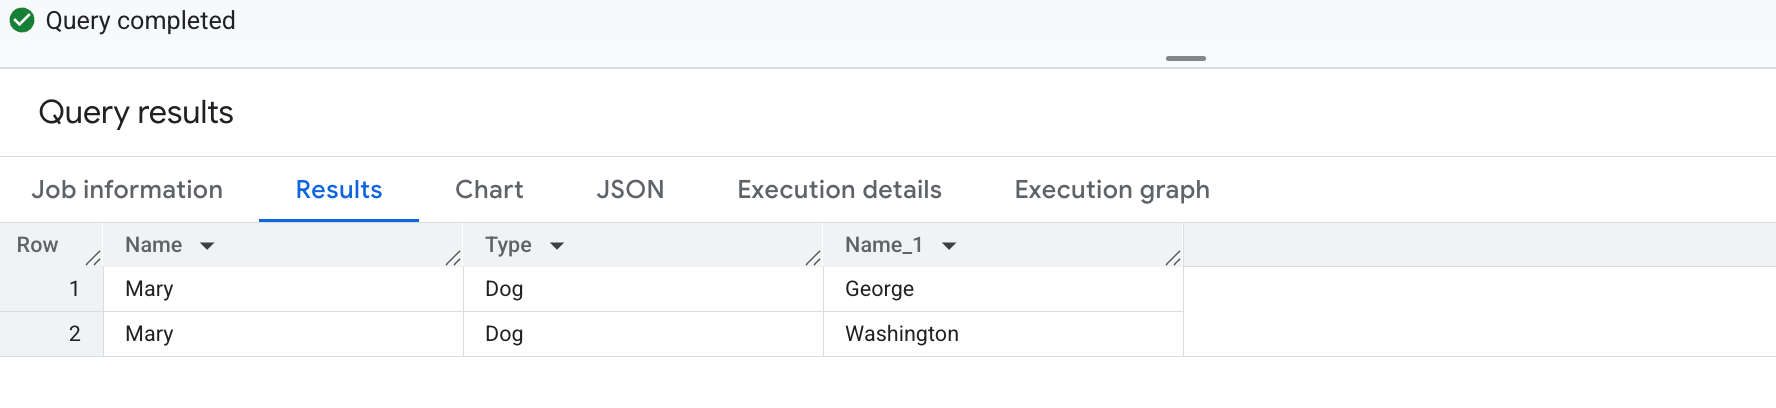
In the query editor, run the following query to check that Mary and her two dogs were added to the appropriate tables:
SELECT o.Name, p.Type, p.Name
FROM
animals_dataset.owners o
JOIN
animals_dataset.pets p
ON
o.OwnerID = p.OwnerID
WHERE
o.Name = 'Mary';
The record for Mary in the owners table has been joined to the two records in the pets table for her dogs: George and Washington.
In the query editor, run the following query to update all values of the animal type "Dog" to be "Canine":
UPDATE
animals_dataset.pets
SET
Type = 'Canine'
WHERE
Type = 'Dog';
This statement modifies 10 rows in the pets table.
Click on Go To Table, and click on the Preview tab.
Verify that all the dogs are now identified as canines in the pets table.
You can click Refresh (top right) to refresh the data in the Preview tab.
In the query editor, run the following query to delete all values of the animal type "Frog":
DELETE FROM
animals_dataset.pets
WHERE
Type = 'Frog';
This statement removes 1 row from the pets table.
Click on Go To Table, and click on the Preview tab.
Verify that all frogs have been removed from the pets table.
You can click Refresh (top right) to refresh the data in the Preview tab.
Click Check my progress to verify the objective.
Update BigQuery table data using DML statements
Task 3. Join data and write CTEs using SQL SELECT statements
In BigQuery, you can write SQL SELECT statements with syntax for joins, CTEs, ordering, grouping, filtering, pivoting, windowing, and more, to retrieve the data that you need.
To learn more about SQL SELECT syntax for working with data in BigQuery tables, review the documentation titled Query syntax.
In this task, you write SQL SELECT statements that include JOIN operations to join multiple tables and WITH clauses to define CTEs.
In the query editor, run the following query with a JOIN to select all owners and their pets:
SELECT
o.Name, p.Type, p.Name, p.Weight
FROM
animals_dataset.owners o
JOIN
animals_dataset.pets p
ON
o.OwnerID = p.OwnerID;
In the query editor, run the same query with a WHERE clause to only select the canines:
SELECT
o.Name, p.Type, p.Name, p.Weight
FROM
animals_dataset.owners o
JOIN
animals_dataset.pets p
ON
o.OwnerID = p.OwnerID
WHERE
p.Type = "Canine";
In the query editor, run the same query with an ORDER BY to sort the results by the owner's name.
SELECT
o.Name, p.Type, p.Name, p.Weight
FROM
animals_dataset.owners o
JOIN
animals_dataset.pets p
ON
o.OwnerID = p.OwnerID
WHERE
p.Type = "Canine"
ORDER BY
o.Name ASC;
In the query editor, run the following query to count the pets by type:
SELECT
type, COUNT(*) AS count
FROM
animals_dataset.pets
GROUP BY
type
ORDER BY
count DESC;
There are 10 canines, 5 cats, 2 pigs, and 2 turtles in the pets table.
In the query editor, run the following query to count the pets by owner.
SELECT
o.Name, COUNT(p.Name) AS count
FROM
animals_dataset.owners o
JOIN
animals_dataset.pets p
ON
o.OwnerID = p.OwnerID
GROUP BY
o.Name
ORDER BY
count DESC;
The owner named Doug has the most pets with 4 total pets.
In the query editor, run the following query to return the pets' information as a nested and repeated field:
SELECT
o.OwnerID,
o.Name AS OwnerName,
ARRAY_AGG(STRUCT(
p.Name AS PetName,
p.Type,
p.Weight)) AS Pets
FROM
animals_dataset.owners AS o
JOIN
animals_dataset.pets AS p
ON
o.OwnerID = p.OwnerID
GROUP BY
o.OwnerID, o.Name;
Note:
In BigQuery, nested and repeated fields are stored as ARRAY`s of STRUCT`s. The ARRAY_AGG(STRUCT…) syntax provides the results as nested and repeated values and makes it easier to see the relationships between the data because joined values are organized clearly.
Another useful SQL option in BigQuery is to use a WITH clause to define CTEs and query the results of another query. Using this syntax, you can avoid using nested SQL statements and make your code easier to read.
In the query editor, run the following query to define a CTE based on the previous query:
WITH owners_pets AS (SELECT
o.OwnerID,
o.Name AS OwnerName,
ARRAY_AGG(STRUCT(
p.Name AS PetName,
p.Type,
p.Weight)) AS Pets
FROM
animals_dataset.owners AS o
JOIN
animals_dataset.pets AS p
ON
o.OwnerID = p.OwnerID
GROUP BY
o.OwnerID, o.Name)
SELECT
op.OwnerName, op.Pets
FROM
owners_pets AS op;
Click Check my progress to verify the objective.
Join data and write CTEs using SQL SELECT statements
Task 4. Create new tables and views using DDL statements
In a previous task, you used DDL to create new BigQuery datasets and tables. In BigQuery, you can also use DDL to create both logical views and materialized views.
To learn more about using DDL statements to create views in BigQuery, review the documentation titled Introduction to views.
In this task, you use DDL to create new tables, logical views, and materialized views.
In the query editor, run the following code to write the results of a query to new table:
CREATE OR REPLACE TABLE
animals_dataset.owners_pets AS (
SELECT
o.OwnerID,
o.Name AS OwnerName,
ARRAY_AGG(STRUCT(
p.PetID,
p.Name AS PetName,
p.Type,
p.Weight)) AS Pets
FROM
animals_dataset.owners AS o
JOIN
animals_dataset.pets AS p
ON
o.OwnerID = p.OwnerID
GROUP BY
o.OwnerID, o.Name
);
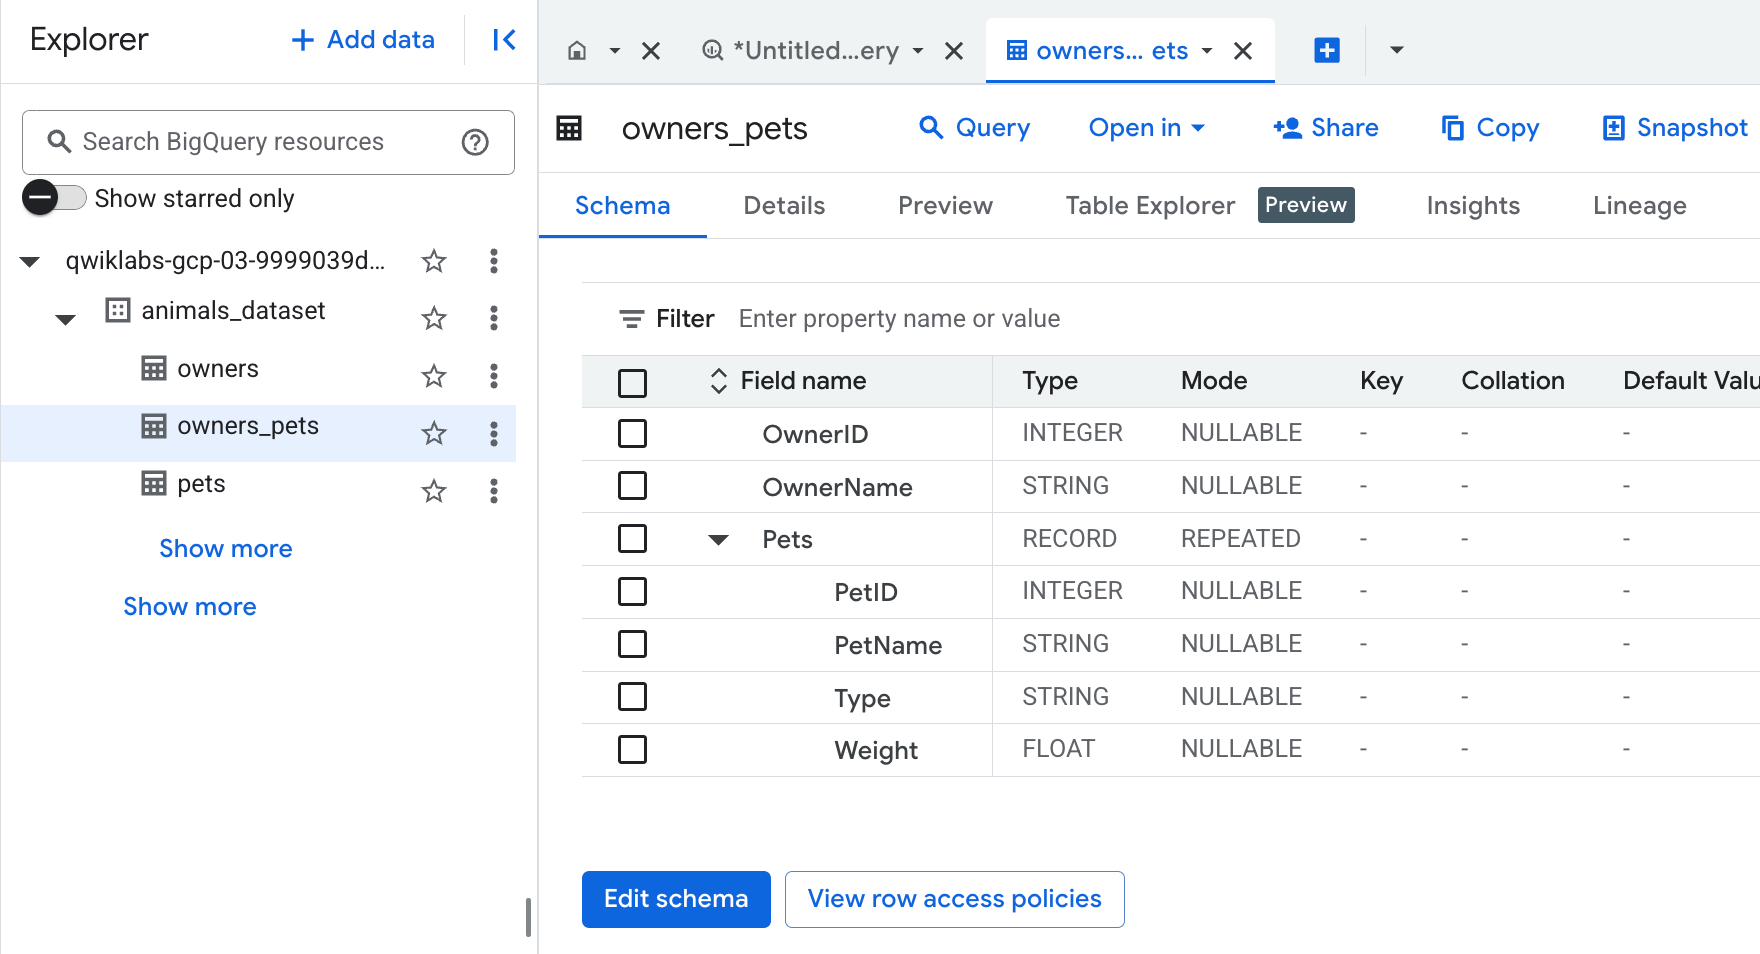
Expand the Explorer pane (left side panel) which lists the dataset and table, and then click on the table name owner_pets.
Click on the Schema tab to review the schema of the newly created table named owners_pets.
The schema includes a nested and repeated field named Pets, which contains the pet ID, name, type, and weight of each pet for each owner.
In a previous task, you ran a query that joined the owners and pets tables to count the number of pets for each owner. Now that the data is contained in a nested and repeated field, you can use the ARRAY_LENGTH function to return the number of pets for each owner.
In the query editor, run the following query to return the number of pets for each owner:
SELECT
OwnerName,
ARRAY_LENGTH(Pets) AS count
FROM
animals_dataset.owners_pets
ORDER BY
count DESC;
In the query editor, run the following query to create a logical view that returns only small pets (those 20 pounds or less):
CREATE OR REPLACE VIEW
animals_dataset.small_pets AS (
SELECT
*
FROM
animals_dataset.pets
WHERE
weight <= 20
);
Click Go to View.
In the Explorer pane, click View Actions (the icon with three vertical buttons) for the small_pets view, and select Query.
In the query editor, run the following query to examine the data in the view:
SELECT
PetID, Weight
FROM
animals_dataset.small_pets;
In BigQuery, materialized views are precomputed views that periodically cache the results of a query for increased performance and efficiency. Materialized views can be especially useful for queries that require complex processing such as aggregations.
In the query editor, run the following query to create a materialized view that returns the total weight of each pet type:
CREATE OR REPLACE MATERIALIZED VIEW
animals_dataset.pet_weight_by_type AS (
SELECT
type,
SUM(Weight) AS total_weight
FROM
animals_dataset.pets
GROUP BY
type
);
Click Go to Materialized View.
In the Explorer pane, click View Actions (the icon with three vertical buttons) for the pet_weight_by_type materialized view, and select Query.
In the query editor, run the following query to examine the data in the materialized view:
SELECT
type, total_weight
FROM
animals_dataset.pet_weight_by_type;
The canines have the highest total weight at 314 pounds.
Click Check my progress to verify the objective.
Create new tables and views using DDL statements
Task 5. Define custom UDFs and stored procedures
In BigQuery, you can define a custom UDF for cases in which there is not a built-in function that already does what you need. A UDF accepts one or more columns of input, executes actions on the input, and returns the result of those actions as the output. In addition, you can also define stored procedures as functions that execute collections of SQL statements such as SELECT, INSERT, and more, in a desired order.
In this task, you define UDFs and stored procedures to recalculate existing values in a table and to make it easier to add new data records to a table.
In the query editor, run the following code to create a UDF that converts pounds into kilograms:
CREATE OR REPLACE FUNCTION animals_dataset.PoundsToKilos(pounds FLOAT64)
AS (
round(pounds / 2.2, 1)
);
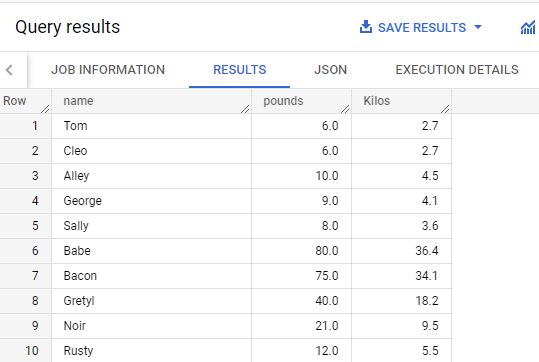
In the query editor, run the following query to test the UDF:
SELECT
name,
weight AS pounds,
animals_dataset.PoundsToKilos(Weight) AS Kilos
FROM
animals_dataset.pets;
You can also create a stored procedure to make adding a new pet easier. The following procedure finds the largest pet ID in the pets table and adds a value of 1 to that ID. It then assigns that new value as the ID for the new Pet. When the new pet is added, the value of the new pet ID is returned.
In the query editor, run the following query to create a stored procedure to add a new pet:
CREATE OR REPLACE PROCEDURE animals_dataset.create_pet(
customerID INT64, type STRING, name STRING, weight FLOAT64, out newPetID INT64)
BEGIN
SET newPetID = (SELECT MAX(PetID) + 1 FROM animals_dataset.pets);
INSERT INTO animals_dataset.pets (PetID, OwnerID, Type, Name, Weight)
VALUES(newPetID, customerID, type, name, weight);
END
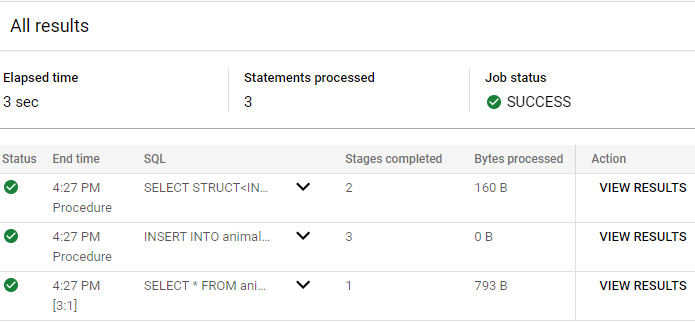
In the query editor, run the following query to test the stored procedure:
DECLARE newPetID INT64;
CALL animals_dataset.create_pet(1, 'Dog', 'Duke', 15.0, newPetID);
SELECT *
FROM
animals_dataset.pets
WHERE
PetID = newPetID;
Click View results for the last statement SELECT *.
Notice that the output variable of the function is the newly created record for a dog named Duke with a pet ID equal to 30.
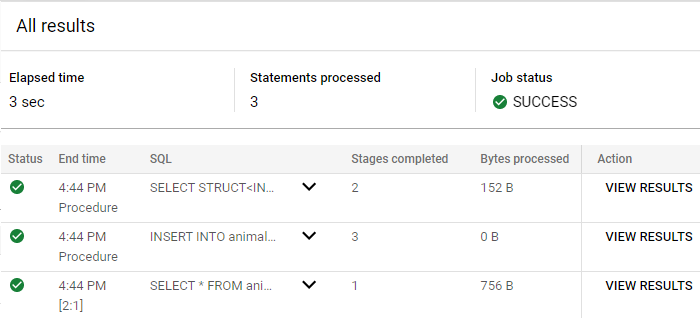
In the query editor, run the following query to add another new pet:
DECLARE newPetID INT64;
CALL animals_dataset.create_pet(4, 'Cat', 'Fluffy', 6.0, newPetID);
SELECT *
FROM
animals_dataset.pets
WHERE
PetID = newPetID;
Click View results for the last statement SELECT *.
Notice that the ID field keeps incrementing in value; the new pet ID for a cat named Fluffy is 31.
In the query editor, run the following query to verify that the two new pets have been added to the pets table:
SELECT *
FROM
animals_dataset.pets
WHERE
Name in ('Duke', 'Fluffy');
Click Check my progress to verify the objective.
Define custom UDFs and stored procedures
End your lab
When you have completed your lab, click End Lab. Google Skills removes the resources you’ve used and cleans the account for you.
You will be given an opportunity to rate the lab experience. Select the applicable number of stars, type a comment, and then click Submit.
The number of stars indicates the following:
1 star = Very dissatisfied
2 stars = Dissatisfied
3 stars = Neutral
4 stars = Satisfied
5 stars = Very satisfied
You can close the dialog box if you don't want to provide feedback.
For feedback, suggestions, or corrections, please use the Support tab.
Copyright 2026 Google LLC All rights reserved. Google and the Google logo are trademarks of Google LLC. All other company and product names may be trademarks of the respective companies with which they are associated.
Sebelum memulai
Lab membuat project dan resource Google Cloud untuk jangka waktu tertentu
Lab memiliki batas waktu dan tidak memiliki fitur jeda. Jika lab diakhiri, Anda harus memulainya lagi dari awal.
Di kiri atas layar, klik Start lab untuk memulai
Gunakan penjelajahan rahasia
Salin Nama Pengguna dan Sandi yang diberikan untuk lab tersebut
Klik Open console dalam mode pribadi
Login ke Konsol
Login menggunakan kredensial lab Anda. Menggunakan kredensial lain mungkin menyebabkan error atau dikenai biaya.
Setujui persyaratan, dan lewati halaman resource pemulihan
Jangan klik End lab kecuali jika Anda sudah menyelesaikan lab atau ingin mengulanginya, karena tindakan ini akan menghapus pekerjaan Anda dan menghapus project
Konten ini tidak tersedia untuk saat ini
Kami akan memberi tahu Anda melalui email saat konten tersedia
Bagus!
Kami akan menghubungi Anda melalui email saat konten tersedia
Satu lab dalam satu waktu
Konfirmasi untuk mengakhiri semua lab yang ada dan memulai lab ini
Gunakan penjelajahan rahasia untuk menjalankan lab
Menggunakan jendela Samaran atau browser pribadi adalah cara terbaik untuk menjalankan lab ini. Langkah ini akan mencegah konflik antara akun pribadi Anda dan akun Siswa, yang dapat menyebabkan tagihan ekstra pada akun pribadi Anda.
In this lab, you create tables and views using DDL statements, update tables using DML statements, join data using SQL, and define custom user-defined functions (UDFs) and stored procedures.

 ), click BigQuery.