GSP249

Overview
Gmail add-ons automate tasks within Gmail, saving time and effort for users. Gmail add-ons can examine incoming messages, then act on these messages in various ways, such as:
- Displaying additional information for the user in the Gmail UI.
- Connecting to non-Google services, to retrieve information or take other actions.
- Providing an interactive interface to allow the user to control the add-on or send information to another service.
What you'll do
In this lab, you create a Gmail Add-on that allows you to quickly change the labels of an email thread.
Setup and requirements
Before you click the Start Lab button
Read these instructions. Labs are timed and you cannot pause them. The timer, which starts when you click Start Lab, shows how long lab resources are made available to you.
This hands-on lab lets you do the lab activities yourself in a real cloud environment, not in a simulation or demo environment. It does so by giving you new, temporary credentials that you use to sign in and access Gmail for the duration of the lab.
What you need
To complete this lab, you need:
- Access to a standard internet browser (Chrome browser recommended).
- Time to complete the lab.
Note: Use an Incognito or private browser window to run this lab. This avoids conflicts between your personal account and the student account.
How to start your lab and sign in to Gmail
-
When ready, click Start Lab.
The Lab Details pane appears with the temporary credentials that you must use to sign into Gmail for this lab.
If you need to pay for the lab, a pop-up opens for you to select your payment method.
-
Click Open Gmail.
The lab spins up resources, and then opens another tab that shows the Sign in page.
Tip: Arrange the tabs in separate windows, side-by-side.
-
If necessary, copy the Username below and paste it into the Sign in dialog.
{{{user_0.username | "Username"}}}
-
Click Next.
-
Copy the Password below and paste it into the Welcome dialog.
{{{user_0.password | "Password"}}}
-
Click Next.
-
If needed, click I understand to accept the terms.
Gmail opens.
-
Click Get started, and then close any further information windows.
You are now in Gmail, looking at your Inbox.
Task 1. Create the script project
Launch Apps Script
- Click this Apps Script link to open in a new tab or browser window. A new project opens.
Note: Apps Script places the project file in your Drive root folder.
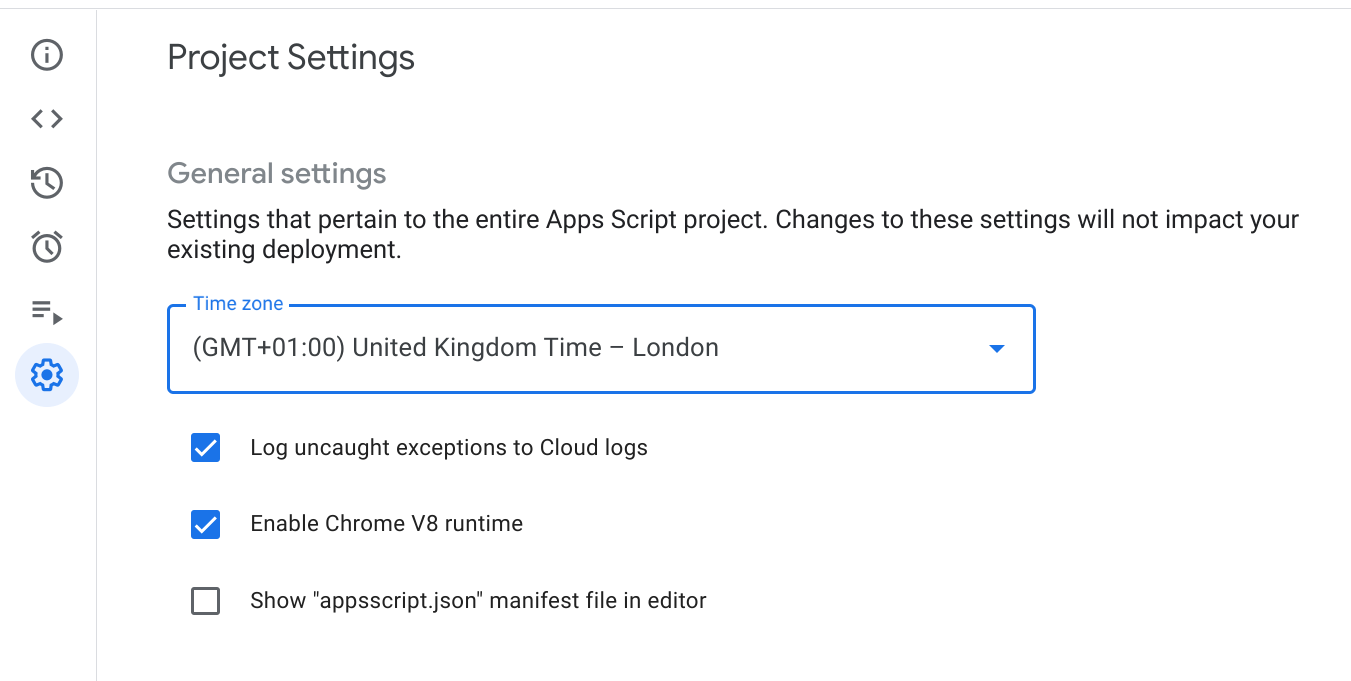
- Click the Settings icon then select the Show "appsscript.json" manifest file in editor option.
Name the project
- Click Untitled project in the upper left.
- Name the project Gmail Add-on Quickstart, and then click Rename.
Create the script file, Code.gs
- Replace the
Code.gs file contents with the following:
Code.gs
/**
* Copyright Google LLC
*
* Licensed under the Apache License, Version 2.0 (the "License");
* you may not use this file except in compliance with the License.
* You may obtain a copy of the License at
*
* https://www.apache.org/licenses/LICENSE-2.0
*
* Unless required by applicable law or agreed to in writing, software
* distributed under the License is distributed on an "AS IS" BASIS,
* WITHOUT WARRANTIES OR CONDITIONS OF ANY KIND, either express or implied.
* See the License for the specific language governing permissions and
* limitations under the License.
*/
/**
* Returns the array of cards that should be rendered for the current
* e-mail thread. The name of this function is specified in the
* manifest 'onTriggerFunction' field, indicating that this function
* runs every time the add-on is started.
*
* @param {Object} e The data provided by the Gmail UI.
* @return {Card[]}
*/
function buildAddOn(e) {
// Activate temporary Gmail add-on scopes.
var accessToken = e.messageMetadata.accessToken;
GmailApp.setCurrentMessageAccessToken(accessToken);
var messageId = e.messageMetadata.messageId;
var message = GmailApp.getMessageById(messageId);
// Get user and thread labels as arrays to enable quick sorting and indexing.
var threadLabels = message.getThread().getLabels();
var labels = getLabelArray(GmailApp.getUserLabels());
var labelsInUse = getLabelArray(threadLabels);
// Create a section for that contains all user Labels.
var section = CardService.newCardSection()
.setHeader("<font color=\"#1257e0\"><b>Available User Labels</b></font>");
// Create a checkbox group for user labels that are added to prior section.
var checkboxGroup = CardService.newSelectionInput()
.setType(CardService.SelectionInputType.CHECK_BOX)
.setFieldName('labels')
.setOnChangeAction(CardService.newAction().setFunctionName('toggleLabel'));
// Add checkbox with name and selected value for each User Label.
for(var i = 0; i < labels.length; i++) {
checkboxGroup.addItem(labels[i], labels[i], labelsInUse.indexOf(labels[i])!= -1);
}
// Add the checkbox group to the section.
section.addWidget(checkboxGroup);
// Build the main card after adding the section.
var card = CardService.newCardBuilder()
.setHeader(CardService.newCardHeader()
.setTitle('Quick Label')
.setImageUrl('https://www.gstatic.com/images/icons/material/system/1x/label_googblue_48dp.png'))
.addSection(section)
.build();
return [card];
}
/**
* Updates the labels on the current thread based on
* user selections. Runs via the OnChangeAction for
* each CHECK_BOX created.
*
* @param {Object} e The data provided by the Gmail UI.
*/
function toggleLabel(e){
var selected = e.formInputs.labels;
// Activate temporary Gmail add-on scopes.
var accessToken = e.messageMetadata.accessToken;
GmailApp.setCurrentMessageAccessToken(accessToken);
var messageId = e.messageMetadata.messageId;
var message = GmailApp.getMessageById(messageId);
var thread = message.getThread();
if (selected != null){
for each (var label in GmailApp.getUserLabels()) {
if(selected.indexOf(label.getName()) != -1){
thread.addLabel(label);
}
else {
thread.removeLabel(label);
}
}
}
else {
for each (var label in GmailApp.getUserLabels()) {
thread.removeLabel(label);
}
}
}
/**
* Converts an GmailLabel object to a array of strings.
* Used for easy sorting and to determine if a value exists.
*
* @param {labelsObjects} A GmailLabel object array.
* @return {lables[]} An array of labels names as strings.
*/
function getLabelArray(labelsObjects){
var labels = [];
for(var i = 0; i < labelsObjects.length; i++) {
labels[i] = labelsObjects[i].getName();
}
labels.sort();
return labels;
}
Note: Before saving, you'll need to update the script manifest to avoid errors.
Task 2. Update the script manifest
Update the manifest (appsscript.json) to provide the add-on with required deployment information.
- In the script editor, select the appsscript.json file from the left menu.
- Replace the content of the manifest (
appsscript.json)with the following:
appsscript.json
{
"oauthScopes": [
"https://www.googleapis.com/auth/gmail.addons.execute",
"https://www.googleapis.com/auth/gmail.addons.current.message.metadata",
"https://www.googleapis.com/auth/gmail.modify"
],
"gmail": {
"name": "Gmail Add-on Quickstart - QuickLabels",
"logoUrl": "https://www.gstatic.com/images/icons/material/system/1x/label_googblue_24dp.png",
"contextualTriggers": [{
"unconditional": {
},
"onTriggerFunction": "buildAddOn"
}],
"openLinkUrlPrefixes": [
"https://mail.google.com/"
],
"primaryColor": "#4285F4",
"secondaryColor": "#4285F4"
}
}
- Click the Save project icon to save the changes to the manifest and Code.gs. This step provides the add-on with required deployment information. If you get an error, save
Code.gs again.
Create a new Apps Script project
Task 3. Deploy the add-on
-
Click the Deploy > Test deployments button at the top of the screen.
-
For Application(s): Gmail click Install.
-
Click Done.
-
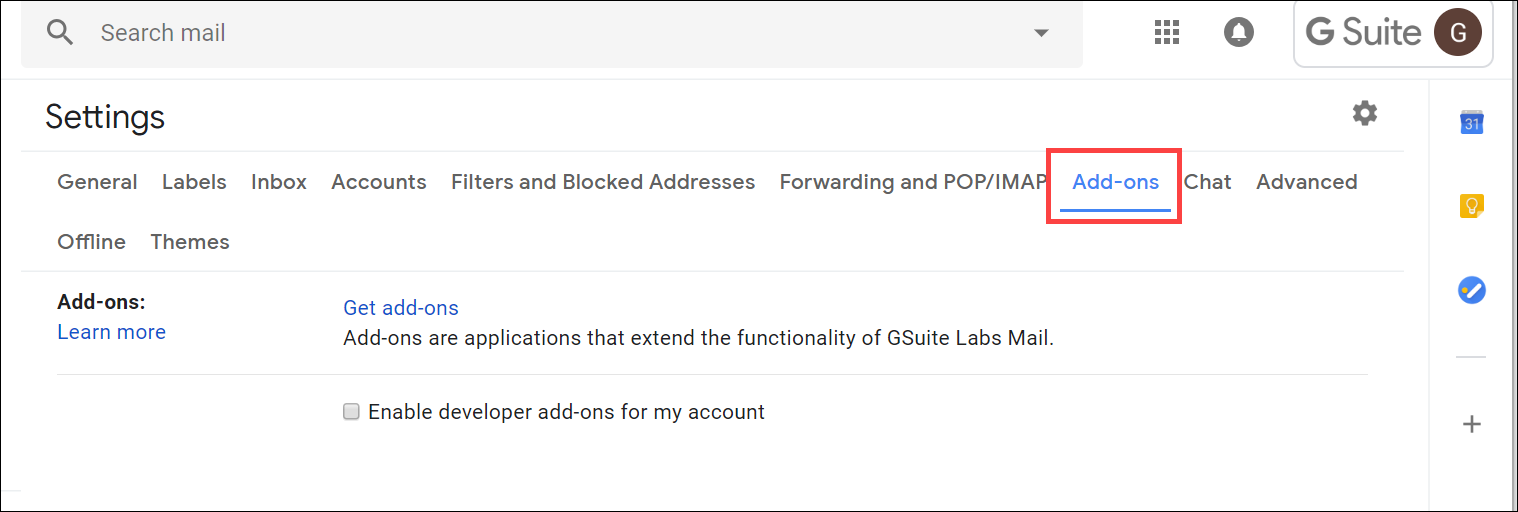
Open the Gmail add-on settings tab.
-
This brings you to the Setting dialog at the Add-ons tab.
When you have completed these steps, the add-on appears in the Installed developer add-ons list and becomes available for use in Gmail.
Note: If you don't see your add-on in the Installed developer add-ons list, refresh the browser window. If the add-on is still not in the list, return to the Gmail Add-on Quickstart tab, uninstall and reinstall the add-on from the Test deployments window.
Task 4. Run the add-on
- Return to your Gmail tab and refresh the tab.
- Choose a message in Gmail and open it.
- Make sure the right side menu is open - click the arrow to expand if it has been collapsed.
Create some labels
- Click the Labels button (
 ) from the Gmail menu bar above the email.
- Click Create new.
- Enter "Test 1" as your label name and click the Create button.
- Repeat these steps to create another label named "Test 2".
Authorize add-on
The add-ons you installed appear in the right menu of the open email thread.
- On the right side of the screen, click on
 .
.
The add-on will place a contextual card on the right-side of the window, with a message asking for authorization.
-
Click Grant permission to open a dialog where you can authorize the add-on.
-
Select the student account that should authorize the add-on.
-
Click Allow.
-
If next dialog may informs you that the app is not verified:
- Click Advanced.
- At the bottom of the dialog, click Go to Gmail Add-on Quickstart (unsafe).
- In the new dialog, type
Continue into the text field, then click Next.
-
Once authorized, the add-on should automatically refresh and start operating.
Task 5. Use the add-on
The Test 1 and the Test 2 labels are checked under the Available User Labels section of the add-on (right side menu).
- Click the Test 2 checkbox to deselect the label. This will remove the label from the email thread you're currently in.
- Verify that the appropriate labels have been applied by navigating back to the Inbox and refreshing the browser. Only the Test 1 label is still applied and Test 2 has been removed.
- Open a different email.
- In the add-on menu, select the Test 1 and Test 2 checkboxes, enabling them both.
- Return to the Inbox and refresh the browser. Both labels have been applied to the email thread.
Create and use the Gmail Add-on
Congratulations!
You now have an idea of what Gmail add-ons are capable of. You could do many other things like displaying other recent threads that the sender has started, or translating the text of an email from one language to another without leaving Gmail.
Next steps / Learn more
Google Cloud training and certification
...helps you make the most of Google Cloud technologies. Our classes include technical skills and best practices to help you get up to speed quickly and continue your learning journey. We offer fundamental to advanced level training, with on-demand, live, and virtual options to suit your busy schedule. Certifications help you validate and prove your skill and expertise in Google Cloud technologies.
Manual Last Updated September 02, 2025
Lab Last Tested September 02, 2025
Copyright 2026 Google LLC. All rights reserved. Google and the Google logo are trademarks of Google LLC. All other company and product names may be trademarks of the respective companies with which they are associated.


