Vertex AI is now Gemini Enterprise Agent Platform! We are currently updating our content to reflect this change. Please bear with us if you encounter naming inconsistencies during this transition.
Aplique suas habilidades no console do Google Cloud
Este laboratório pode incorporar ferramentas de IA para ajudar no seu aprendizado.
CBL391
Overview
In this lab, you learn about Google Cloud buildpacks, which allow developers to create containerized applications and deploy them without the need to install Docker locally, or create a Dockerfile. You will then take the same image and learn to deploy it directly on Cloud Run, allowing Cloud Run to do the building for you.
Objectives
In this lab, you learn to:
Build a sample application with pack and the Google Cloud Buildpacks builder.
Deploy the resulting container image to Cloud Run.
Deploy the same image again, this time using Cloud Run (which uses Google Cloud Buildpacks) to perform the -build and package the container image for you.
Setup and requirements
For each lab, you get a new Google Cloud project and set of resources for a fixed time at no cost.
Sign in to Google Skills using an incognito window.
Note the lab's access time (for example, 1:15:00), and make sure you can finish within that time.
There is no pause feature. You can restart if needed, but you have to start at the beginning.
When ready, click Start lab.
Note your lab credentials (Username and Password). You will use them to sign in to the Google Cloud Console.
Click Open Google Console.
Click Use another account and copy/paste credentials for this lab into the prompts.
If you use other credentials, you'll receive errors or incur charges.
Accept the terms and skip the recovery resource page.
How to start your lab and sign in to the Console
Click the Start Lab button. If you need to pay for the lab, a pop-up opens for you to select your payment method.
On the left is a panel populated with the temporary credentials that you must use for this lab.
Copy the username, and then click Open Google Console.
The lab spins up resources, and then opens another tab that shows the Choose an account page.
Note: Open the tabs in separate windows, side-by-side.
On the Choose an account page, click Use Another Account. The Sign in page opens.
Paste the username that you copied from the Connection Details panel. Then copy and paste the password.
Note: You must use the credentials from the Connection Details panel. Do not use your Google Skills credentials. If you have your own Google Cloud account, do not use it for this lab (avoids incurring charges).
Click through the subsequent pages:
Accept the terms and conditions.
Do not add recovery options or two-factor authentication (because this is a temporary account).
Do not sign up for free trials.
After a few moments, the Cloud console opens in this tab.
Note: You can view the menu with a list of Google Cloud Products and Services by clicking the Navigation menu at the top-left.
Activate Google Cloud Shell
Google Cloud Shell is a virtual machine that is loaded with development tools. It offers a persistent 5GB home directory and runs on the Google Cloud.
Google Cloud Shell provides command-line access to your Google Cloud resources.
In Cloud console, on the top right toolbar, click the Open Cloud Shell button.
Click Continue.
It takes a few moments to provision and connect to the environment. When you are connected, you are already authenticated, and the project is set to your PROJECT_ID. For example:
gcloud is the command-line tool for Google Cloud. It comes pre-installed on Cloud Shell and supports tab-completion.
You can list the active account name with this command:
[core]
project = qwiklabs-gcp-44776a13dea667a6
Note:
Full documentation of gcloud is available in the
gcloud CLI overview guide
.
Reference
Basic Linux Commands
Below you will find a reference list of a few very basic Linux commands which may be included in the instructions or code blocks for this lab.
Command -->
Action
.
Command -->
Action
mkdir (make directory)
create a new folder
.
cd (change directory)
change location to another folder
ls (list )
list files and folders in the directory
.
cat (concatenate)
read contents of a file without using an editor
apt-get update
update package manager library
.
ping
signal to test reachability of a host
mv (move )
moves a file
.
cp (copy)
makes a file copy
pwd (present working directory )
returns your current location
.
sudo (super user do)
gives higher administration privileges
Task 1. Enable the Cloud Run API and configure your Shell environment
From Cloud Shell, enable the Cloud Run API:
gcloud services enable run.googleapis.com
If you are asked to authorize the use of your credentials, do so. You should then see a successful message similar to this one:
Operation "operations/acf.cc11852d-40af-47ad-9d59-477a12847c9e" finished successfully.
Note: You can also enable the API using the APIs & Services section of the console.
Set the compute region:
gcloud config set compute/region {{{project_0.default_region | REGION }}}
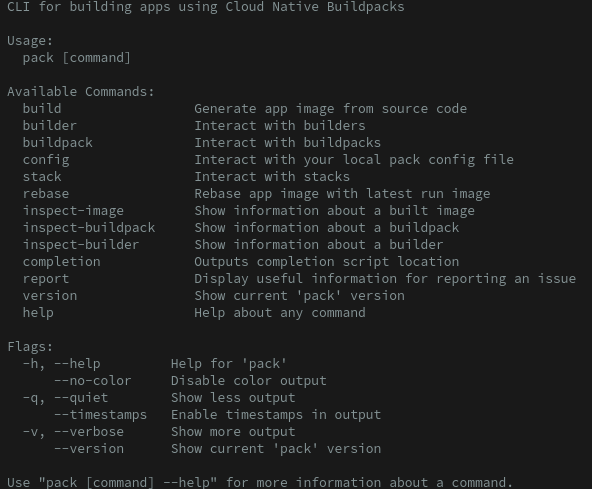
Task 2. List the pack CLI commands
The pack CLI has already been installed on your lab account.
To see the list of pack commands available to you, open your cloud shell terminal and type pack. You should see output similar to the example below:
Scan the list.
Task 3. Clone the Buildpack sample repository
Google Cloud Buildpack helps developers focus on writing code, not on containerizing it.
Buildpack supports the following languages: Java, Node, Go, Python, and .NET (C#).
Google provides a Buildpack Repository containing sample code you can use to practice using Buildpack to easily containerize and deploy applications.
To use the provided sample applications in the language of your choice, you will first need to clone the Buildpack repository and then select a sample to build with the pack build command.
Clone the buildpack-samples repository
Clone the buildpacks samples repository to your local directory using the command below:
Copy code from the language of your choice, shown in the list in the table below. Use this code in the cloud shell to build an application container. (You only need to create one container in one of these languages for the purposes of this lab.)
cd buildpack-samples/sample-node
pack build --builder=gcr.io/buildpacks/builder sample-node
cd buildpack-samples/sample-python
pack build --builder=gcr.io/buildpacks/builder sample-python
cd buildpack-samples/sample-go
pack build --builder=gcr.io/buildpacks/builder sample-go
cd buildpack-samples/sample-java-gradle
pack build --builder=gcr.io/buildpacks/builder sample-java-gradle
cd buildpack-samples/sample-java-mvn
pack build --builder=gcr.io/buildpacks/builder sample-java-mvn
cd buildpack-samples/sample-dotnet
pack build --builder=gcr.io/buildpacks/builder sample-dotnet
Run your new build container in Docker
Run the appropriate section from the command below to bind the sample app created in the previous step to port 8080, so that it can be accessed via the browser.
docker run -it -e PORT=8080 -p 8080:8080 sample-node
docker run -it -e PORT=8080 -p 8080:8080 sample-python
docker run -it -e PORT=8080 -p 8080:8080 sample-go
docker run -it -e PORT=8080 -p 8080:8080 sample-java-gradle
docker run -it -e PORT=8080 -p 8080:8080 sample-java-mvn
docker run -it -e PORT=8080 -p 8080:8080 sample-dotnet
In the Cloud Shell window, click on the Web preview icon and select Preview on port 8080.
A new browser will open showing the "hello, world" message.
Press CTRL+C to stop the application.
Task 4. Build and run your sample app on Cloud Run
In the tasks above, we have built a container image locally using pack. After this, the next step would generally be pushing the container to Artifact Registry and then deploy to Cloud Run. However, it is also possible to have Cloud Run do all of the building and deployment for you.
Use the one-step gcloud command to deploy your container:
gcloud beta run deploy --source .
When prompted:
Confirm the service name by pressing Enter.
Choose region.
If asked to allow unauthenticated invocations, type Y and press Enter.
Wait a few minutes until the deployment is complete. The output should look similar to the below example:
Done.
Service [sample-node] revision [sample-node-00001-woz] has been deployed and is serving 100 percent of traffic.
Service URL: https://sample-node-z2caq24usq-uc.a.run.app
Congratulations!
You have completed this lab!
Next steps / Learn more
For more information on building a stateless HTTP container suitable for Cloud Run from code source and pushing it to Container Registry, see:
When you have completed your lab, click End Lab. Google Skills removes the resources you’ve used and cleans the account for you.
You will be given an opportunity to rate the lab experience. Select the applicable number of stars, type a comment, and then click Submit.
The number of stars indicates the following:
1 star = Very dissatisfied
2 stars = Dissatisfied
3 stars = Neutral
4 stars = Satisfied
5 stars = Very satisfied
You can close the dialog box if you don't want to provide feedback.
For feedback, suggestions, or corrections, please use the Support tab.
Copyright 2026 Google LLC All rights reserved. Google and the Google logo are trademarks of Google LLC. All other company and product names may be trademarks of the respective companies with which they are associated.
Antes de começar
Os laboratórios criam um projeto e recursos do Google Cloud por um período fixo
Os laboratórios têm um limite de tempo e não têm o recurso de pausa. Se você encerrar o laboratório, vai precisar recomeçar do início.
No canto superior esquerdo da tela, clique em Começar o laboratório
Usar a navegação anônima
Copie o nome de usuário e a senha fornecidos para o laboratório
Clique em Abrir console no modo anônimo
Fazer login no console
Faça login usando suas credenciais do laboratório. Usar outras credenciais pode causar erros ou gerar cobranças.
Aceite os termos e pule a página de recursos de recuperação
Não clique em Terminar o laboratório a menos que você tenha concluído ou queira recomeçar, porque isso vai apagar seu trabalho e remover o projeto
Este conteúdo não está disponível no momento
Você vai receber uma notificação por e-mail quando ele estiver disponível
Ótimo!
Vamos entrar em contato por e-mail se ele ficar disponível
Um laboratório por vez
Confirme para encerrar todos os laboratórios atuais e iniciar este
Use a navegação anônima para executar o laboratório
A melhor maneira de executar este laboratório é usando uma janela de navegação anônima
ou privada. Isso evita conflitos entre sua conta pessoal
e a conta de estudante, o que poderia causar cobranças extras
na sua conta pessoal.
In this lab, you learn about Google Cloud buildpacks, which allow developers to create containerized applications and deploy them without the need to install Docker locally, or create a Dockerfile. You will then take the same image and learn to deploy it directly on Cloud Run, allowing Cloud Run to do the building for you.
Duração:
Configuração: 0 minutos
·
Tempo de acesso: 45 minutos
·
Tempo para conclusão: 45 minutos