Vertex AI is now Gemini Enterprise Agent Platform! We are currently updating our content to reflect this change. Please bear with us if you encounter naming inconsistencies during this transition.
Wykorzystuj swoje umiejętności w konsoli Google Cloud
Punkty kontrolne
Create Cloud Managed Airflow environment
Sprawdź postępy
/ 35
Create a Cloud Storage bucket
Sprawdź postępy
/ 35
Uploading the DAG to Cloud Storage
Sprawdź postępy
/ 30
Instrukcje i wymagania dotyczące konfiguracji modułu
Chroń swoje konto i postępy. Zawsze używaj okna przeglądania prywatnego i danych logowania do modułu, kiedy go uruchamiasz.
Te treści nie są jeszcze zoptymalizowane pod kątem urządzeń mobilnych.
Dla maksymalnej wygody odwiedź nas na komputerze, korzystając z linku przesłanego e-mailem.
Overview
Workflows are a common theme in data analytics - they involve ingesting, transforming, and analyzing data to figure out the meaningful information within. In Google Cloud, the tool for hosting workflows is Cloud Managed Airflow which is a hosted version of the popular open source workflow tool Apache Airflow.
In this lab, you use the Google Cloud console to set up a Cloud Managed Airflow environment. You then use Cloud Managed Airflow to go through a simple workflow that verifies the existence of a data file, creates a Cloud Managed Apache Spark cluster, runs an Apache Hadoop wordcount job on the Cloud Managed Apache Spark cluster, and deletes the Cloud Managed Apache Spark cluster afterwards.
What you'll do
Use the Google Cloud console to create the Cloud Managed Airflow environment
View and run the DAG (Directed Acyclic Graph) in the Airflow web interface
View the results of the wordcount job in storage
Setup and requirements
Lab setup
For each lab, you get a new Google Cloud project and set of resources for a fixed time at no cost.
Sign in to Google Skills using an incognito window.
Note the lab's access time (for example, 1:15:00), and make sure you can finish within that time.
There is no pause feature. You can restart if needed, but you have to start at the beginning.
When ready, click Start lab.
Note your lab credentials (Username and Password). You will use them to sign in to the Google Cloud Console.
Click Open Google Console.
Click Use another account and copy/paste credentials for this lab into the prompts.
If you use other credentials, you'll receive errors or incur charges.
Accept the terms and skip the recovery resource page.
Activate Google Cloud Shell
Google Cloud Shell is a virtual machine that is loaded with development tools. It offers a persistent 5GB home directory and runs on the Google Cloud.
Google Cloud Shell provides command-line access to your Google Cloud resources.
In Cloud console, on the top right toolbar, click the Open Cloud Shell button.
Click Continue.
It takes a few moments to provision and connect to the environment. When you are connected, you are already authenticated, and the project is set to your PROJECT_ID. For example:
gcloud is the command-line tool for Google Cloud. It comes pre-installed on Cloud Shell and supports tab-completion.
You can list the active account name with this command:
[core]
project = qwiklabs-gcp-44776a13dea667a6
Note:
Full documentation of gcloud is available in the
gcloud CLI overview guide
.
Check project permissions
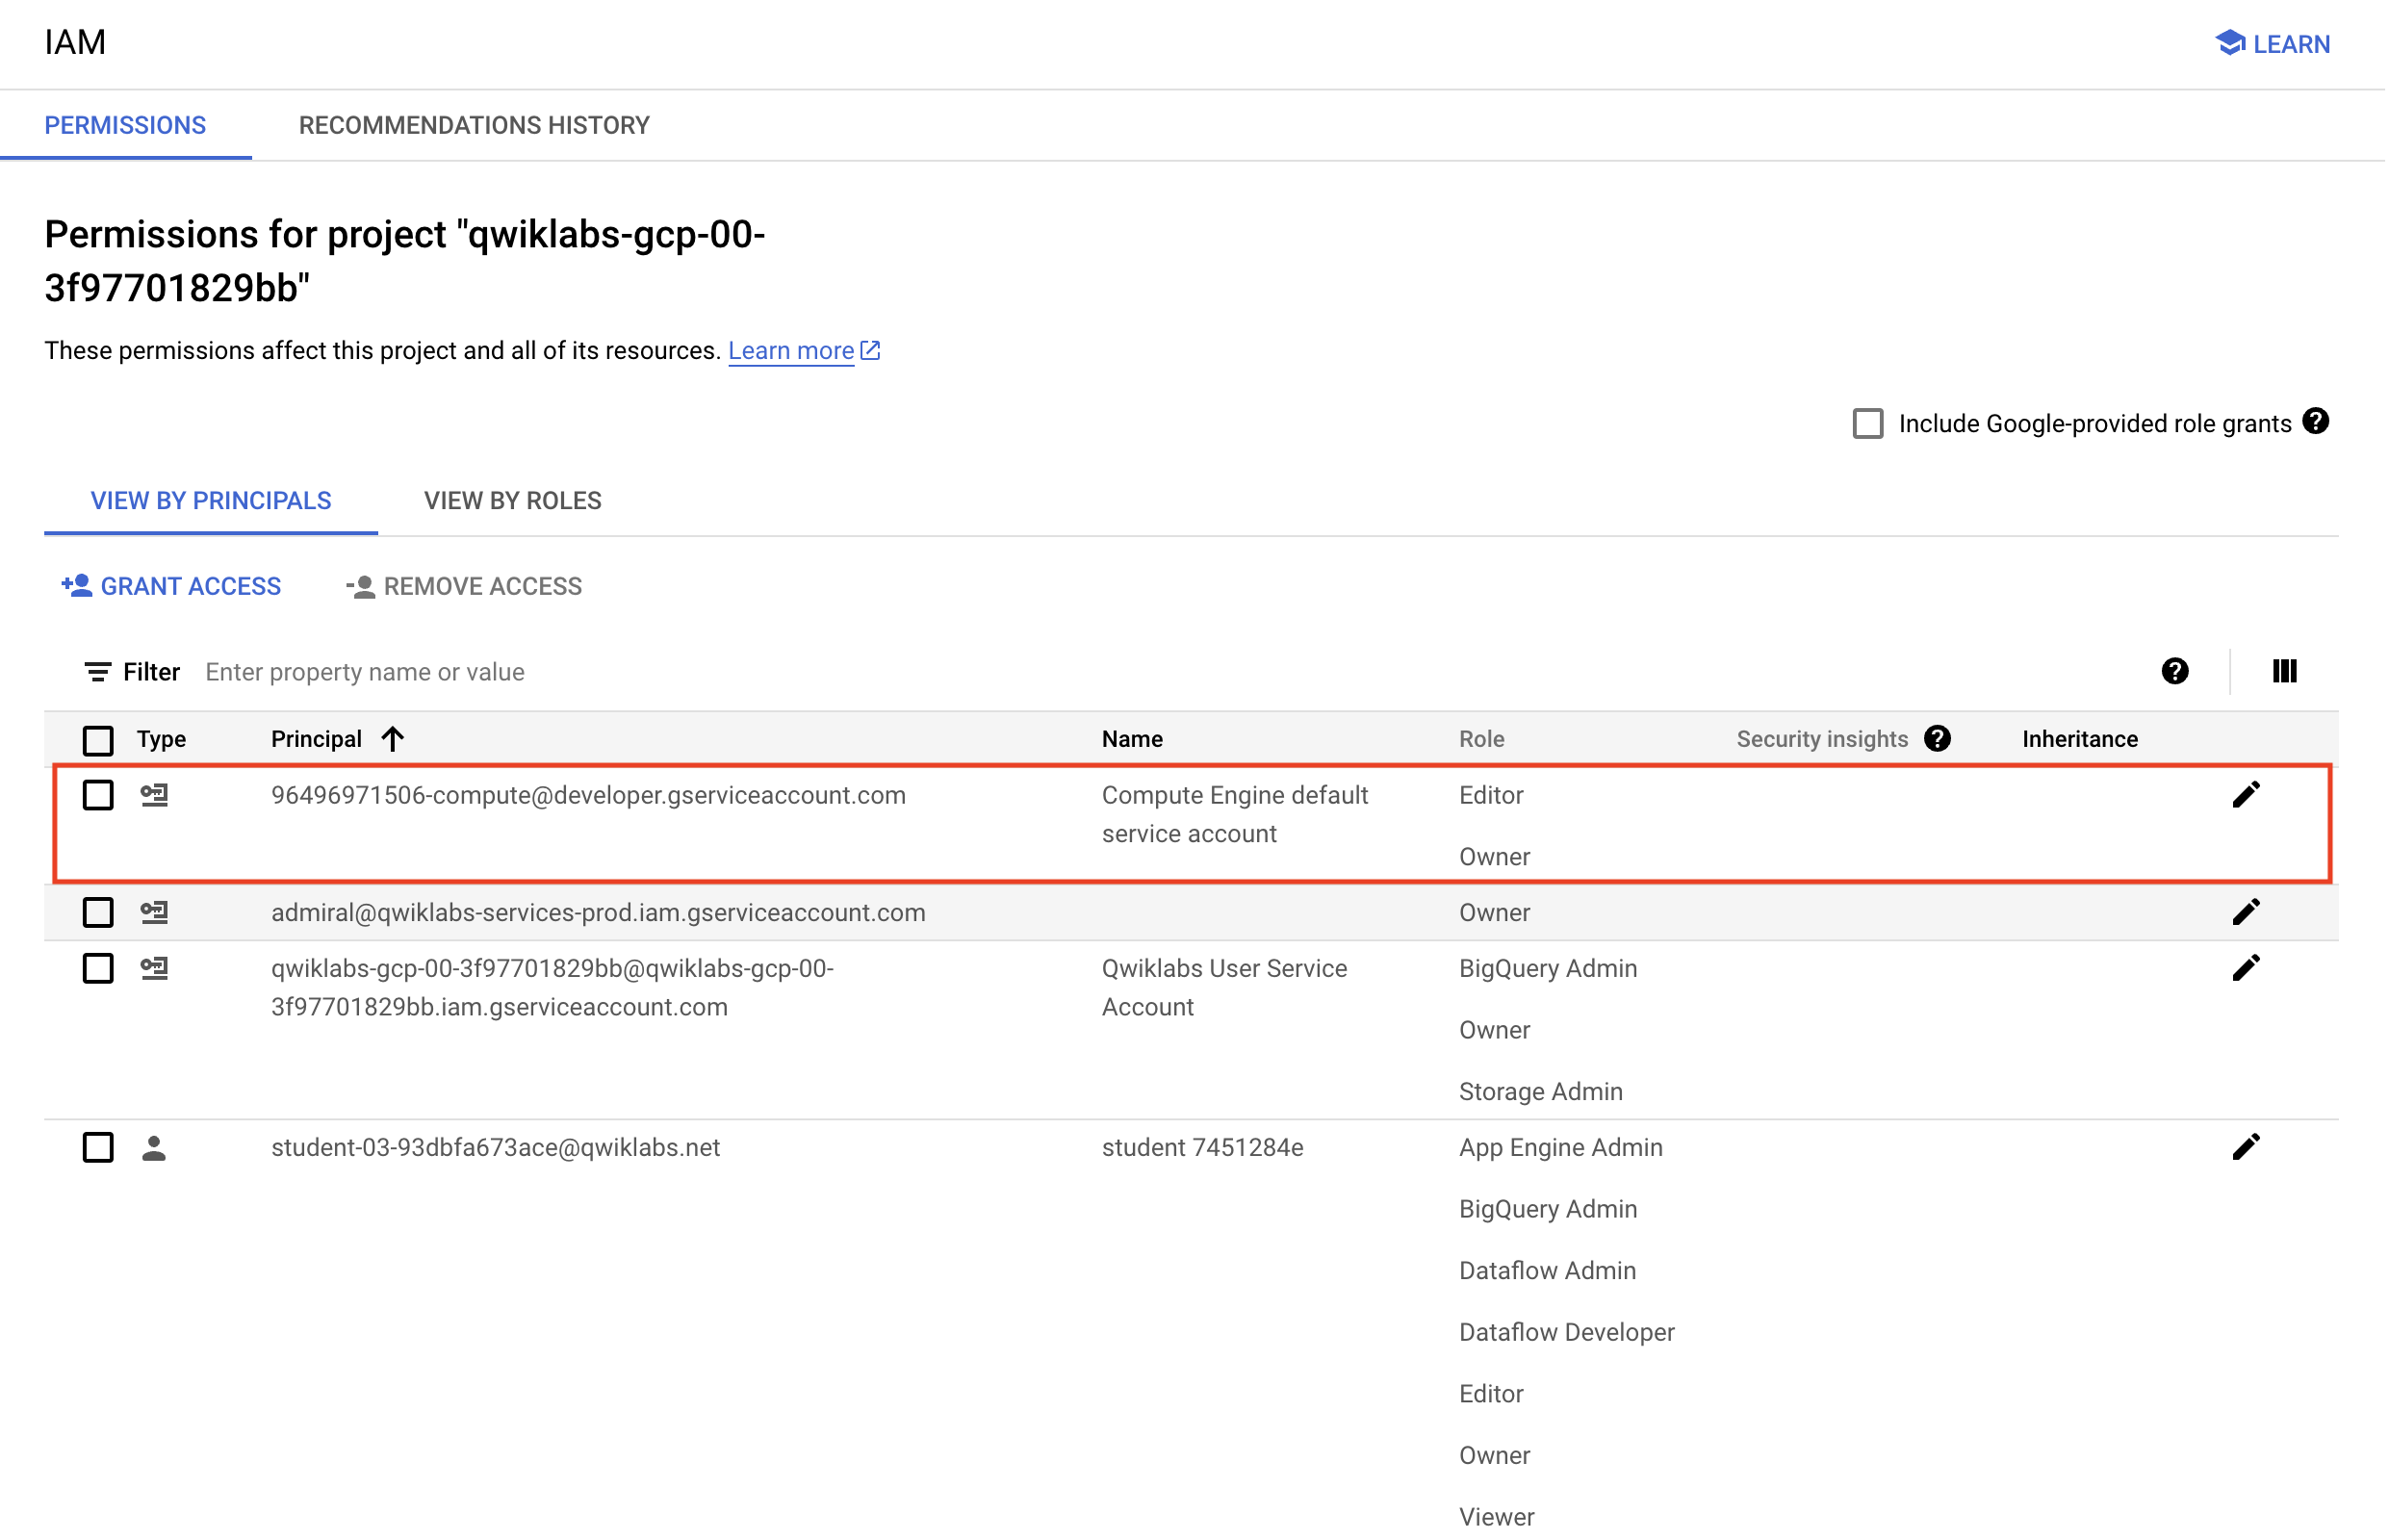
Before you begin your work on Google Cloud, you need to ensure that your project has the correct permissions within Identity and Access Management (IAM).
In the Google Cloud console, on the Navigation menu (), select IAM & Admin > IAM.
Confirm that the default compute Service Account {project-number}-compute@developer.gserviceaccount.com is present and has the editor role assigned. The account prefix is the project number, which you can find on Navigation menu > Cloud Overview > Dashboard.
Note: If the account is not present in IAM or does not have the editor role, follow the steps below to assign the required role.
In the Google Cloud console, on the Navigation menu, click Cloud Overview > Dashboard.
Copy the project number (e.g. 729328892908).
On the Navigation menu, select IAM & Admin > IAM.
At the top of the roles table, below View by Principals, click Grant Access.
In this section, you create a Cloud Managed Airflow environment.
Note: Before proceeding further, make sure that you have performed earlier tasks to ensure that the required APIs are successfully enabled. If not, then please perform those tasks otherwise Cloud Managed Airflow environment creation will fail.
On the Google Cloud console title bar, type Managed Airflow in the Search field, then click Managed Airflow in the Products & Page section.
Click Create Environment and select Managed Airflow Gen 3. Set the following for your environment:
Property
Value
Name
highcpu
Location
Image Version
composer-3-airflow-n.n.n-build.n (Note: select the highest number image available)
Service account
xxxxx-compute@developer.gserviceaccount.com
Resilience mode
Standard resilience
Airflow database zone
For Environment resources, Select Small.
For Web server network access control, select Allow access from all IP addresses.
Leave all other settings as default.
Click Create.
The environment creation process is completed when the green checkmark displays to the left of the environment name on the Environments page in the console.
It can take 15-30 minutes for the environment to complete the setup process. Continue with the lab while the environment spins up.
Click Check my progress to verify the objective.
Create Cloud Managed Airflow environment.
Create a Cloud Storage bucket
Create a Cloud Storage bucket in your project. This bucket will be used as output for the Hadoop job from Managed Apache Spark.
Go to Navigation menu > Cloud Storage > Buckets and then click + Create.
Give your bucket a universally unique name such as your Project ID, , then click Create. If prompted Public access will be prevented, click Confirm.
Remember the Cloud Storage bucket name to use it as an Airflow variable later in the lab.
Click Check my progress to verify the objective.
Create a Cloud Storage bucket.
Task 3. Airflow and core concepts
While waiting for your Managed Airflow environment to get created, review some terms that are used with Airflow.
Airflow is a platform to programmatically author, schedule and monitor workflows.
Use Airflow to author workflows as directed acyclic graphs (DAGs) of tasks. The airflow scheduler executes your tasks on an array of workers while following the specified dependencies.
Now let's discuss the workflow you'll be using. Cloud Managed Airflow workflows are comprised of DAGs (Directed Acyclic Graphs). DAGs are defined in standard Python files that are placed in Airflow's DAG_FOLDER. Airflow will execute the code in each file to dynamically build the DAG objects. You can have as many DAGs as you want, each describing an arbitrary number of tasks. In general, each one should correspond to a single logical workflow.
Below is the hadoop_tutorial.py workflow code, also referred to as the DAG:
"""Example Airflow DAG that creates a Cloud Managed Apache Spark cluster, runs the Hadoop
wordcount example, and deletes the cluster.
This DAG relies on three Airflow variables
https://airflow.apache.org/concepts.html#variables
* gcp_project - Google Cloud Project to use for the Cloud Managed Apache Spark cluster.
* gce_zone - Google Compute Engine zone where Cloud Managed Apache Spark cluster should be
created.
* gce_region - Google Compute Engine region where Cloud Managed Apache Spark cluster should be
created.
* gcs_bucket - Google Cloud Storage bucket to used as output for the Hadoop jobs from Managed Apache Spark.
See https://cloud.google.com/storage/docs/creating-buckets for creating a
bucket.
"""
import datetime
import os
from airflow import models
from airflow.providers.google.cloud.operators.dataproc import (
DataprocCreateClusterOperator,
DataprocDeleteClusterOperator,
DataprocSubmitJobOperator,
)
from airflow.utils.trigger_rule import TriggerRule
# Define the DAG's schedule using a cron expression for daily runs
DAILY_SCHEDULE = '0 0 * * *' # Runs at midnight every day
# Output file for Cloud Managed Apache Spark job.
output_file = os.path.join(
models.Variable.get('gcs_bucket'), 'wordcount',
datetime.datetime.now().strftime('%Y%m%d-%H%M%S')) + os.sep
# Path to Hadoop wordcount example available on every Managed Apache Spark cluster.
WORDCOUNT_JAR = (
'file:///usr/lib/hadoop-mapreduce/hadoop-mapreduce-examples.jar'
)
# Arguments to pass to Cloud Managed Apache Spark job.
wordcount_args = ['wordcount', 'gs://pub/shakespeare/rose.txt', output_file]
yesterday = datetime.datetime.combine(
datetime.datetime.today() - datetime.timedelta(1),
datetime.datetime.min.time())
default_dag_args = {
# Setting start date as yesterday starts the DAG immediately when it is
# detected in the Cloud Storage bucket.
'start_date': yesterday,
# To email on failure or retry set 'email' arg to your email and enable
# emailing here.
'email_on_failure': False,
'email_on_retry': False,
# If a task fails, retry it once after waiting at least 5 minutes
'retries': 1,
'retry_delay': datetime.timedelta(minutes=5),
'project_id': models.Variable.get('gcp_project')
}
with models.DAG(
dag_id='composer_hadoop_tutorial', # It's good practice to explicitly use 'dag_id'
schedule_interval=DAILY_SCHEDULE, # Using the new cron expression
default_args=default_dag_args) as dag:
# Create a Cloud Managed Apache Spark cluster.
create_dataproc_cluster = DataprocCreateClusterOperator(
task_id='create_dataproc_cluster',
# Give the cluster a unique name by appending the date scheduled.
# See https://airflow.apache.org/code.html#default-variables
cluster_name='composer-hadoop-tutorial-cluster-{{ ds_nodash }}',
num_workers=2,
region=models.Variable.get('gce_region'),
zone=models.Variable.get('gce_zone'),
image_version='2.0',
master_machine_type='e2-standard-2',
worker_machine_type='e2-standard-2')
# Run the Hadoop wordcount example installed on the Cloud Dataproc cluster
# master node.
run_dataproc_hadoop = DataprocSubmitJobOperator(
task_id='run_dataproc_hadoop',
region=models.Variable.get('gce_region'),
job={
"placement": {"cluster_name": 'composer-hadoop-tutorial-cluster-{{ ds_nodash }}'},
"hadoop_job": {
"main_jar_file_uri": WORDCOUNT_JAR,
"args": wordcount_args
}
}
)
# Delete Cloud Managed Apache Spark cluster.
delete_dataproc_cluster = DataprocDeleteClusterOperator(
task_id='delete_dataproc_cluster',
project_id=models.Variable.get('gcp_project'),
region=models.Variable.get('gce_region'),
cluster_name='composer-hadoop-tutorial-cluster-{{ ds_nodash }}',
# Setting trigger_rule to ALL_DONE causes the cluster to be deleted
# even if the Dataproc job fails.
trigger_rule=TriggerRule.ALL_DONE)
# Define DAG dependencies.
create_dataproc_cluster >> run_dataproc_hadoop >> delete_dataproc_cluster
To orchestrate the three workflow tasks, the DAG imports the following operators:
DataprocCreateClusterOperator: Creates a Cloud Managed Apache Spark cluster.
DataprocSubmitJobOperator: Submits a Hadoop wordcount job and writes results to a Cloud Storage bucket.
DataprocDeleteClusterOperator: Deletes the cluster to avoid incurring ongoing Compute Engine charges.
The tasks run sequentially, which you can see in this section of the file:
# Define DAG dependencies.
create_dataproc_cluster >> run_dataproc_hadoop >> delete_dataproc_cluster
The name of the DAG is composer_hadoop_tutorial, and the DAG runs once each day:
with models.DAG(
'composer_hadoop_tutorial',
# Continue to run DAG once per day
schedule_interval=datetime.timedelta(days=1),
default_args=default_dag_args) as dag:
Because the start_date that is passed in to default_dag_args is set to yesterday, Cloud Managed Airflow schedules the workflow to start immediately after the DAG uploads.
Task 5. Viewing environment information
Go back to Managed Airflow to check the status of your environment.
Once your environment has been created, click the name of the environment (highcpu) to see its details.
On the Environment configuration tab you'll see information such as the Airflow web UI URL, GKE cluster, and a link to the DAGs folder, which is stored in your bucket.
Note: Cloud Managed Airflow only schedules the workflows in the /dags folder.
Task 6. Using the Airflow UI
To access the Airflow web interface using the console:
Go back to the Environments page.
In the Airflow webserver column for the environment, click Airflow.
Click on your lab credentials.
The Airflow web interface opens in a new browser window.
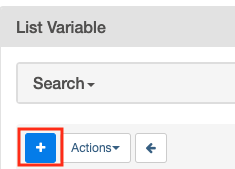
Task 7. Setting Airflow variables
Airflow variables are an Airflow-specific concept that is distinct from environment variables.
From the Airflow interface, select Admin > Variables from the menu bar.
Click + icon to add a new record.
Create the following Airflow variables: gcp_project, gcs_bucket, gce_zone, and gce_region. Click Save after each variable.
Key
Val
Details
gcp_project
The Google Cloud Platform project you're using for this lab.
gcs_bucket
gs://
This bucket stores the output from the Hadoop jobs from Managed Apache Spark.
gce_zone
This is the Compute Engine zone where your Cloud Managed Apache Spark cluster will be created.
gce_region
This is the Compute Engine region where your Cloud Managed Apache Spark cluster will be created.
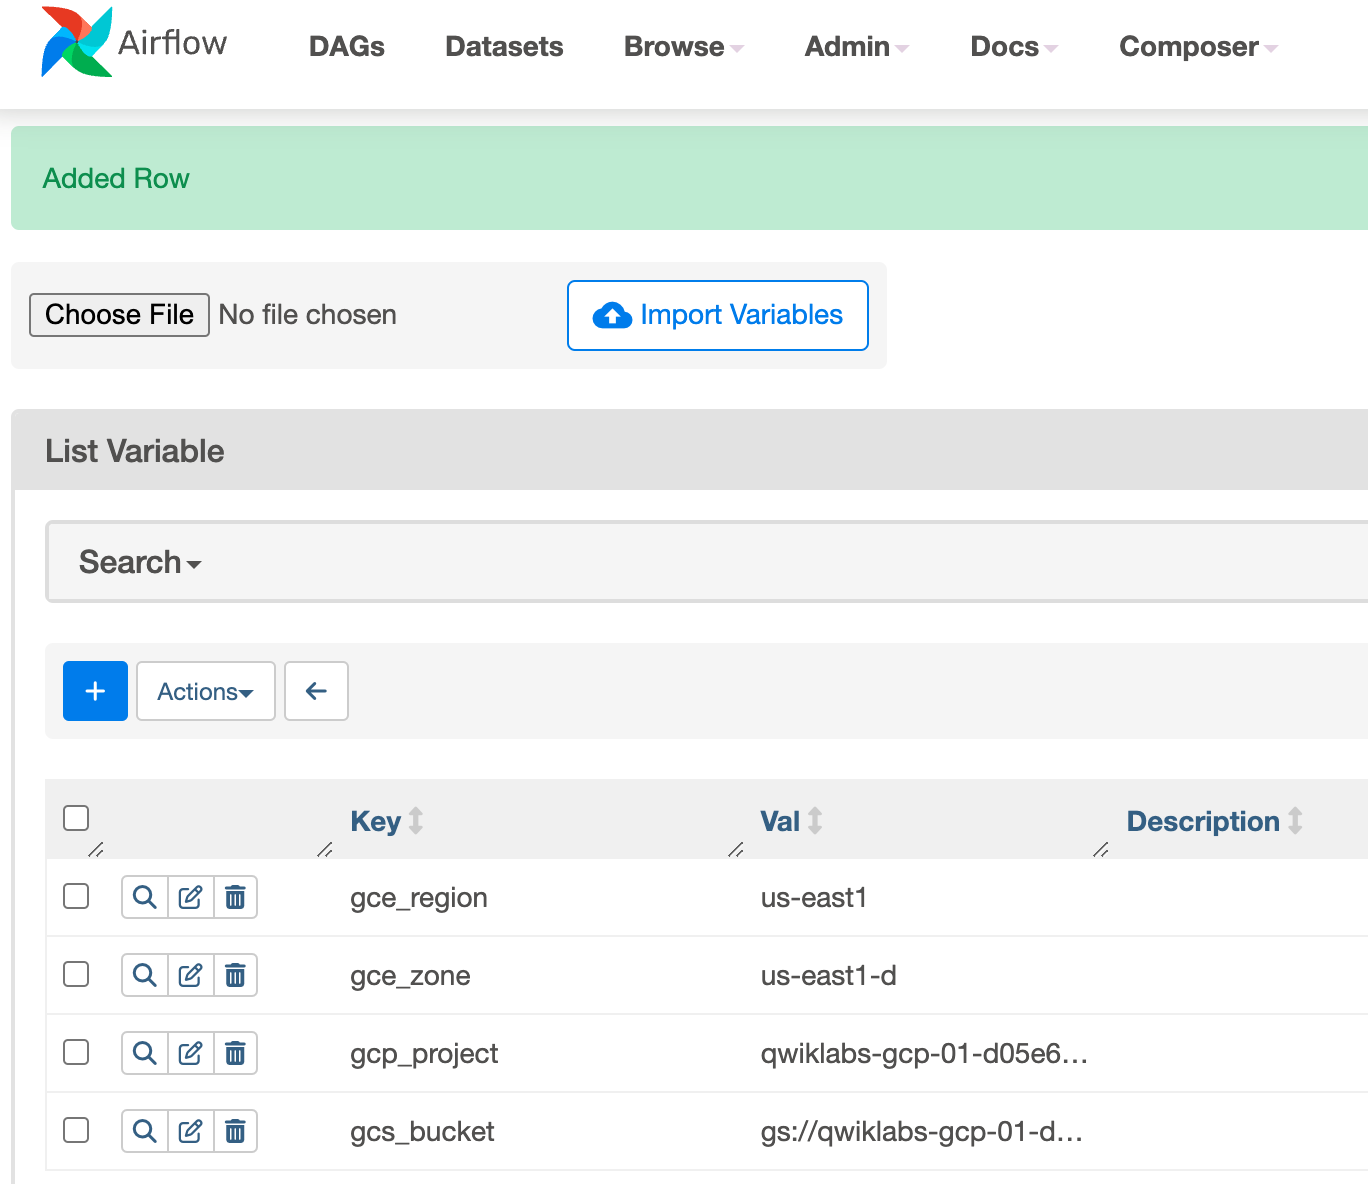
Click Save. After adding first variable repeat the same process for second and third variable. Your Variables table should look like this when you're finished:
Task 8. Uploading the DAG to Cloud Storage
To upload the DAG:
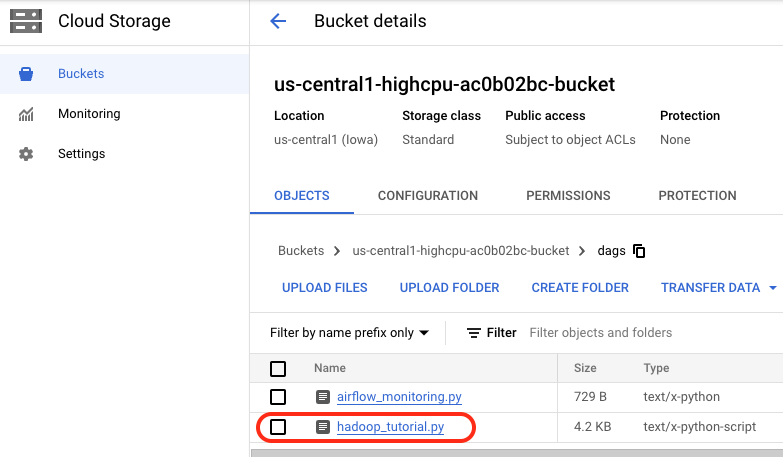
In the Cloud Shell run the below command to upload a copy of the hadoop_tutorial.py file to the Cloud Storage bucket that was automatically created when you created the environment.
Replace <DAGs_folder_path> in the following command with the path to the DAGs folder:
Once the file has been successfully uploaded to the DAGs directory, open dags folder in the bucket and you will see the file in the Objects tab of the Bucket details.
When a DAG file is added to the DAGs folder, Cloud Managed Airflow adds the DAG to Airflow and schedules it automatically. DAG changes occur within 3-5 minutes.
You can see the task status of the composer_hadoop_tutorial DAG in the Airflow web interface.
Note: You may safely ignore any message on the interface such as "The scheduler does not appear to be running...". The Airflow web interface will update as the DAG progresses.
Click Check my progress to verify the objective.
Uploading the DAG to Cloud Storage.
Exploring DAG runs
When you upload your DAG file to the dags folder in Cloud Storage, Cloud Managed Airflow parses the file. If no errors are found, the name of the workflow appears in the DAG listing, and the workflow is queued to run immediately.
Make sure that you're on the DAGs tab in the Airflow web interface. It takes several minutes for this process to complete. Refresh your browser to make sure you're looking at the latest information.
In Airflow, click composer_hadoop_tutorial to open the DAG details page. This page includes several representations of the workflow tasks and dependencies.
In the toolbar, click Graph. Mouseover the graphic for each task to see its status. Note that the border around each task also indicates the status (green border = running; red = failed, etc.).
Click the "Refresh" link to make sure you're looking at the most recent information. The borders of the processes change color as the state of the process changes
Note: If your Managed Apache Spark cluster already exists, you can run the workflow again to reach the success state by clicking `create_dataproc_cluster` graphic and then click Clear to reset the three tasks and click OK to confirm.
Once the status for create_dataproc_cluster has changed to "running", go to Navigation menu > View all products > Managed Apache Spark, then click on:
Clusters to monitor cluster creation and deletion. The cluster created by the workflow is ephemeral: it only exists for the duration of the workflow and is deleted as part of the last workflow task.
Jobs to monitor the Apache Hadoop wordcount job. Click the Job ID to see job log output.
Once Dataproc gets to a state of "Running", return to Airflow and click Refresh to see that the cluster is complete.
When the run_dataproc_hadoop process is complete, go to Navigation menu > Cloud Storage > Buckets and click on the name of your bucket to see the results of the wordcount in the wordcount folder.
Once all the steps are complete in the DAG, each step has a dark green border. Additionally the Dataproc cluster that was created is now deleted.
Congratulations!
You've successfully run a Cloud Managed Airflow workflow!
When you have completed your lab, click End Lab. Google Skills removes the resources you’ve used and cleans the account for you.
You will be given an opportunity to rate the lab experience. Select the applicable number of stars, type a comment, and then click Submit.
The number of stars indicates the following:
1 star = Very dissatisfied
2 stars = Dissatisfied
3 stars = Neutral
4 stars = Satisfied
5 stars = Very satisfied
You can close the dialog box if you don't want to provide feedback.
For feedback, suggestions, or corrections, please use the Support tab.
Copyright 2026 Google LLC All rights reserved. Google and the Google logo are trademarks of Google LLC. All other company and product names may be trademarks of the respective companies with which they are associated.
Moduły tworzą projekt Google Cloud i zasoby na określony czas.
Moduły mają ograniczenie czasowe i nie mają funkcji wstrzymywania. Jeśli zakończysz moduł, musisz go zacząć od początku.
Aby rozpocząć, w lewym górnym rogu ekranu kliknij Rozpocznij moduł.
Użyj przeglądania prywatnego
Skopiuj podaną nazwę użytkownika i hasło do modułu.
Kliknij Otwórz konsolę w trybie prywatnym.
Zaloguj się w konsoli
Zaloguj się z użyciem danych logowania do modułu. Użycie innych danych logowania może spowodować błędy lub naliczanie opłat.
Zaakceptuj warunki i pomiń stronę zasobów przywracania.
Nie klikaj Zakończ moduł, chyba że właśnie został przez Ciebie zakończony lub chcesz go uruchomić ponownie, ponieważ spowoduje to usunięcie wyników i projektu.
Ta treść jest obecnie niedostępna
Kiedy dostępność się zmieni, wyślemy Ci e-maila z powiadomieniem
Świetnie
Kiedy dostępność się zmieni, skontaktujemy się z Tobą e-mailem
Jeden moduł, a potem drugi
Potwierdź, aby zakończyć wszystkie istniejące moduły i rozpocząć ten
Aby uruchomić moduł, użyj przeglądania prywatnego
Najlepszym sposobem na uruchomienie tego laboratorium jest użycie okna incognito lub przeglądania prywatnego. Dzięki temu unikniesz konfliktu między swoim kontem osobistym a kontem do nauki, co mogłoby spowodować naliczanie dodatkowych opłat na koncie osobistym.
In this lab, you create a Cloud Managed Airflow environment using the GCP Console. You then use the Airflow web interface to run a workflow that verifies a data file, creates and runs an Apache Hadoop wordcount job on a Managed Apache Spark cluster, and deletes the cluster.
Czas trwania:
Konfiguracja: 0 min
·
Dostęp na 90 min
·
Ukończono w 90 min


 ), select IAM & Admin > IAM.