Dieser Inhalt ist noch nicht für Mobilgeräte optimiert.
Die Lernumgebung funktioniert am besten, wenn Sie auf einem Computer über einen per E‑Mail gesendeten Link darauf zugreifen.
Overview
In this lab, you peer two networks. This allows communication between machines in those networks using internal IP addresses. This means that databases can be deployed on a private network without external IP addresses, and those databases will only be reachable from the peered network.
Objectives
In this lab, you learn how to perform the following tasks:
Peer two networks.
Deploy a VM with no external IP.
Setup and requirements
In this task, you perform initialization steps for your lab.
For each lab, you get a new Google Cloud project and set of resources for a fixed time at no cost.
Sign in to Google Skills using an incognito window.
Note the lab's access time (for example, 1:15:00), and make sure you can finish within that time.
There is no pause feature. You can restart if needed, but you have to start at the beginning.
When ready, click Start lab.
Note your lab credentials (Username and Password). You will use them to sign in to the Google Cloud Console.
Click Open Google Console.
Click Use another account and copy/paste credentials for this lab into the prompts.
If you use other credentials, you'll receive errors or incur charges.
Accept the terms and skip the recovery resource page.
Task 1. Peer two networks
Open a new web browser window and navigate to the Google Cloud Console (console.cloud.google.com). Use the project selector to choose
the first project with a leading name of 'qwiklabs-gcp.'
On the Navigation menu (), click Cloud Overview.
In the Project info section, find your Project ID and copy and paste it into a text file. You will need it later.
Click Activate Cloud Shell () in the upper right of the Console. The Cloud Shell terminal will open in a pane at the bottom of the window. Click Continue if prompted.
To clone a GitHub repository that includes a completed version of the previous lab, enter the following command:
cd ~/training-data-analyst/courses/db-migration/terraform-create-peering/
Type ls, and you see that this folder has the Terraform files to create two networks and a couple of test servers.
Click Open Editor, and then click Open in a new window.
Navigate to training-data-analyst/courses/db-migration/terraform-create-peering/ folder, and then open the terraform.tfvars file.
Change the values in the terraform.tfvars file as noted below.
Item
Value
project_id
gcp_region_1
gcp_zone_1
In the Cloud Console, initialize Terraform and create the resources, by entering the following commands:
terraform init
terraform plan
terraform apply -auto-approve
If you see the Authorize Cloud Shell dialog box, click Authorize.
When the Terraform process completes, on the Navigation menu (), click Compute Engine.
You now have two machines: one in the public network and one in the private network.
Copy the internal IP address of the private machine to the clipboard (it should be 10.2.2.2), and then SSH into the one with the name that begins with public-test-server-.
Ping the private machine (at this point it shouldn't work):
ping 10.2.2.2
Note: To allow communication between two GCP networks via their internal IP addresses, you need to peer them. You'll do that now.
On the Navigation menu (), click VPC network > VPC network peering.
Notice that there are no peered networks at this point. You could set up the peering here in the Console, but using Terraform is more automated and reproducible.
Back in Cloud Shell, make sure you are in the ~/training-data-analyst/courses/db-migration/terraform-create-peering/ folder, and create a file called vpc-peering.tf:
cd ~/training-data-analyst/courses/db-migration/terraform-create-peering/
touch vpc-peering.tf
Click Open Editor, find the file you just created, and add the following code to it:
resource "google_compute_network_peering" "public-private" {
name = "peering1"
network = google_compute_network.public-vpc.self_link
peer_network = google_compute_network.private-vpc.self_link
}
resource "google_compute_network_peering" "private-public" {
name = "peering2"
network = google_compute_network.private-vpc.self_link
peer_network = google_compute_network.public-vpc.self_link
}
Note: A peering request has to be made from both networks. That is why there are two network peerings: one from the public network to the private network, and one in the opposite direction.
To create the peering, switch back to the Cloud Shell terminal and enter the following command:
terraform apply -auto-approve
After the command completes, return to the Console. Navigate away from the VPC network peering page and then back to it, to refresh the view. The peering is created and active.
Switch back to the SSH window of the public test server, and your ping command has started working. Press CTRL+C to stop the command, and then type exit to close the SSH session.
Click Check my progress to verify the objective.
Peer two networks
Task 2. Deploy a VM with no external IP
Once the networks are peered, machines in the private network do not need a public IP address.
In Cloud Shell, switch to the Code Editor, and then open the file private-test-server-linux.tf.
In the network_interface section, comment out the line that reads access_config { } (line 19).
Note: Comments in Terraform use the "#" character. This will cause the VM to be created without an external IP address.
Because there is no longer going to be an external IP address, you can't output its value.
Find the code that outputs the VM's external IP address, and change it to the string NONE. It should be line 29. See the example below:
output "private-test-server-linux-external-ip" {
value = "NONE"
}
Return to the Cloud Shell terminal and apply your change:
terraform apply -auto-approve
Click Check my progress to verify the objective.
Deploy a VM with no external IP
When the Terraform command completes, in the Console, go to the Compute Engine service. The private VM now has no external IP address. SSH into the public VM and make sure you can still ping the private server via its internal IP address.
Return to the the Cloud Shell terminal and delete everything:
terraform destroy -auto-approve
Congratulations! You have peered two networks. This allows communication between machines in those networks using internal IP addresses. This means that databases can be deployed on a private network without external IP addresses, and those databases will only be reachable from the peered network.
End your lab
When you have completed your lab, click End Lab. Google Skills removes the resources you’ve used and cleans the account for you.
You will be given an opportunity to rate the lab experience. Select the applicable number of stars, type a comment, and then click Submit.
The number of stars indicates the following:
1 star = Very dissatisfied
2 stars = Dissatisfied
3 stars = Neutral
4 stars = Satisfied
5 stars = Very satisfied
You can close the dialog box if you don't want to provide feedback.
For feedback, suggestions, or corrections, please use the Support tab.
Copyright 2026 Google LLC All rights reserved. Google and the Google logo are trademarks of Google LLC. All other company and product names may be trademarks of the respective companies with which they are associated.
Labs erstellen ein Google Cloud-Projekt und Ressourcen für einen bestimmten Zeitraum
Labs haben ein Zeitlimit und keine Pausenfunktion. Wenn Sie das Lab beenden, müssen Sie von vorne beginnen.
Klicken Sie links oben auf dem Bildschirm auf Lab starten, um zu beginnen
Privates Surfen verwenden
Kopieren Sie den bereitgestellten Nutzernamen und das Passwort für das Lab
Klicken Sie im privaten Modus auf Konsole öffnen
In der Konsole anmelden
Melden Sie sich mit Ihren Lab-Anmeldedaten an. Wenn Sie andere Anmeldedaten verwenden, kann dies zu Fehlern führen oder es fallen Kosten an.
Akzeptieren Sie die Nutzungsbedingungen und überspringen Sie die Seite zur Wiederherstellung der Ressourcen
Klicken Sie erst auf Lab beenden, wenn Sie das Lab abgeschlossen haben oder es neu starten möchten. Andernfalls werden Ihre bisherige Arbeit und das Projekt gelöscht.
Diese Inhalte sind derzeit nicht verfügbar
Bei Verfügbarkeit des Labs benachrichtigen wir Sie per E-Mail
Sehr gut!
Bei Verfügbarkeit kontaktieren wir Sie per E-Mail
Es ist immer nur ein Lab möglich
Bestätigen Sie, dass Sie alle vorhandenen Labs beenden und dieses Lab starten möchten
Privates Surfen für das Lab verwenden
Am besten führen Sie dieses Lab in einem Inkognito- oder privaten Browserfenster aus. So vermeiden Sie Konflikte zwischen Ihrem privaten Konto und dem Teilnehmerkonto, die zusätzliche Kosten für Ihr privates Konto verursachen könnten.
In this lab, you will peer two networks. This will allow communication between machines in those networks using internal IP addresses. This means databases can be deployed on a private network without external IP addresses, and those database will only be reachable from from the peered network.

 ), click Cloud Overview.
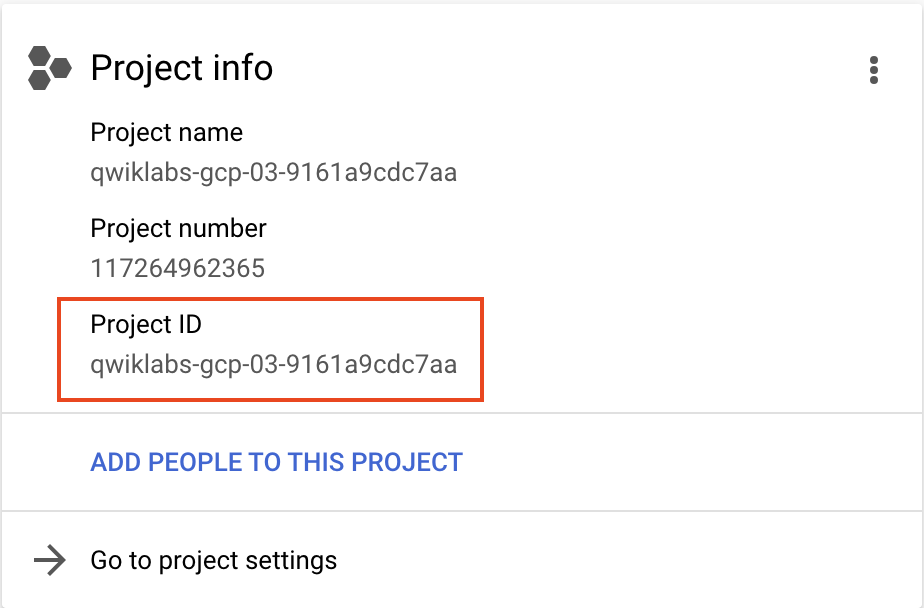
 ) in the upper right of the Console. The Cloud Shell terminal will open in a pane at the bottom of the window. Click Continue if prompted.


