Este conteúdo ainda não foi otimizado para dispositivos móveis.
Para aproveitar a melhor experiência, acesse nosso site em um computador desktop usando o link enviado a você por e-mail.
Overview
In this lab, you run Dataflow pipelines to serve predictions for batch requests and streaming in real time.
Objectives
In this lab, you learn how to perform the following tasks:
Create a prediction service that calls your trained model deployed in Cloud to serve predictions.
Run a Dataflow job to have the prediction service read in batches from a CSV file and serve predictions.
Run a streaming Dataflow pipeline to read requests in real time from Pub/Sub and write predictions into a BigQuery table.
Setup and requirements
For each lab, you get a new Google Cloud project and set of resources for a fixed time at no cost.
Sign in to Google Skills using an incognito window.
Note the lab's access time (for example, 1:15:00), and make sure you can finish within that time.
There is no pause feature. You can restart if needed, but you have to start at the beginning.
When ready, click Start lab.
Note your lab credentials (Username and Password). You will use them to sign in to the Google Cloud Console.
Click Open Google Console.
Click Use another account and copy/paste credentials for this lab into the prompts.
If you use other credentials, you'll receive errors or incur charges.
Accept the terms and skip the recovery resource page.
Activate Cloud Shell
Cloud Shell is a virtual machine that contains development tools. It offers a persistent 5-GB home directory and runs on Google Cloud. Cloud Shell provides command-line access to your Google Cloud resources. gcloud is the command-line tool for Google Cloud. It comes pre-installed on Cloud Shell and supports tab completion.
Click the Activate Cloud Shell button () at the top right of the console.
Click Continue.
It takes a few moments to provision and connect to the environment. When you are connected, you are also authenticated, and the project is set to your PROJECT_ID.
[core]
project = qwiklabs-gcp-44776a13dea667a6
Note: Full documentation of gcloud is available in the gcloud CLI overview guide.
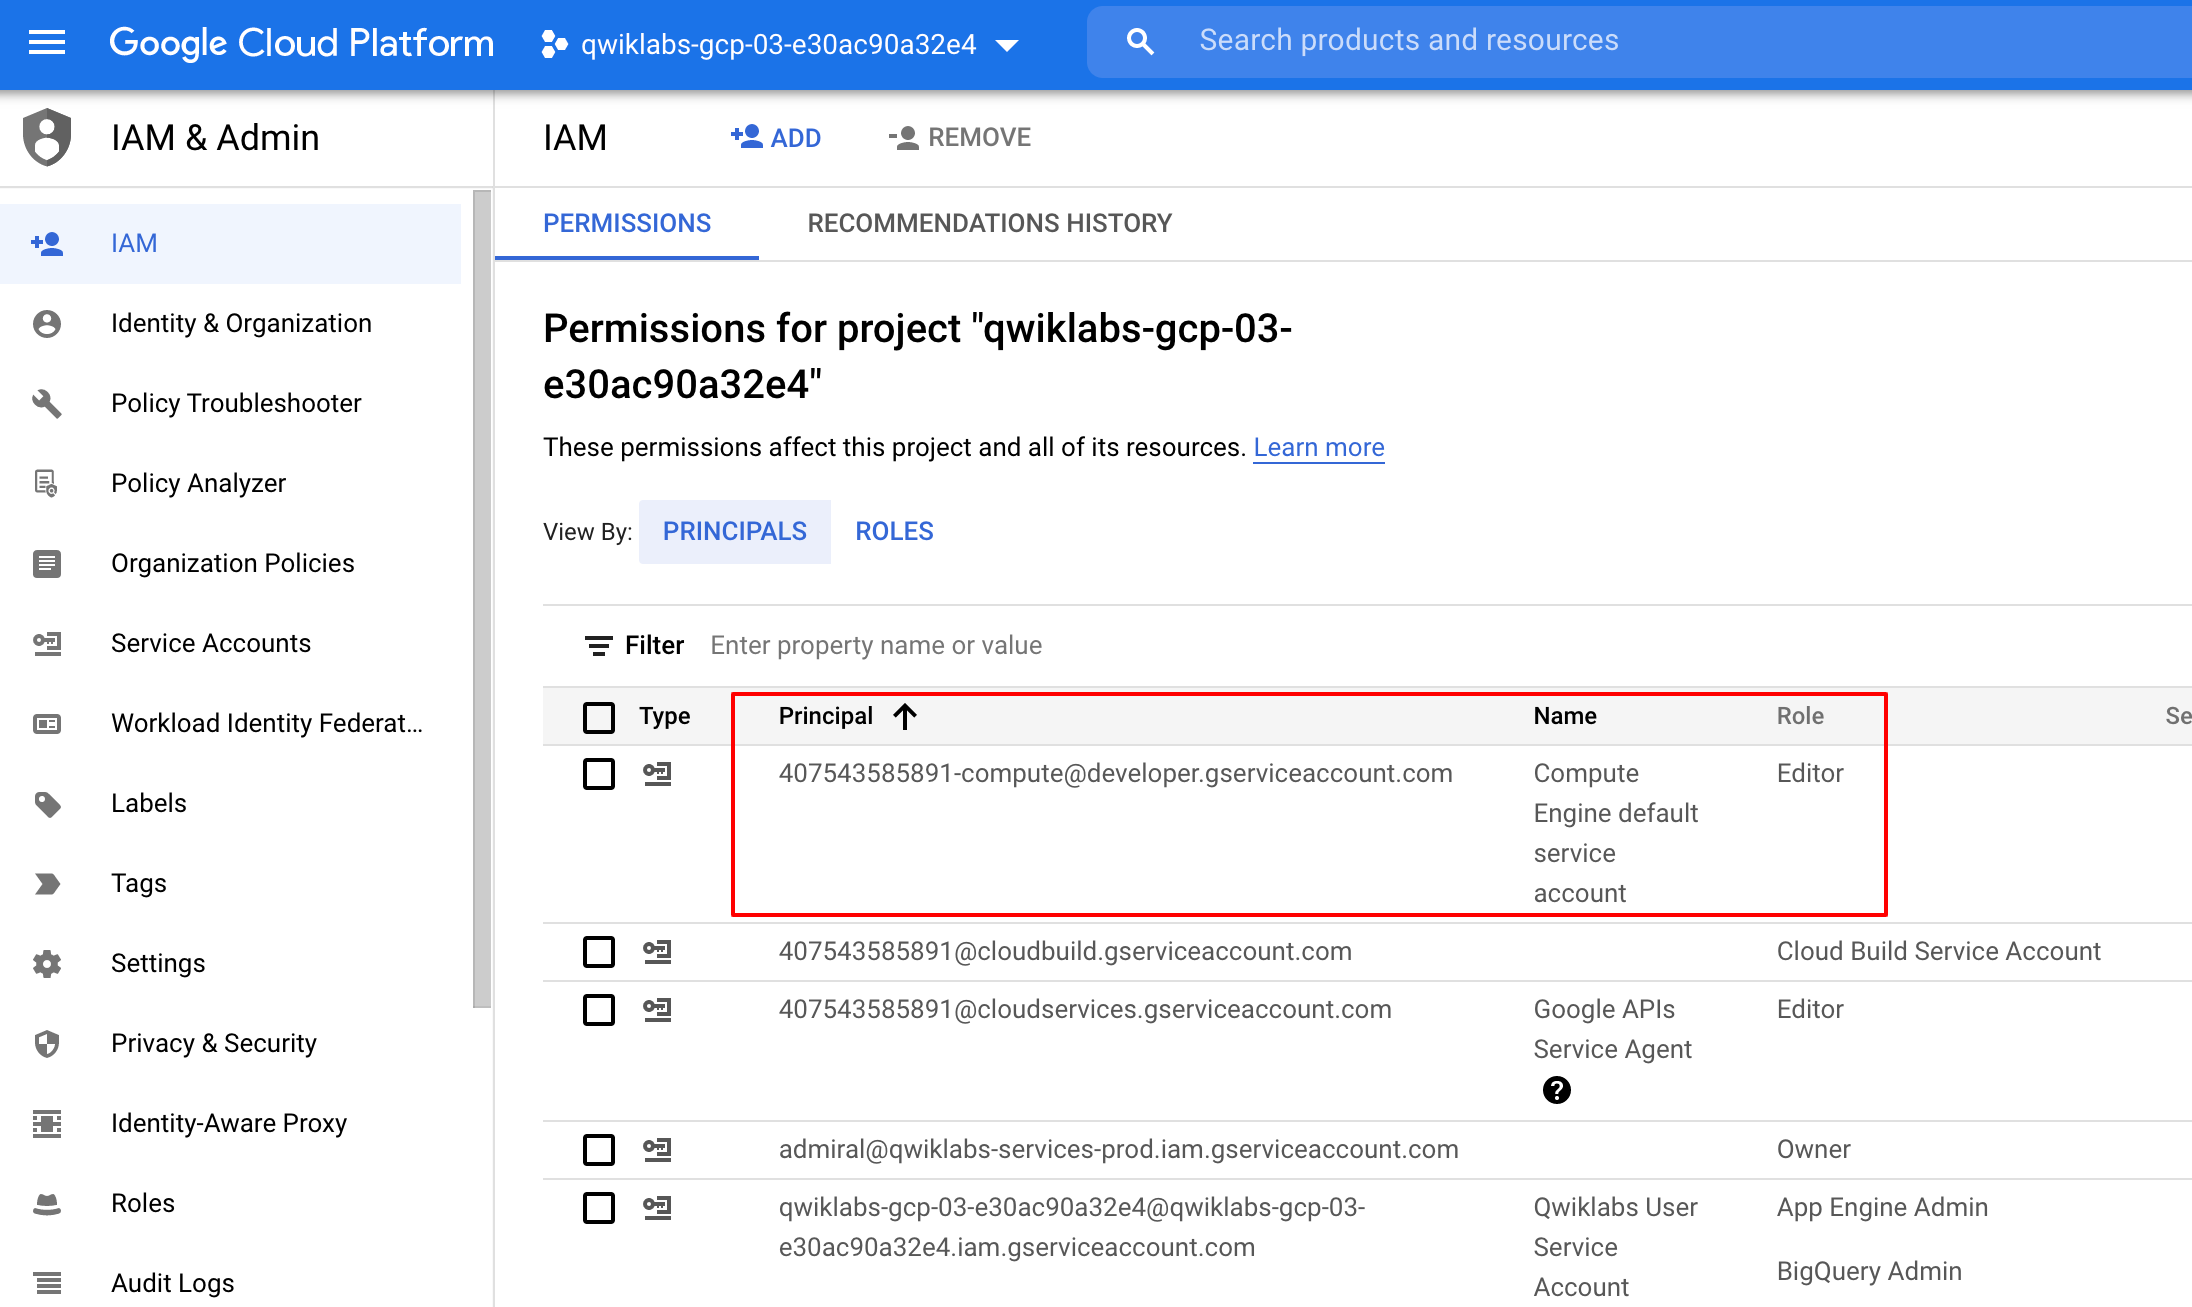
Check project permissions
Before you begin working on Google Cloud, you must ensure that your project has the correct permissions within Identity and Access Management (IAM).
In the Google Cloud console, on the Navigation menu (), click IAM & Admin > IAM.
Confirm that the default compute Service Account {project-number}-compute@developer.gserviceaccount.com is present and has the editor role assigned. The account prefix is the project number, which you can find on Navigation menu > Cloud overview.
If the account is not present in IAM or does not have the editor role, follow the steps below to assign the required role.
In the Google Cloud console, on the Navigation menu, click Cloud overview.
From the Project info card, copy the Project number.
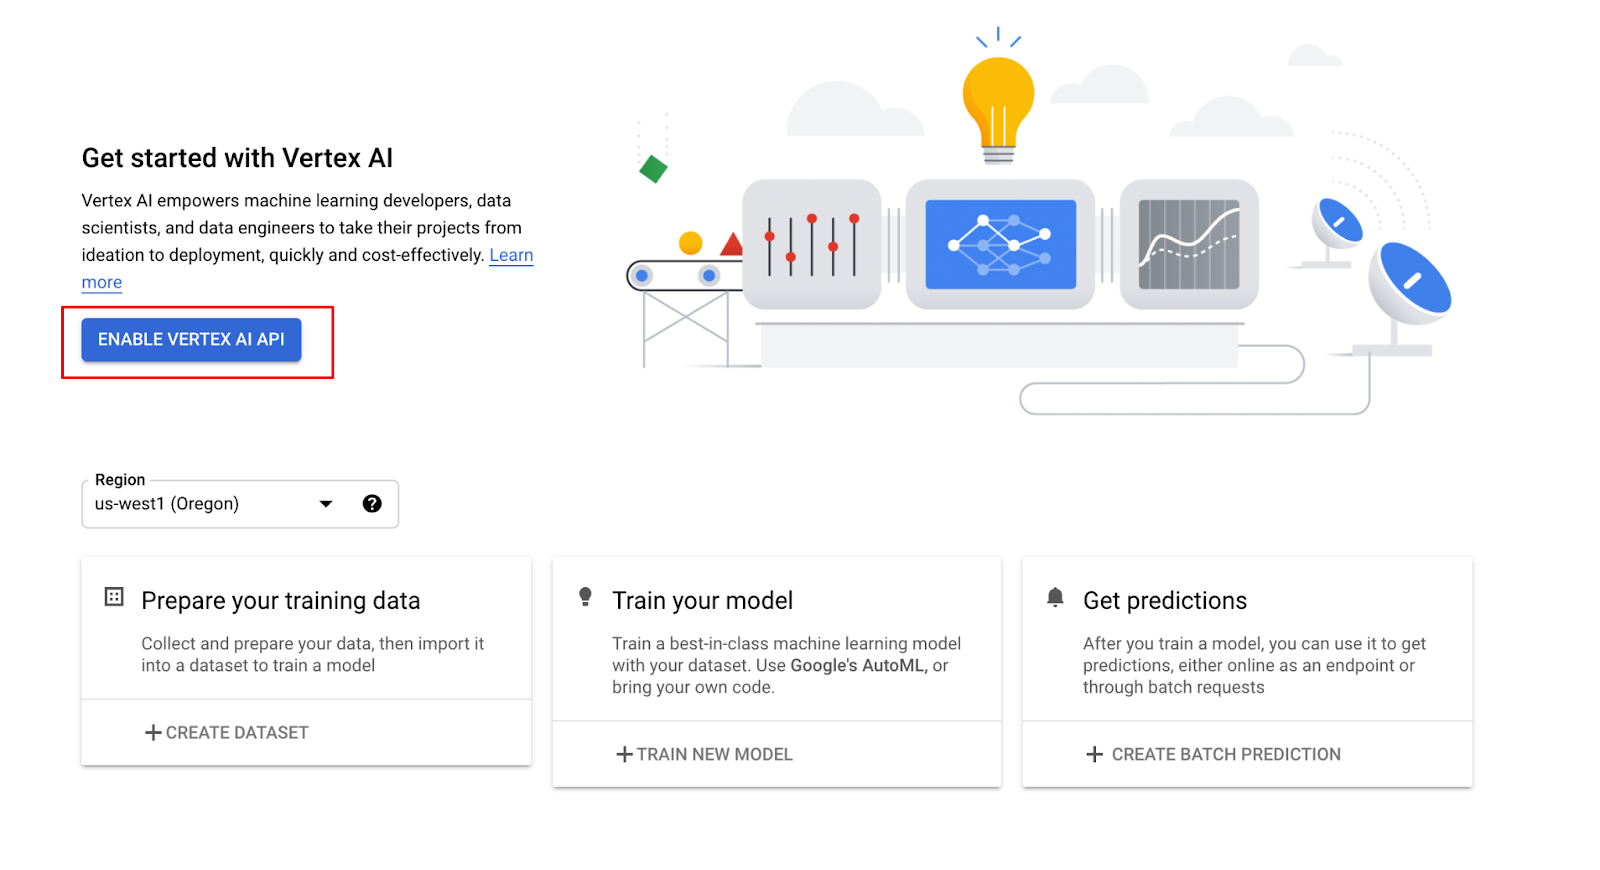
In the Google Cloud Console, on the Navigation Menu, click Vertex AI > Workbench. Select User-Managed Notebooks.
On the Notebook instances page, Click Create New and choose the latest version of TensorFlow Enterprise 2.6 (with LTS) in Environment.
In the New notebook instance dialog, confirm the name of the deep learning VM, if you don’t want to change the region and zone, leave all settings as they are and then click Create.
The new VM will take 2-3 minutes to start.
Click Open JupyterLab.
A JupyterLab window will open in a new tab.
Task 2. Clone course repo within your Vertex AI Notebooks instance
The GitHub repo contains both the lab file and solutions files for the course.
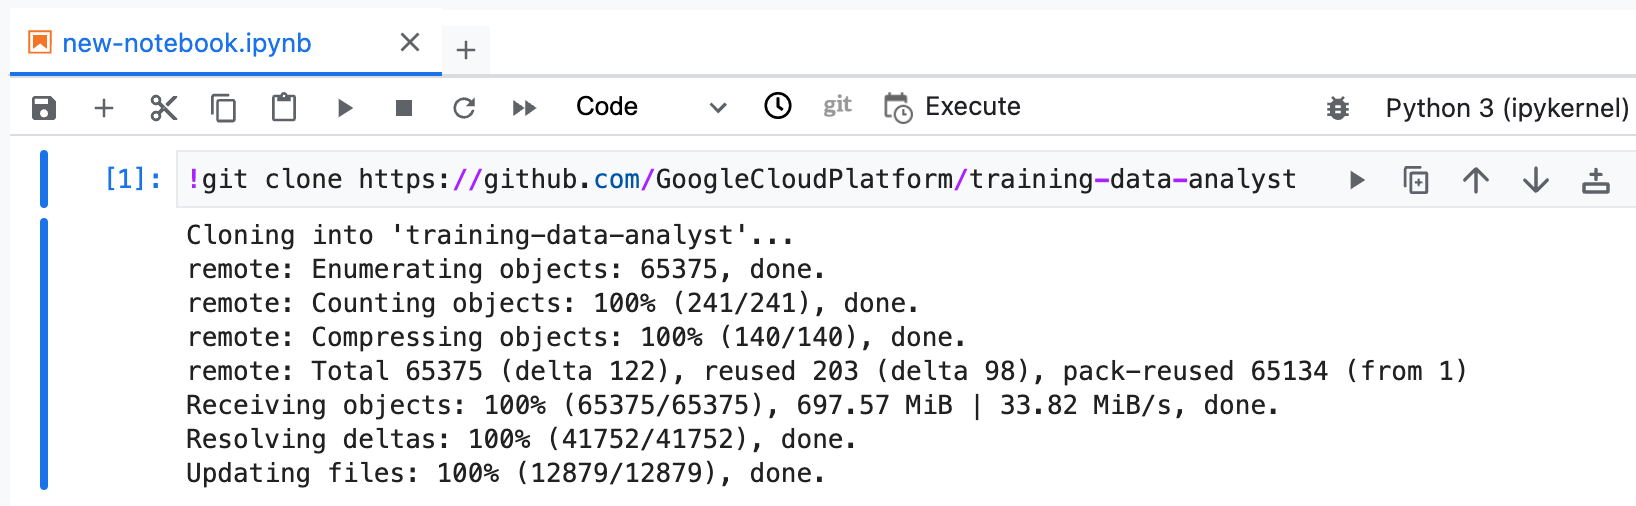
Copy and run the following code in the first cell of your notebook to clone the training-data-analyst repository.
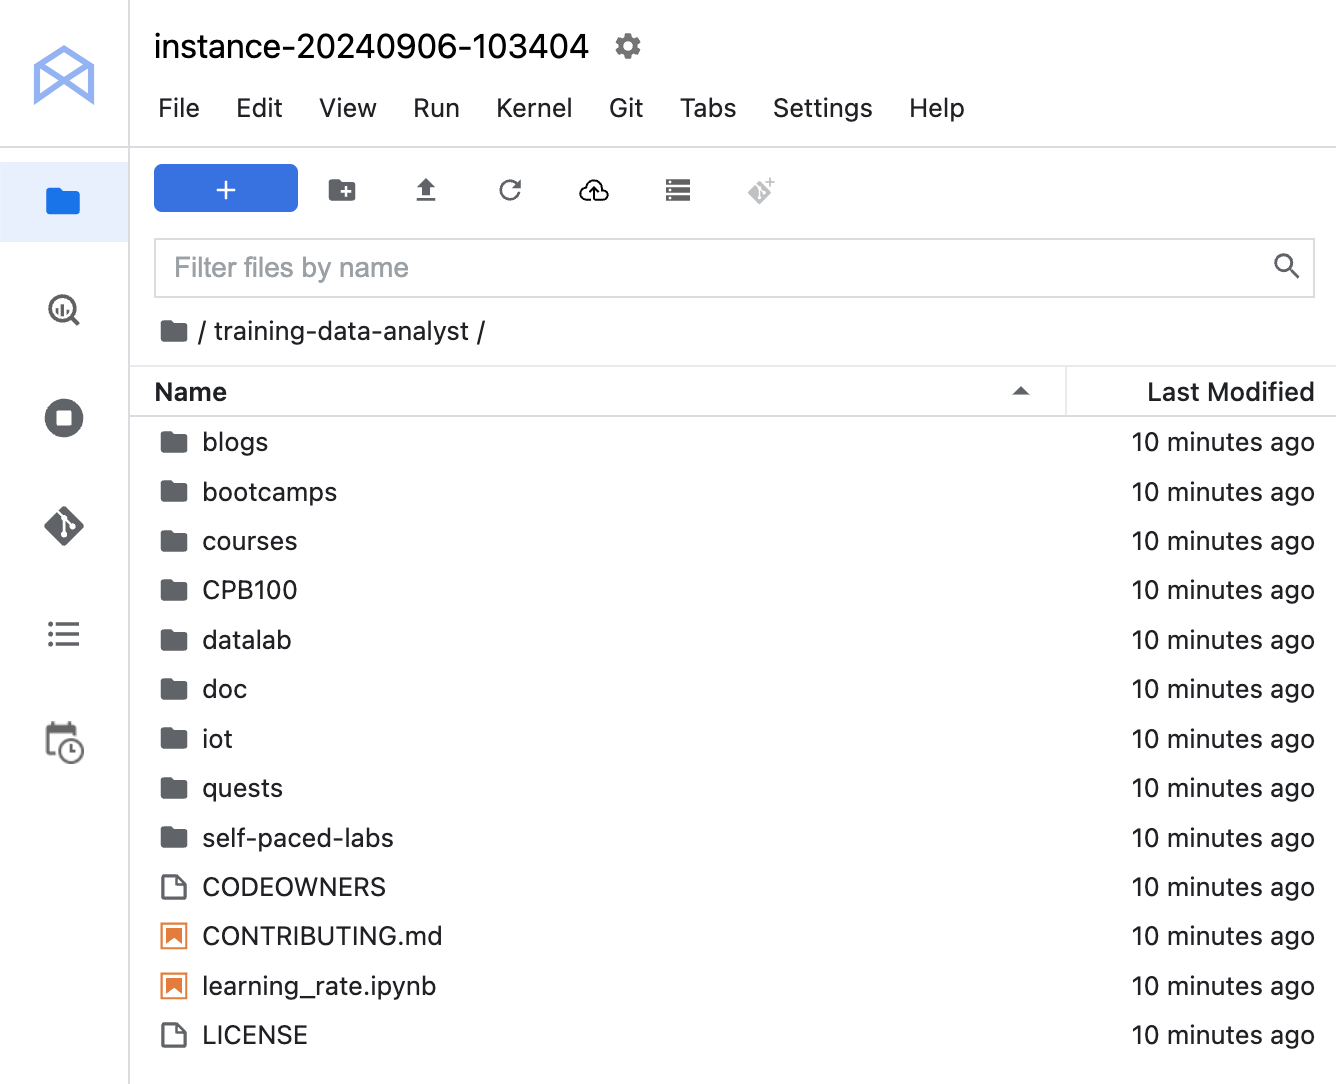
Confirm that you have cloned the repository. Double-click on the training-data-analyst directory and ensure that you can see its contents.
Task 3. Run the notebook to copy and trained the Vertex AI Platform model
In this task, you navigate to the notebook for this lab. You then clear all outputs to reset the notebook and then complete the lines required in order to run the code.
In the notebook interface, navigate to training-data-analyst > courses > machine_learning > deepdive2 > production_ml > labs, and open serving_ml_prediction.ipynb.
In the notebook interface, click Edit > Clear All Outputs.
Carefully read through the notebook instructions and fill in lines marked with a #TODO where you need to complete the code. Don't forget to set your PROJECT ID in the #Replace with your PROJECT field.
Note: To run the current cell, click the cell and press SHIFT+ENTER. Other cell commands are listed in the notebook UI under Run.
Hints may also be provided for the tasks to guide you along. Highlight the text to read the hints (they are in white text).
If you need more help, look at the complete solution at training-data-analyst > courses > machine_learning > deepdive2 > production_ml > solutions, and open serving_ml_prediction.ipynb.
Task 4. Browse lab files
In this task, you clone the course repository and explore the folder that contains code for this lab. You then run a script that highlights which code you need to add or modify.
In Cloud Shell, clone the course repository:
cd ~
git clone https://github.com/GoogleCloudPlatform/training-data-analyst
In Cloud Shell, navigate to the folder containing the code for this lab:
cd ~/training-data-analyst/courses/machine_learning/deepdive/06_structured/labs/serving
To see a list of items you need to add/modify to existing code to run your app, run the following script:
./what_to_fix.sh
A list of filenames is returned, and lines within those files are marked with TODO. These are the lines where you have to add/modify code. For this lab, you will focus on #TODO items for .java files only, namely BabyweightMLService.java : which is your prediction service.
How the code is organized
Task 5. Prediction service
In this task, you fix the code in BabyweightMLService.java and test it with the run\_once.sh script that is provided. If you need help with the code, look at the next section that provides hints on how to fix code in BabyweightMLService.java.
On the Cloud Shell toolbar, click Open Editor. You can use the Cloud Shell code editor to view and edit the contents of these files.
Navigate to the following directory: training-data-analyst > courses> machine_learning > deepdive > 06_structured > labs > serving > pipeline > src > main > java > com > google > cloud > training > mlongcp.
Open the BabyweightMLService.java files and replace #TODOs in the code.
In Cloud Shell, run the following script to test your ML service:
cd ~/training-data-analyst/courses/machine_learning/deepdive/06_structured/labs/serving
./run_once.sh
Task 6. Serve predictions for batch requests
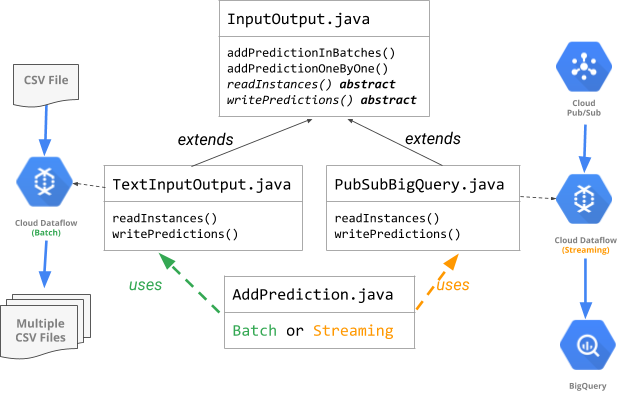
In this task, you call AddPrediction.java, which takes a batch input (one big CSV), calls the prediction service to generate babyweight predictions, and writes them into local files (multiple CSVs).
In your Cloud Shell code editor, open the AddPrediction.java file available in the following directory: training-data-analyst > courses> machine_learning > deepdive > 06_structured > labs > serving > pipeline > src > main > java > com > google > cloud > training > mlongcp.
Look through the code and notice how, based on input argument, it decides to set up a batch or streaming pipeline and creates the appropriate TextInputOutput or PubSubBigQuery io object respectively to handle the reading and writing.
Note: Look at the diagram in the "How the code is organized" section to understand this.
To test batch mode, run the run_ontext.sh script provided in the lab directory:
cd ~/training-data-analyst/courses/machine_learning/deepdive/06_structured/labs/serving
export JAVA_HOME=/usr/lib/jvm/java-8-openjdk-amd64
./run_ontext.sh
Task 7. Serve predictions in real time with a streaming pipeline
In this task you launch a streaming pipeline with Dataflow, which will accept incoming information from Pub/Sub, use the information to call the prediction service to get babyweight predictions, and finally write that information into a BigQuery table.
In the Google Cloud Console, on the Navigation menu, click Pub/Sub.
Click Create topic, and create a topic called babies.
Return to Cloud Shell, modify the script run_dataflow.sh to get Project ID (using --project) from command line arguments, and then run the following code:
cd ~/training-data-analyst/courses/machine_learning/deepdive/06_structured/labs/serving
./run_dataflow.sh
This will create a streaming Dataflow pipeline.
In the Google Cloud Console, on the Navigation menu, click Dataflow and verify that the streaming job is created.
Note: If the streaming job failed, re-run the command ./run_dataflow.sh.
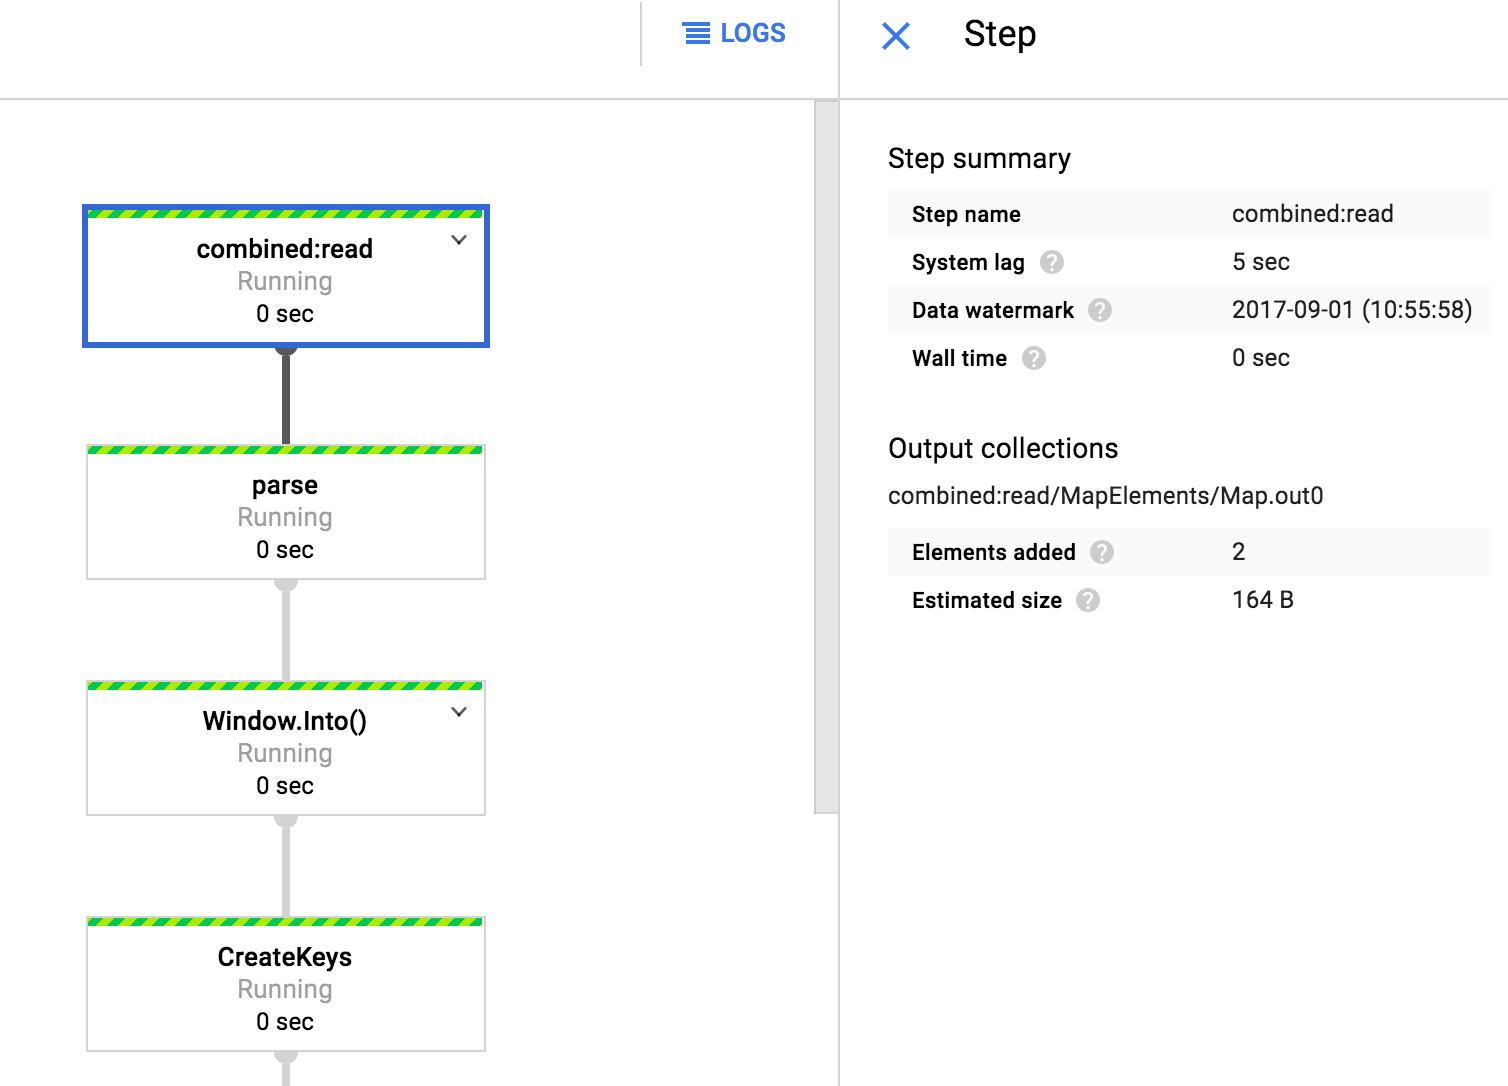
Click on the job name to view the pipeline graph.
Click on the pipeline steps (boxes) and look at the run details (like system lag, elements added, etc.) of that step.
This means that your pipeline is running and waiting for input. You can provide input through the Pub/Sub topic.
Copy some lines from your example.csv.gz:
cd ~/training-data-analyst/courses/machine_learning/deepdive/06_structured/labs/serving
zcat exampledata.csv.gz
In the Google Cloud Console, return to the Pub/Sub page and click on the babies topic.
On the bottom panel click on Messages and then click Publish message.
In the message box, paste the lines you just copied from exampledata.csv.gz, and click Publish.
In the Google Cloud Console, return to the Dataflow page, click on your job, and see how the run details have changed for the steps; for example, click on write_toBQ and look at Elements added.
Verify that the predicted weights have been recorded in the BigQuery table.
In the Google Cloud Console, on the Navigation menu, click BigQuery.
The Welcome to BigQuery in the Cloud Console message box opens.
Click Done.
On the Explorer tab, expand your Google Cloud Project ID.
The babyweight dataset is listed, and the predictions table is nested under the dataset.
Note: If the predictions table is not displayed, wait a few minutes. The pipeline has allowed latency that can add some delay. You many need to refresh the page to see this.
Type the query in the query editor to retrieve rows from your predictions table:
SELECT * FROM babyweight.predictions LIMIT 1000
Click Run.
Notice the predicted_weights_pounds column in the result.
Remember that your pipeline is still running. You can publish additional messages from your example.csv.gz and verify new rows added to your predictions table. When you are satisfied, to stop the Dataflow pipeline,
On the Dataflow Jobs page, click Stop.
Select Drain, and then click Stop Job.
Review
In this lab you learned how to:
Create a prediction service that calls your trained model deployed in Cloud to serve predictions.
Run a Dataflow job to have the prediction service read in batches from a CSV file and serve predictions.
Run a streaming Dataflow pipeline to read requests in real time from Pub/Sub and write predictions into a BigQuery table.
End your lab
When you have completed your lab, click End Lab. Google Skills removes the resources you’ve used and cleans the account for you.
You will be given an opportunity to rate the lab experience. Select the applicable number of stars, type a comment, and then click Submit.
The number of stars indicates the following:
1 star = Very dissatisfied
2 stars = Dissatisfied
3 stars = Neutral
4 stars = Satisfied
5 stars = Very satisfied
You can close the dialog box if you don't want to provide feedback.
For feedback, suggestions, or corrections, please use the Support tab.
Copyright 2026 Google LLC All rights reserved. Google and the Google logo are trademarks of Google LLC. All other company and product names may be trademarks of the respective companies with which they are associated.
Os laboratórios criam um projeto e recursos do Google Cloud por um período fixo
Os laboratórios têm um limite de tempo e não têm o recurso de pausa. Se você encerrar o laboratório, vai precisar recomeçar do início.
No canto superior esquerdo da tela, clique em Começar o laboratório
Usar a navegação anônima
Copie o nome de usuário e a senha fornecidos para o laboratório
Clique em Abrir console no modo anônimo
Fazer login no console
Faça login usando suas credenciais do laboratório. Usar outras credenciais pode causar erros ou gerar cobranças.
Aceite os termos e pule a página de recursos de recuperação
Não clique em Terminar o laboratório a menos que você tenha concluído ou queira recomeçar, porque isso vai apagar seu trabalho e remover o projeto
Este conteúdo não está disponível no momento
Você vai receber uma notificação por e-mail quando ele estiver disponível
Ótimo!
Vamos entrar em contato por e-mail se ele ficar disponível
Um laboratório por vez
Confirme para encerrar todos os laboratórios atuais e iniciar este
Use a navegação anônima para executar o laboratório
A melhor maneira de executar este laboratório é usando uma janela de navegação anônima
ou privada. Isso evita conflitos entre sua conta pessoal
e a conta de estudante, o que poderia causar cobranças extras
na sua conta pessoal.
In this lab, you run Dataflow pipelines to serve predictions for batch requests and streaming in real time.
Duração:
Configuração: 0 minutos
·
Tempo de acesso: 120 minutos
·
Tempo para conclusão: 90 minutos

 ) at the top right of the console.
 ), click IAM & Admin > IAM.