Mettez en pratique vos compétences dans la console Google Cloud
Points de contrôle
Launch Vertex AI Workbench instance
Vérifier ma progression
/ 30
Clone a course repo within your JupyterLab interface
Vérifier ma progression
/ 30
Perform advanced Feature Engineering in Keras
Vérifier ma progression
/ 40
Instructions et exigences de configuration de l'atelier
Protégez votre compte et votre progression. Utilisez toujours une fenêtre de navigation privée et les identifiants de l'atelier pour exécuter cet atelier.
Ce contenu n'est pas encore optimisé pour les appareils mobiles.
Pour une expérience optimale, veuillez accéder à notre site sur un ordinateur de bureau en utilisant un lien envoyé par e-mail.
Overview
Duration is 1 min
In this lab, you use Keras to build a taxifare price prediction model and utilize advanced feature engineering to improve the fare amount prediction for NYC taxi cab rides.
What you learn
In this lab, you learn how to:
Create a Workbench Instance Notebook.
Process temporal feature columns in Keras.
Use Lambda layers to perform feature engineering on geolocation features.
Create bucketized and crossed feature columns.
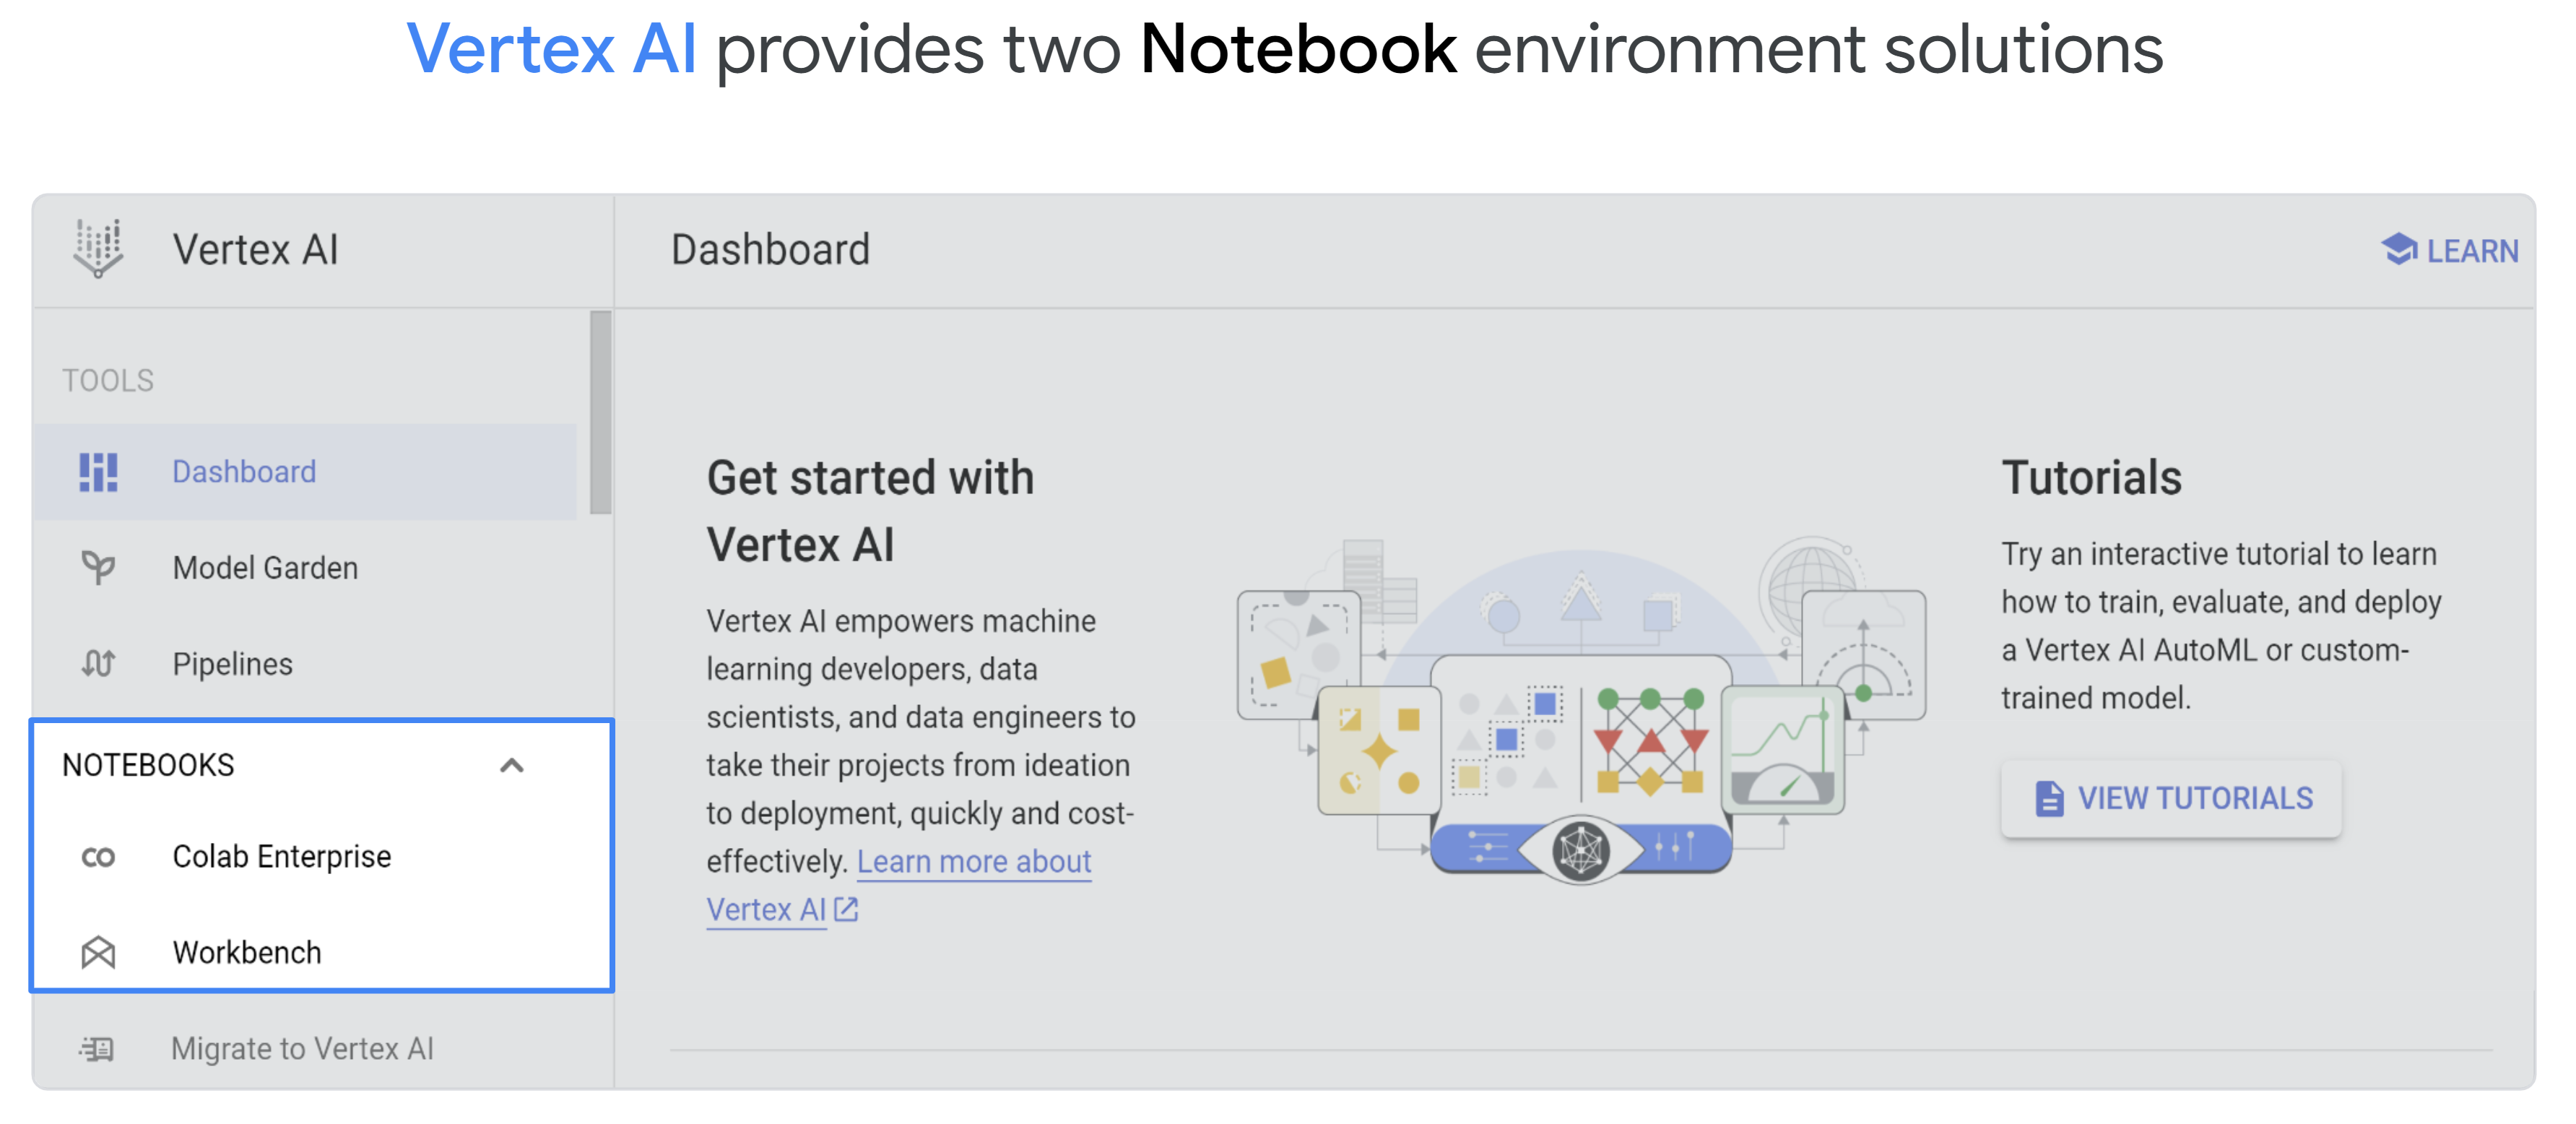
Vertex AI offers two Notebook Solutions, Workbench and Colab Enterprise.
Workbench
Vertex AI Workbench is a good option for projects that prioritize control and customizability. It’s great for complex projects spanning multiple files, with complex dependencies. It’s also a good choice for a data scientist who is transitioning to the cloud from a workstation or laptop.
Vertex AI Workbench Instances comes with a preinstalled suite of deep learning packages, including support for the TensorFlow and PyTorch frameworks.
Setup and requirements
For each lab, you get a new Google Cloud project and set of resources for a fixed time at no cost.
Sign in to Qwiklabs using an incognito window.
Note the lab's access time (for example, 1:15:00), and make sure you can finish within that time.
There is no pause feature. You can restart if needed, but you have to start at the beginning.
When ready, click Start lab.
Note your lab credentials (Username and Password). You will use them to sign in to the Google Cloud Console.
Click Open Google Console.
Click Use another account and copy/paste credentials for this lab into the prompts.
If you use other credentials, you'll receive errors or incur charges.
Accept the terms and skip the recovery resource page.
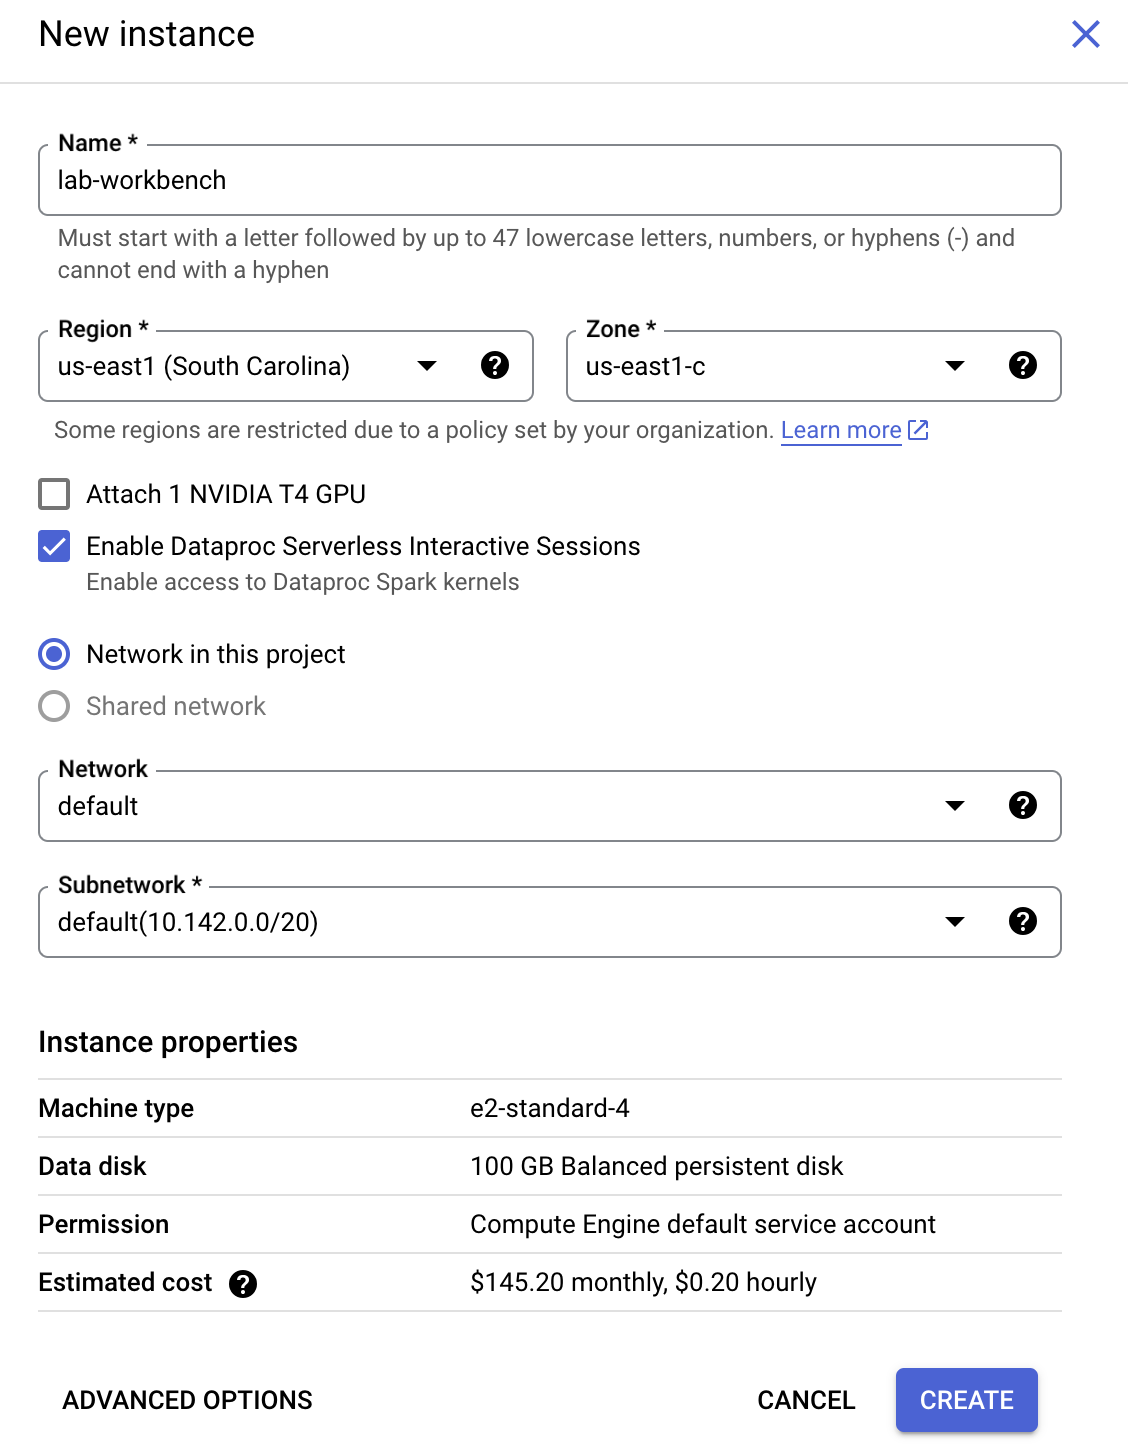
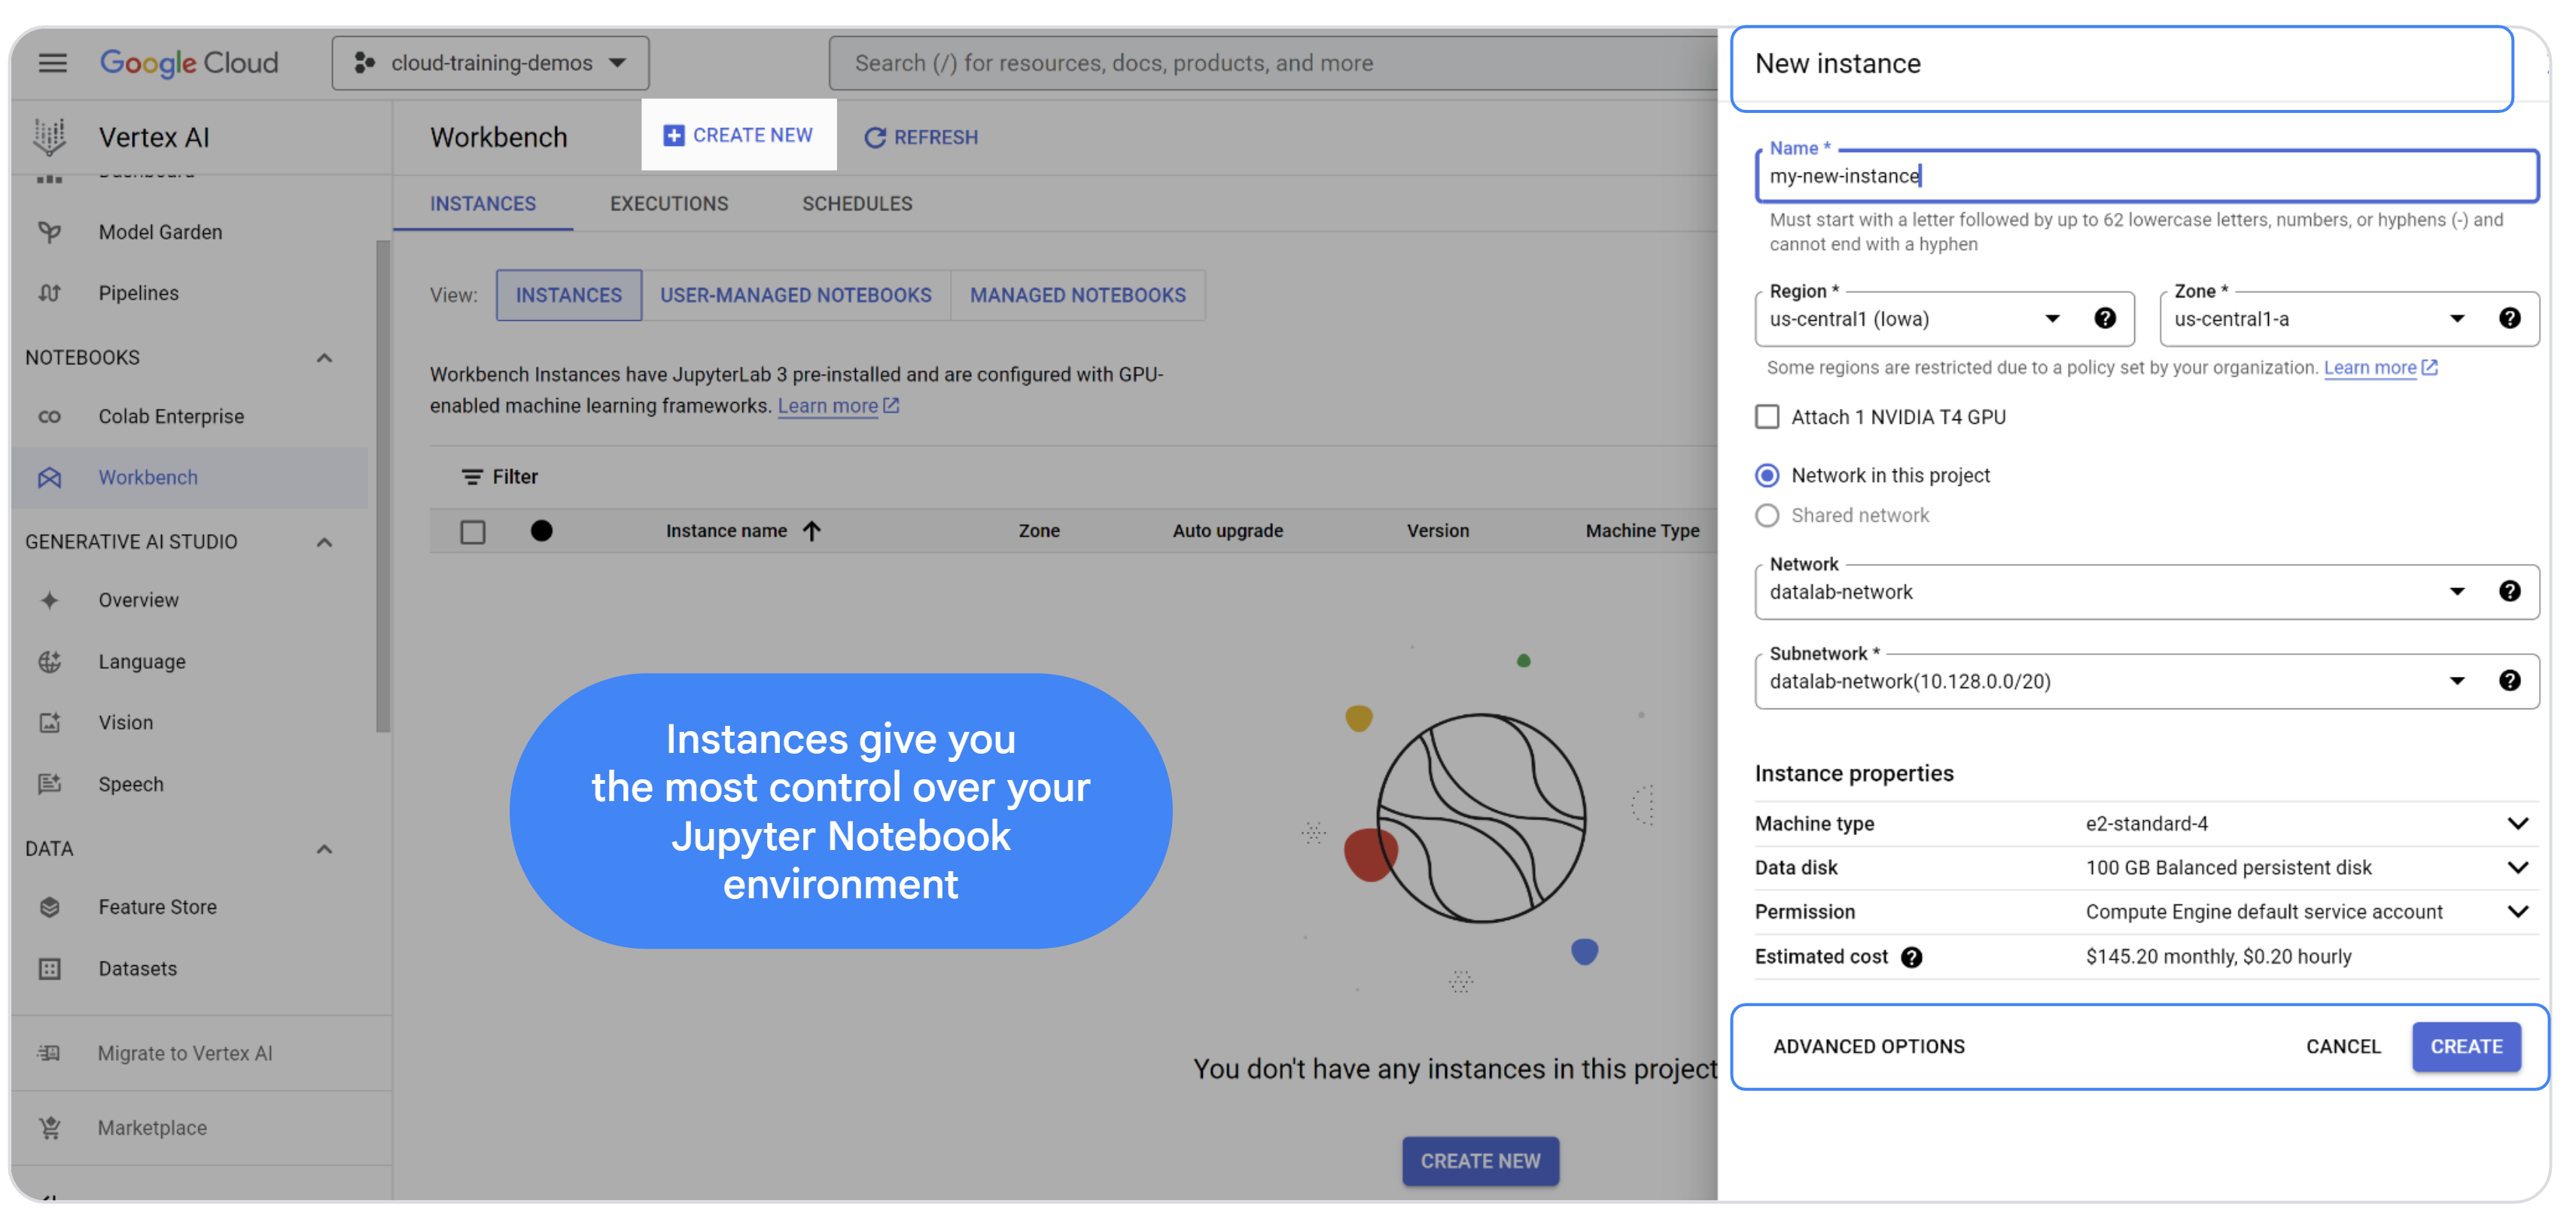
Task 1. Launch Vertex AI Workbench instance
In the Google Cloud console, from the Navigation menu (), select Vertex AI > Dashboard.
Click Enable All Recommended APIs.
In the Navigation menu, click Workbench.
At the top of the Workbench page, ensure you are in the Instances view.
Click Create New.
Configure the Instance:
Name: lab-workbench
Region: Set the region to
Zone: Set the zone to
Advanced Options (Optional): If needed, click "Advanced Options" for further customization (e.g., machine type, disk size).
Click Create.
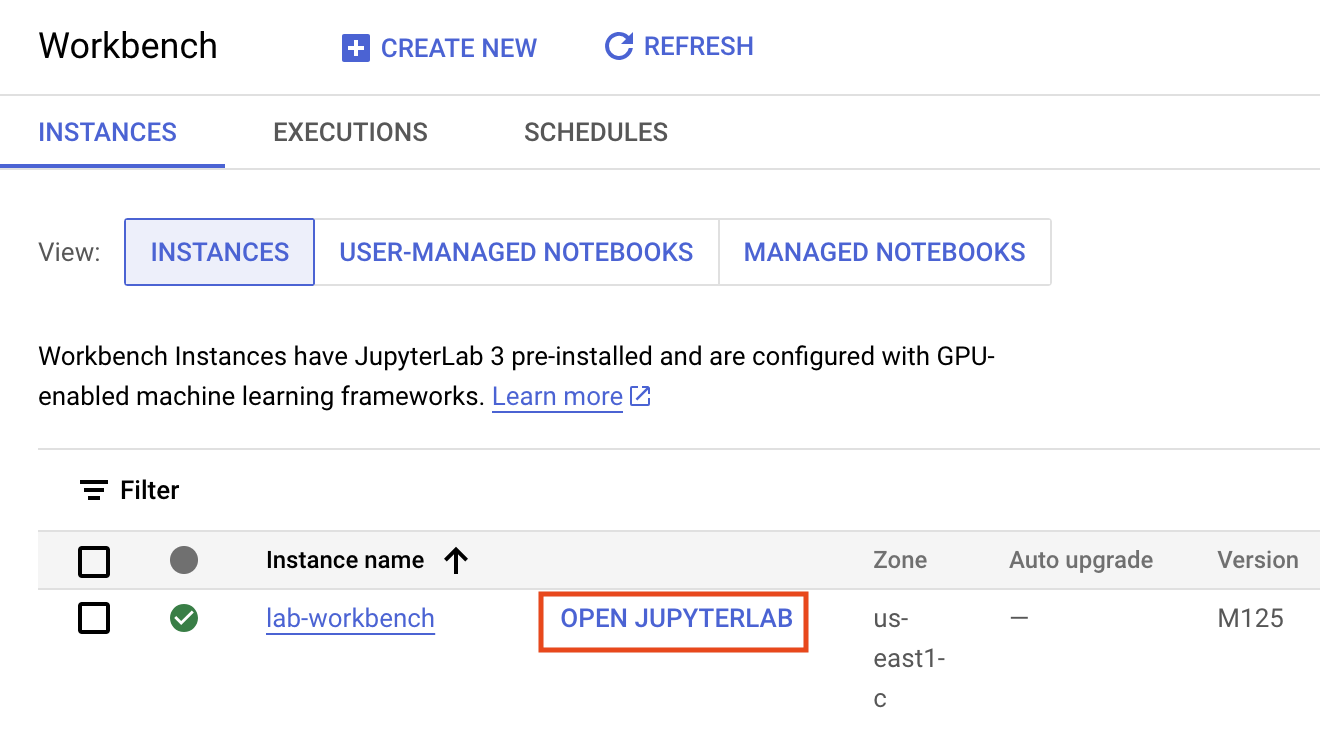
This will take a few minutes to create the instance. A green checkmark will appear next to its name when it's ready.
Click Open Jupyterlab next to the instance name to launch the JupyterLab interface. This will open a new tab in your browser.
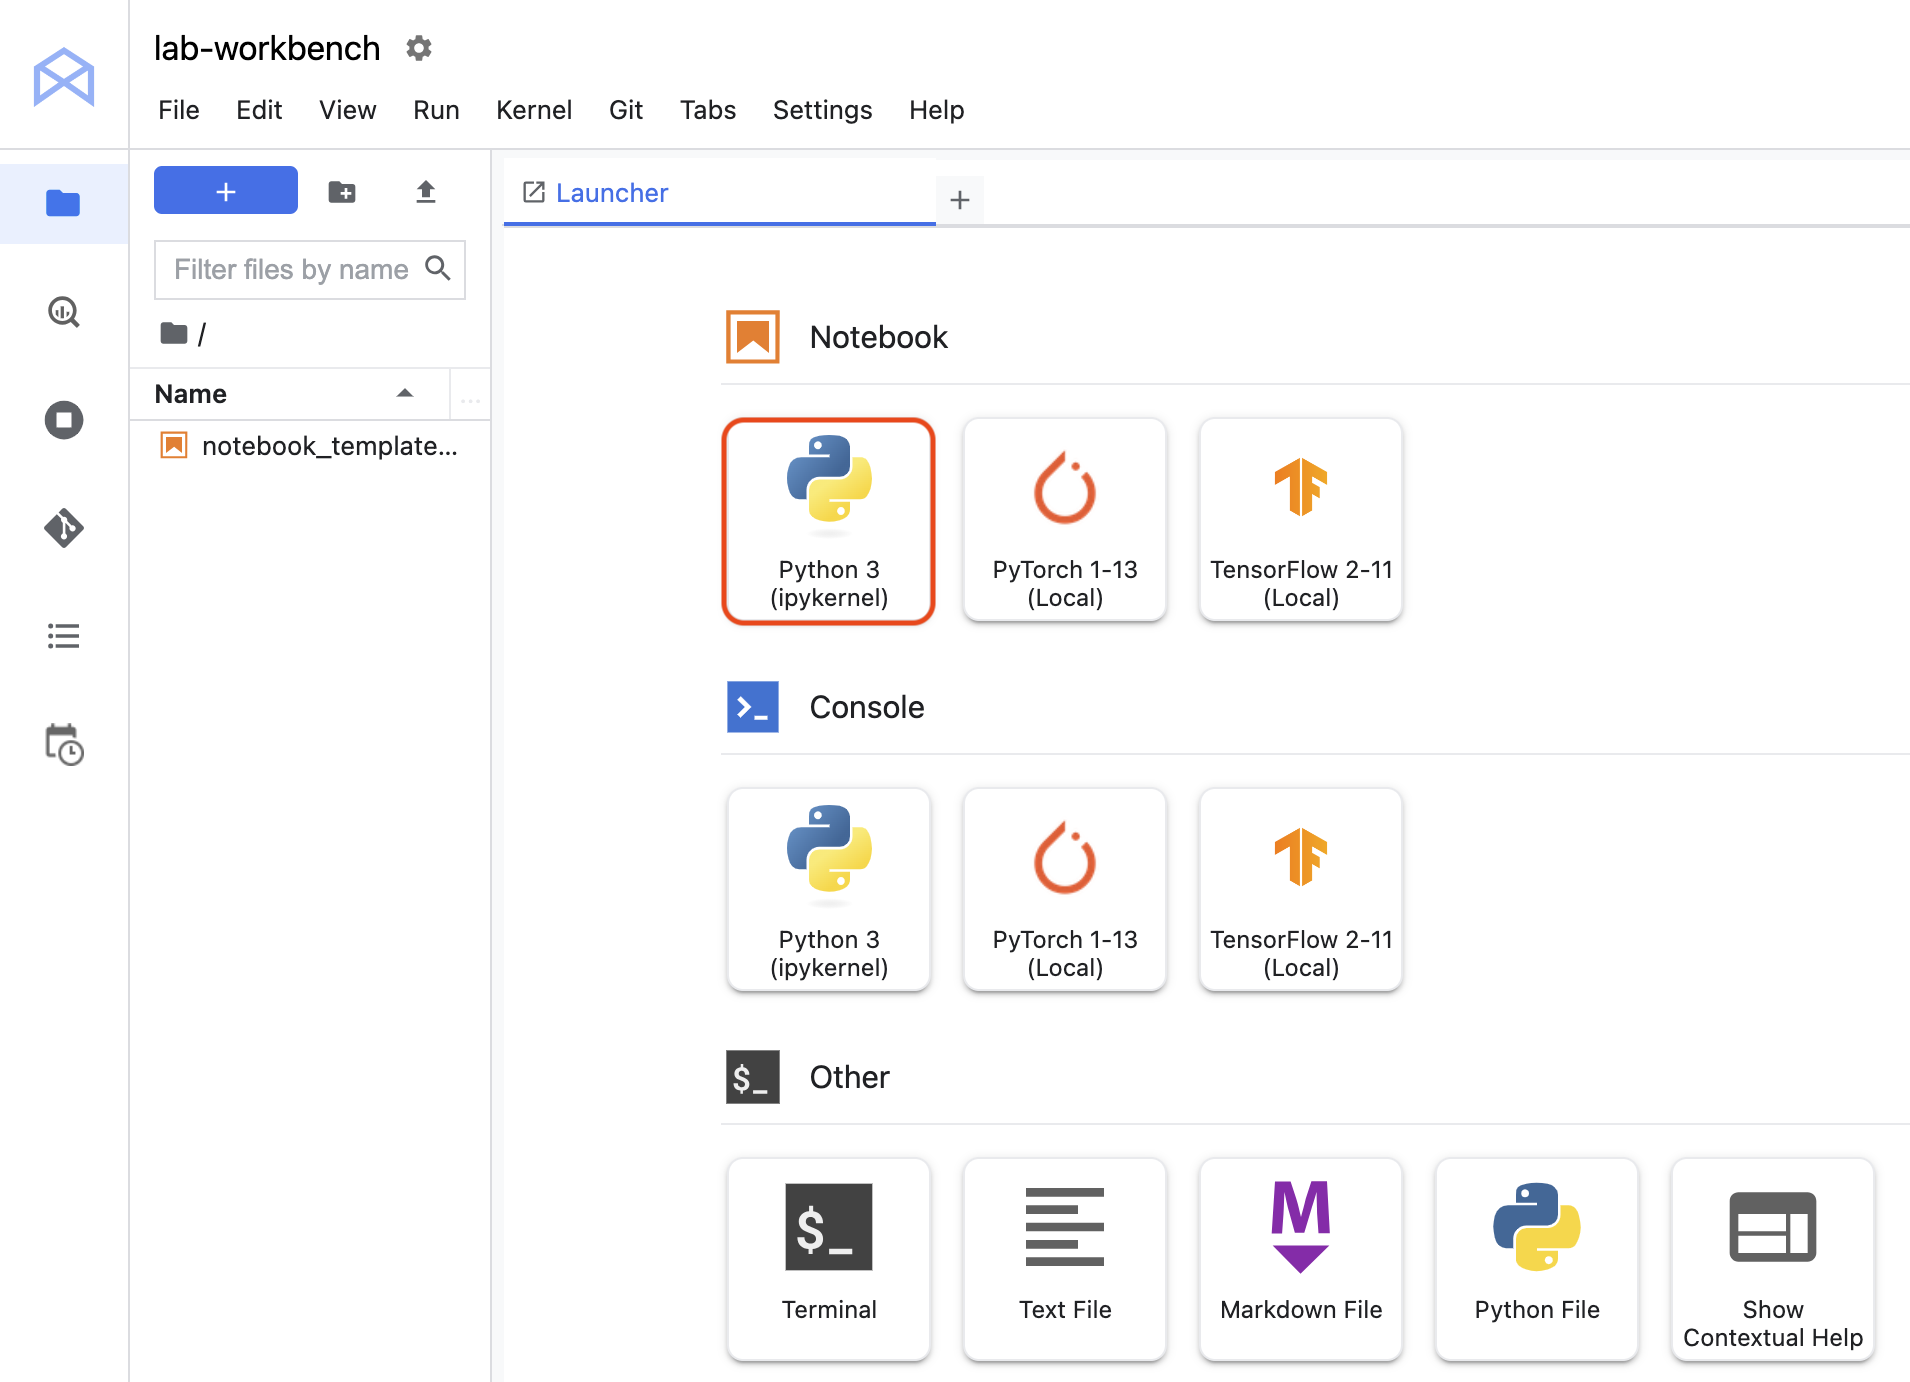
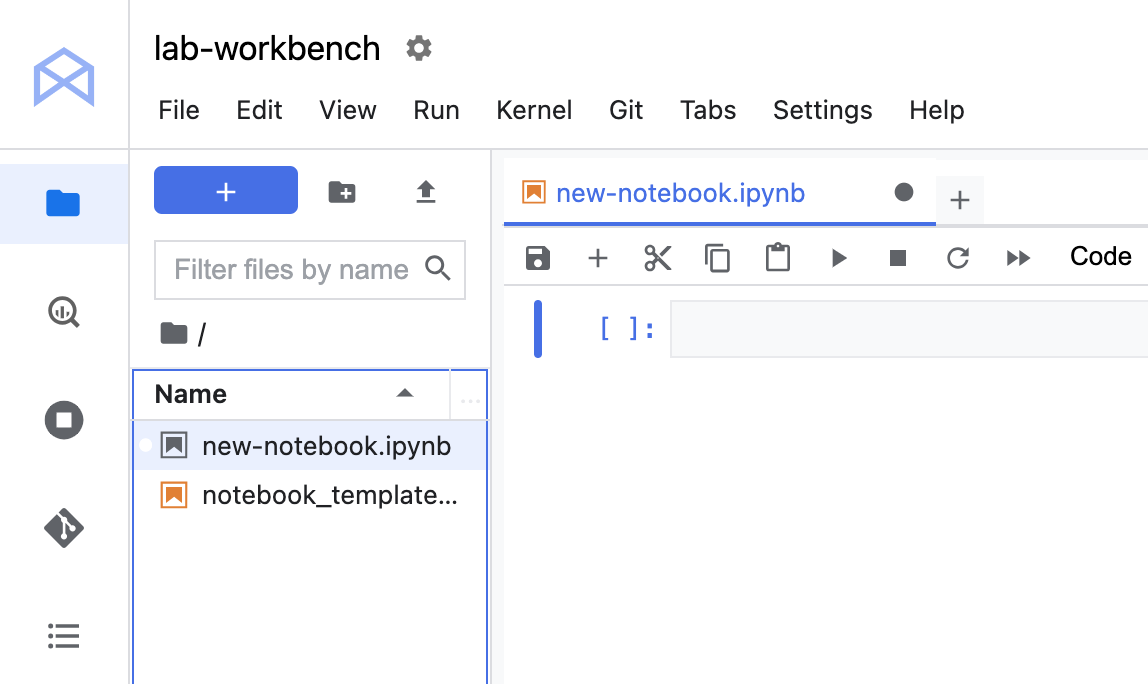
Click the Python 3 icon to launch a new Python notebook.
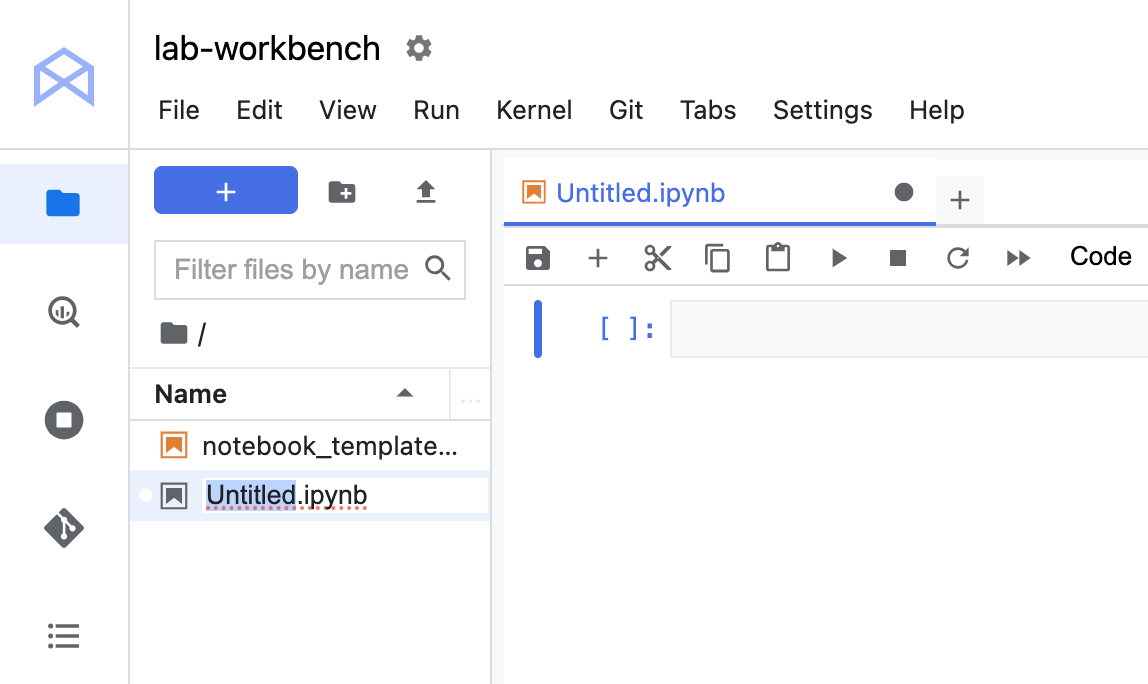
Right-click on the Untitled.ipynb file in the menu bar and select Rename Notebook to give it a meaningful name.
Your environment is set up. You are now ready to start working with your Vertex AI Workbench notebook.
Click Check my progress to verify the objective.
Launch Vertex AI Workbench instance
Task 2. Clone a course repo within your JupyterLab interface
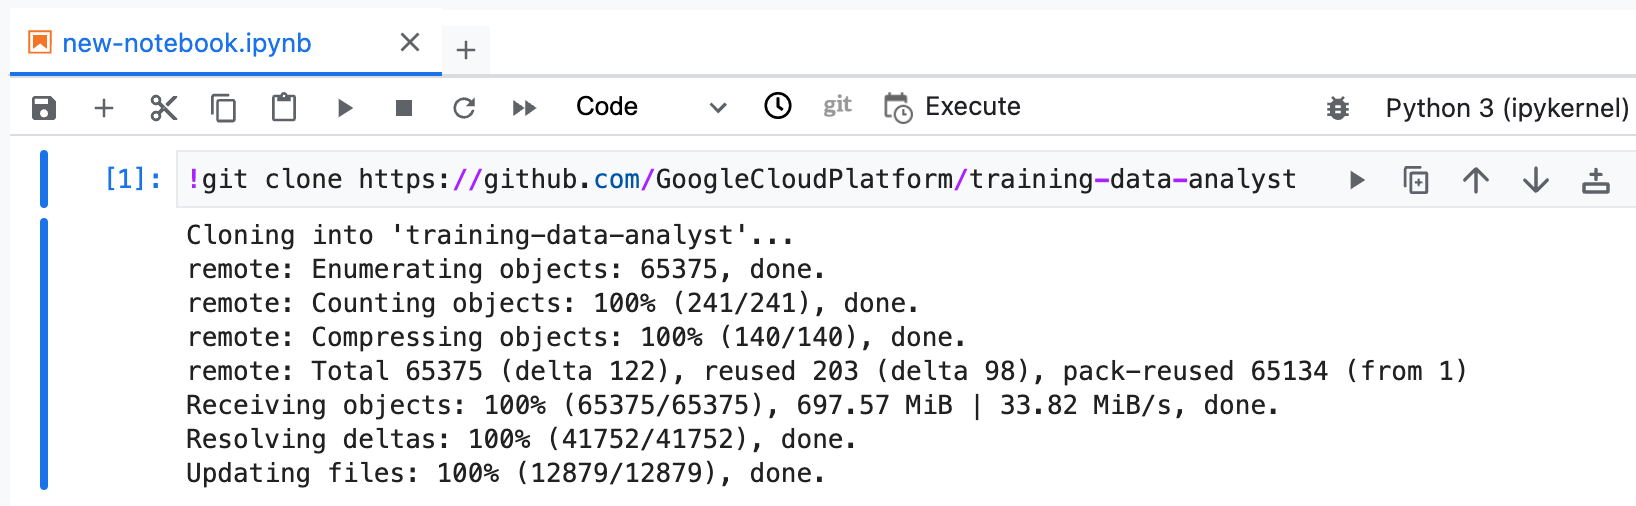
The GitHub repo contains both the lab file and solutions files for the course.
Copy and run the following code in the first cell of your notebook to clone the training-data-analyst repository.
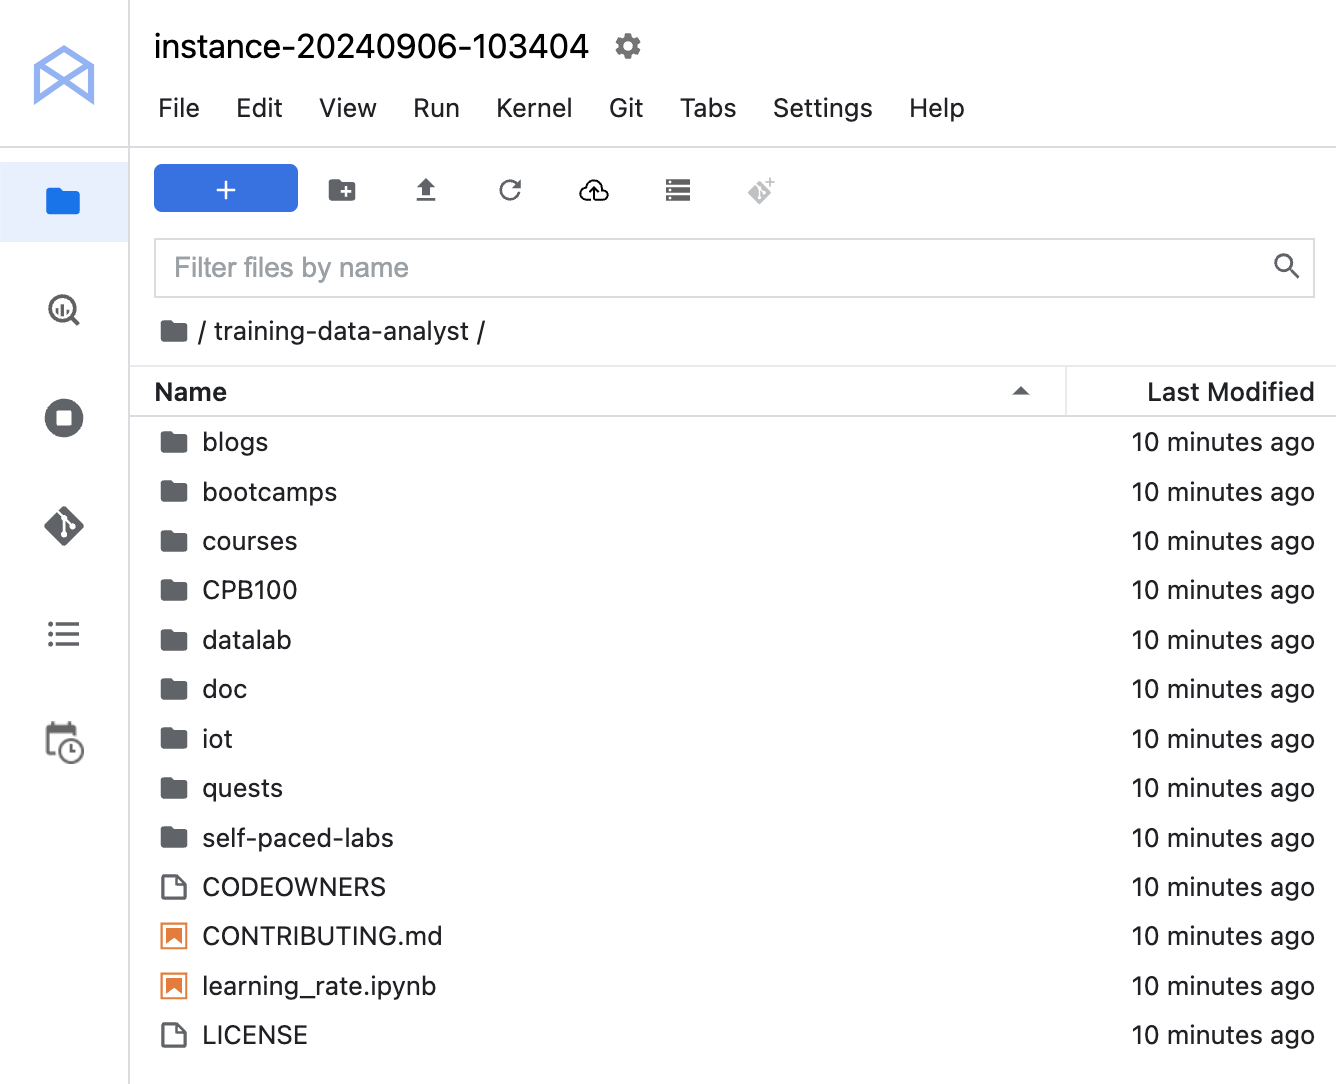
Confirm that you have cloned the repository. Double-click on the training-data-analyst directory and ensure that you can see its contents.
Click Check my progress to verify the objective.
Clone a course repo within your JupyterLab interface
Task 3. Perform advanced Feature Engineering in Keras
Duration is 60 min
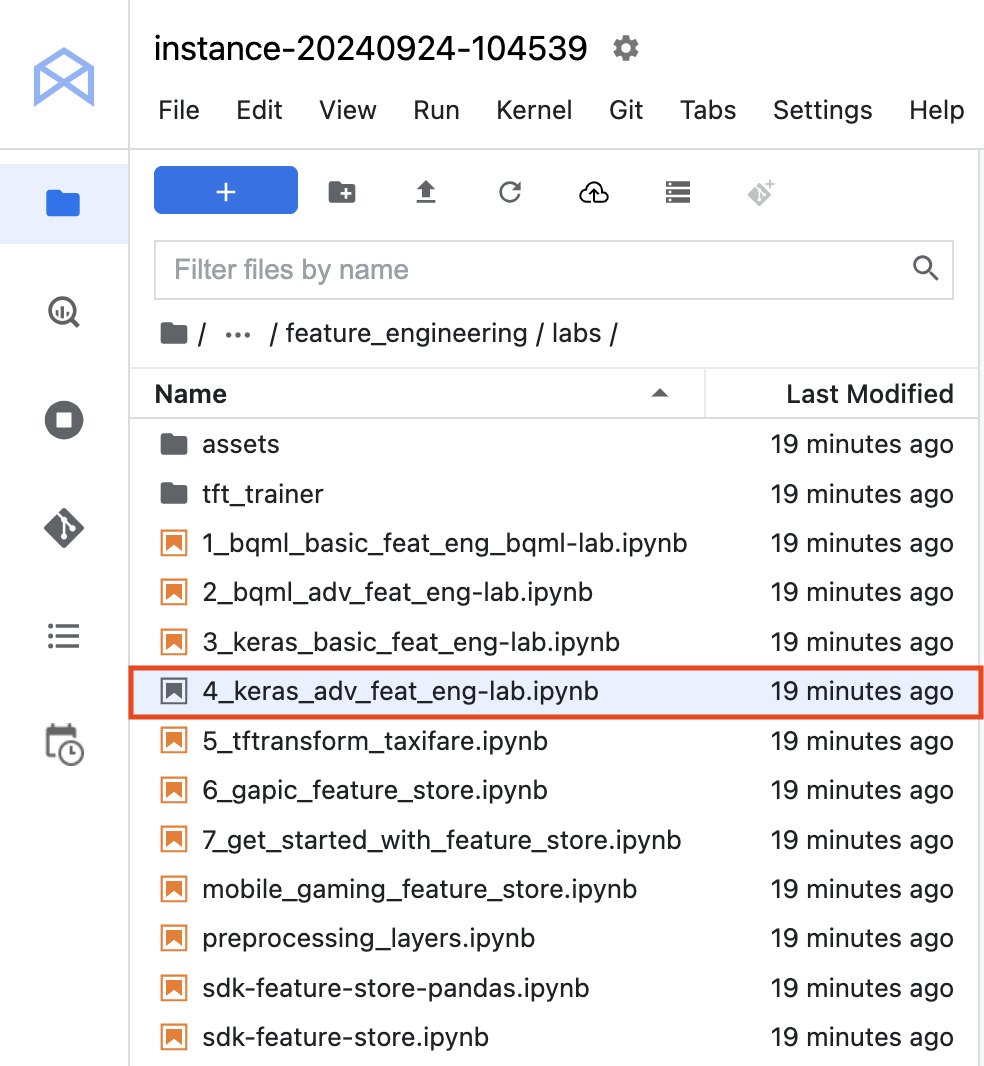
In the notebook interface, navigate to training-data-analyst > courses > machine_learning > deepdive2 > feature_engineering > labs and opening 4_keras_adv_feat_eng-lab.ipynb.
A pop-up will appear for you to select a kernel. Choose the TensorFlow 2.11 (Local) kernel from the options.
In the notebook interface, click on Edit > Clear All Outputs (click on Edit, then in the drop-down menu, select Clear All Outputs).
Carefully read through the notebook instructions and fill in lines marked with #TODO where you need to complete the code as needed.
Click Check my progress to verify the objective.
Perform advanced Feature Engineering in Keras
End your lab
When you have completed your lab, click End Lab. Qwiklabs removes the resources you’ve used and cleans the account for you.
You will be given an opportunity to rate the lab experience. Select the applicable number of stars, type a comment, and then click Submit.
The number of stars indicates the following:
1 star = Very dissatisfied
2 stars = Dissatisfied
3 stars = Neutral
4 stars = Satisfied
5 stars = Very satisfied
You can close the dialog box if you don't want to provide feedback.
For feedback, suggestions, or corrections, please use the Support tab.
Copyright 2022 Google LLC All rights reserved. Google and the Google logo are trademarks of Google LLC. All other company and product names may be trademarks of the respective companies with which they are associated.
Les ateliers créent un projet Google Cloud et des ressources pour une durée déterminée.
Les ateliers doivent être effectués dans le délai imparti et ne peuvent pas être mis en pause. Si vous quittez l'atelier, vous devrez le recommencer depuis le début.
En haut à gauche de l'écran, cliquez sur Démarrer l'atelier pour commencer.
Utilisez la navigation privée
Copiez le nom d'utilisateur et le mot de passe fournis pour l'atelier
Cliquez sur Ouvrir la console en navigation privée
Connectez-vous à la console
Connectez-vous à l'aide des identifiants qui vous ont été attribués pour l'atelier. L'utilisation d'autres identifiants peut entraîner des erreurs ou des frais.
Acceptez les conditions d'utilisation et ignorez la page concernant les ressources de récupération des données.
Ne cliquez pas sur Terminer l'atelier, à moins que vous n'ayez terminé l'atelier ou que vous ne vouliez le recommencer, car cela effacera votre travail et supprimera le projet.
Ce contenu n'est pas disponible pour le moment
Nous vous préviendrons par e-mail lorsqu'il sera disponible
Parfait !
Nous vous contacterons par e-mail s'il devient disponible
Un atelier à la fois
Confirmez pour mettre fin à tous les ateliers existants et démarrer celui-ci
Utilisez la navigation privée pour effectuer l'atelier
Ouvrez une fenêtre de navigateur en mode navigation privée pour effectuer cet atelier. Vous éviterez ainsi les conflits entre votre compte personnel et le compte temporaire de participant, qui pourraient entraîner des frais supplémentaires facturés sur votre compte personnel.
In this lab, you will use Keras to build a taxifare price prediction model and utilize advanced feature engineering to improve the fare amount prediction for NYC taxi cab rides.
Durée :
0 min de configuration
·
Accessible pendant 90 min
·
Terminé après 90 min

 ), select Vertex AI > Dashboard.
 Create New.