Te treści nie są jeszcze zoptymalizowane pod kątem urządzeń mobilnych.
Dla maksymalnej wygody odwiedź nas na komputerze, korzystając z linku przesłanego e-mailem.
Overview
Cloud Storage allows world-wide storage and retrieval of any amount of data at any time. You can use Cloud Storage for a range of scenarios, which includes serving website content, storing data for archival and disaster recovery, or distributing large data objects to users via direct download.
In this lab you configure an application to use Cloud Storage to store and retrieve application data. The application is an online Quiz, the data is the form data, including an image you upload from your local machine.
Objectives
In this lab, you learn how to perform the following tasks:
Set up Cloud Shell as your development environment
Update the application code to integrate Cloud Datastore
Use the Quiz application to upload an image file into Cloud Storage and view the image in the Quiz
Setup and requirements
For each lab, you get a new Google Cloud project and set of resources for a fixed time at no cost.
Sign in to Google Skills using an incognito window.
Note the lab's access time (for example, 1:15:00), and make sure you can finish within that time.
There is no pause feature. You can restart if needed, but you have to start at the beginning.
When ready, click Start lab.
Note your lab credentials (Username and Password). You will use them to sign in to the Google Cloud Console.
Click Open Google Console.
Click Use another account and copy/paste credentials for this lab into the prompts.
If you use other credentials, you'll receive errors or incur charges.
Accept the terms and skip the recovery resource page.
Activate Google Cloud Shell
Google Cloud Shell is a virtual machine that is loaded with development tools. It offers a persistent 5GB home directory and runs on the Google Cloud.
Google Cloud Shell provides command-line access to your Google Cloud resources.
In Cloud console, on the top right toolbar, click the Open Cloud Shell button.
Click Continue.
It takes a few moments to provision and connect to the environment. When you are connected, you are already authenticated, and the project is set to your PROJECT_ID. For example:
gcloud is the command-line tool for Google Cloud. It comes pre-installed on Cloud Shell and supports tab-completion.
You can list the active account name with this command:
[core]
project = qwiklabs-gcp-44776a13dea667a6
Note:
Full documentation of gcloud is available in the
gcloud CLI overview guide
.
Task 1. Create a virtual environment
virtualenv is used to create user space virtual environments that allow you to install different sets of Python packages for different projects. Using virtualenv also means you don't have to install Python packages globally which can cause system tools or other Python projects to break. In this lab virtualenv is also used to make sure that Python3 is used for all Python commands.
Configure a virtualenv ennvironment for Python 3:
virtualenv -p python3 vrenv
Activate the virtual environment:
source vrenv/bin/activate
Task 2. Prepare the Quiz application
In this section, you access Cloud Shell, clone the git repository containing the Quiz application, and run the application.
Clone source code in Cloud Shell
To clone the repository for the class, execute the following command:
Updates pip, then runs pip install -r requirements.txt
Creates entities in Cloud Datastore
Prints out the Google Cloud Platform Project ID
Run the application:
python run_server.py
The application is running when you see the following output:
* Running on http://127.0.0.1:8080/ (Press CTRL+C to quit)
* Restarting with stat
* Debugger is active!
* Debugger PIN: 502-577-323
Review the Quiz application
To view the application, click Web preview > Preview on port 8080.
Click the Create Question link in the toolbar.
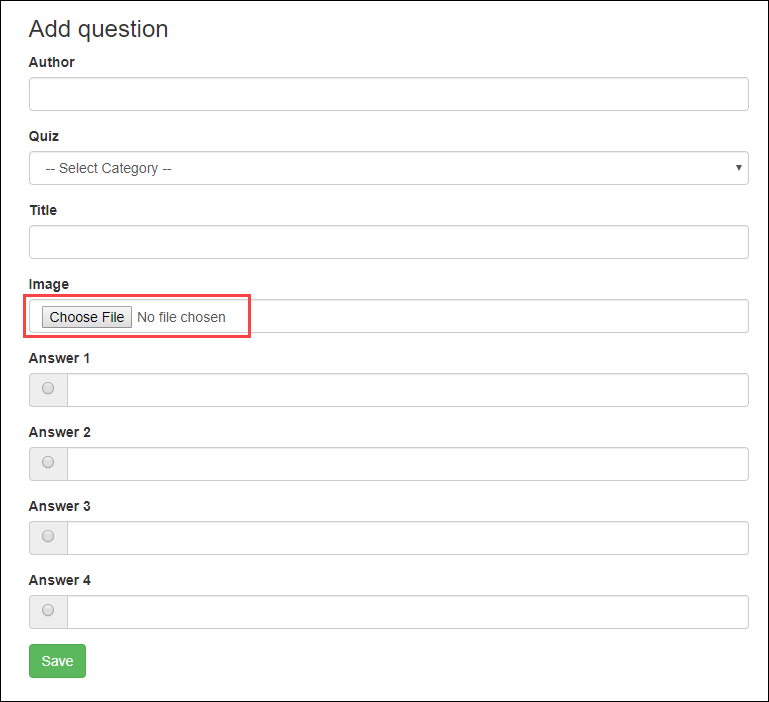
You should see a simple form that contains textboxes for the question and answers and radio buttons to select the correct answer
Note:
The form has a file upload field that you will be using to upload either image or video files. In this lab you upload an image file; you use the same process to upload video file.
Task 3. Examine the Quiz application code
In this section, you review the case study application code.
In this lab you'll view and edit files. You can use the shell editors that are installed on Cloud Shell, such as nano or vim or the Cloud Shell code editor.
This lab uses the Cloud Shell code editor to review the Quiz application code.
Launch the Cloud Shell code editor
From Cloud Shell, click Open Editor > Open in new window to launch the code editor.
Examine the application code
Navigate to the /cloudstorage/start folder using the file browser panel on the left side of the editor.
Select the add.html file in the ...quiz/webapp/templates/ folder.
This file contains the template for the Create Question form.
Notice how the form has been modified to use multipart/form-data as the enc-type, and there are two new form controls:
A file upload control called image
A hidden field called imageUrl
Select the routes.py file in the ...quiz/webapp folder.
This file contains the route for the POST handler that receives the form data. It has been modified to get the image file from the form.
Select the questions.py file in the ...quiz/webapp folder.
This file contains the handler that processes the form data extracted in the routes.py file. You will modify this file to use a new module that is a client for Cloud Storage.
Select the ...quiz/gcp/storage.py file.
This is the file where you will write code to save image file data into Cloud Storage.
Task 4. Create a Cloud Storage bucket
In this section, you create a Cloud Storage bucket and export an environment variable that references it.
Return to the Cloud Shell command line and click on Open Terminal.
Stop the application by pressing Ctrl+C.
Create a Cloud Storage bucket named <Project ID>-media:
You can create a bucket using the gcloud storage buckets create command, passing through the name of the bucket as gs://BUCKET_NAME.
You can use $DEVSHELL_PROJECT_ID as the bucket name prefix followed by -media
To export the Cloud Storage bucket name as an environment variable named GCLOUD_BUCKET, execute the following command:
export GCLOUD_BUCKET=$DEVSHELL_PROJECT_ID-media
Note:
Notice that the application makes use of environment variables for configuration.
This allows the development team to deploy the application into development, test, staging, and production just by changing these variables.
Click Check my progress to verify the objective.
Create a bucket
Task 5. Adding objects to Cloud Storage
In this section, you write code to save uploaded files into Cloud Storage.
Note: Update or add code between the following comments:
// TODO // END TODO
To maximize your learning, review the code, inline comments, and related API documentation.
In code editor, move to the top of the ...quiz/gcp/storage.py file.
Get the bucket name from the GCLOUD_BUCKET environment variable.
Import the storage module from the google.cloud package.
Create a Cloud Storage client.
Get a reference to the Cloud Storage bucket.
quiz/gcp/storage.py:
# TODO: Get the Bucket name from the GCLOUD_BUCKET environment variable
bucket_name = os.getenv('GCLOUD_BUCKET')
# END TODO
# TODO: Import the storage module
from google.cloud import storage
# END TODO
# TODO: Create a client for Cloud Storage
storage_client = storage.Client()
# END TODO
# TODO: Use the client to get the Cloud Storage bucket
bucket = storage_client.get_bucket(bucket_name)
# END TODO
Write code to send a file to Cloud Storage
Sill in storage.py, in the the upload_file(...) function, remove the existing pass statement, then use the Cloud Storage client to upload a file to your Cloud Storage bucket and make it publicly available.
Get a reference to a Cloud Storage blob object in the bucket.
Use the blob object to upload the image.
Make the file public.
Return the blob's public URL.
quiz/gcp/storage.pyupload_file(...) function:
"""
Uploads a file to a given Cloud Storage bucket and returns the public url
to the new object.
"""
def upload_file(image_file, public):
pass
# TODO: Use the bucket to get a blob object
blob = bucket.blob(image_file.filename)
# END TODO
# TODO: Use the blob to upload the file
blob.upload_from_string(
image_file.read(),
content_type=image_file.content_type)
# END TODO
# TODO: Make the object public
if public:
blob.make_public()
# END TODO
# TODO: Modify to return the blob's Public URL
return blob.public_url
# END TODO
Save storage.py.
Write code to use the Cloud Storage functionality
In the editor, move to the top of the ...quiz/webapp/questions.py file.
Modify the import statement to use your storage client as well as the datastore client.
Move to the upload_file(...) function and use your storage client to upload a file, and assign the returned public URL to a variable.
Modify the return statement to return the public URL.
Move to the save_question(...) function and write an if test to see if the image_file is present.
If it is, then call the upload_file(...) function, and assign the public URL to a entity property named imageUrl.
If not, then assign an empty string to the entity imageUrl property.
quiz/webapp/questions.py:
# TODO: Import the storage module
from quiz.gcp import storage, datastore
# END TODO
"""
uploads file into google cloud storage
- upload file
- return public_url
"""
def upload_file(image_file, public):
if not image_file:
return None
# TODO: Use the storage client to Upload the file
# The second argument is a boolean
public_url = storage.upload_file(
image_file,
public
)
# END TODO
# TODO: Return the public URL
# for the object
return public_url
# END TODO
"""
uploads file into google cloud storage
- call method to upload file (public=true)
- call datastore helper method to save question
"""
def save_question(data, image_file):
# TODO: If there is an image file, then upload it
# And assign the result to a new Datastore
# property imageUrl
# If there isn't, assign an empty string
if image_file:
data['imageUrl'] = str(
upload_file(image_file, True))
else:
data['imageUrl'] = u''
# END TODO
data['correctAnswer'] = int(data['correctAnswer'])
datastore.save_question(data)
return
Save questions.py.
Run the application and create a Cloud Storage object
In Cloud Shell, click Web preview > Preview on port 8080 to preview the Quiz application.
Click the Create Question link.
Complete the form with the following values, and then click Save:
Form Field
Value
Author
Your name
Quiz
Google Cloud Platform
Title
Which product does this logo relate to?
Image
Upload the Google_Cloud_Storage_logo.png file you previously downloaded
Answer 1
App Engine
Answer 2
Cloud Storage (Select the Answer 2 radio button)
Answer 3
Compute Engine
Answer 4
Kubernetes Engine
Return to the Cloud Console and navigate to Navigation menu > Cloud Storage.
On the Cloud Storage > Buckets page, click the correct bucket (named <Project ID>-media).
You should see your new object named Google_Cloud_Storage_logo.png.
Click Check my progress to verify the objective.
Upload objects to your bucket
Run the client application and test the Cloud Storage public URL
Add /api/quizzes/gcp to the end of the application's URL.
You should see that JSON data has been returned to the client corresponding to the Question you added in the web application.
The imageUrl property should have a value corresponding to the object in Cloud Storage.
Return to the application home page and click the Take Test link.
Click GCP, and answer each question.
When you get to the question you just added, you should see the image has been formatted inside the client-side web application!
End your lab
When you have completed your lab, click End Lab. Google Skills removes the resources you’ve used and cleans the account for you.
You will be given an opportunity to rate the lab experience. Select the applicable number of stars, type a comment, and then click Submit.
The number of stars indicates the following:
1 star = Very dissatisfied
2 stars = Dissatisfied
3 stars = Neutral
4 stars = Satisfied
5 stars = Very satisfied
You can close the dialog box if you don't want to provide feedback.
For feedback, suggestions, or corrections, please use the Support tab.
Copyright 2026 Google LLC All rights reserved. Google and the Google logo are trademarks of Google LLC. All other company and product names may be trademarks of the respective companies with which they are associated.
Moduły tworzą projekt Google Cloud i zasoby na określony czas.
Moduły mają ograniczenie czasowe i nie mają funkcji wstrzymywania. Jeśli zakończysz moduł, musisz go zacząć od początku.
Aby rozpocząć, w lewym górnym rogu ekranu kliknij Rozpocznij moduł.
Użyj przeglądania prywatnego
Skopiuj podaną nazwę użytkownika i hasło do modułu.
Kliknij Otwórz konsolę w trybie prywatnym.
Zaloguj się w konsoli
Zaloguj się z użyciem danych logowania do modułu. Użycie innych danych logowania może spowodować błędy lub naliczanie opłat.
Zaakceptuj warunki i pomiń stronę zasobów przywracania.
Nie klikaj Zakończ moduł, chyba że właśnie został przez Ciebie zakończony lub chcesz go uruchomić ponownie, ponieważ spowoduje to usunięcie wyników i projektu.
Ta treść jest obecnie niedostępna
Kiedy dostępność się zmieni, wyślemy Ci e-maila z powiadomieniem
Świetnie
Kiedy dostępność się zmieni, skontaktujemy się z Tobą e-mailem
Jeden moduł, a potem drugi
Potwierdź, aby zakończyć wszystkie istniejące moduły i rozpocząć ten
Aby uruchomić moduł, użyj przeglądania prywatnego
Najlepszym sposobem na uruchomienie tego laboratorium jest użycie okna incognito lub przeglądania prywatnego. Dzięki temu unikniesz konfliktu między swoim kontem osobistym a kontem do nauki, co mogłoby spowodować naliczanie dodatkowych opłat na koncie osobistym.
In this lab, you add images and video to an application. You also store files as objects in a Cloud Storage bucket.
Czas trwania:
Konfiguracja: 0 min
·
Dostęp na 60 min
·
Ukończono w 60 min