Next 2026 - Image Generation with Gemini - Nano Banana
Atelier
10 minutes
universal_currency_alt
Sans frais
show_chart
Débutant
info
Cet atelier peut intégrer des outils d'IA pour vous accompagner dans votre apprentissage.

Ce contenu n'est pas encore optimisé pour les appareils mobiles.
Pour une expérience optimale, veuillez accéder à notre site sur un ordinateur de bureau en utilisant un lien envoyé par e-mail.
Note: To ensure a consistent and high-performance experience, this lab may provide cached responses for some model requests.

Overview
In this lab, you explore Gemini 2.5 Flash Image (Nano Banana), Google’s state-of-the-art model for high-speed image generation, prompt-based editing, and visual reasoning.
In this lab, you write a Python script that prompts the model to generate a creative image: a cat eating a nano-banana in a fancy restaurant under the Gemini constellation.
Objectives
Google’s Generative AI, accessed through the google-genai Python SDK, gives you direct access to Gemini models so you can generate text, images, and multimodal outputs in your AI-powered applications.
In this lab, you learn how to perform the following tasks:
-
Connect to Google’s Generative AI services using the
genai.Client to interact with Gemini models.
-
Load a pre-trained Image Generation Model
gemini-2.5-flash-image to generate images without training your own ML model.
-
Send text prompts to the model and see how Gemini interprets natural language instructions.
-
Extract and save the generated image produced by the model.
-
Understand the basics of building AI applications using the new GenAI SDK and Python.
- Labs are timed and cannot be paused. The timer starts when you click Start.
- The included IDE is preconfigured with the gcloud SDK.
- Use the terminal to execute commands and then click Check my progress to verify your work.
Working with Generative AI
After starting the lab, you will get a split pane view consisting of the Code Editor and the lab instructions. Follow these steps to interact with the Generative AI APIs using genai Python SDK.
- Click Explorer to access the pre-created workspace file.
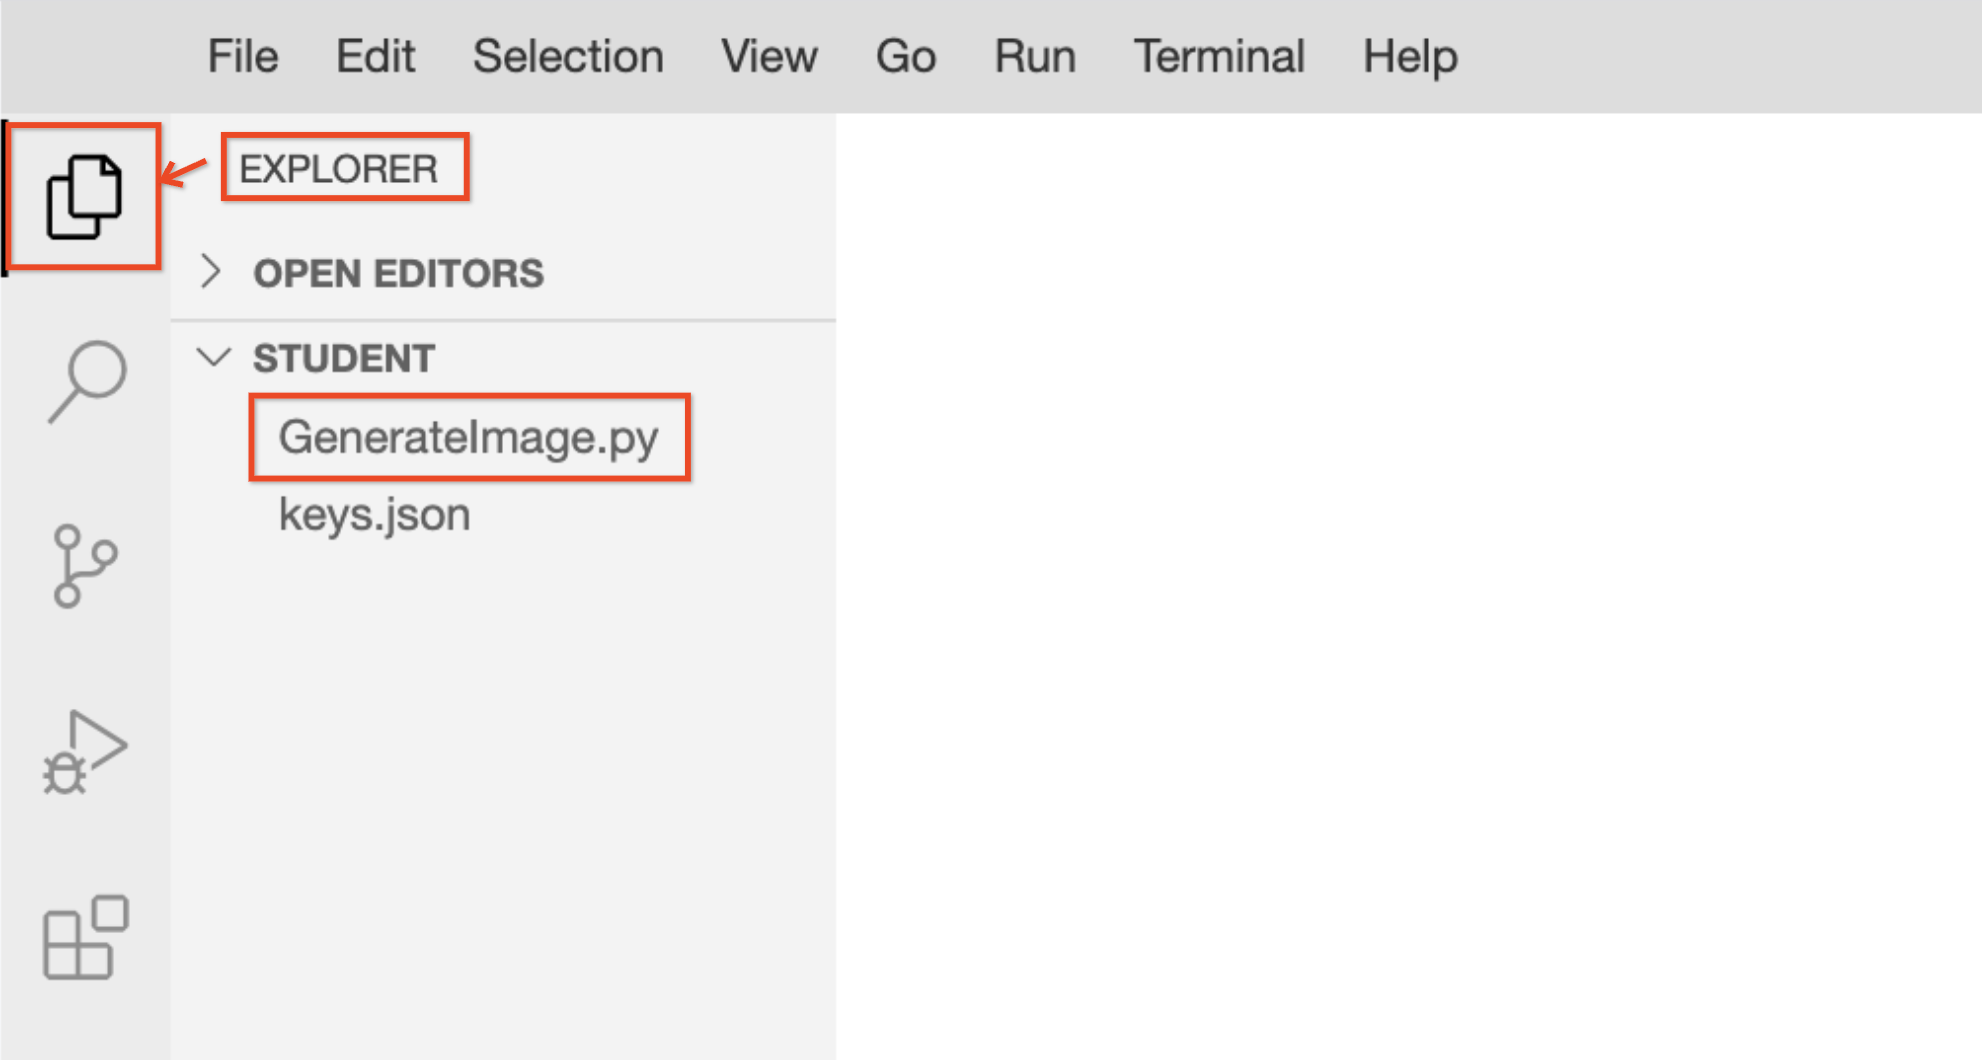
-
Select GenerateImage.py to open the file in the Code Editor.
-
To initialize the Generative AI client and send a text prompt to the model to generate an image, copy and paste the following code into your file:
import time
from google import genai
from google.genai import types
from PIL import Image
from google.genai.types import HttpOptions, ModelContent, Part, UserContent
from google.cloud import logging as gcp_logging
from google.genai.errors import ClientError
# ------ Below cloud logging code is for Qwiklab's internal use, do not edit/remove it. --------
# Initialize Google Cloud logging
gcp_logging_client = gcp_logging.Client()
gcp_logging_client.setup_logging()
client = genai.Client(
vertexai=True,
project='{{{ project_0.project_id | "project-id" }}}',
location='{{{ project_0.default_region | "REGION" }}}',
http_options=HttpOptions(api_version="v1")
)
prompt = (
"Create a picture of my cat eating a nano-banana in a "
"fancy restaurant under the Gemini constellation",
)
# Configuration for retry logic
MAX_RETRIES = 3
INITIAL_DELAY = 2
for attempt in range(MAX_RETRIES + 1):
try:
response = client.models.generate_content(
model="gemini-2.5-flash-image",
contents=[prompt],
)
for part in response.parts:
if part.text is not None:
print(part.text)
elif part.inline_data is not None:
image = part.as_image()
image.save("image.png")
break
except ClientError as e:
if "429" in str(e) or "RESOURCE_EXHAUSTED" in str(e):
if attempt < MAX_RETRIES:
delay = INITIAL_DELAY * (2 ** attempt)
print(f"Warning: Resource exhausted (429). Retrying in {delay} seconds... (Attempt {attempt + 1}/{MAX_RETRIES})")
time.sleep(delay)
else:
print("We are experiencing high demand right now. To stay on track, please skip this step for now and continue with the next part of the lab. You can try this prompt again in a few minutes.")
finally:
# Verify if the process concluded without a response object being created
if 'response' not in locals() and attempt == MAX_RETRIES:
print("Final Status: Process terminated unsuccessfully.")
-
Click File > Save to store your script.
-
To send the prompt to the model and generate an image file named image.png, click the triangle icon or run the following command in the terminal:
python3 GenerateImage.py
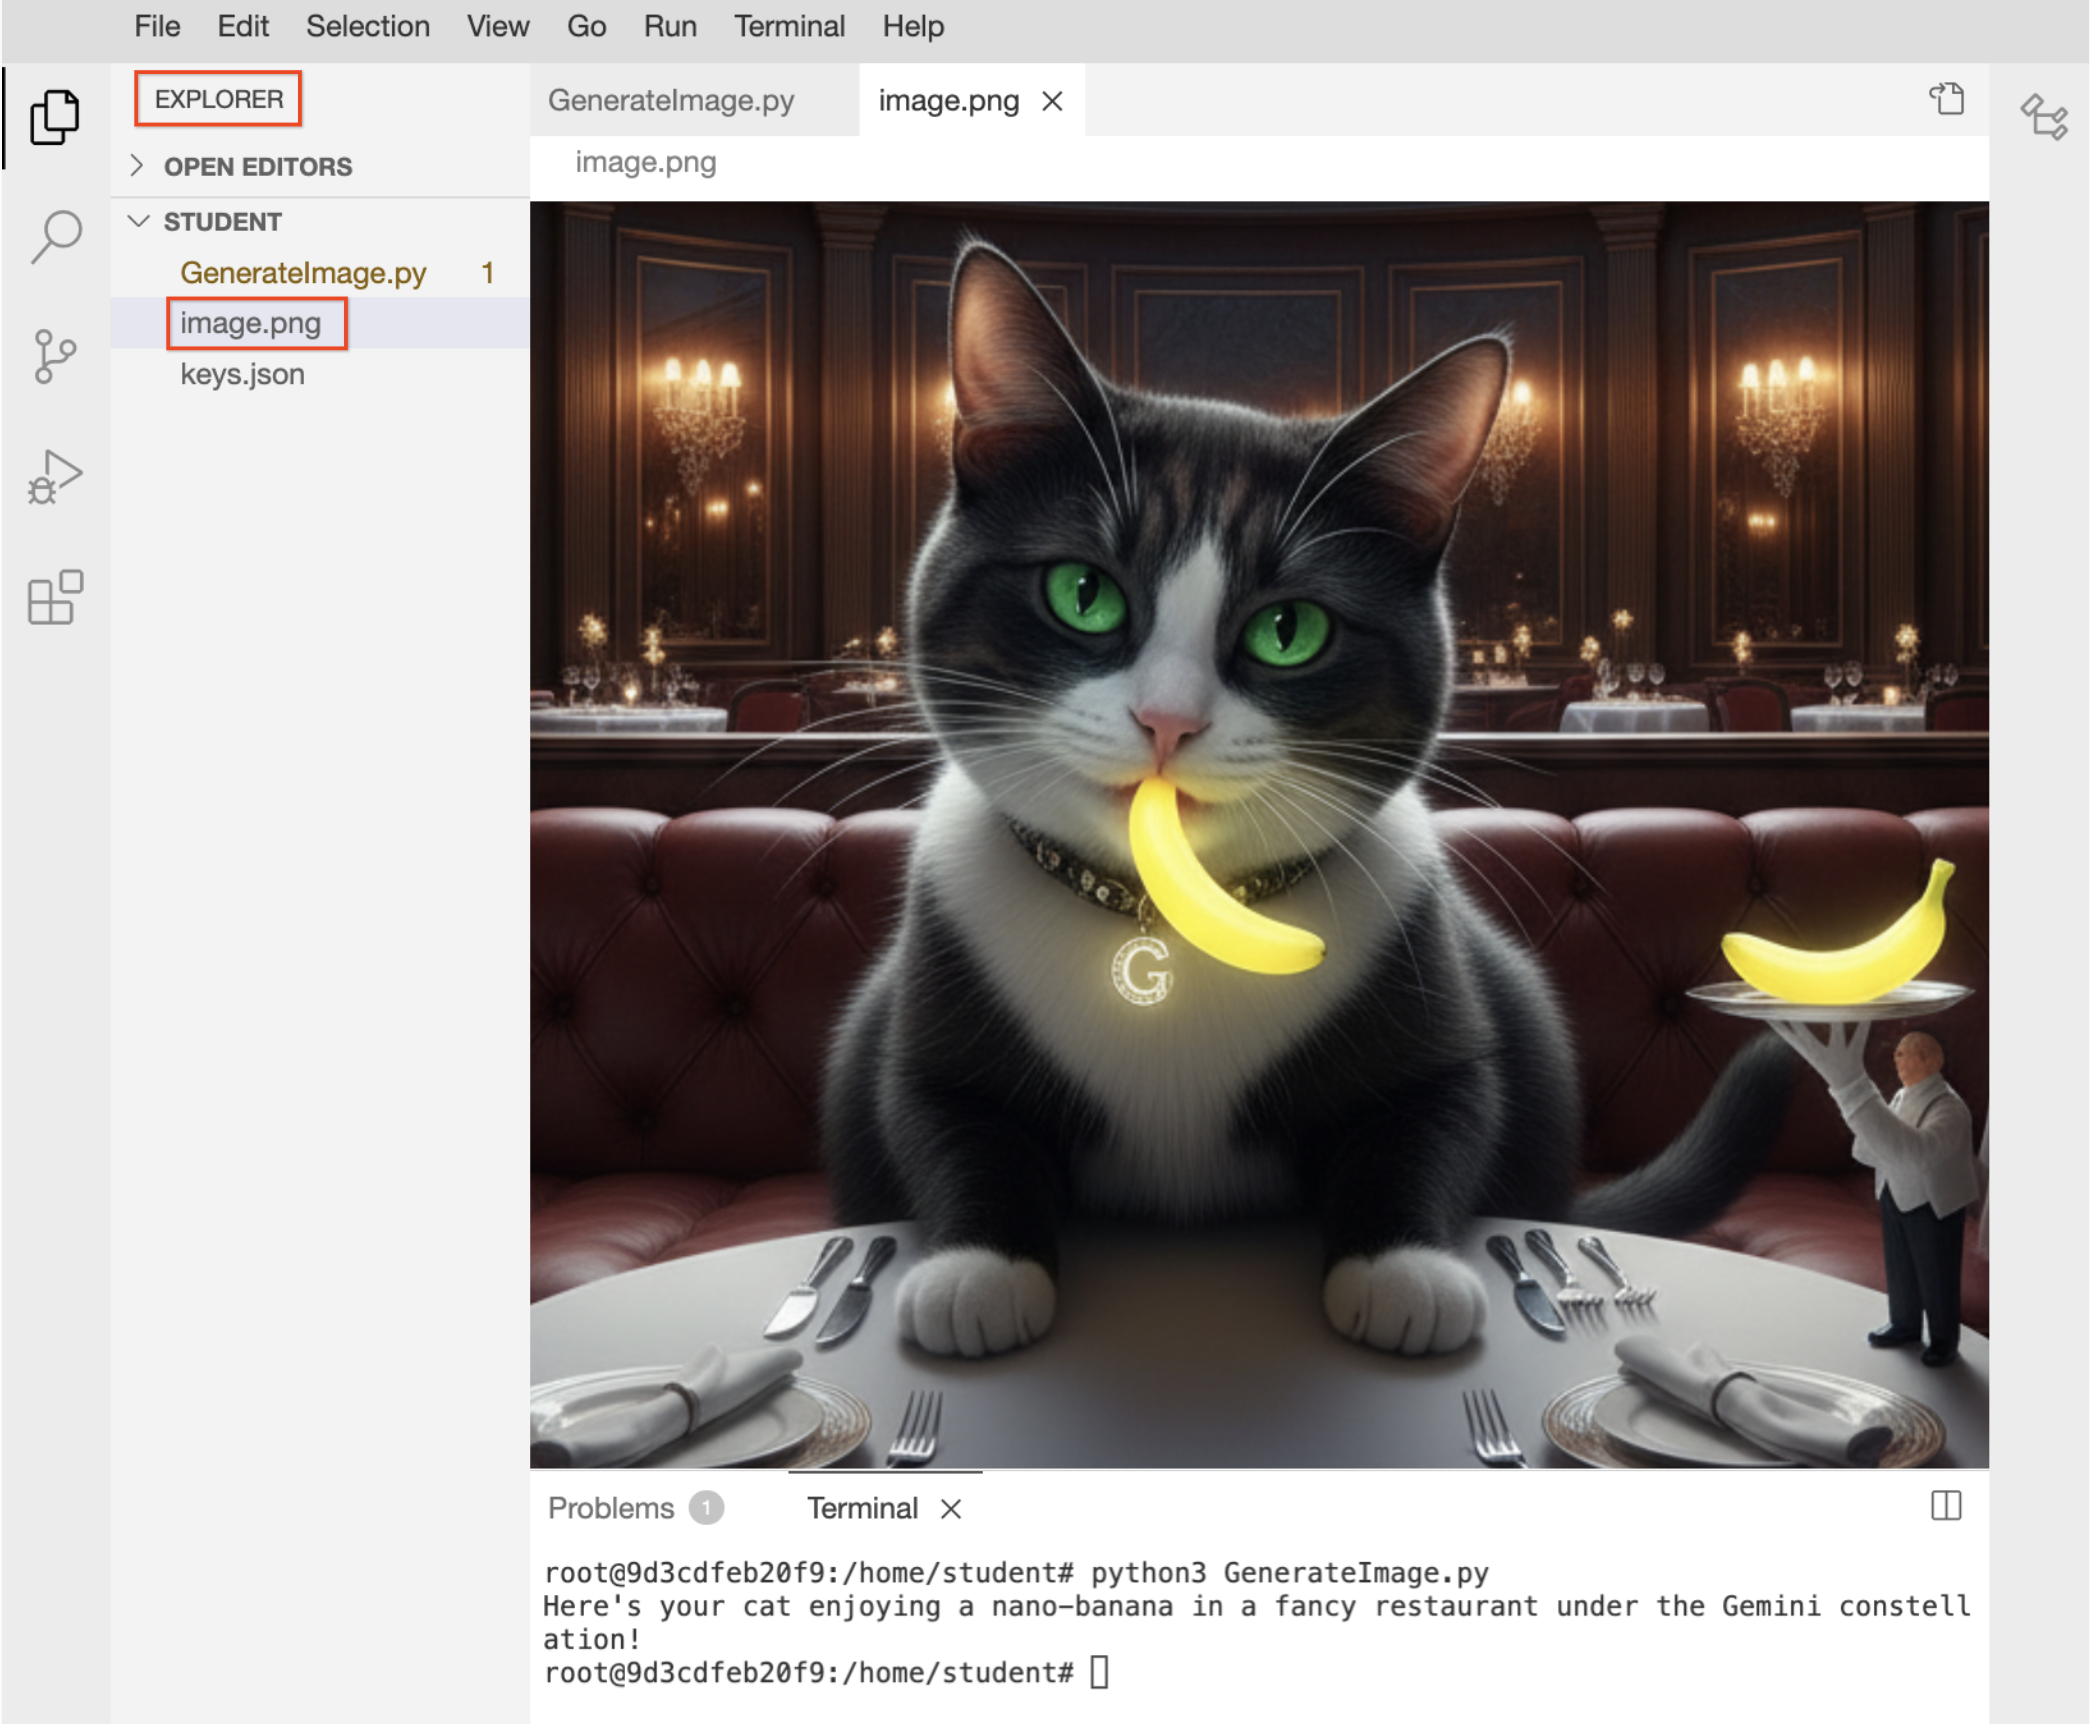
Sample output:
 Note: You can ignore any warnings related to Python version dependencies.
- In the Explorer, click image.png to view the generated image output.
Code Explanation
-
genai.Client: Initializes the connection to Agent Platform.
-
gemini-2.5-flash-image: This is the technical ID for the Nano Banana model.
-
generate_content: Sends your text prompt to the model's neural network.
-
Inline_data: The model returns the image as raw data, which the script converts into a viewable .png file.
Click Check my progress to verify the objective and obtain the passcode for the Skills Challenge.
Send a text prompt to Gen AI and receive an image response
Congratulations!
You have successfully connected to Google’s Generative AI services, initialized the Nano Banana model, and transformed a creative text prompt into a high-quality digital image.
Manual Last Updated April 24, 2026
Lab Last Tested April 24, 2026
Copyright 2026 Google LLC. All rights reserved. Google and the Google logo are trademarks of Google LLC. All other company and product names may be trademarks of the respective companies with which they are associated.


