

准备工作
- 实验会创建一个 Google Cloud 项目和一些资源,供您使用限定的一段时间
- 实验有时间限制,并且没有暂停功能。如果您中途结束实验,则必须重新开始。
- 在屏幕左上角,点击开始实验即可开始
Identify employee machines
/ 1
Retrieve machine allocation data
/ 1
Retrieve login attempt data
/ 1
Identify employee machines
/ 1
Retrieve machine allocation data
/ 1
Retrieve login attempt data
/ 1
As a security analyst, you’ll often find that you need data from more than one table.
Previously, you learned that a relational database is a structured database containing tables that are related to each other.
SQL joins enable you to combine tables that contain a shared column. This is helpful when you need to connect information that appears in different tables.
In this lab activity, you’ll use SQL joins to connect separate tables and retrieve needed information.
Get ready to apply what you’ve learned and join some data!
In this scenario, you’ll investigate a recent security incident that compromised some machines.
You are responsible for getting the required information from the database for the investigation.
Here’s how you’ll do this task: First, you’ll use an inner join to identify which employees are using which machines. Second, you’ll use left and right joins to find machines that do not belong to any specific user and users who do not have any specific machine assigned to them. Finally, you’ll use an inner join to list all login attempts made by all employees.
You’re ready to join tables in SQL!
The lab starts with the organization database in the MariaDB shell that is already open. This means you can start with the tasks as soon as you click the Start Lab button.
If you unintentionally exit the organization database in the MariaDB shell, you can reconnect by running the sudo mysql organization command.
You'll need to start the lab before you can access the materials. To do this, click the green “Start Lab” button at the top of the screen.
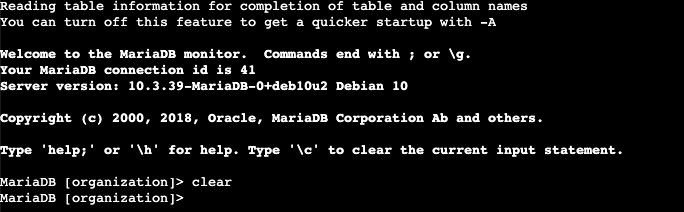
After you click the Start Lab button, you will see a shell, where you will be performing further steps in the lab. You should have a shell like this:
When you have completed all the tasks, refer to the End your Lab section that follows the tasks for information on how to end your lab.
First, you must identify which employees are using which machines. The data is located in the machines and employees tables.
You must use a SQL inner join to return the records you need based on a connecting column. In the scenario, both tables include the device_id column, which you’ll use to perform the join.
machines table:You’ll note that this query is not sufficient to perform the join and retrieve the information you need.
machines and employees tables on the device_id column. Replace X and Y with this column name:employees table after INNER JOIN makes it the right table.
To complete a join you need to link the joined tables on a common column. In the case of the employees and machines tables, the device_id column is common.
The correct query to solve this step:
Answer: The inner join query returned 185 rows.
Click Check my progress to verify that you have completed this task correctly.
You now must return the information on all machines and the employees who have machines. Next, you must do the reverse and retrieve the information of all employees and any machines that are assigned to them.
To achieve this, you’ll complete a left join and a right join on the employees and machines tables. The results will include all records from one or the other table. You must link these tables using the common device_id column.
machines and employees tables through a left join. You must replace the keyword X in the query:The correct query to solve this step:
FROM and before LEFT JOIN are included in the result. In this case, all records from the machines table are included, regardless of whether they are assigned to an employee or not.
Answer: The last username returned is NULL.
machines and employees tables through a right join. You must replace the keyword X in the query to solve the problem:RIGHT JOIN are included in the result. In this case, all records from the employees table are included, regardless of whether they have a machine or not.
The correct query to solve this step:
Answer: The value in the username column for the last record returned is areyes.
Click Check my progress to verify that you have completed this task correctly.
To continue investigating the security incident, you must retrieve the information on all employees who have made login attempts. To achieve this, you’ll perform an inner join on the employees and log_in_attempts tables, linking them on the common username column.
employees and log_in_attempts tables. Replace X with the name of the right table. Then replace Y and Z with the name of the column that connects the two tables:The correct query to solve this step:
Answer: There are 200 records returned by the inner join.
Click Check my progress to verify that you have completed this task correctly.
Great work!
You have completed this activity and should be able to use joins to combine data from multiple tables in a database.
You now have practical experience in using
INNER JOIN,LEFT JOIN, andRIGHT JOIN.Great work using SQL joins to obtain the precise data you need.
Before you end the lab, make sure you’re satisfied that you’ve completed all the tasks, and follow these steps:


此内容目前不可用
一旦可用,我们会通过电子邮件告知您

太好了!
一旦可用,我们会通过电子邮件告知您

一次一个实验
确认结束所有现有实验并开始此实验
完成此快速步骤即可开始实验。