
准备工作
- 实验会创建一个 Google Cloud 项目和一些资源,供您使用限定的一段时间
- 实验有时间限制,并且没有暂停功能。如果您中途结束实验,则必须重新开始。
- 在屏幕左上角,点击开始实验即可开始
Create a connection to AlloyDB
/ 30
Set IAM permissions for the connection service account
/ 30
Running a federated query from BigQuery
/ 40
Create a connection to AlloyDB
/ 30
Set IAM permissions for the connection service account
/ 30
Running a federated query from BigQuery
/ 40
BigQuery federated queries In this lab, you will explore the power of federated queries to gain real-time insights by directly querying an operational database from within BigQuery. You will learn how to connect BigQuery to an AlloyDB for PostgreSQL database, enabling you to join historical analytical data with live transactional data without the need for complex and time-consuming ETL pipelines. This hands-on experience demonstrates a key capability of a modern data lakehouse: the ability to unify data across disparate systems for comprehensive analysis.
You will begin by configuring an external connection in BigQuery that securely links to a sample AlloyDB instance containing web log data. Next, you will grant the connection you just created permission to query AlloyDB. Finally, you will construct a SQL query using the EXTERNAL_QUERY function. This powerful function allows you to execute a query against the AlloyDB database and treat its results as a temporary table within your BigQuery environment.
The core task involves writing a single federated query that joins a customer dataset stored natively in BigQuery with live web log data in AlloyDB. By mastering this technique, you can unlock sophisticated, real-time use cases that combine deep historical context with immediate operational awareness. For example, Cymbal E-commerce could use this approach to answer the business question: "What have our historically highest-spending customers been viewing on our website?"
EXTERNAL_QUERY SQL functionRead these instructions. Labs are timed and you cannot pause them. The timer, which starts when you click Start Lab, shows how long Google Cloud resources will be made available to you.
This hands-on lab lets you do the lab activities yourself in a real cloud environment, not in a simulation or demo environment. It does so by giving you new, temporary credentials that you use to sign in and access Google Cloud for the duration of the lab.
To complete this lab, you need:
Since this is a temporary account, which will last only as long as this lab:
 ) at the top-left.
In the Google Cloud Console, enter BigQuery Connection API in the top search bar.
Click on the result BigQuery Connection API.
If the API is not already enabled, click Enable to enable the API.
In this task, you create a new connection to AlloyDB for BigQuery to use.
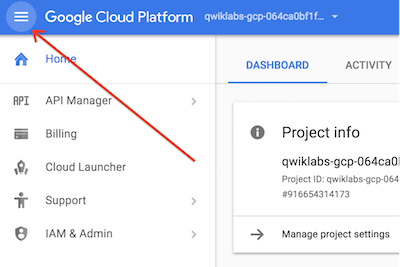
In the Google Cloud Console, in the Navigation menu (
Under Explorer, click + Add data.
In the fly out on the left under Data Source Type select Databases.
On the right of the fly out under Featured data sources click the card for Google Cloud AlloyDB.
In the resulting selection of cards click on BigQuery Federation.
In the Externa data source entry screen use the following values:
| Property | Value |
|---|---|
| Connection type | AlloyDB |
| Connection ID | |
| Location type | Region |
| Region | |
| Friendly name | leave blank |
| Description | leave blank |
| Encryption | Default |
| Username | |
| Password | |
| Database | |
| AlloyDB Instance |
Click Check my progress to verify the objective.
To access data in AlloyDB the service account that was created automatically when you made the connection needs to be given permission to AlloyDB.
In BigQuery Classic Explorer panel expand the entry that is the project id for the lab.
Now expand the entry Connections.
Click on the entry that you just created. The details for the connection will appear in the main panel on the right. Copy the entry listed for the Service account id. Here is an example of what it appears like: service-164632061610@gcp-sa-bigqueryconnection.iam.gserviceaccount.com
From the navigation menu select IAM & Admin and from the flyout submenu select IAM.
Click + Grant access.
For New principals paste in the connection service account id you copied in step 3.
Click the Select a role drop down. In the Filter area that appears enter AlloyDB. Scroll until you find AlloyDB Client and select it.
Click Add another role.
Click the new Select a role drop down. In the Filter area that appears enter BigQuery. Scroll until you find BigQuery Connection User and select it.
Click the Save box at the bottom of the screen.
Click Check my progress to verify the objective.
In this task you will run a query combining Cymbal's customer information in BigQuery with their weblog information in AlloyDB.
In the Google Cloud Console Navigation menu (
In BigQuery Classic Explorer panel expand the entry that is the project id for the lab.
Now expand the entry Connections.
Click the 3 vertical dots to the right of the connection you created. Select Query
Update the query by replacing the SELECT statement in the EXTERNAL_QUERY portion of the query with the following code. Don't replace the entire query, only the portion within the EXTERNAL_QUERY block between the " " marks:
Click Run. The returned data is from AlloyDB even through you are in BigQuery!
We will now extend the query to combine data in BigQuery native tables with the data in AlloyDB.
Replace the current query with the following code:
Click Run. The returned data combines data in AlloyDB and data in BigQuery!
Click Check my progress to verify the objective.
You configured and used a BigQuery external connection to allow BigQuery to access and process data stored in AlloyDB.


此内容目前不可用
一旦可用,我们会通过电子邮件告知您

太好了!
一旦可用,我们会通过电子邮件告知您

一次一个实验
确认结束所有现有实验并开始此实验
完成此快速步骤即可开始实验。