GSP1314

Overview
In distributed applications—especially those that handle financial data or require precise ordering of events—fault tolerance and message determinism are essential. This lab teaches how Aeron Cluster addresses these challenges using a Raft consensus algorithm, providing a practical, hands-on understanding of how message durability and consistency are achieved in real time.
OSS Aeron messaging supported by Adaptive is a high-performance, low-latency messaging bus designed for financial services and other applications that require extreme speed and reliability. In this lab, you will learn how to run Aeron messaging in Google Cloud.You learn how to run a basic deployment of Aeron Cluster to demonstrate high availability deterministic message handling, node to node communication, failover and recovery, admin commands and basic messaging.
Objectives
In this lab, you learn how to perform the following tasks:
- Review cluster leader election
- Run administration and status commands
- Submitting messages to the cluster
- Receiving those messages
- Node failover during message processing
Prerequisites
This lab is intended for DevOps, operations, network, or development professionals who have:
- A foundational understanding of distributed systems and messaging architectures
- Basic experience with deploying and managing virtual machines or cloud infrastructure
- Familiarity with concepts related to high availability and fault tolerance
- An interest in building low-latency, resilient infrastructure for real-time applications such as trading systems
Setup and requirements
Before you click the Start Lab button
Read these instructions. Labs are timed and you cannot pause them. The timer, which starts when you click Start Lab, shows how long Google Cloud resources are made available to you.
This hands-on lab lets you do the lab activities in a real cloud environment, not in a simulation or demo environment. It does so by giving you new, temporary credentials you use to sign in and access Google Cloud for the duration of the lab.
To complete this lab, you need:
- Access to a standard internet browser (Chrome browser recommended).
Note: Use an Incognito (recommended) or private browser window to run this lab. This prevents conflicts between your personal account and the student account, which may cause extra charges incurred to your personal account.
- Time to complete the lab—remember, once you start, you cannot pause a lab.
Note: Use only the student account for this lab. If you use a different Google Cloud account, you may incur charges to that account.
How to start your lab and sign in to the Google Cloud console
-
Click the Start Lab button. If you need to pay for the lab, a dialog opens for you to select your payment method.
On the left is the Lab Details pane with the following:
- The Open Google Cloud console button
- Time remaining
- The temporary credentials that you must use for this lab
- Other information, if needed, to step through this lab
-
Click Open Google Cloud console (or right-click and select Open Link in Incognito Window if you are running the Chrome browser).
The lab spins up resources, and then opens another tab that shows the Sign in page.
Tip: Arrange the tabs in separate windows, side-by-side.
Note: If you see the Choose an account dialog, click Use Another Account.
-
If necessary, copy the Username below and paste it into the Sign in dialog.
{{{user_0.username | "Username"}}}
You can also find the Username in the Lab Details pane.
-
Click Next.
-
Copy the Password below and paste it into the Welcome dialog.
{{{user_0.password | "Password"}}}
You can also find the Password in the Lab Details pane.
-
Click Next.
Important: You must use the credentials the lab provides you. Do not use your Google Cloud account credentials.
Note: Using your own Google Cloud account for this lab may incur extra charges.
-
Click through the subsequent pages:
- Accept the terms and conditions.
- Do not add recovery options or two-factor authentication (because this is a temporary account).
- Do not sign up for free trials.
After a few moments, the Google Cloud console opens in this tab.
Note: To access Google Cloud products and services, click the Navigation menu or type the service or product name in the Search field.

Infrastructure for the Aeron cluster
In this lab, three public compute instance VMs — aeron-cluster-node1, aeron-cluster-node2 and aeron-cluster-node3 have been provisioned and configured. The Aeron node software has been successfully installed on each of these instances.
Task 1. Start the Aeron Cluster
The three VMs will act as nodes in the Aeron cluster. For each node, you will run the basic-auction-cluster script.
Start the Aeron Cluster
This will start the Aeron node execution client.
-
In the Cloud console, on the Navigation menu (☰), click Compute Engine > VM Instances.
This may take a minute to initialize for the first time.
-
From the aeron-cluster-node1 VM, click SSH and run the following commands. Leave the ssh terminal window open to see the log messages come through.
# Put internal IP address of the aeron-cluster-node1 VM
export THIS_HOST=<aeron-cluster-node1-int-ip>
List all three internal IP addresses, in order, of the aeron-cluster-node1, aeron-cluster-node2, aeron-cluster-node3 VMs
export HOST_NAMES=<aeron-cluster-node1-int-ip>,<aeron-cluster-node2-int-ip>,<aeron-cluster-node3-int-ip>
Export Java Home and start the cluster
export JAVA_HOME=/usr/lib/jvm/java-17-openjdk-amd64
cd ~/aeron/aeron-samples/scripts/cluster
sed -i '/^ADD_OPENS="/ s|"$| --add-opens java.base/sun.nio.ch=ALL-UNNAMED"|' script-common
# Pass in 0 for the cluster id for node1
./basic-auction-cluster 0
You should see log messages similar to this.
Output (do not copy)
[65579.193264105] log started 2024-05-15 13:22:24.648+0000
[0] Started Cluster Node on 10.150.0.7...
[65580.270772124] CLUSTER: SERVICE_ACK [56/56]: memberId=0 logPosition=0 timestamp=0 timeUnit=MILLISECONDS ackId=0 relevantId=37 serviceId=0
[65580.292184186] CLUSTER: NEW_ELECTION [44/44]: memberId=0 leadershipTermId=-1 logPosition=0 appendPosition=0 reason=node started
[65580.335497276] CLUSTER: ELECTION_STATE_CHANGE [75/75]: memberId=0 INIT -> CANVASS leaderId=-1 candidateTermId=-1 leadershipTermId=-1 logPosition=0 logLeadershipTermId=-1 appendPosition=0 catchupPosition=-1
[65580.335583936] CLUSTER: STATE_CHANGE [22/22]: memberId=0 INIT -> ACTIVE
- From the aeron-cluster-node2 VM, click SSH and run the following command. Leave the ssh terminal window open to see the log messages come through.
# Put internal IP address of the aeron-cluster-node2 VM
export THIS_HOST=<aeron-cluster-node2-int-ip>
List all three internal IP addresses, in order, of the aeron-cluster-node1,aeron-cluster-node2,aeron-cluster-node3 VMs
export HOST_NAMES=<aeron-cluster-node1-int-ip>,<aeron-cluster-node2-int-ip>,<aeron-cluster-node3-int-ip>
Export Java Home and start the cluster
export JAVA_HOME=/usr/lib/jvm/java-17-openjdk-amd64
cd ~/aeron/aeron-samples/scripts/cluster
sed -i '/^ADD_OPENS="/ s|"$| --add-opens java.base/sun.nio.ch=ALL-UNNAMED"|' script-common
# Pass in 1 for the cluster id for node2
./basic-auction-cluster 1
You should see log messages similar to this.
Output (do not copy)
You should see the logs from aeron-cluster-node1 increase as well.
[65559.287616185] log started 2024-05-15 13:33:08.882+0000
[1] Started Cluster Node on 10.128.0.11...
[65560.368854007] CLUSTER: SERVICE_ACK [56/56]: memberId=1 logPosition=0 timestamp=0 timeUnit=MILLISECONDS ackId=0 relevantId=37 serviceId=0
[65560.422474075] CLUSTER: NEW_ELECTION [44/44]: memberId=1 leadershipTermId=-1 logPosition=0 appendPosition=0 reason=node started
.........
[65561.782783427] CLUSTER: ELECTION_STATE_CHANGE [96/96]: memberId=1 FOLLOWER_LOG_AWAIT -> FOLLOWER_READY leaderId=0 candidateTermId=0 leadershipTermId=0 logPosition=0 logLeadershipTermId=0 appendPosition=0 catchupPosition=-1
[65561.797524243] CLUSTER: ELECTION_STATE_CHANGE [84/84]: memberId=1 FOLLOWER_READY -> CLOSED leaderId=0 candidateTermId=0 leadershipTermId=0 logPosition=0 logLeadershipTermId=0 appendPosition=0 catchupPosition=-1
[65561.847023032] CLUSTER: REPLAY_NEW_LEADERSHIP_TERM [57/57]: memberId=1 isInElection=false leadershipTermId=0 logPosition=96 termBaseLogPosition=0 appVersion=1 timestamp=1715779991391 timeUnit=MILLISECONDS
- From the aeron-cluster-node3 VM, click SSH and run the following command. Leave the ssh terminal window open to see the log messages come through.
# Put internal IP address of the aeron-cluster-node3 VM
export THIS_HOST=<aeron-cluster-node3-int-ip>
List all three internal IP addresses, in order, of the aeron-cluster-node1,aeron-cluster-node2,aeron-cluster-node3 VMs
export HOST_NAMES=<aeron-cluster-node1-int-ip>,<aeron-cluster-node2-int-ip>,<aeron-cluster-node3-int-ip>
Export Java Home and start the cluster
export JAVA_HOME=/usr/lib/jvm/java-17-openjdk-amd64
cd ~/aeron/aeron-samples/scripts/cluster
sed -i '/^ADD_OPENS="/ s|"$| --add-opens java.base/sun.nio.ch=ALL-UNNAMED"|' script-common
# Pass in 2 for the cluster id for node3
./basic-auction-cluster 2
You should see log messages similar to this.
Output (do not copy)
You should see the logs from aeron-cluster-node1 and aeron-cluster-node2 increase as well.
[65602.383243612] log started 2024-05-15 13:35:08.687+0000
[2] Started Cluster Node on 10.138.0.25...
[65603.620978935] CLUSTER: SERVICE_ACK [56/56]: memberId=2 logPosition=0 timestamp=0 timeUnit=MILLISECONDS ackId=0 relevantId=38 serviceId=0
.........
[65604.240443849] CLUSTER: ELECTION_STATE_CHANGE [97/97]: memberId=2 FOLLOWER_CATCHUP -> FOLLOWER_LOG_INIT leaderId=0 candidateTermId=0 leadershipTermId=0 logPosition=96 logLeadershipTermId=0 appendPosition=96 catchupPosition=96
[65604.240614868] CLUSTER: ELECTION_STATE_CHANGE [95/95]: memberId=2 FOLLOWER_LOG_INIT -> FOLLOWER_READY leaderId=0 candidateTermId=0 leadershipTermId=0 logPosition=96 logLeadershipTermId=0 appendPosition=96 catchupPosition=96
[65604.258589323] CLUSTER: ELECTION_STATE_CHANGE [84/84]: memberId=2 FOLLOWER_READY -> CLOSED leaderId=0 candidateTermId=0 leadershipTermId=0 logPosition=96 logLeadershipTermId=0 appendPosition=96 catchupPosition=96
- The cluster is up and running!
Click Check my progress to verify the objective.
Start the Aeron Cluster.
Task 2. Start the Sample Auction Client
This will run the auction client to submit messages to the cluster. This is a sample client that submits sample bids to an auction.
Start the Auction Client
- Open a new ssh terminal on aeron-cluster-node1. Leave the current aeron-cluster-node1 terminal window open to see the log messages.
- Run this script to send messages to the cluster. Watch the log files increase with the new traffic. This will send 20 messages to the cluster using the client id 101.
cd ~/aeron/aeron-samples/scripts/cluster
export JAVA_HOME=/usr/lib/jvm/java-17-openjdk-amd64
Put internal IP address of the aeron-cluster-node1 VM
export THIS_HOST=<aeron-cluster-node1-int-ip>
List all three internal IP addresses, in order, of the aeron-cluster-node1, aeron-cluster-node2, aeron-cluster-node3 VMs
export HOST_NAMES=<aeron-cluster-node1-int-ip>,<aeron-cluster-node2-int-ip>,<aeron-cluster-node3-int-ip>
Send Auction Data
./basic-auction-client 101 20
You should see log messages similar to this on all three nodes of the cluster
Output (do not copy)
Sent(0, 101, 105) bidsRemaining=19
SessionMessage(1, 0,101, 105, true)
Sent(1, 101, 105) bidsRemaining=18
SessionMessage(1, 1,101, 105, false)
.........
Sent(19, 101, 172) bidsRemaining=0
SessionMessage(1, 19,101, 172, true)
On the cluster logs, you will see something similar to this:
attemptBid(this=Auction{bestPrice=0, currentWinningCustomerId=-1}, price=105,customerId=101)
attemptBid(this=Auction{bestPrice=105, currentWinningCustomerId=101}, price=105,customerId=101)
attemptBid(this=Auction{bestPrice=105, currentWinningCustomerId=101}, price=111,customerId=101)
.........
[66772.266690356] CLUSTER: APPEND_SESSION_CLOSE [61/61]: memberId=0 sessionId=1 closeReason=CLIENT_ACTION leadershipTermId=0 timestamp=1715780537722 timeUnit=MILLISECONDS
onSessionClose(ClientSession{id=1, responseStreamId=102, responseChannel='aeron:udp?endpoint=10.150.0.7:38675', encodedPrincipal=[], responsePublication=null, isClosing=false})
Click Check my progress to verify the objective.
Start the Auction Client.
Task 3. Run Administrative Tools For the Cluster
This section covers a couple of administrative tools for the cluster.
Run Admin Tools
- In the new SSH terminal on aeron-cluster-node1 that you opened in the previous task, run AeronStat to find stats about the node.
cd ~/aeron/aeron-samples/scripts
./aeron-stat watch=false
# For auto-refresh, set watch=true
- Find the cluster leader
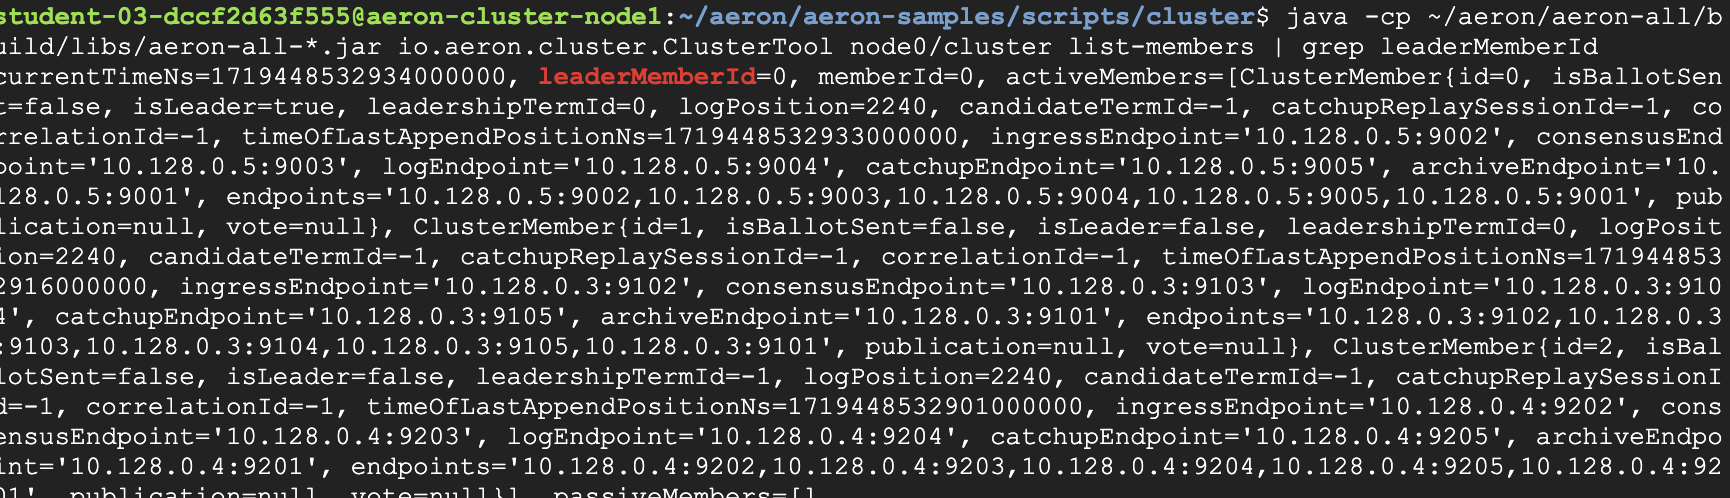
cd ~/aeron/aeron-samples/scripts/cluster
java -cp ~/aeron/aeron-all/build/libs/aeron-all-*.jar io.aeron.cluster.ClusterTool node0/cluster list-members | grep leaderMemberId
You should see messages similar to this: leaderMemberId=0
- Use the Cluster Tool to get additional information about the node and cluster. Other commands such as retrieving errors and snapshot management are available with this tool.
cd ~/aeron/aeron-samples/scripts/cluster
Describe the cluster
java -cp ~/aeron/aeron-all/build/libs/aeron-all-*.jar io.aeron.cluster.ClusterTool node0/cluster describe
Get the pid of the node. Combine this with pkill to stop the node
java -cp ~/aeron/aeron-all/build/libs/aeron-all-*.jar io.aeron.cluster.ClusterTool node0/cluster pid
List members of the cluster
java -cp ~/aeron/aeron-all/build/libs/aeron-all-*.jar io.aeron.cluster.ClusterTool node0/cluster list-members
See all options
java -cp ~/aeron/aeron-all/build/libs/aeron-all-*.jar io.aeron.cluster.ClusterTool node0/cluster
Task 4. Simulate Failover of the Cluster
These steps will guide you through stopping the leader node to simulate a failover. You will find the leader, stop the leader and watch the nodes determine a new leader, then restart the node and find the leader.
Simulate Failover by Stopping the Leader Node
- In the terminal window of aeron-cluster-node1, confirm this node is the leader.
cd ~/aeron/aeron-samples/scripts/cluster
java -cp ~/aeron/aeron-all/build/libs/aeron-all-*.jar io.aeron.cluster.ClusterTool node0/cluster list-members | grep leaderMemberId
- Find the pid of the node
java -cp ~/aeron/aeron-all/build/libs/aeron-all-*.jar io.aeron.cluster.ClusterTool node0/cluster pid
You should see something like this.
Output (do not copy)
32824
- Stop the node using this command. Use the pid from the previous command. Watch the log files of the other nodes to see how the nodes handle a node stopping.
kill -9 <pid>
You should see something like this in the log files of the other nodes. It will take a second or two to update. The leader will change
Output (do not copy)
aeron-cluster-node1
[66772.266690356] CLUSTER: APPEND_SESSION_CLOSE [61/61]: memberId=0 sessionId=1 closeReason=CLIENT_ACTION leadershipTermId=0 timestamp=1715780537722 timeUnit=MILLISECONDS
onSessionClose(ClientSession{id=1, responseStreamId=102, responseChannel='aeron:udp?endpoint=10.150.0.7:38675', encodedPrincipal=[], responsePublication=null, isClosing=false})
aeron-cluster-node2
[69338.274923670] CLUSTER: NEW_ELECTION [56/56]: memberId=1 leadershipTermId=0 logPosition=2240 appendPosition=2240 reason=leader heartbeat timeout
Consensus Module
io.aeron.cluster.client.ClusterEvent: WARN - leader heartbeat timeout
[69338.298304601] CLUSTER: ELECTION_STATE_CHANGE [75/75]: memberId=1 INIT -> CANVASS leaderId=-1 candidateTermId=0 leadershipTermId=0 logPosition=2240 logLeadershipTermId=0 appendPosition=2240 catchupPosition=-1
[69338.316800488] CLUSTER: ELECTION_STATE_CHANGE [79/79]: memberId=1 CANVASS -> NOMINATE leaderId=-1 candidateTermId=0 leadershipTermId=0 logPosition=2240 logLeadershipTermId=0 appendPosition=2240 catchupPosition=-1
.........
[69339.499787778] CLUSTER: ELECTION_STATE_CHANGE [87/87]: memberId=1 LEADER_INIT -> LEADER_READY leaderId=1 candidateTermId=1 leadershipTermId=1 logPosition=2240 logLeadershipTermId=1 appendPosition=2240 catchupPosition=-1
[69339.628143405] CLUSTER: ELECTION_STATE_CHANGE [82/82]: memberId=1 LEADER_READY -> CLOSED leaderId=1 candidateTermId=1 leadershipTermId=1 logPosition=2240 logLeadershipTermId=1 appendPosition=2240 catchupPosition=-1
aeron-cluster-node3
[69261.580239897] CLUSTER: NEW_ELECTION [56/56]: memberId=2 leadershipTermId=0 logPosition=2240 appendPosition=2240 reason=leader heartbeat timeout
Consensus Module
io.aeron.cluster.client.ClusterEvent: WARN - leader heartbeat timeout
[69261.588946244] CLUSTER: ELECTION_STATE_CHANGE [75/75]: memberId=2 INIT -> CANVASS leaderId=-1 candidateTermId=0 leadershipTermId=0 logPosition=2240 logLeadershipTermId=0 appendPosition=2240 catchupPosition=-1
.........
[69262.899601640] CLUSTER: ELECTION_STATE_CHANGE [84/84]: memberId=2 FOLLOWER_READY -> CLOSED leaderId=1 candidateTermId=1 leadershipTermId=1 logPosition=2240 logLeadershipTermId=1 appendPosition=2240 catchupPosition=-1
[69262.969083383] CLUSTER: REPLAY_NEW_LEADERSHIP_TERM [57/57]: memberId=2 isInElection=false leadershipTermId=1 logPosition=2336 termBaseLogPosition=2240 appVersion=1 timestamp=1715783769220 timeUnit=MILLISECONDS
Click Check my progress to verify the objective.
Simulate Failover by Stopping the Leader Node.
Task 5. Restart the Previous Leader Node
Let's observe how the cluster reacts when a node is added while messages are being submitted to the cluster.
The primary value proposition of Aeron to capital markets is that it delivers high availability and consistent ordering of message events through the cluster to support matching engines, order management systems, and other market process requirements.
You can simulate losing a node via killing the process but consider it being caused from a machine failure, network congestion, or other reasons a single node can go offline.
You will see the event of a node rejoining the cluster to demonstrate a change in the leader node and re-establishing.
Start the Previous Leader Node While Submitting Messages
- Open a new ssh terminal from a different VM (not the previous leader i.e., aeron-cluster-node1). From the command line prompt, run this command to find the new leader.
cd ~/aeron/aeron-samples/scripts/cluster
export JAVA_HOME=/usr/lib/jvm/java-17-openjdk-amd64
Put internal IP address of the VM that you selected on the previous step
export THIS_HOST=<aeron-cluster-node*-int-ip>
List all three internal IP addresses, in order, of the aeron-cluster-node1, aeron-cluster-node2, aeron-cluster-node3 VMs
export HOST_NAMES=<aeron-cluster-node1-int-ip>,<aeron-cluster-node2-int-ip>,<aeron-cluster-node3-int-ip>
Checks if the current node is the leader.
Update the node*/cluster parameter i.e., if you've selected node aeron-cluster-node2 then update the node number to node1/cluster or if you've selected node aeron-cluster-node3 then use node2/cluster in the following command:
java -cp ~/aeron/aeron-all/build/libs/aeron-all-*.jar io.aeron.cluster.ClusterTool node*/cluster list-members | grep leaderMemberId
You should see messages similar to this.
Output (do not copy)
currentTimeNs=1718129916131000000, leaderMemberId=1, memberId=1
This indicates clusterId1 (aeron-cluster-node1) is the leader.
Note: Be prepared to run these next two steps quickly back to back.
- From the node which is still running (VM that you selected on the previous step), run the command to submit 300 messages containing bids prices to the cluster
cd ~/aeron/aeron-samples/scripts/cluster
export JAVA_HOME=/usr/lib/jvm/java-17-openjdk-amd64
./basic-auction-client 101 300
You should see log messages similar to this.
Output (do not copy)
Sent(0, 101, 105) bidsRemaining=19
SessionMessage(1, 0,101, 105, true)
Sent(1, 101, 105) bidsRemaining=18
SessionMessage(1, 1,101, 105, false)
.........
Sent(19, 101, 172) bidsRemaining=0
SessionMessage(1, 19,101, 172, true)
**On the cluster logs, you will see something similar to this:**
attemptBid(this=Auction{bestPrice=0, currentWinningCustomerId=-1}, price=105,customerId=101)
attemptBid(this=Auction{bestPrice=105, currentWinningCustomerId=101}, price=105,customerId=101)
attemptBid(this=Auction{bestPrice=105, currentWinningCustomerId=101}, price=111,customerId=101)
.........
[66772.266690356] CLUSTER: APPEND_SESSION_CLOSE [61/61]: memberId=0 sessionId=1 closeReason=CLIENT_ACTION leadershipTermId=0 timestamp=1715780537722 timeUnit=MILLISECONDS
onSessionClose(ClientSession{id=1, responseStreamId=102, responseChannel='aeron:udp?endpoint=10.150.0.7:38675', encodedPrincipal=[], responsePublication=null, isClosing=false})
- While that is running, restart the previous leader. Go to the command line window of the previous leader(aeron-cluster-node1), and start the node again.
cd ~/aeron/aeron-samples/scripts/cluster
./basic-auction-cluster 0
You should see log messages similar to this.
Output (do not copy)
[65579.193264105] log started 2024-05-15 13:22:24.648+0000
[0] Started Cluster Node on 10.150.0.7...
[65580.270772124] CLUSTER: SERVICE_ACK [56/56]: memberId=0 logPosition=0 timestamp=0 timeUnit=MILLISECONDS ackId=0 relevantId=37 serviceId=0
[65580.292184186] CLUSTER: NEW_ELECTION [44/44]: memberId=0 leadershipTermId=-1 logPosition=0 appendPosition=0 reason=node started
[65580.335497276] CLUSTER: ELECTION_STATE_CHANGE [75/75]: memberId=0 INIT -> CANVASS leaderId=-1 candidateTermId=-1 leadershipTermId=-1 logPosition=0 logLeadershipTermId=-1 appendPosition=0 catchupPosition=-1
[65580.335583936] CLUSTER: STATE_CHANGE [22/22]: memberId=0 INIT -> ACTIVE
- When an additional node is added (or in this case reestablished), the node will compare its current journal or log to the leader in the cluster:
For example: memberId=0 logPosition=2336 timestamp=1718200735598 timeUnit=MILLISECONDS
Whereas you will then see the cluster has a much higher log position on the leader node.
For example: memberId=0 FOLLOWER_LOG_INIT -> FOLLOWER_READY leaderId=1 candidateTermId=2 leadershipTermId=2 logPosition=11296
The new node will start processing new messages as well as begin to backfill the missing items from the other nodes
FOLLOWER_CATCHUP -> FOLLOWER_LOG_INIT leaderId=1 candidateTermId=2 leadershipTermId=2 logPosition=11296 logLeadershipTermId=2 appendPosition=11296 catchupPosition=11200
With that, the cluster is back to a healthy state for deterministic and high availability of messages to the applications.
Note: If the messages stop before you see the results, increase the number of messages in step 2 and run it again.
- Check who the leader is? Did the leader stay the same? Or was the previous leader made leader again?
Click Check my progress to verify the objective.
Start the Previous Leader Node.
Congratulations!
Congratulations! You've successfully completed the Lab!.
In this lab, you deployed and managed a highly available Aeron messaging cluster in the cloud environment. You simulated failovers and observed dynamic scaling, directly experiencing Aeron's resilience in action. With the Aeron administration tool, you gained valuable real-time insights into its distributed messaging capabilities, solidifying the practical application of Aeron in building robust, fault-tolerant systems.
Next Steps / Learn More
Here are additional resources to continue working with Aeron.
Manual Last Updated May 22, 2025
Lab Last Tested May 22, 2025
Copyright 2025 Google LLC. All rights reserved. Google and the Google logo are trademarks of Google LLC. All other company and product names may be trademarks of the respective companies with which they are associated.


