Este conteúdo ainda não foi otimizado para dispositivos móveis.
Para aproveitar a melhor experiência, acesse nosso site em um computador desktop usando o link enviado a você por e-mail.
This lab was developed with our partner, NetApp. Your personal information may be shared with NetApp, the lab sponsor, if you have opted-in to receive product updates, announcements, and offers in your Account Profile.
GSP1313
Overview
Google Cloud NetApp Volumes is a fully managed data storage service that lets you move file-based applications to Google Cloud. It has support for Network File System (NFSv3 and NFSv4.1) and Server Message Block (SMB) protocols built-in, so you don't need to re-architect your applications and can continue to get persistent storage for your applications.
Volume backups provide independent point-in-time copies of your volume. They can be used to store old backups and provide the necessary second copy of your data. Daily, weekly, and monthly backup schedules allow for RPOs starting at one day. Volume backups can only be restored as a whole. Creating a volume from a backup (RTO) can take hours, depending on the size of the backup.
In this lab you will learn how to manage Google Cloud NetApp Volumes backup.
Read these instructions. Labs are timed and you cannot pause them. The timer, which starts when you click Start Lab, shows how long Google Cloud resources will be made available to you.
This Qwiklabs hands-on lab lets you do the lab activities yourself in a real cloud environment, not in a simulation or demo environment. It does so by giving you new, temporary credentials that you use to sign in and access Google Cloud for the duration of the lab.
What you need
To complete this lab, you need:
Access to a standard internet browser (Chrome browser recommended).
Time to complete the lab.
Note: If you already have your own personal Google Cloud account or project, do not use it for this lab.
Note: If you are using a Pixelbook, open an Incognito window to run this lab.
How to start your lab and sign in to the Google Cloud Console
Click the Start Lab button. If you need to pay for the lab, a pop-up opens for you to select your payment method.
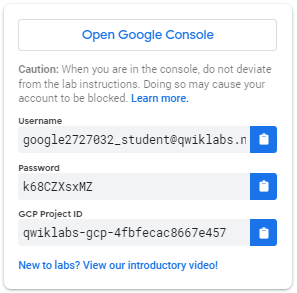
On the left is a panel populated with the temporary credentials that you must use for this lab.
Copy the username, and then click Open Google Console.
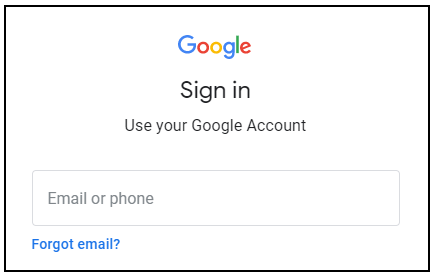
The lab spins up resources, and then opens another tab that shows the Sign in page.
Tip: Open the tabs in separate windows, side-by-side.
In the Sign in page, paste the username that you copied from the Connection Details panel. Then copy and paste the password.
Important: You must use the credentials from the Connection Details panel. Do not use your Qwiklabs credentials. If you have your own Google Cloud account, do not use it for this lab (avoids incurring charges).
Click through the subsequent pages:
Accept the terms and conditions.
Do not add recovery options or two-factor authentication (because this is a temporary account).
Do not sign up for free trials.
After a few moments, the Cloud Console opens in this tab.
Activate Cloud Shell
Cloud Shell is a virtual machine that is loaded with development tools. It offers a persistent 5GB home directory and runs on the Google Cloud. Cloud Shell provides command-line access to your Google Cloud resources.
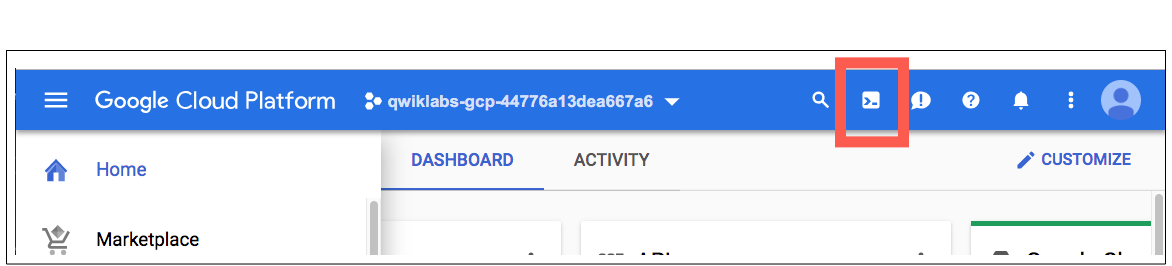
In the Cloud Console, in the top right toolbar, click the Activate Cloud Shell button.
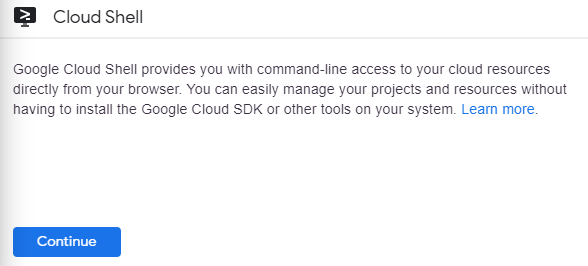
Click Continue.
It takes a few moments to provision and connect to the environment. When you are connected, you are already authenticated, and the project is set to your PROJECT_ID. For example:
gcloud is the command-line tool for Google Cloud. It comes pre-installed on Cloud Shell and supports tab-completion.
You can list the active account name with this command:
In the Google Cloud console search bar (), type NetApp Volumes and select the result to open the service.
In the navigation pane, click Volumes. A volume (volume1) has already been created for this lab.
Open Compute Engine → VM Instances in a new browser tab and click the SSH button for vm1.
Return to the NetApp Volumes page. In the row for the volume (volume1), click the overflow menu (), then select Mount Instructions.
Run the following commands from the Mount instructions into the SSH window in the following order:
Install the nfs utilities on the Linux VM:
sudo apt-get install nfs-common -y
Create a directory in the VM:
sudo mkdir /share1
Mount the volume by copying the sudo mount command from the Mount instructions and running it in the SSH terminal. The command includes the unique IP address of the volume. It will look like the command below:
sudo mount -t nfs -o rw,hard,rsize=65536,wsize=65536,vers=3,tcp <IP_ADDRESS>:/share1 /share1
Note: Please run the mount command exactly as it appears in your specific Mount instructions panel, as the IP address in this command is unique to your volume.
Verify that the volume has been mounted to your VM successfully:
df -h | grep share1
Click Check my progress to verify that you've performed the above task.
Mount the volume
Task 2. Create a backup vault
A backup vault marks the location you store your backups in.
Go to the NetApp Volumes page in the Google Cloud console.
In the navigation pane, click Backup vaults under Data protection.
Click Create.
For Name, type vault1
For Region, select
Click Create.
Click Check my progress to verify that you've performed the above task.
Create a backup vault
Task 3. Create a manual backup
You can manage the backups using the Backups menu and within the Volumes menu.
In vm1, create folders and files by running the following commands:
To list the content of the volume, run the following command:
sudo ls /share1
Go to the NetApp Volumes page in the Google Cloud console.
In the navigation pane, click Volumes.
Click volume1, then click the Backups tab.
Click Create backup.
For Name, type backup1
Keep the Backup source as Volume's current state.
For the Backup location, select vault1.
Click Create.
Note: When you create the first backup of a volume, all of the volume's used data is sent to the backup vault. Subsequent backups of the same volume only include data that has changed from the previous backup. This allows for fast incremental-forever backups and reduces the required capacity inside the backup vault.
In the navigation pane, click Backups under Data protection to check the backup status.
Task 4. Set a backup schedule
Backup policies define a schedule for automated backup creation. You can define how many daily, weekly, and monthly backups of your data you want NetApp Volumes to retain. If a policy is attached to a volume, then backups will generate automatically.
Create a backup policy
In the navigation pane, click Backup policies under Policies.
Click Create.
For Name, type policy1
For Region, select
You can customize the backup schedule configuration based on your RPO needs. As an example, include the following configuration:
Daily: Backups to keep = 30
Weekly: Backups to keep = 8
Monthly: Backups to keep = 12
Click Create.
Click Check my progress to verify that you've performed the above task.
Create a backup policy
Attach the backup policy to the volume
Once that the backup policy has been created, you have to attach the policy (policy1) to the volume (volume1) to allow the backups be created automatically.
In the navigation pane, click Volumes.
Click volume1, then click the Backups tab.
Click Manage Backup Policy.
Select the Allow scheduled backups checkbox.
For backup policy, select policy1.
For backup vault, select vault1.
Click Save.
Click Check my progress to verify that you've performed the above task.
Attach a policy to the volume
Task 5. Restore a backup
To restore a backup, you have to create a new volume from a backup.
Go to the NetApp Volumes page in the Google Cloud console.
In the navigation pane, click Volumes.
Click volume1, then click the Backups tab.
You should see the backup (backup1) that you took in the task 3. If the backup status is still creating, wait some minutes.
In the row for the backup (backup1), click the overflow menu (), then select Create new volume from backup.
Create the volume using the following information:
Name = restore-from-volume1
Storage Pool = pool1
Share name = share1-restored
Click Create.
Note: The restore process time can take some time depending on the volume capacity.
Click Check my progress to verify that you've performed the above task.
Restore a volume from a backup
Congratulations!
You have learned how to create manual backups, scheduled backups, and restore an entire volume from a backup.
Next steps / Learn more
Be sure to check out the official NetApp Volumes documentation:
...helps you make the most of Google Cloud technologies. Our classes include technical skills and best practices to help you get up to speed quickly and continue your learning journey. We offer fundamental to advanced level training, with on-demand, live, and virtual options to suit your busy schedule. Certifications help you validate and prove your skill and expertise in Google Cloud technologies.
Manual last updated January 2, 2025
Manual Last tested January 2, 2025
Copyright 2024 Google LLC All rights reserved. Google and the Google logo are trademarks of Google LLC. All other company and product names may be trademarks of the respective companies with which they are associated.
Os laboratórios criam um projeto e recursos do Google Cloud por um período fixo
Os laboratórios têm um limite de tempo e não têm o recurso de pausa. Se você encerrar o laboratório, vai precisar recomeçar do início.
No canto superior esquerdo da tela, clique em Começar o laboratório
Usar a navegação anônima
Copie o nome de usuário e a senha fornecidos para o laboratório
Clique em Abrir console no modo anônimo
Fazer login no console
Faça login usando suas credenciais do laboratório. Usar outras credenciais pode causar erros ou gerar cobranças.
Aceite os termos e pule a página de recursos de recuperação
Não clique em Terminar o laboratório a menos que você tenha concluído ou queira recomeçar, porque isso vai apagar seu trabalho e remover o projeto
Este conteúdo não está disponível no momento
Podemos avisar você por e-mail quando estiver disponível
Ótimo!
Vamos entrar em contato por e-mail se ficar disponível
Um laboratório por vez
Confirme para encerrar todos os laboratórios atuais e iniciar este
Use a navegação anônima para executar o laboratório
A melhor maneira de executar este laboratório é usando uma janela de navegação anônima
ou privada. Isso evita conflitos entre sua conta pessoal
e a conta de estudante, o que poderia causar cobranças extras
na sua conta pessoal.
Learn how to protect your data with Google Cloud NetApp Volumes using backup
Duração:
Configuração: 10 minutos
·
Tempo de acesso: 40 minutos
·
Tempo para conclusão: 40 minutos




 ), type NetApp Volumes and select the result to open the service.
 ), then select Mount Instructions.