Add Cloud Data Fusion API Service Agent role to service account
Vérifier ma progression
/ 25
Deploy a sample pipeline
Vérifier ma progression
/ 25
View the result
Vérifier ma progression
/ 25
Create a cloud data fusion instance
Vérifier ma progression
/ 25
Add Cloud Data Fusion API Service Agent role to service account
Vérifier ma progression
/ 25
Deploy a sample pipeline
Vérifier ma progression
/ 25
View the result
Vérifier ma progression
/ 25
Cet atelier peut intégrer des outils d'IA pour vous accompagner dans votre apprentissage.
Overview
This lab teaches you how to create a Data Fusion instance and deploy a sample pipeline that's provided.
The pipeline reads a JSON file containing NYT bestseller data from Cloud Storage. The pipeline then runs transformations on the file to parse and clean the data. And finally loads a subset of the records into BigQuery.
Objectives
In this lab you will learn to:
Create a Data Fusion instance
Deploy a sample pipeline that runs some transformations on a JSON file and filter out matching results into BigQuery
Setup
For each lab, you get a new Google Cloud project and set of resources for a fixed time at no cost.
Sign in to Google Skills using an incognito window.
Note the lab's access time (for example, 1:15:00), and make sure you can finish within that time.
There is no pause feature. You can restart if needed, but you have to start at the beginning.
When ready, click Start lab.
Note your lab credentials (Username and Password). You will use them to sign in to the Google Cloud Console.
Click Open Google Console.
Click Use another account and copy/paste credentials for this lab into the prompts.
If you use other credentials, you'll receive errors or incur charges.
Accept the terms and skip the recovery resource page.
How to start your lab and sign in to the Google Cloud console
Click the Start Lab button. If you need to pay for the lab, a dialog opens for you to select your payment method.
On the right is the Lab setup and access panel with the following:
The Open Google Cloud console button
The temporary credentials (username and password) that you must use for this lab
Other information, if needed, to step through this lab
Note that the lab timer is located near the top of the page, showing the remaining time.
Click Open Google Cloud console (or right-click and select Open Link in Incognito Window if you are running the Chrome browser).
The lab spins up resources, and then opens another tab that shows the Sign in page.
Tip: Arrange the tabs in separate windows, side-by-side.
Note: If you see the Choose an account dialog, click Use Another Account.
If necessary, copy the Username below and paste it into the Sign in dialog.
{{{user_0.username | "Username"}}}
You can also find the Username in the Lab setup and access panel.
Click Next.
Copy the Password below and paste it into the Welcome dialog.
{{{user_0.password | "Password"}}}
You can also find the Password in the Lab setup and access panel.
Click Next.
Important: You must use the credentials the lab provides you. Do not use your Google Cloud account credentials.
Note: Using your own Google Cloud account for this lab may incur extra charges.
Click through the subsequent pages:
Accept the terms and conditions.
Do not add recovery options or two-factor authentication (because this is a temporary account).
Do not sign up for free trials.
After a few moments, the Google Cloud console opens in this tab.
Note: To access Google Cloud products and services, click the Navigation menu or type the service or product name in the Search field.
Activate Cloud Shell
Cloud Shell is a virtual machine that contains development tools. It offers a persistent 5-GB home directory and runs on Google Cloud. Cloud Shell provides command-line access to your Google Cloud resources. gcloud is the command-line tool for Google Cloud. It comes pre-installed on Cloud Shell and supports tab completion.
Click the Activate Cloud Shell button () at the top right of the console.
Click Continue.
It takes a few moments to provision and connect to the environment. When you are connected, you are also authenticated, and the project is set to your PROJECT_ID.
[core]
project = qwiklabs-gcp-44776a13dea667a6
Note: Full documentation of gcloud is available in the gcloud CLI overview guide.
Check project permissions
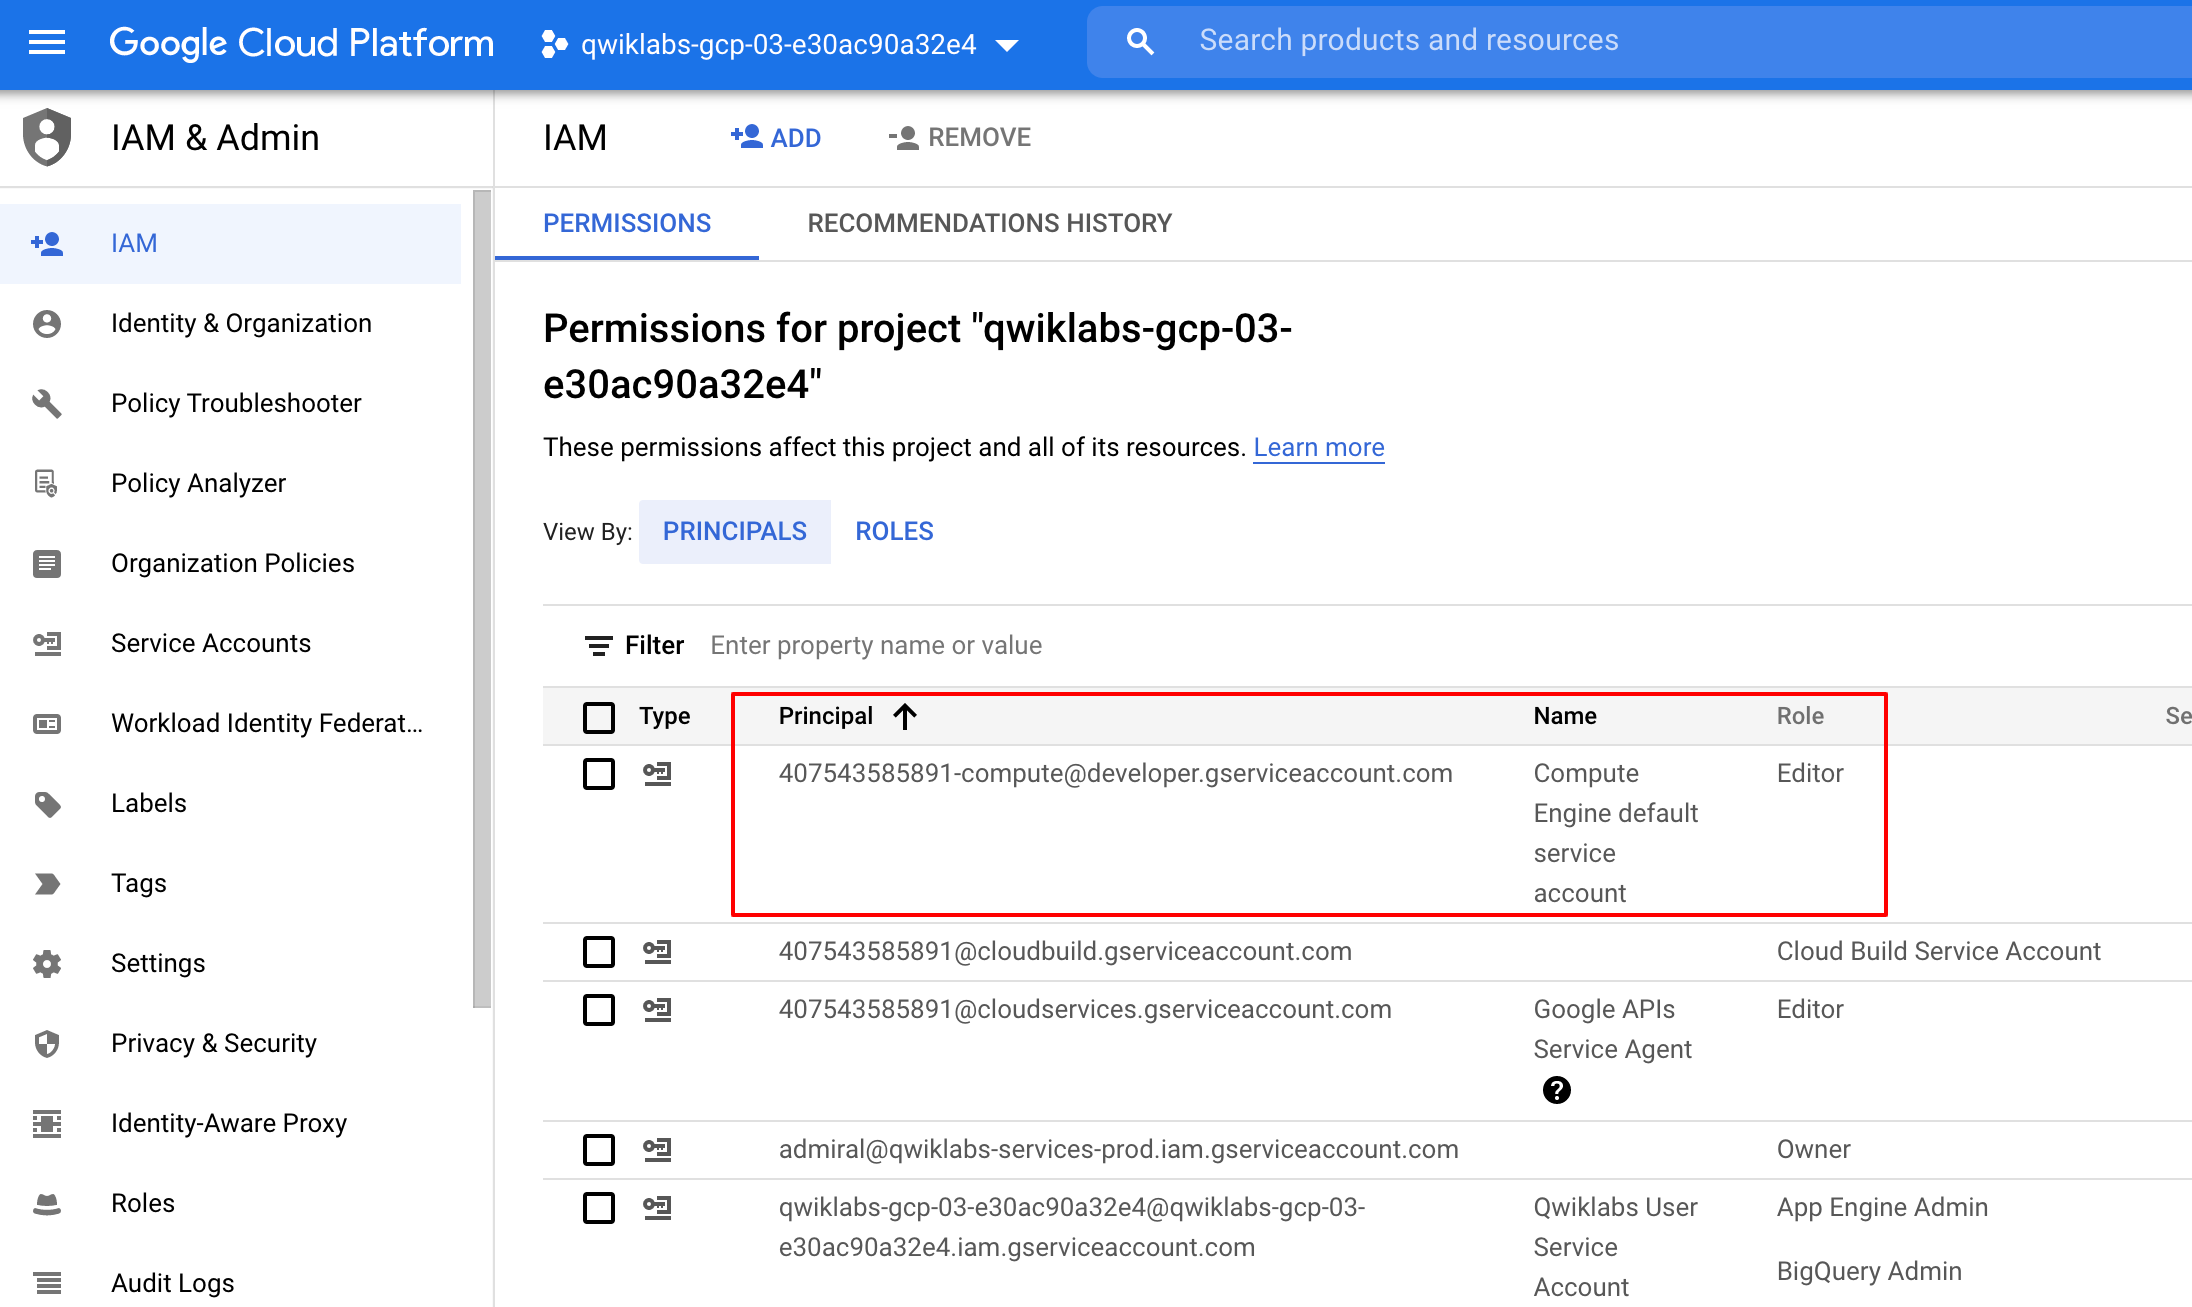
Before you begin working on Google Cloud, you must ensure that your project has the correct permissions within Identity and Access Management (IAM).
In the Google Cloud console, on the Navigation menu (), click IAM & Admin > IAM.
Confirm that the default compute Service Account {project-number}-compute@developer.gserviceaccount.com is present and has the editor role assigned. The account prefix is the project number, which you can find on Navigation menu > Cloud overview.
If the account is not present in IAM or does not have the editor role, follow the steps below to assign the required role.
In the Google Cloud console, on the Navigation menu, click Cloud overview.
From the Project info card, copy the Project number.
Replace {project-number} with your project number.
For Select a role, select Basic (or Project) > Editor.
Click Save.
Task 1. Enable Cloud Data Fusion API
In the Cloud console, on the Navigation menu (), select APIs & Services > Library.
In the search box, type Data fusion to find the Cloud Data Fusion API and click on the hyperlink.
The API is already enabled, click Manage then click Disable API. Confirm Disable.
After the API is disabled, click Enable to re-enable the API.
Task 2. Create a Cloud Data Fusion instance
In the Google Cloud Console, on the Navigation menu (), click View all products. Under Analytics, click Data Fusion.
Click the Create an Instance link at the top of the section to create a Cloud Data Fusion instance.
In the Create Data Fusion instance page that loads:
a. Enter a name for your instance (like cdf-lab-instance).
b. In the Region, select us-central1.
c. Under Edition, select Basic.
d. In the Authorization section, click Grant Permission if required.
e. Click on the dropdown icon next to Advanced Options, under Advanced Monitoring and Logging, check the checkbox for Managed Service for Spark Cloud logging.
f. Leave all other fields as-is, then click Create.
Click Check my progress to verify the objective.
Create a cloud data fusion instance
Note: Creation of the instance takes around 10 minutes. While you're waiting, please watch this presentation on Cloud Data Fusion from Next '19 starting at the 15:31 time stamp. Come back and check on your instance every now and then, you can finish watching the video after the lab is completed.
Note: Remember, this lab has a time limit, and you will lose your work when the time runs out.
Next, you will grant permissions to the service account associated with the instance, using the following steps.
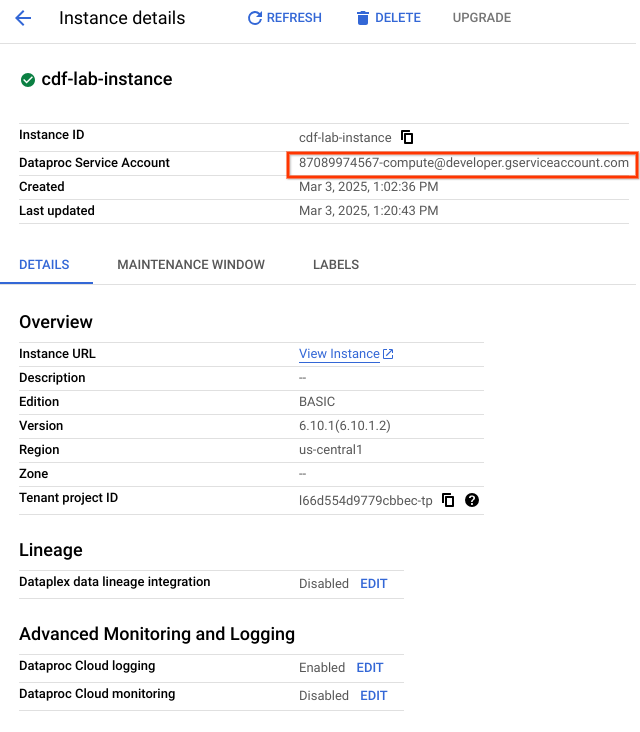
Click on the instance name. On the Instance details page copy the Managed Service for Spark Service Account to your clipboard.
In the Cloud console, on the Navigation menu (), select IAM & Admin > IAM.
On the IAM Permissions page, click +Grant Access.
In the New principals field paste the Managed Service for Spark Service Account.
Click into the Select a role field and start typing Cloud Data Fusion API Service Agent, then select it.
Click Save.
Click Check my progress to verify the objective.
Add Cloud Data Fusion API Service Agent role to service account
Task 3. Navigate the Cloud Data Fusion UI
When using Cloud Data Fusion, you use both the Cloud console and the separate Cloud Data Fusion UI.
In the Cloud console, you can create and delete Cloud Data Fusion instances, and view Cloud Data Fusion instance details.
In the Cloud Data Fusion web UI, you can use the various pages, such as Pipeline Studio or Wrangler, to use Cloud Data Fusion functionality.
To navigate the Cloud Data Fusion UI, follow these steps:
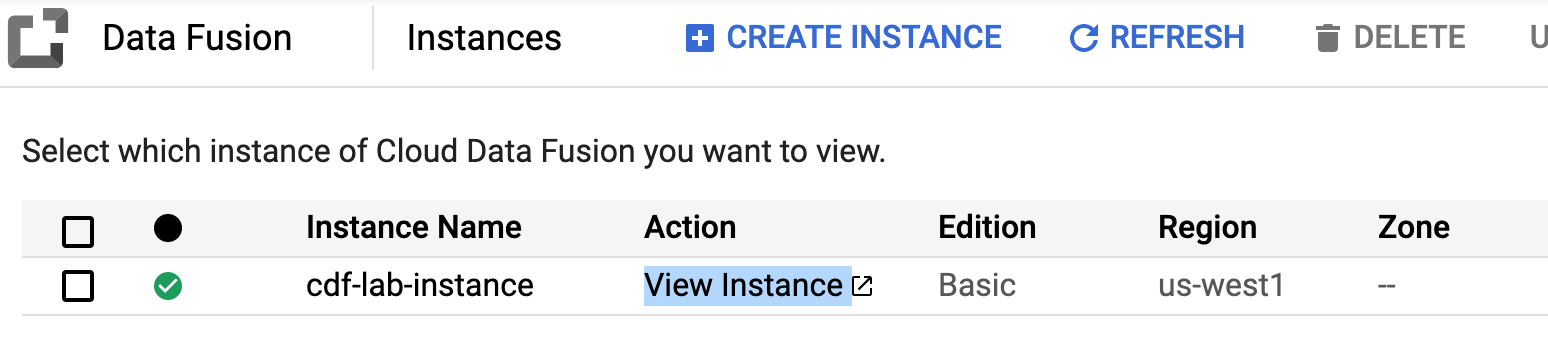
In the Google Cloud Console, on the Navigation menu (), click View all products. Under Analytics, click Data Fusion.
Click the View Instance link next to your Data Fusion instance. Select your lab credentials to sign in and if required, check the checkbox next to Manage your Google Service Control data. Click Continue.
If prompted to take a tour of the service click on Cancel. You should now be in the Cloud Data Fusion UI.
Notice that the Cloud Data Fusion web UI comes with its own navigation panel (on the left) to navigate to the page you need.
Task 4. Deploy a sample pipeline
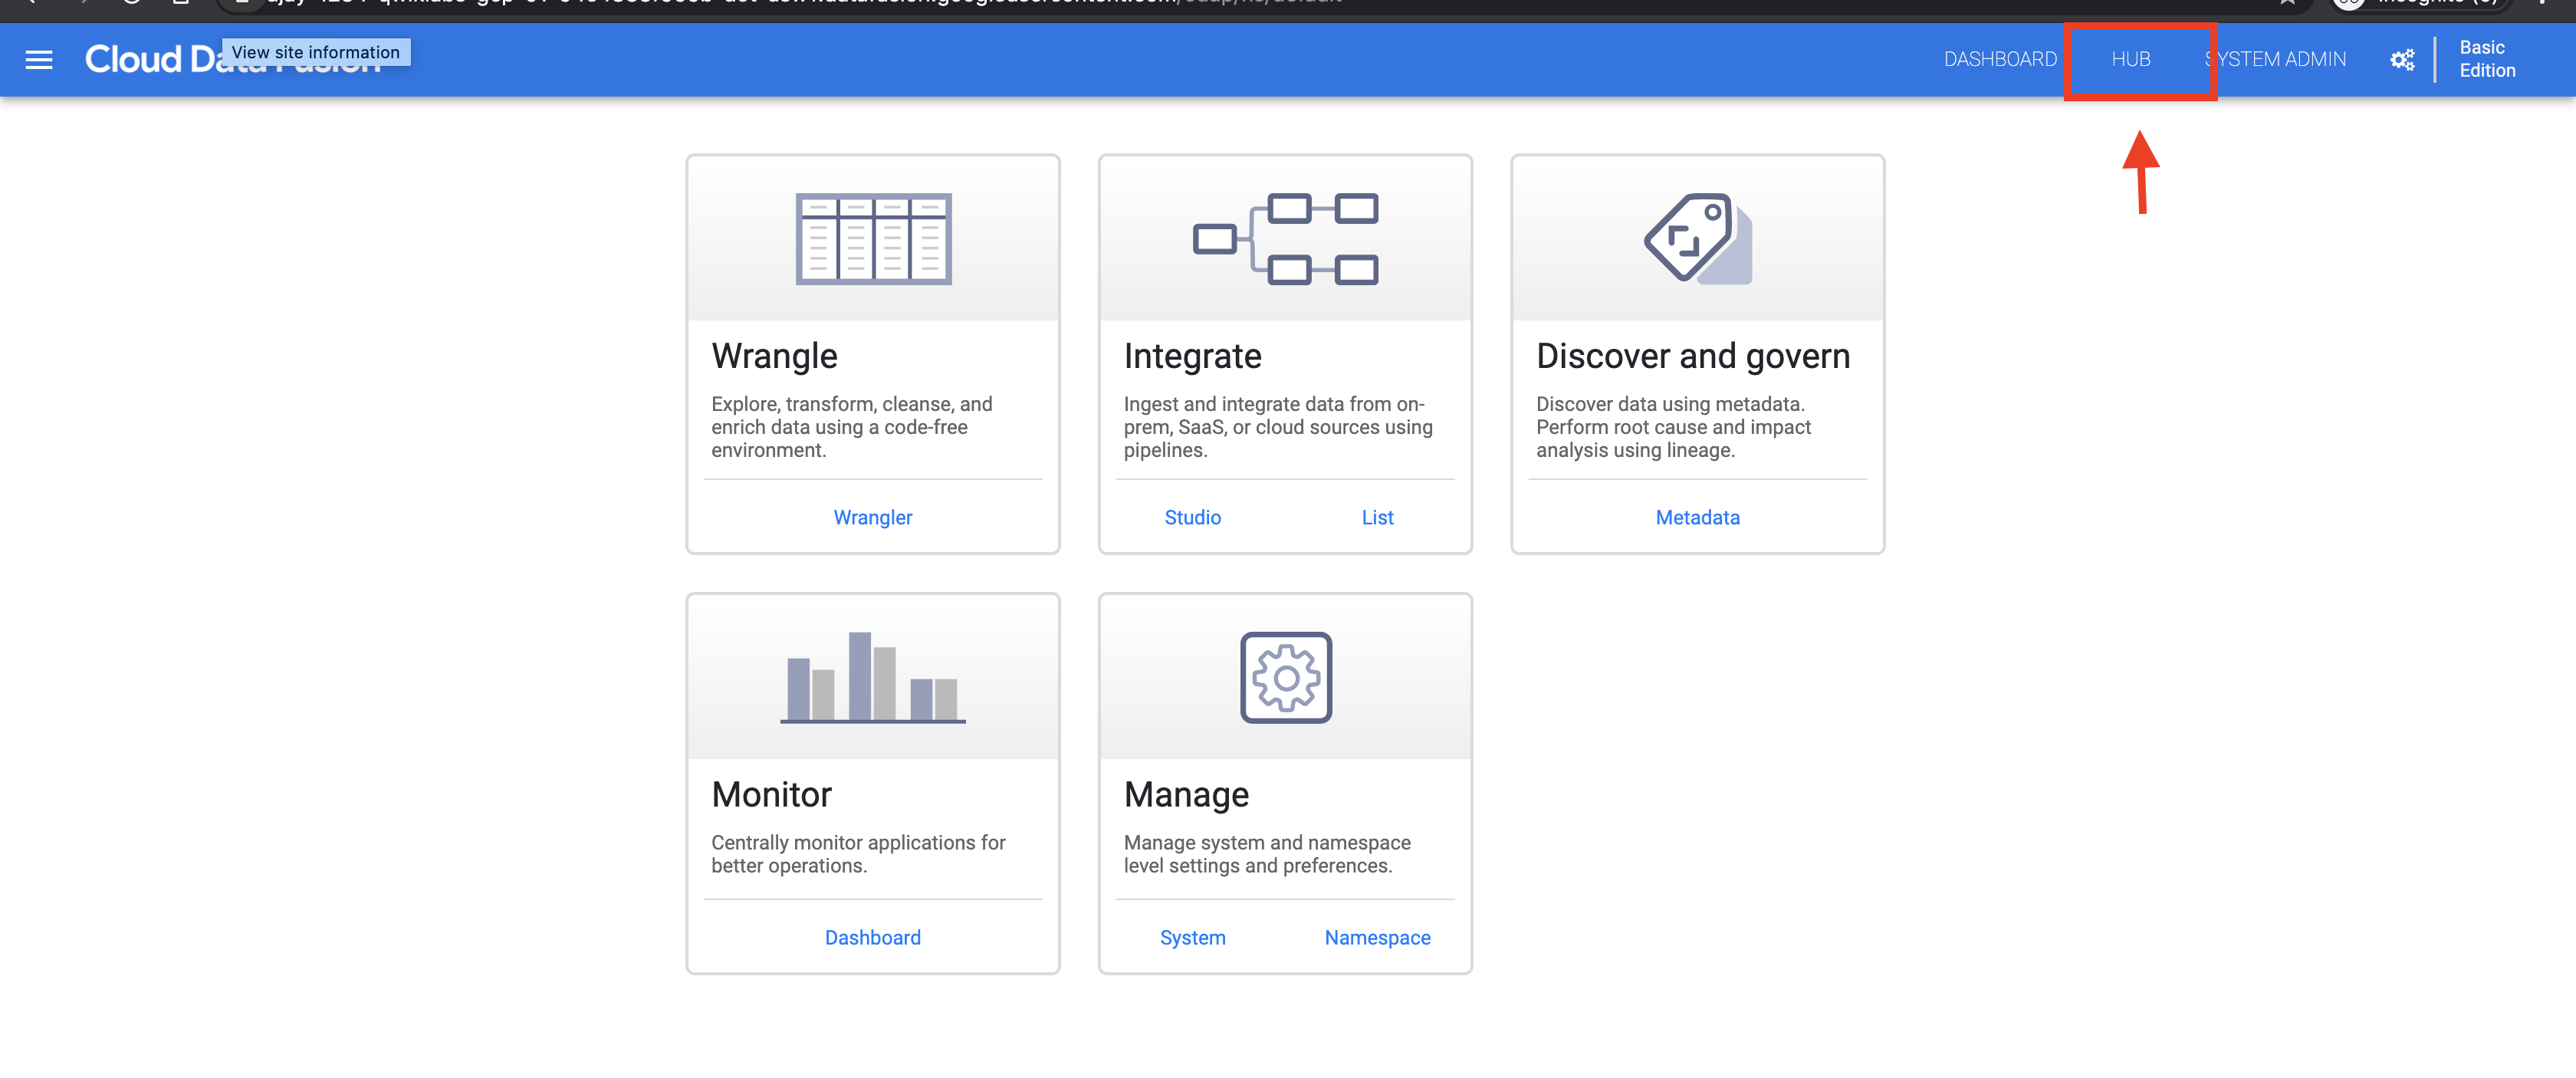
Sample pipelines are available through the Cloud Data Fusion Hub, which allows you to share reusable Cloud Data Fusion pipelines, plugins, and solutions.
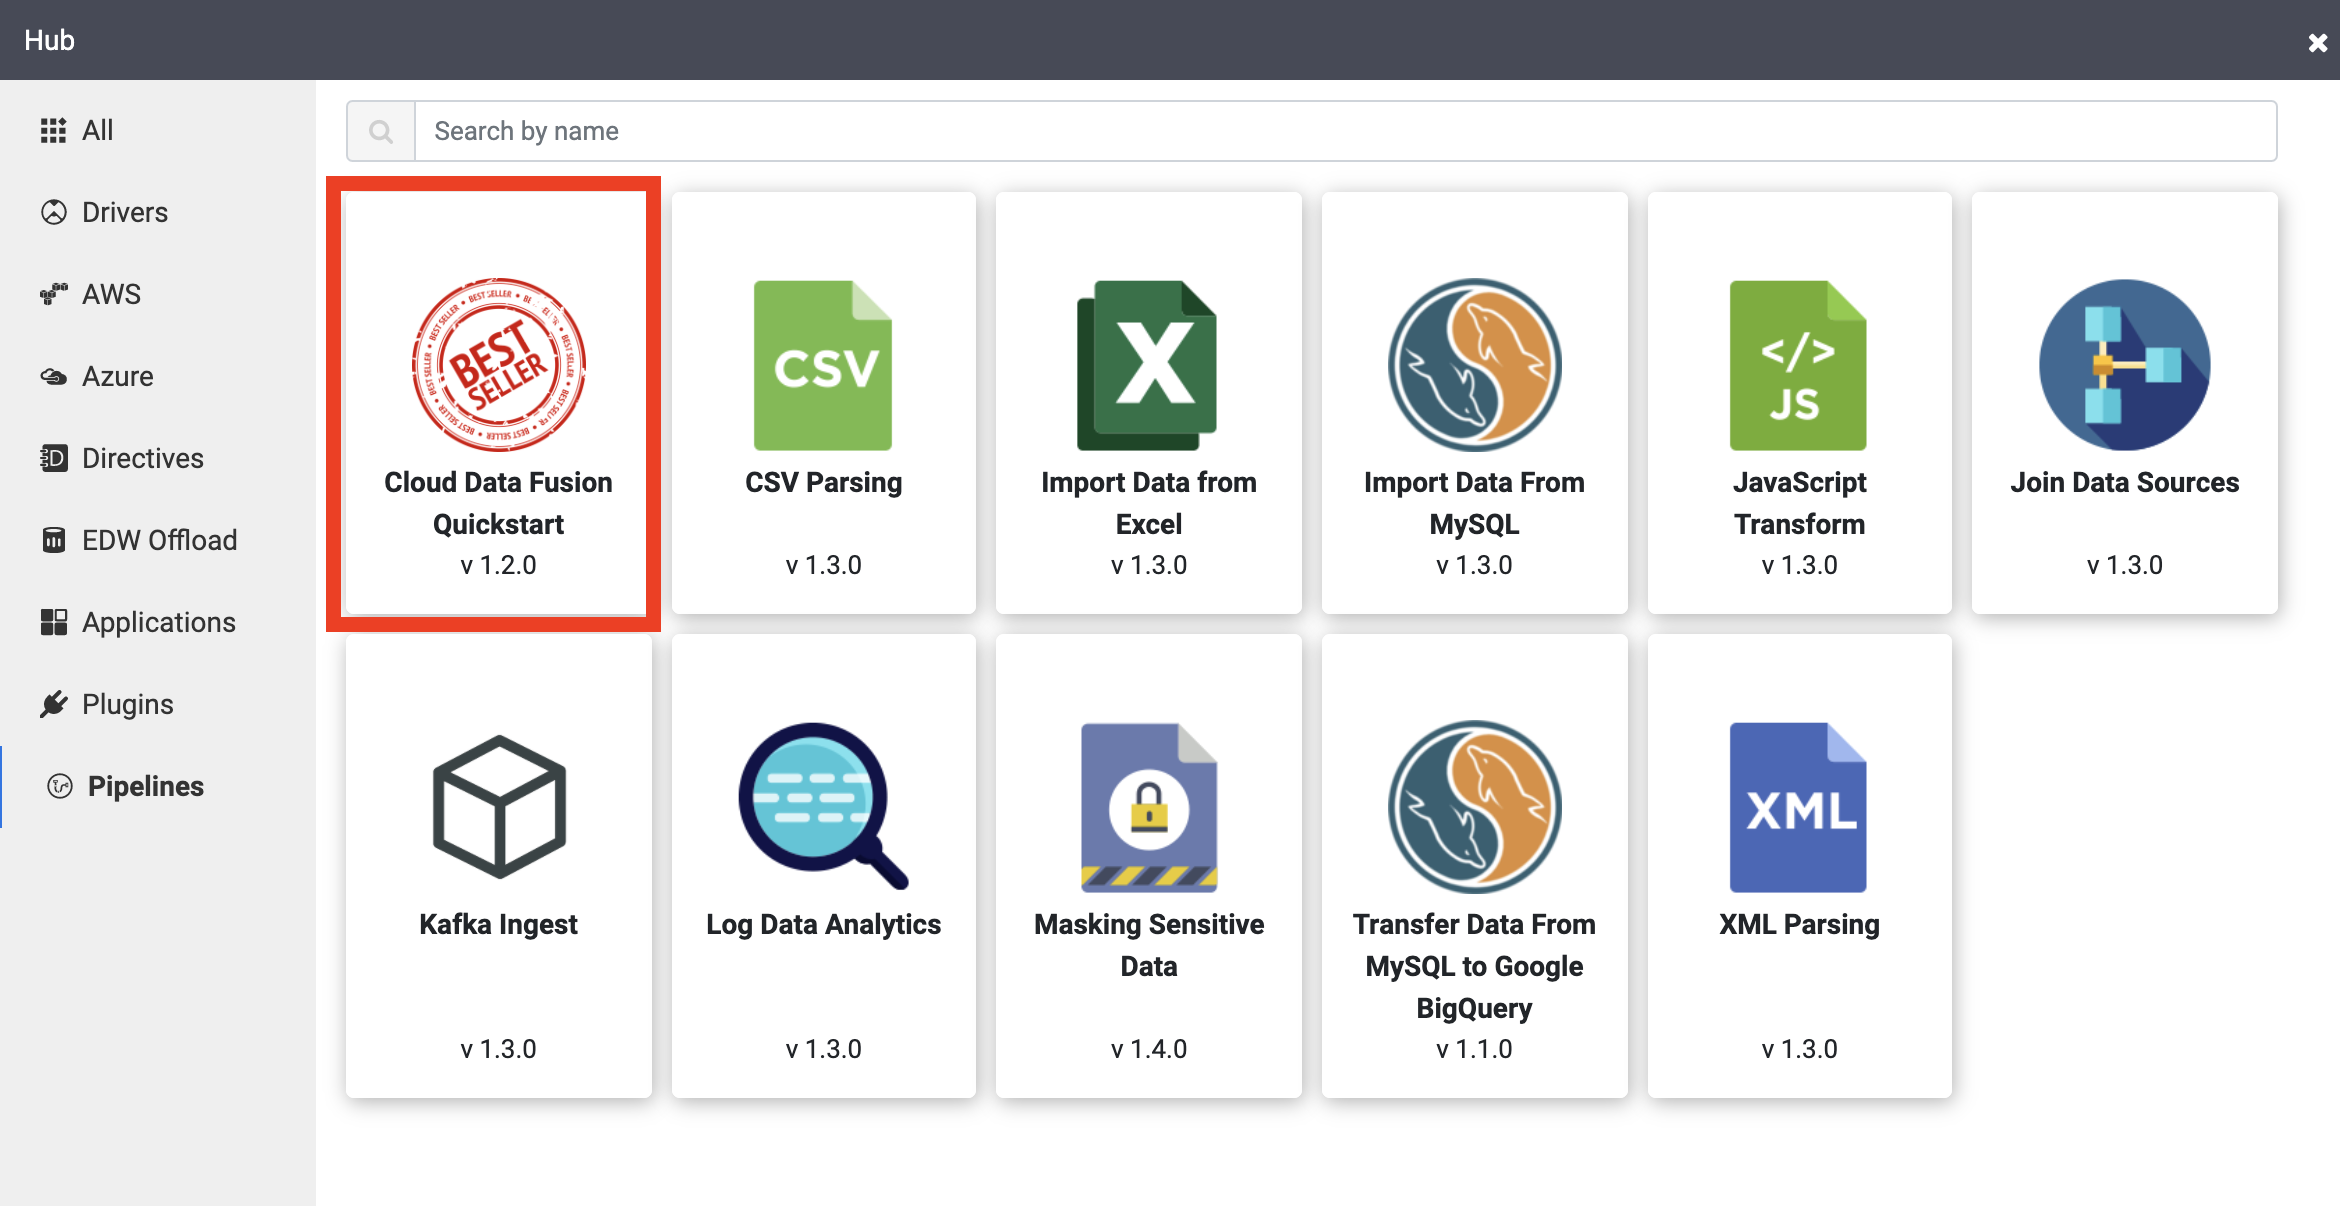
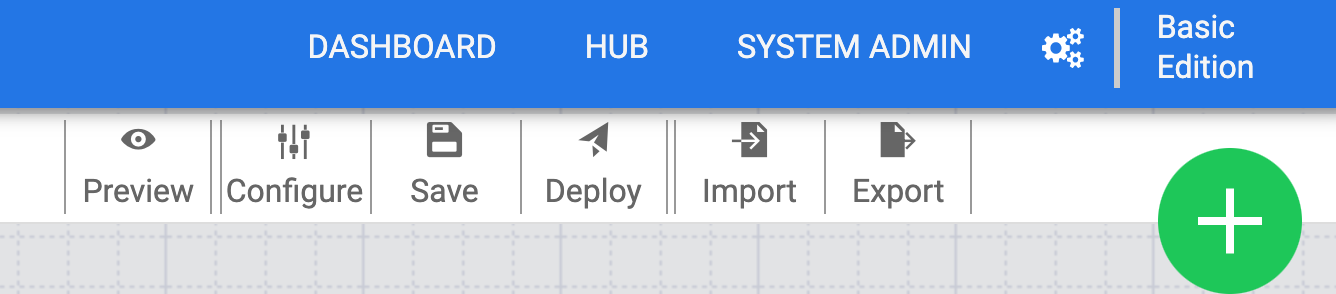
In the Cloud Data Fusion web UI, click HUB on the top right.
In the left panel, click Pipelines.
Click the Cloud Data Fusion Quickstart pipeline, and then click Create on the popup that appears.
In the Cloud Data Fusion Quickstart configuration panel, click Finish.
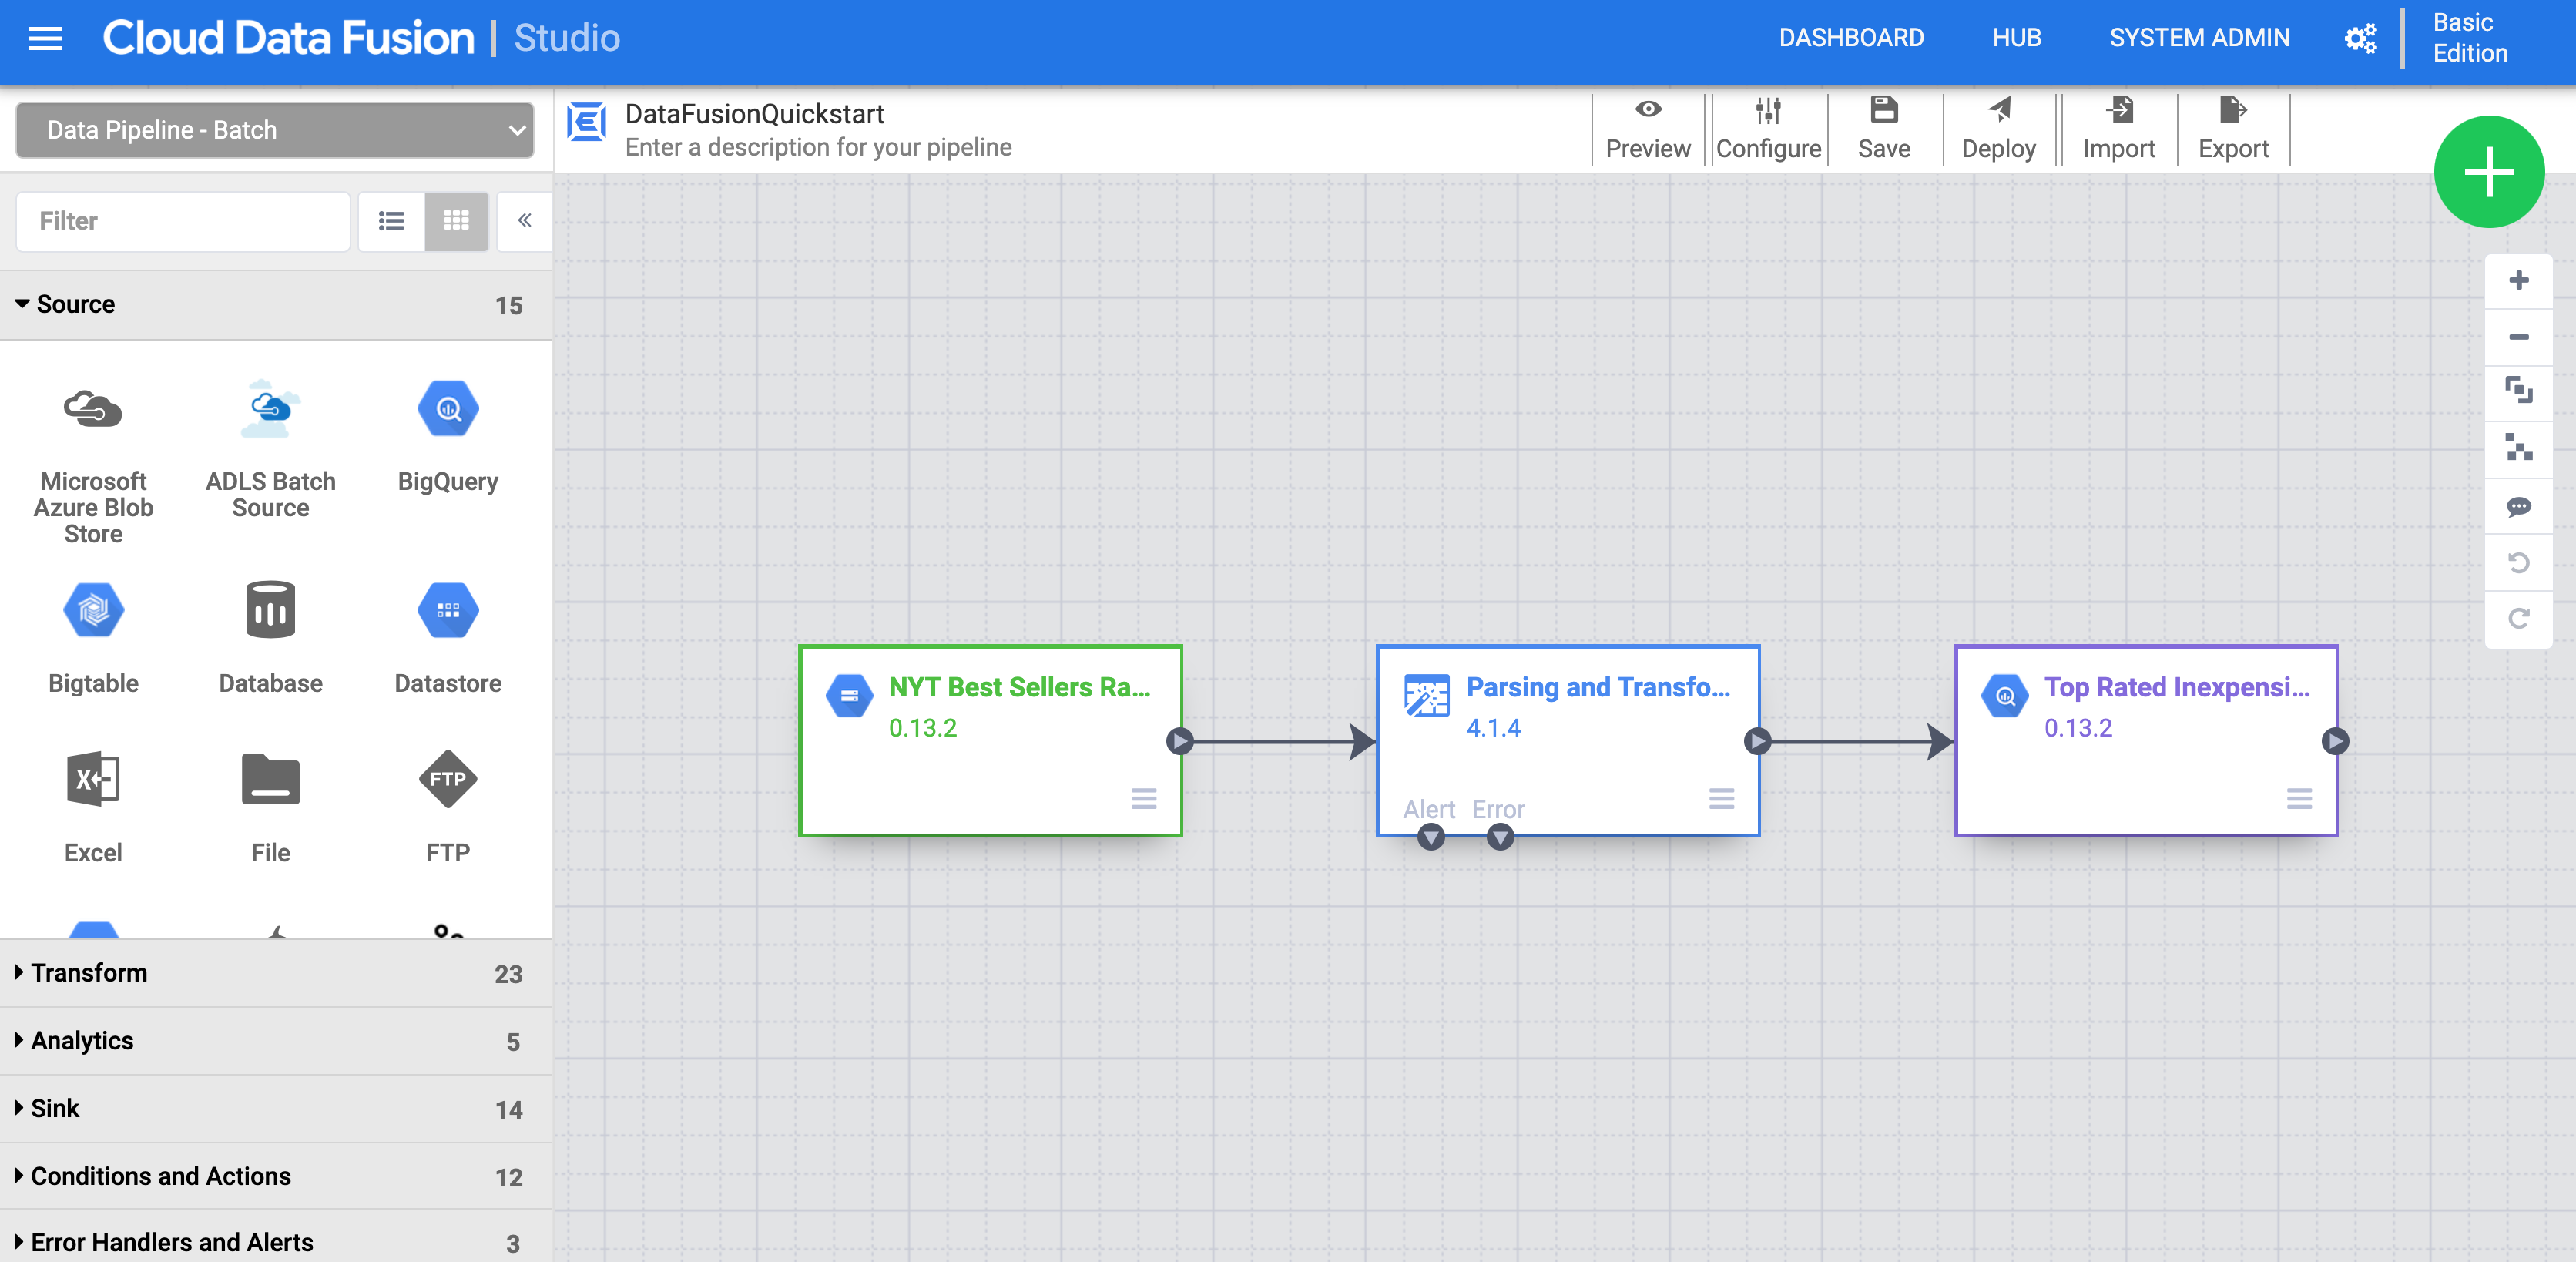
Click Customize Pipeline. A visual representation of your pipeline appears in the Pipeline Studio, which is a graphical interface for developing data integration pipelines. Available pipeline plugins are listed on the left, and your pipeline is displayed on the main canvas area. You can explore your pipeline by holding the pointer over each pipeline node and clicking the Properties button that appears. The Properties menu for each node allows you to view the objects and operations associated with the node.
Note:
A node in a pipeline is an object that is connected in a sequence to produce a Directed Acyclic Graph. E.g. Source, Sink, Transform, Action, etc.
In the top right menu, click Deploy. This submits the pipeline to Cloud Data Fusion. You will execute the pipeline in the next section.
Task 5. View your pipeline
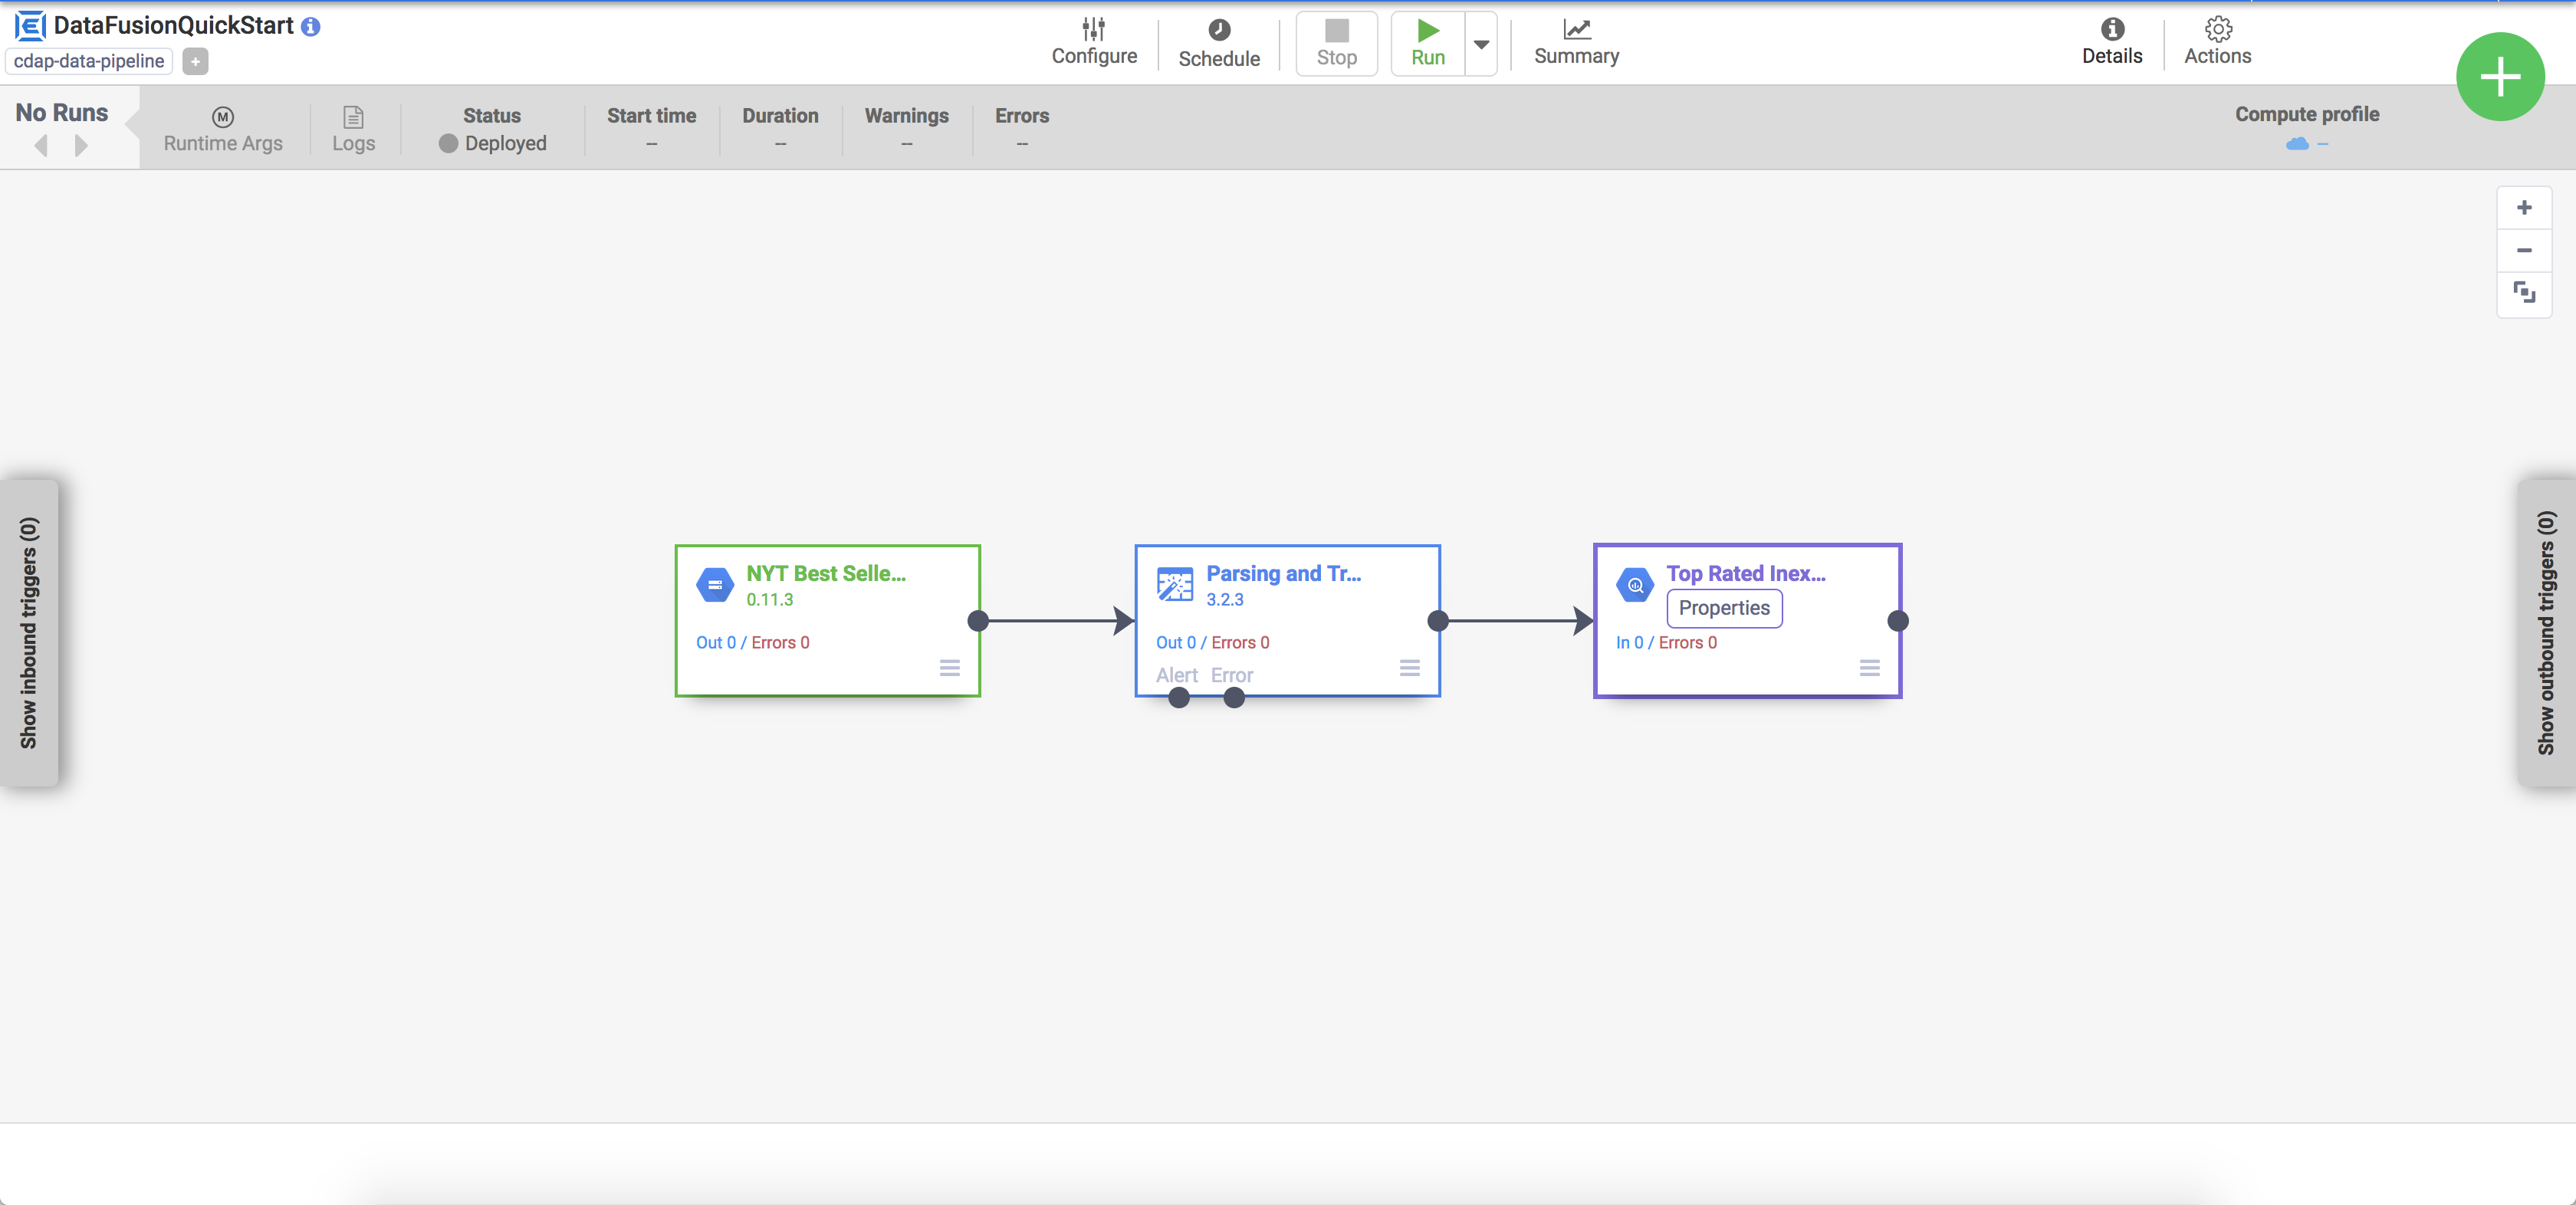
The deployed pipeline appears in the pipeline details view, where you can do the following:
View the pipeline's structure and configuration.
Run the pipeline manually or set up a schedule or a trigger.
View a summary of the pipeline's historical runs, including execution times, logs, and metrics.
Task 6. Execute your pipeline
In the pipeline details view, click on Run in the top center to execute your pipeline.
Note: When executing a pipeline, Cloud Data Fusion provisions an ephemeral Managed Service for Spark cluster, executes the pipeline on the cluster using Apache Hadoop MapReduce or Apache Spark, and then deletes the cluster. When the pipeline transitions to the Running state, you can monitor the Managed Service for Spark cluster creation and deletion. This cluster only exists for the duration of the pipeline.
Note: If the pipeline status fails, rerun the pipeline again.
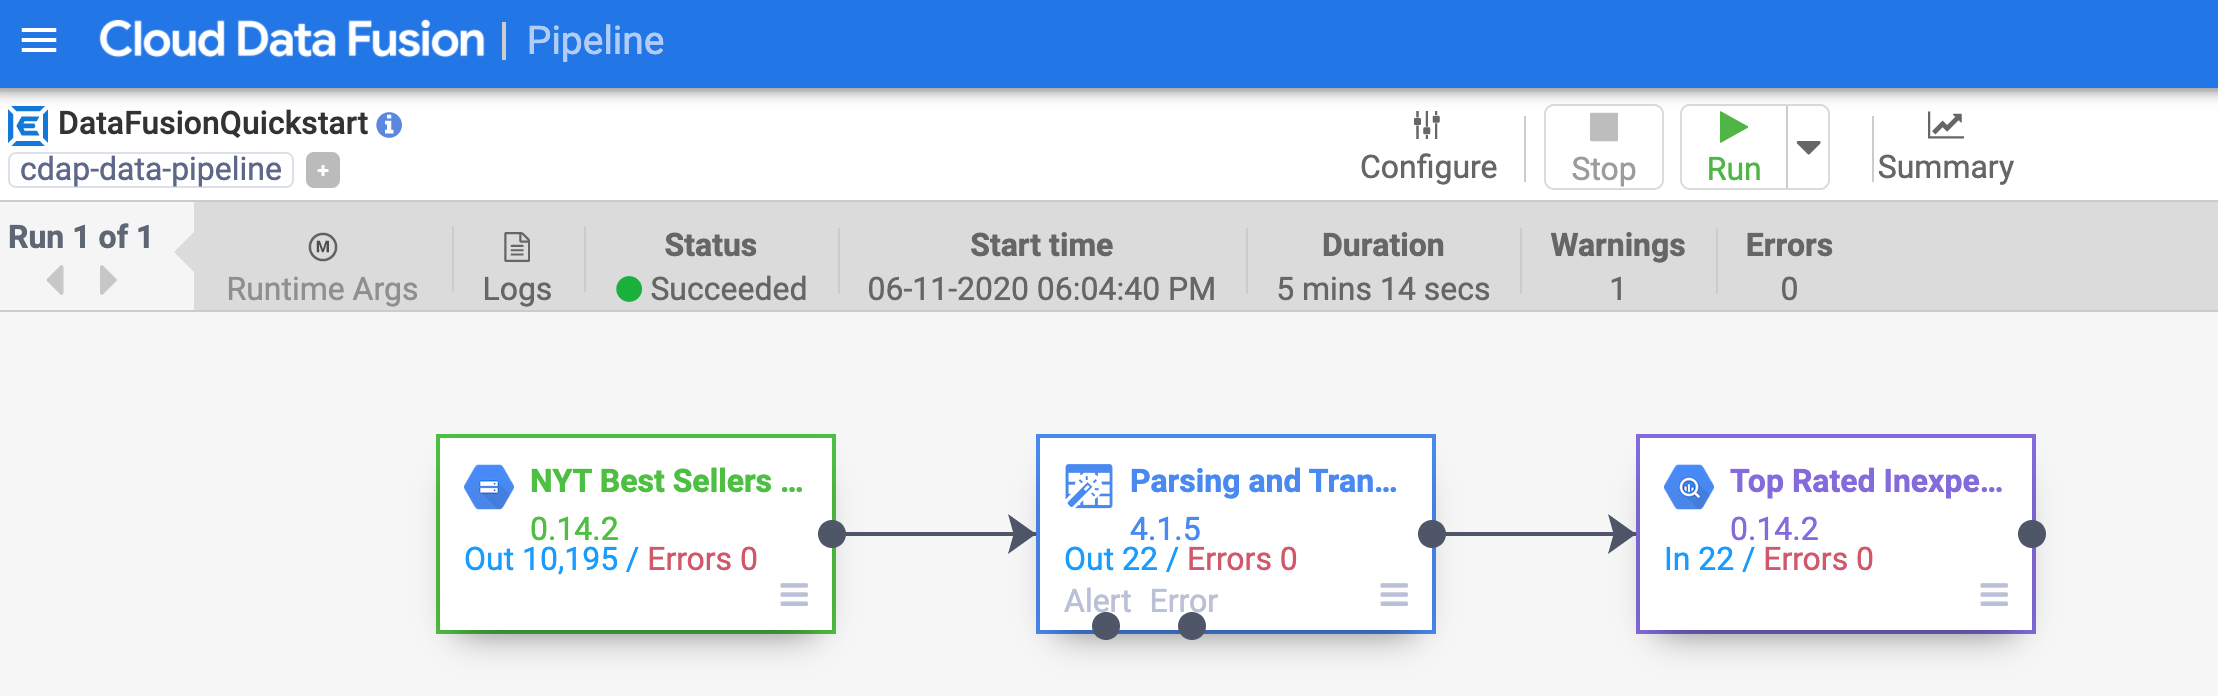
After a few minutes, the pipeline finishes. The pipeline Status changes to Succeeded and the number of records processed by each node is displayed.
Click Check my progress to verify the objective.
Deploy and execute a sample pipeline
Task 7. View the results
The pipeline writes output into a BigQuery table. You can verify that using the following steps.
In the Classic Explorer pane, click your Project ID (it will start with qwiklabs).
Under the GCPQuickstart dataset in your project, click the top_rated_inexpensive table.
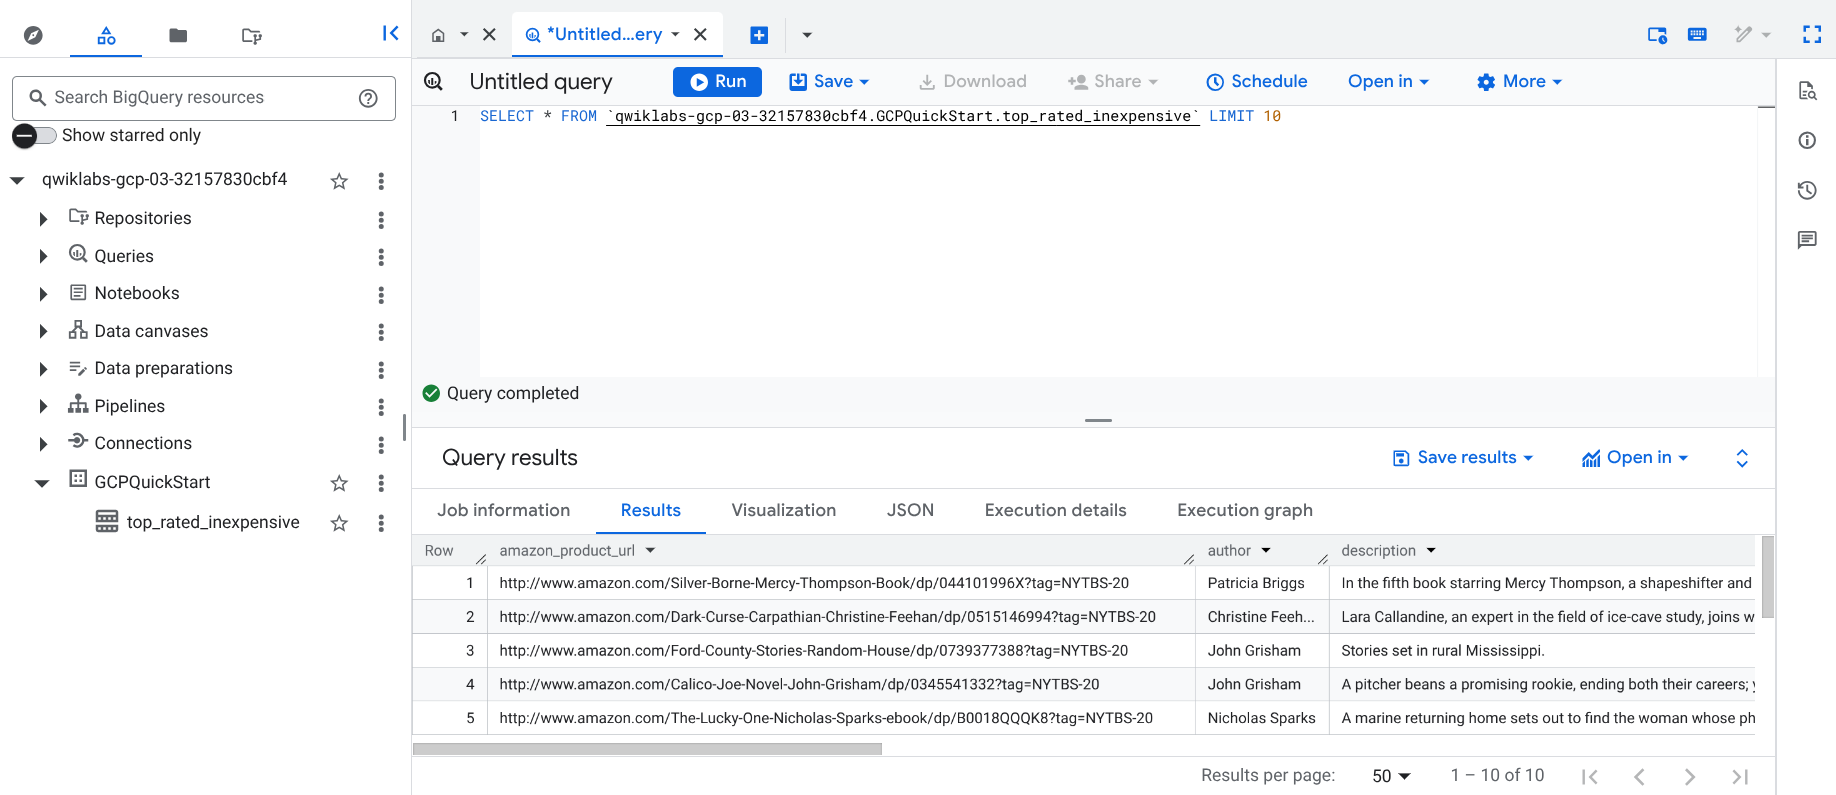
Click + SQL Query, paste the query below, and then click Run.
SELECT * FROM `{{{project_0.project_id | "PROJECT_ID"}}}.GCPQuickStart.top_rated_inexpensive` LIMIT 10
Wait for the query to finish. A similar Results will appear.
Click Check my progress to verify the objective.
View the result
Congratulations!
In this lab, you learned how to create a Data Fusion instance and deploy a sample pipeline that reads an input file from Cloud Storage, transforms and filters the data to output a subset of the data into BigQuery.
End your lab
When you have completed your lab, click End Lab. Google Skills removes the resources you’ve used and cleans the account for you.
You will be given an opportunity to rate the lab experience. Select the applicable number of stars, type a comment, and then click Submit.
The number of stars indicates the following:
1 star = Very dissatisfied
2 stars = Dissatisfied
3 stars = Neutral
4 stars = Satisfied
5 stars = Very satisfied
You can close the dialog box if you don't want to provide feedback.
For feedback, suggestions, or corrections, please use the Support tab.
Manual Last Updated May 26, 2026
Lab Last Tested December 17, 2025
Copyright 2026 Google LLC All rights reserved. Google and the Google logo are trademarks of Google LLC. All other company and product names may be trademarks of the respective companies with which they are associated.
Avant de commencer
Les ateliers créent un projet Google Cloud et des ressources pour une durée déterminée.
Les ateliers doivent être effectués dans le délai imparti et ne peuvent pas être mis en pause. Si vous quittez l'atelier, vous devrez le recommencer depuis le début.
En haut à gauche de l'écran, cliquez sur Démarrer l'atelier pour commencer.
Utilisez la navigation privée
Copiez le nom d'utilisateur et le mot de passe fournis pour l'atelier
Cliquez sur Ouvrir la console en navigation privée
Connectez-vous à la console
Connectez-vous à l'aide des identifiants qui vous ont été attribués pour l'atelier. L'utilisation d'autres identifiants peut entraîner des erreurs ou des frais.
Acceptez les conditions d'utilisation et ignorez la page concernant les ressources de récupération des données.
Ne cliquez pas sur Terminer l'atelier, à moins que vous n'ayez terminé l'atelier ou que vous ne vouliez le recommencer, car cela effacera votre travail et supprimera le projet.
Ce contenu n'est pas disponible pour le moment
Nous vous préviendrons par e-mail lorsqu'il sera disponible
Parfait !
Nous vous contacterons par e-mail s'il devient disponible
Un atelier à la fois
Confirmez pour mettre fin à tous les ateliers existants et démarrer celui-ci
Utilisez la navigation privée pour effectuer l'atelier
Le meilleur moyen d'exécuter cet atelier consiste à utiliser une fenêtre de navigation privée. Vous éviterez ainsi les conflits entre votre compte personnel et le compte temporaire de participant, qui pourraient entraîner des frais supplémentaires facturés sur votre compte personnel.
In this lab you will learn how to create a Data Fusion instance and deploy a sample pipeline
Durée :
1 min de configuration
·
Accessible pendant 90 min
·
Terminé après 90 min



 ) at the top right of the console.
 ), click IAM & Admin > IAM.