

准备工作
- 实验会创建一个 Google Cloud 项目和一些资源,供您使用限定的一段时间
- 实验有时间限制,并且没有暂停功能。如果您中途结束实验,则必须重新开始。
- 在屏幕左上角,点击开始实验即可开始
Deploy Apache Cassandra using Docker
/ 15
Create a keyspace and table for application in docker container
/ 10
Create a firewall rule
/ 10
Run an application to load data into Apache Cassandra
/ 10
Create an instance named dse-server
/ 15
Enable Authentication on DataStax Enterprise
/ 10
Create a keyspace and table for application on dse-server instance
/ 10
Run an application to load data into dse-server
/ 10
Migrate the data from Open Source Cassandra to DSE
/ 10

In this lab, you will learn how to migrate an application running on Apache Cassandra™ to DataStax Enterprise (DSE). To do this, you will deploy a Cassandra™ database and an application that writes data into it. You will then deploy a DataStax Enterprise database and connect the same application to the database. Finally, you will learn how to migrate data from Apache Cassandra™ to DSE using the DataStax Bulk Loader dsbulk.
In this lab, you will learn how to perform the following tasks:
Read these instructions. Labs are timed and you cannot pause them. The timer, which starts when you click Start Lab, shows how long Google Cloud resources are made available to you.
This hands-on lab lets you do the lab activities in a real cloud environment, not in a simulation or demo environment. It does so by giving you new, temporary credentials you use to sign in and access Google Cloud for the duration of the lab.
To complete this lab, you need:
Click the Start Lab button. If you need to pay for the lab, a dialog opens for you to select your payment method. On the left is the Lab Details pane with the following:
Click Open Google Cloud console (or right-click and select Open Link in Incognito Window if you are running the Chrome browser).
The lab spins up resources, and then opens another tab that shows the Sign in page.
Tip: Arrange the tabs in separate windows, side-by-side.
If necessary, copy the Username below and paste it into the Sign in dialog.
You can also find the Username in the Lab Details pane.
Click Next.
Copy the Password below and paste it into the Welcome dialog.
You can also find the Password in the Lab Details pane.
Click Next.
Click through the subsequent pages:
After a few moments, the Google Cloud console opens in this tab.

Cloud Shell is a virtual machine that is loaded with development tools. It offers a persistent 5GB home directory and runs on the Google Cloud. Cloud Shell provides command-line access to your Google Cloud resources.
Click Activate Cloud Shell 
Click through the following windows:
When you are connected, you are already authenticated, and the project is set to your Project_ID,
gcloud is the command-line tool for Google Cloud. It comes pre-installed on Cloud Shell and supports tab-completion.
Output:
Output:
gcloud, in Google Cloud, refer to the gcloud CLI overview guide.
In the Cloud Console, select Navigation menu > Compute Engine > VM instances.
To create a new instance, click Create Instance.
In the Machine configuration.
apache-cassandra
E2
e2-medium
Click OS And storage.
Click Networking.
cql-server.Click Create.
When the instance is available, click on the instance to view the VM instance details.
Click the SSH button to connect in a browser.
Run the following command to start the Cassandra container:
Click Check my progress to verify the objective.
You should see a container using an image called cassandra:latest. If you don't, give it a few seconds and run the previous command again. Eventually you should see something similar to this output:

Click Check my progress to verify the objective.
Before you connect an application to the database, you'll need to create a firewall rule that allows CQL connections to the server. CQL connections are made over TCP on port 9042.
In the Cloud Console, navigate to VPC Network > Firewall.
Click Create Firewall Rule.
For the name, use allow-cql.
In the Target tags field enter cql-server.
For Source IP ranges enter 0.0.0.0/0.
Under Protocols and ports check the box next to tcp and enter 9042 in the field.
Click Create.
Click Check my progress to verify the objective.
The application loads 100 records into the table you created earlier.
To run it, you will need to know the external IP address of the instance hosting the Cassandra™ database.
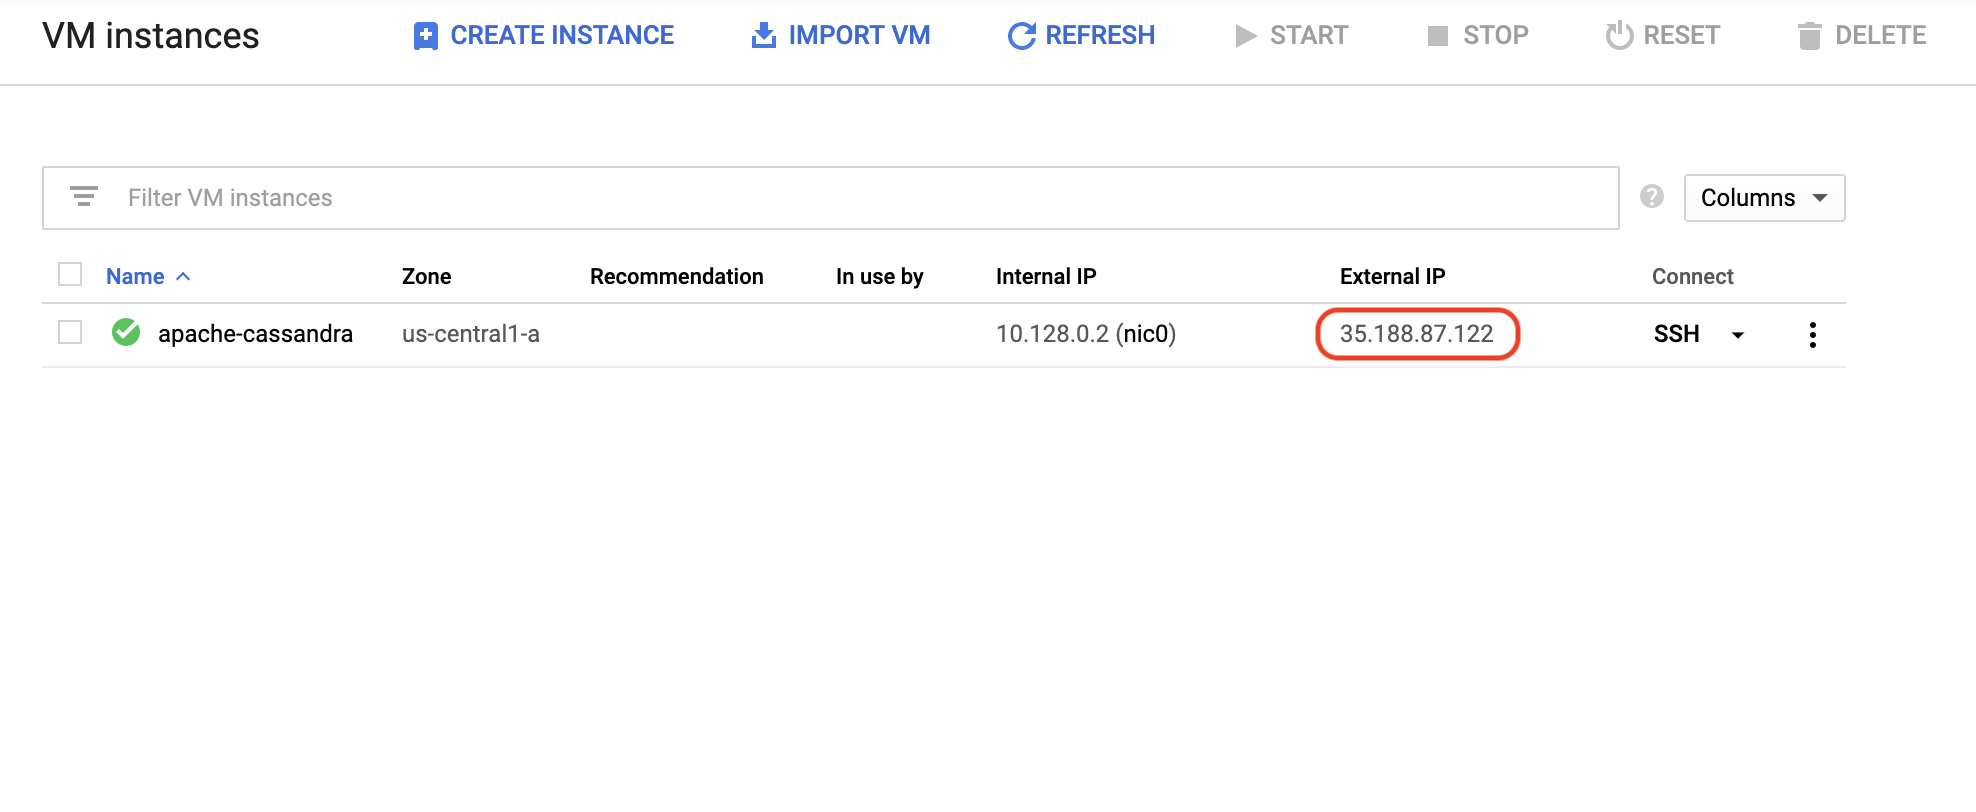
In the Console, navigate to the Compute Engine > VM Instances page.
Note the external IP address of the apache-cassandra VM.
<<external-ip>> with the External IP address of your apache-cassandra VM:The query should return 100.
Click Check my progress to verify the objective.
In the Cloud Console, select Navigation menu > Compute Engine > VM instances.
To create a new instance, click Create Instance.
In the Machine configuration.
dse-server
E2
e2-medium
Click OS And storage.
Network tag: cql-server.
When the instance is available, click the dse-server instance.
Click the SSH button to connect in a browser.
Run the following command to start the DSE container:
Click Check my progress to verify the objective.
You should see a container using an image called registry.hub.docker.com/datastax/dse-server:6.8.18.
You will now need to enable authentication. To do this, you will copy a config file dse.yaml from inside the container to the host VM's local filesystem.
Type i to go into insert mode.
Browse to the following lines in the file:
Uncomment all of the lines, and make sure there are no spaces at the start of the first line authentication_options:.
Edit the second line so that it reads enabled: true.
The block of text should now look like this:
Use Ctrl+c to save the file, type :wq, and hit ENTER to save and exit the editor.
Copy the updated configuration file back to the container:
Click Check my progress to verify the objective.
You should see the following error because authentication is enabled: Connection error: ('Unable to connect to any servers', {'127.0.0.1:9042': error(111, "Tried connecting to [('127.0.0.1', 9042)]. Last error: Connection refused")}).
Keep the CQL Shell open and return to the Cloud Console.
Click Check my progress to verify the objective.
In the Console, navigate to the Compute Engine > VM Instances page. Note the external IP address of the dse-server VM.
Open Cloud Shell and run the application again, replacing <<dse-external-ip>> with the external IP address of the VM hosting the DSE Docker image.
Note, we are using a different datacenter name dc1:
You should see 100 records returned.
Note that you didn't actually have to modify the code! If you are interested, you can download the application code.
Click Check my progress to verify the objective.
In the SSH window of your DSE VM instance, type exit to quit the CQL shell. You should now be at the command prompt inside the dse-server container.
In the container shell, download and unzip the DataStax bulkloader:
dsbulk-x.x.x), then cd into the bin directory:<<your_path>> with the output from the previous command:apache-cassandra VM:The records will be exported to a csv file in ~/export.
dse-server VM:You should now see that the number of records has increased following the import.
Click Check my progress to verify the objective.
In this lab, you migrated an application running on Apache Cassandra™ to DataStax Enterprise. You first deployed a Cassandra™ database and a DataStax Enterprise database using Docker. Next, you connected an application to both Cassandra™ and DSE using CQL Shell and ran some simple DDL commands to create a table, load some data, and query it. You then migrated the data from the Apache Cassandra™ database to the DSE database using the DataStax Bulk Loader dsbulk.
...helps you make the most of Google Cloud technologies. Our classes include technical skills and best practices to help you get up to speed quickly and continue your learning journey. We offer fundamental to advanced level training, with on-demand, live, and virtual options to suit your busy schedule. Certifications help you validate and prove your skill and expertise in Google Cloud technologies.
Manual Last Updated January 13, 2026
Lab Last Tested January 13, 2026
Copyright 2026 Google LLC. All rights reserved. Google and the Google logo are trademarks of Google LLC. All other company and product names may be trademarks of the respective companies with which they are associated.


此内容目前不可用
一旦可用,我们会通过电子邮件告知您

太好了!
一旦可用,我们会通过电子邮件告知您

一次一个实验
确认结束所有现有实验并开始此实验